Page 3 - Sommaire
3 Sommaire Avertissements................................................4 Description de l’appareil..................................6 Tableau des programmes ...............................8 Comment faire un lavage ? .............................9 Guide de lavage ......................................
Page 4 - Avertissements; Sécurité générale
4 Avertissements IMPORTANT !Ces avertissements ont été rédigés pour votre sécurité et celle d’autrui. Nous vous prions de lire attentivement ces remarques avant d’installer et d’utiliser votre appareil. Nous vous remercions de votre attention. Conservez cette notice d’utilisation avec votre appareil...
Page 6 - Description de l’appareil; Le bandeau de commandes
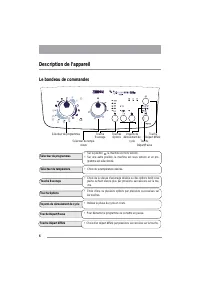
6 Description de l’appareil Le bandeau de commandes Sélecteur de programmes • Sur la position , la machine est hors tension.• Sur une autre position, la machine est sous tension et un pro- gramme est sélectionné. Sélecteur de programmes Sélecteur de tempé- rature Touche Essorage Touches Options Touc...
Page 7 - La boîte à produits
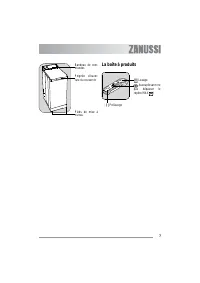
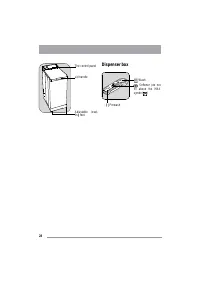
7 La boîte à produits Bandeau de com- mandes Poignée d’ouver- ture du couvercle Pieds de mise à niveau Prélavage Assouplissant (ne pas dépasser lerepère MAX ) M Lavage
Page 8 - Tableau des programmes
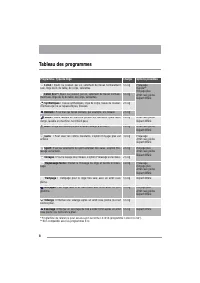
8 Tableau des programmes Programme / Type de linge Charge Options possibles Coton : Blanc ou couleur, par ex, vêtement de travail normalement sale, linge de lit, de table, de corps, serviettes. 5,5 kg Prélavage Rapide** Rinçage plus Arrêt cuve pleine Départ différé Coton Eco* : Blanc ou couleur, par...
Page 9 - Comment faire un lavage ?; Première utilisation; Chargement du linge
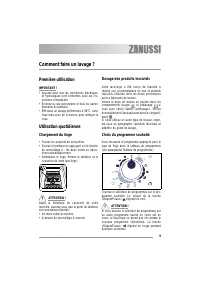
9 Comment faire un lavage ? Première utilisation IMPORTANT ! • Assurez-vous que les connexions électriques et hydrauliques sont conformes avec les ins- tructions d’installation. • Enlevez la cale polystyrène et tous les autres éléments du tambour. • Effectuez un lavage préliminaire à 90°C, sans ling...
Page 10 - Choix de l’option
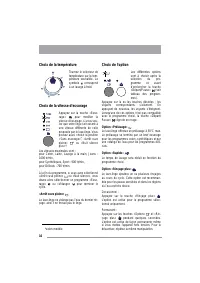
10 Choix de la température Tournez le sélecteur de température sur la tem- pérature souhaitée. Le symbole correspond à un lavage à froid. Choix de la vitesse d’essorage Appuyez sur la touche «Esso- rage» pour modifier la vitesse d’essorage, si vous vou- lez que votre linge soit essoré à une vitesse ...
Page 11 - Démarrage du programme; Fin du programme
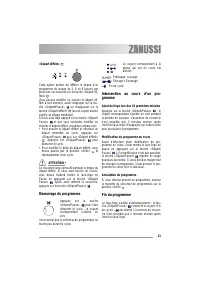
11 «Départ différé» Cette option permet de différer le départ d’un programme de lavage de 3, 6 ou 9 heures par pressions successives sur la touche «Départ dif- féré» . Vous pouvez modifier ou annuler le départ dif- féré à tout moment, avant d’appuyer sur la tou- che «Départ/Pause» en réappuyant sur ...
Page 12 - Mode veille
12 Tournez la manette du sélecteur de program- mes sur la position «Arrêt» . Sortez le linge. Débranchez la prise de courant et fermez le robinet d’alimentation en eau. ATTENTION ! Nous vous recommandons de laisser le couver- cle et le tambour ouverts après utilisation afin d’aérer la cuve. Mode vei...
Page 13 - Guide de lavage; Tri et préparation du linge
13 Guide de lavage IMPORTANT ! Tri et préparation du linge • Triez le linge par type et symbole d’entretien (voir chapitre Symboles internationaux ci- après) : lavage normal pour le linge résistant pouvant supporter un lavage et un essorage énergiques ; lavage délicat pour le linge déli- cat qu’il c...
Page 14 - Symboles internationaux
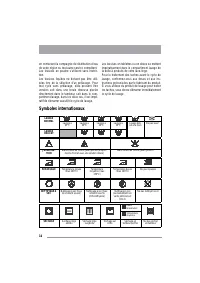
14 en contactant la compagnie de distribution d’eau de votre région ou tout autre service compétent. Les lessives en poudre s’utilisent sans restric- tion. Les lessives liquides ne doivent pas être utili- sées lors de la sélection d’un prélavage. Pour tout cycle sans prélavage, elles peuvent être ve...
Page 15 - Entretien et nettoyage; Détartrage de l’appareil
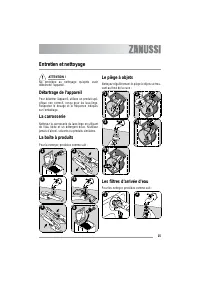
15 Entretien et nettoyage ATTENTION ! Ne procédez au nettoyage qu’après avoir débranché l’appareil. Détartrage de l’appareil Pour détartrer l’appareil, utilisez un produit spé- cifique non corrosif, conçu pour les lave-linge. Respectez le dosage et la fréquence indiqués sur l’emballage. La carrosser...
Page 16 - En cas d’anomalie de fonctionnement
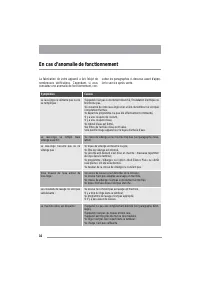
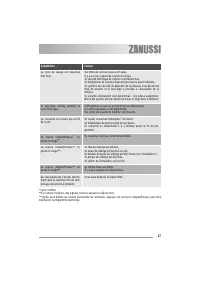
16 En cas d’anomalie de fonctionnement La fabrication de votre appareil a fait l’objet de nombreuses vérifications. Cependant, si vous constatez une anomalie de fonctionnement, con- sultez les paragraphes ci-dessous avant d’appe-ler le service après vente. Symptômes Causes Le lave-linge ne démarre p...
Page 18 - Caractéristiques techniques
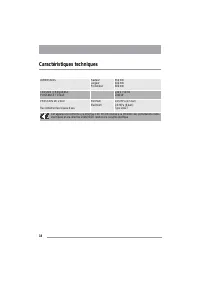
18 Caractéristiques techniques DIMENSIONS Hauteur Largeur Profondeur 850 mm 400 mm 600 mm TENSION / FREQUENCE PUISSANCE TOTALE 230 V / 50 Hz 2300 W PRESSION DE L’EAU Raccordement au réseau d’eau Minimum Maximum 0,05 MPa (0,5 bar) 0,8 MPa (8 bars) Type 20x27 Cet appareil est conforme à la directive C...
Page 19 - Consommations
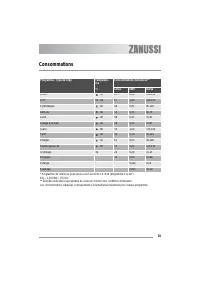
19 Consommations Programme / Type de linge Températu- res Consommations indicatives** °C Litres kWh Durée Coton - 90 67 2,20 140-150 Eco* 40 - 90 67 1,90 145-155 Synthétiques - 60 48 0,85 90-100 Délicats - 40 53 0,55 60-70 Laine - 40 48 0,45 55-65 Lavage à la main - 40 48 0,45 55-65 Jeans - 60 55 1,...
Page 20 - Environnement; Mise au rebut
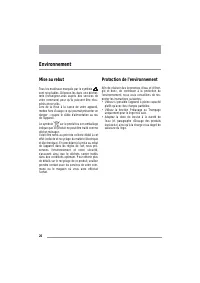
20 Environnement Mise au rebut Tous les matériaux marqués par le symbole sont recyclables. Déposez-les dans une déchet- terie (renseignez-vous auprès des services de votre commune) pour qu’ils puissent être récu- pérés et recyclés. Lors de la mise à la casse de votre appareil, mettez hors d’usage ce...
Page 21 - Installation; Déballage
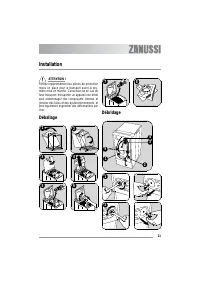
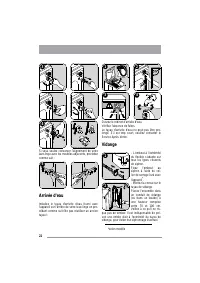
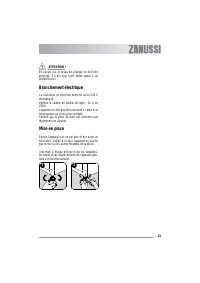
21 Installation ATTENTION ! Retirez impérativement les pièces de protection mises en place pour le transport avant la pre- mière mise en marche. Conservez-les en cas de futur transport: transporter un appareil non bridé peut endommager des composants internes et générer des fuites et des dysfonction...
Page 24 - Contents
24 Contents Warnings .......................................................25 Description of the appliance..........................27 Programmes table.........................................29 How to run a wash cycle ? ............................30 Washing guide ....................................
Page 25 - Warnings; General safety
25 Warnings WARNING !These warnings are for the safety of you and others around you. Please read these points carefully before ins- talling and using your appliance. Thank you for your attention. Keep this user manual with your appliance. If the appliance is sold or given to another per- son, please...
Page 26 - Use
26 drain hose. This way, the water remaining in the hoses will be drained away, avoiding any ice formation which would damage your appliance. Before turning your appliance on again, ensure that it is installed in an area where the tempera- ture will not fall below freezing. Use • Your appliance is i...
Page 27 - Description of the appliance; The control panel
27 Description of the appliance The control panel Programme selector • In the position, the machine is switched off.• In a another position, the machine is switched on and a pro- gramme is selected. Programme selector Temperature selector dial Spin pushbutton Option pushbuttons Start/Pause pushbutto...
Page 28 - Dispenser box
28 Dispenser box The control panel Lid handle Adjustable level- ling feet Prewash Softener (do not fill above the MAXsymbol ) M Wash
Page 29 - Programmes table
29 Programmes table Programme / Type of washing Load Possible options Cotton : White or colour, e.g., normally soiled work clothes, bed linen, table linen, body linen, towels. 5,5 kg Prewash Quick** Rinse plus Rinse hold Delay start Cotton Eco* : White or colour, e.g., normally soiled work clothes, ...
Page 30 - How to run a wash cycle ?; Using for the first time; Loading washing
30 How to run a wash cycle ? Using for the first time IMPORTANT ! • Ensure the electrical and water connections comply with the installation instructions. • Remove the polystyrene insert and all other items inside the drum. • Run an initial wash cycle at 90°C, without any washing but with detergent ...
Page 31 - Selecting options
31 Selecting the temperature Turn the temperature selector dial to the desi- red temperature. The symbol means a cold wash. Selecting the spin speed Press the «Spin» pushbutton to change the spin speed, if you want your washing to be spun at a different speed to the one selected by the appliance. Yo...
Page 32 - Start of the programme; End of the programme
32 «Delay start» This option allows you to delay the start of a wash programme by 3, 6 or 9 hours by pressing the «Delay start» pushbutton. You can change or cancel the delayed start time at any time before you press the «Start/Pause» pushbutton, by pressing the «Delay start» pushbutton again (when ...
Page 33 - Standby mode
33 WARNING ! We recommend leaving the lid and drum open after use to ventilate the water tank. Standby mode If the appliance is on but no commands are selected for 10 min before or after a cycle, it goes into standby mode. All the lights go out and«Start/Pause» flashes slowly. To exit standby mode, ...
Page 34 - Washing guide; Sorting and preparing the washing
34 Washing guide IMPORTANT ! Sorting and preparing the washing • Sort washing by type and care label (refer to International symbols section below) : normal wash for tough fabrics which can withstand intense washing and spinning cycles ; delicate wash for delicate fabrics which need to be treated wi...
Page 35 - International symbols
35 For stain removal before a wash cycle, please refer to manufacturer’s recommended amounts and instructions. If you use a detergent to remove stains, the wash cycle must be started immediately. International symbols NORMAL WASH Wash at 95°C Wash at 60°C Wash at 40°C Wash at 30°C Hand wash Do not w...
Page 36 - Care and cleaning; Descaling the appliance
36 Care and cleaning WARNING ! Unplug the appliance before cleaning. Descaling the appliance To descale the appliance, use an appropriate non-corrosive product designed for washing machines. Read product label for recommended amounts and how often descaling should be car- ried out. The exterior Use ...
Page 37 - Operating problems
37 Operating problems Numerous checks were carried out on your appliance before it left the factory. However, should you notice a malfunction, please refer to the sections below before contacting the after-sales service. Problems Causes The washing machine doesn’t start or doesn’t fill : •the applia...
Page 39 - Technical specifications
39 Technical specifications DIMENSIONS Height Width Depth 850 mm 400 mm 600 mm LINE VOLTAGE / FREQUENCY POWER CONSUMPTION 230 V / 50 Hz 2300 W WATER PRESSURE Connection to water supply Minimum Maximum 0,05 MPa (0,5 bar) 0,8 MPa (8 bar) Type 20x27 This appliance conforms to the CEE 89-336 directive c...
Page 40 - Consumption
40 Consumption Programme / Washing type Temperatures Average consumption** °C Litres kWh Time Cotton - 90 67 2,20 140-150 Eco* 40 - 90 67 1,90 145-155 Synthetics - 60 48 0,85 90-100 Delicates - 40 53 0,55 60-70 Wool - 40 48 0,45 55-65 Handwash - 40 48 0,45 55-65 Jeans - 60 55 1,00 135-145 Sport - 40...
Page 41 - Environment; Disposing of the appliance
41 Environment Disposing of the appliance All materials carrying the symbol are recy- clable. Dispose of them at a waste collection site (enquire at your local council) for collection and recycling. When disposing of your appliance, remove all parts which could be dangerous to others: cut off the po...
Page 42 - Unpacking
42 Installation WARNING ! Remove all protective packaging for transit before using for the first time. Keep in case nee- ded for future transit : Transporting a non-secu- red appliance may damage internal components and cause leakages and malfunctions. The appliance can also be damaged through physi...