Yamaha ISX-800 - Manuals
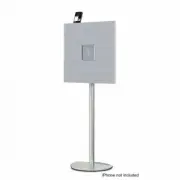
Manual Yamaha ISX-800
Summary
i En 1 To assure the finest performance, please read this manual carefully. Keep it in a safe place for future reference. 2 Install this unit in a well ventilated, cool, dry, clean place – away from direct sunlight, heat sources, vibration, dust, moisture and cold. For proper ventilation, allow the ...
1 En Eng lish Fr ançais Deu ts ch S ve n ska It aliano E spañol Ned er la nds Русск ий NAMES OF PARTS AND THEIR FUNCTIONS .........................2ADJUSTING THE CLOCK .........................................................5LISTENING TO iPod............................................................
2 En a (Power) Press to turn the system on/off. Time is displayed on the front panel even when the system is off. y • Press and hold on the top of the unit for more than 3 seconds to set the system to power save mode. No information on the front panel is displayed in power save mode. This can reduce...
3 En NAMES OF PARTS AND THEIR FUNCTIONS Eng lish 1 Play/shuffle/repeat indicator Displays the playback mode (P. 6, 9). b Remote control signal receiver c Clock indicator Shows the clock hour hand (P. 5). d Source indicator Shows selected source. e Alarm indicator Turns on if the alarm has been set (...
NAMES OF PARTS AND THEIR FUNCTIONS 4 En a Remote control signal transmitter b (Power) Press to turn the system on/off. c ALARM Switches the alarm on/off. d SNOOZE/SLEEP Set the sleep timer or switch the alarm to snooze mode (P. 14, 15). e Source button Switch the source to be played. f FOLDER Switch...
5 En Eng lish 1 Move the CLOCK switch on the rear panel to SET. 2 Set the time with / . 3 Move the CLOCK switch on the rear panel to CLOCK1 or CLOCK2. y • Connecting an iPod to the iPod dock in step 2 will copy the time on the iPod to the unit. If the iPod is already connected to the iPod dock when ...
6 En For details on compatible iPod models, refer to “SPECIFICATIONS” (P. 19). 1 Connect an iPod to the iPod dock . 2 Press SOURCE and set iPod as the playback source. 3 Play the iPod by pressing / . Playback can be controlled with either the remote control, iPod or the top panel on this unit. y • Y...
7 En Eng lish 1 Press SOURCE to set CD as the playback source. 2 Insert the audio CD into the Disc slot with the label side facing toward the front of the unit. Playback starts automatically. The track number is shown for a while when starting playback or skipping tracks. Use the following buttons t...
LISTENING TO CD AND USB DEVICES 8 En 1 Press SOURCE to set CD as the playback source. 2 Insert the data CD into the Disc slot with the label side facing toward the front of the unit. Playback starts automatically. The folder/file number is shown for a while when starting playback or skipping tracks....
9 En LISTENING TO CD AND USB DEVICES Eng lish 1 Press SOURCE and set USB as the playback source. 2 Connect a USB device to the USB port . Playback starts automatically. The folder/file number is shown for a while when starting playback or skipping tracks. Use the following buttons to control the uni...
10 En Note If you tune to an FM station manually, the sound will be in monaural. 1 Press SOURCE and set FM as the playback source. 2 Press / to tune the FM station. Use the preset function to store your favorite 5 stations. 1 Press / to tune into your favorite FM station. 2 Press and hold down PRESE...
11 En LISTENING TO EXTERNAL SOURCES Eng lish 1 Press SOURCE and set FM as the playback source. 2 Press PRESET repeatedly to select the preset FM station. Turn the system off before connecting audio cables. Remove the terminal cover before connecting external devices. 1 Connect external audio device ...
12 En The unit includes an alarm function (IntelliAlarm) that plays back music sources or set of beeps at the set time in a variety of different methods. The alarm function has following features. 3 types of alarms Select from 3 alarm types, combining music and beep sounds. Various music sources...
13 En USING THE ALARM FUNCTION Eng lish 1 Press and hold ALARM . The alarm indicator ( ) and set alarm time will flash. 2 Press / to set the alarm time. 3 Select the alarm type with the ALARM TYPE switch on the rear panel. For details on alarm types, refer to P. 12. 4 (when alarm types other than BE...
USING THE ALARM FUNCTION 14 En 1 Press ALARM . When the alarm is on, the alarm indicator ( ) is shown, and the alarm time is shown for a while. If you press ALARM again, the alarm indicator ( ) and the alarm will turn off. y The set alarm time will be saved even if the alarm is turned off. If the al...
15 En Eng lish You can set the time to turn off the system automatically. 1 Press SNOOZE/SLEEP a number of times to set the time until the system turns off. The sleep timer can be set to 30, 60, 90 and 120 minutes. When the time is set, the sleep indicator ( ) is shown on the front panel display. y ...
16 En If there is a problem with the unit, check the following list first. If you cannot resolve the problem with the suggested solutions or if the problem is not listed below, turn off and unplug the system, and consult the nearest authorized Yamaha dealer or service center. TROUBLESHOOTING General...
17 En TROUBLESHOOTING Eng lish CD playback Problem Cause Solution Disc cannot be inserted. The system is set to power save mode. Press to cancel the power save mode ( ☞ P. 2). Some button operations do not work. The disc loaded into the unit may not be compatible. Use a disc supported by the unit ( ...
18 En This unit is designed for use with audio CD, CD-R*, and CD-RW* with the logos followings. * ISO 9660 format CD-R/RW y This unit can play back discs bearing any of the logo marks above. A disc logo mark is printed on the disc and the disc jacket. Notes • Do not load any other type of disc into ...
19 En Eng lish PLAYER SECTION iPod (Digital connection) • Compatible iPod models .............................................iPod touch (1st, 2nd, 3rd and 4th generations) iPod classic iPod nano (2nd, 3rd, 4th, 5th and 6th generations) • Compatible iPhone models .....................................
1 Ru Eng lish F ra n зa is Deu ts ch S venska Ital ia no Espaс o l N eder la nds Русск ий НАЗВАНИЯ ЧАСТЕЙ И ИХ ФУНКЦИИ......................................2НАСТРОЙКА ЧАСОВ ................................................................5ПРОСЛУШИВАНИЕ iPod...............................................
2 Ru a (Питание) Нажмите эту кнопку , чтобы включить или выключить систему . Время отображается на передней панели , даже если система выключена . y • Для перевода системы в режим экономии электроэнергии нажмите и удерживайте кнопку в верхней части устройства не менее 3 секунд . В режиме экономии эл...
3 Ru НАЗВАНИЯ ЧАСТЕЙ И ИХ ФУНКЦИИ Русск ий 1 Индикатор воспроизведения/воспроизведения в случайном порядке/повторного воспроизведения Показывает режим воспроизведения ( стр . 6, 9). b Приемник сигнала пульта ДУ c Индикатор часов Показывает часовую стрелку часов ( стр . 5). d Индикатор источника Пока...
НАЗВАНИЯ ЧАСТЕЙ И ИХ ФУНКЦИИ 4 Ru a Передатчик сигнала пульта ДУ b (Питание) Нажмите эту кнопку , чтобы включить или выключить систему . c ALARM Используется для включения и выключения будильника . d SNOOZE/SLEEP Установка таймера перехода в режим ожидания или переключение будильника в режим повторе...
5 Ru Русск ий 1 Установите переключатель CLOCK на задней панели в положение SET. 2 Установите время с помощью кнопок / . 3 Установите переключатель CLOCK на задней панели в положение CLOCK1 или CLOCK2. y • При подключении iPod к док - разъему iPod в шаге 2 время на iPod будет скопировано на устройст...
6 Ru Для получения подробной информации о совместимости моделей iPod см . раздел “ ТЕХНИЧЕСКИЕ ХАРАКТЕРИСТИКИ ” ( стр . 19). 1 Подключите iPod к док - разъему iPod . 2 Нажмите кнопку SOURCE и задайте iPod в качестве источника воспроизведения . 3 Воспроизведите iPod, нажав кнопку / . Воспроизведением...
7 Ru Русск ий 1 Нажмите кнопку SOURCE и задайте CD- диск в качестве источника воспроизведения . 2 Вставьте аудио CD в слот для диска , направив сторону с этикеткой к передней части устройства . Воспроизведение начнется автоматически . Номер дорожки отображается на дисплее в течение некоторого времен...
ПРОСЛУШИВАНИЕ CD-ДИСКОВ И УСТРОЙСТВ USB 8 Ru 1 Нажмите кнопку SOURCE и задайте CD- диск в качестве источника воспроизведения . 2 Вставьте CD с данными в слот для диска , направив сторону с этикеткой к передней части устройства . Воспроизведение начнется автоматически . Номер папки / файла отображает...
9 Ru ПРОСЛУШИВАНИЕ CD-ДИСКОВ И УСТРОЙСТВ USB Русск ий 1 Нажмите кнопку SOURCE и задайте устройство USB в качестве источника воспроизведения . 2 Подключите устройство USB к порту USB . Воспроизведение начнется автоматически . Номер папки / файла отображается на дисплее в течение некоторого времени , ...
10 Ru Примечание Если настройку FM- радиостанции выполнить вручную , будет воспроизводиться монофонический звук . 1 Нажмите кнопку SOURCE и задайте FM- радиостанцию в качестве источника воспроизведения . 2 Нажмите кнопку / для настройки FM- радиостанции . Используйте заданную функцию для сохранения ...
11 Ru ПРОСЛУШИВАНИЕ ВНЕШНИХ ИСТОЧНИКОВ Русск ий 1 Нажмите кнопку SOURCE и задайте FM- радиостанцию в качестве источника воспроизведения . 2 Нажмите кнопку PRESET несколько раз , чтобы выбрать предварительно настроенную FM- радиостанцию . Выключите систему перед подключением аудиокабелей . Снимите кр...
12 Ru Устройство имеет функцию будильника (IntelliAlarm), которая воспроизводит мелодию или набор звуковых сигналов в установленное время различными способами . Функция будильника обладает следующими возможностями . 3 типа будильников Устройство имеет 3 типа будильников , сочетающие музыку и звуко...
13 Ru ИСПОЛЬЗОВАНИЕ ФУНКЦИИ БУДИЛЬНИКА Русск ий 1 Нажмите и удерживайте кнопку ALARM . Индикатор будильника ( ) и установленное время сигнала будут мигать . 2 Нажмите кнопку / , чтобы установить время сигнала . 3 Выберите тип сигнала будильника с помощью переключателя ALARM TYPE на задней панели . Д...
ИСПОЛЬЗОВАНИЕ ФУНКЦИИ БУДИЛЬНИКА 14 Ru 1 Нажмите кнопку ALARM . Если функция будильника включена , отображается индикатор будильника ( ) и временно отображается время срабатывания . При повторном нажатии кнопки ALARM индикатор будильника ( ) и будильник будут отключены . y Установленное время сигнал...
15 Ru Русск ий Можно задать автоматическое отключение системы в назначенное время . 1 Нажмите кнопку SNOOZE/SLEEP несколько раз , чтобы задать время до момента выключения системы . Для таймера можно задать интервал 30, 60, 90 и 120 минут . После установки времени на дисплее передней панели появится ...
16 Ru В случае возникновения проблем при использовании устройства сначала обратитесь к следующему списку . Если устранить проблему с помощью предложенных способов не удается , или если проблема не указана в списке , выключите систему и отсоедините от сети электропитания , затем обратитесь к ближайше...
18 Ru Это устройство поддерживает диски аудио CD, CD-R*, CD- RW* со следующими логотипами . * ISO 9660 формат CD-R/RW y Данное устройство способно воспроизводить диски , имеющие любой из перечисленных выше логотипов . Логотип диска напечатан на диске и обложке диска . Примечания • Не загружайте в да...
19 Ru Русск ий РАЗДЕЛ ПРОИГРЫВАТЕЛЯ iPod ( цифровое соединение ) • Совместимые iPod ...........................................iPod touch (1- го , 2- го , 3- го и 4- го поколения ) iPod classic iPod nano (2- го , 3- го , 4- го , 5- го и 6- го поколения ) • Совместимые iPhone .........................
User Manual Yamaha ISX-800
Yamaha Manuals
-
Yamaha NS AW150
User Manual
-
Yamaha NS AW150
Installation Manual
-
Yamaha NS AW350
User Manual
-
Yamaha NS AW350
Installation Manual
-
Yamaha NS AW350
Manual
- Yamaha TTN503 User Manual
-
Yamaha CLP 825
User Manual
-
Yamaha CLP 835
User Manual
-
Yamaha CLP 845
User Manual
-
Yamaha CLP 865GP
User Manual
-
Yamaha CLP 875
User Manual
-
Yamaha CLP 885
User Manual
-
Yamaha CLP 895GP
User Manual
-
Yamaha NS IW470WH
Installation Manual
-
Yamaha NS IW470WH
User Manual
-
Yamaha CS500
User Manual
-
Yamaha CS 800
Manual
-
Yamaha NS F210BL
User Manual
-
Yamaha ATS C300
User Manual
-
Yamaha PASC9
User Manual
