Westinghouse WVG6515SD - Manuals
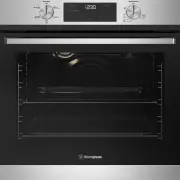
User Manual Westinghouse WVG6515SD


Summary
2 CONTENTS CONTENTS Please read the user manual carefully and store in a handy place for later reference. The symbols you will see in this booklet have these meanings: WARNING WARNING This symbol indicates information concerning your personal safety. WARNING CAUTION This symbol indicates information...
3 SAFETY SAFETY Please read the user manual carefully and store in a handy place for later reference. TIPS & INFORMATION IMPORTANT Important – check for any damages or marks If you find the oven is damaged or marked, you must report it within 7 days if you wish to claim for damage/ marks under t...
4 SAFETY WARNING CAUTION Read the following carefully to avoid damage to the appliance. • The grill door must be left fully open whilst grilling in a separate grill wall oven and a separate grill underbench oven. • The grill tray must be fully inserted whilst grilling. • Do not place thick portions ...
Westinghouse Ovens Manuals
-
 Westinghouse DSP635S
User Manual
Westinghouse DSP635S
User Manual
-
 Westinghouse DSP635W
User Manual
Westinghouse DSP635W
User Manual
-
 Westinghouse GEK1385RW
User Manual
Westinghouse GEK1385RW
User Manual
-
 Westinghouse GGR475S
User Manual
Westinghouse GGR475S
User Manual
-
 Westinghouse GGR475SLPG
User Manual
Westinghouse GGR475SLPG
User Manual
-
 Westinghouse GGR475WLPG
User Manual
Westinghouse GGR475WLPG
User Manual
-
 Westinghouse GOR474S
User Manual
Westinghouse GOR474S
User Manual
-
 Westinghouse GOR474SLPG
User Manual
Westinghouse GOR474SLPG
User Manual
-
 Westinghouse GOR476S
User Manual
Westinghouse GOR476S
User Manual
-
 Westinghouse GOR476SLPG
User Manual
Westinghouse GOR476SLPG
User Manual
-
 Westinghouse GOR476W
User Manual
Westinghouse GOR476W
User Manual
-
 Westinghouse GSP625WLPG
User Manual
Westinghouse GSP625WLPG
User Manual
-
 Westinghouse GXR650S
User Manual
Westinghouse GXR650S
User Manual
-
 Westinghouse GXR650W
User Manual
Westinghouse GXR650W
User Manual
-
 Westinghouse GXR650WLPG
User Manual
Westinghouse GXR650WLPG
User Manual
-
 Westinghouse PAK557W
User Manual
Westinghouse PAK557W
User Manual
-
 Westinghouse PAK804W
User Manual
Westinghouse PAK804W
User Manual
-
 Westinghouse PAK806W
User Manual
Westinghouse PAK806W
User Manual
-
 Westinghouse PAK808W
User Manual
Westinghouse PAK808W
User Manual
-
 Westinghouse PDR790S
User Manual
Westinghouse PDR790S
User Manual