Westinghouse WVE614WA - Manuals
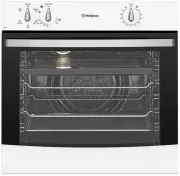
User Manual Westinghouse WVE614WA


Summary
2 3 SAFETY CONTENTS Please read the user manual carefully and store in a handy place for later reference. TIPS & INFORMATION IMPORTANT Important – check for any damages or marks. • If you find the oven is damaged or marked, you must report it within 7 days if you wish to claim for damage/marks u...
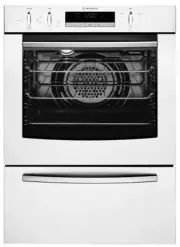
4 5 IMPORTANT SAFETY INSTRUCTIONS PRODUCT DESCRIPTION IMPORTANT SAFETY INSTRUCTIONS Cooktop only • If the ceramic glass on cooktop is accidently cracked, switch off the appliance to avoid the possibility of electric shock. • Unattended cooking on a hob with fat or oil can be dangerous and may result...
6 7 PRODUCT DESCRIPTION BEFORE FIRST USE Preparing your appliance for the first time • Please remove all internal boxes and bags from the oven before operation. • Please wipe out the oven interior prior to operation with warm soapy water and polish dry with a soft clean cloth. Do not close the oven ...
Westinghouse Ovens Manuals
-
 Westinghouse DSP635S
User Manual
Westinghouse DSP635S
User Manual
-
 Westinghouse DSP635W
User Manual
Westinghouse DSP635W
User Manual
-
 Westinghouse GEK1385RW
User Manual
Westinghouse GEK1385RW
User Manual
-
 Westinghouse GGR475S
User Manual
Westinghouse GGR475S
User Manual
-
 Westinghouse GGR475SLPG
User Manual
Westinghouse GGR475SLPG
User Manual
-
 Westinghouse GGR475WLPG
User Manual
Westinghouse GGR475WLPG
User Manual
-
 Westinghouse GOR474S
User Manual
Westinghouse GOR474S
User Manual
-
 Westinghouse GOR474SLPG
User Manual
Westinghouse GOR474SLPG
User Manual
-
 Westinghouse GOR476S
User Manual
Westinghouse GOR476S
User Manual
-
 Westinghouse GOR476SLPG
User Manual
Westinghouse GOR476SLPG
User Manual
-
 Westinghouse GOR476W
User Manual
Westinghouse GOR476W
User Manual
-
 Westinghouse GSP625WLPG
User Manual
Westinghouse GSP625WLPG
User Manual
-
 Westinghouse GXR650S
User Manual
Westinghouse GXR650S
User Manual
-
 Westinghouse GXR650W
User Manual
Westinghouse GXR650W
User Manual
-
 Westinghouse GXR650WLPG
User Manual
Westinghouse GXR650WLPG
User Manual
-
 Westinghouse PAK557W
User Manual
Westinghouse PAK557W
User Manual
-
 Westinghouse PAK804W
User Manual
Westinghouse PAK804W
User Manual
-
 Westinghouse PAK806W
User Manual
Westinghouse PAK806W
User Manual
-
 Westinghouse PAK808W
User Manual
Westinghouse PAK808W
User Manual
-
 Westinghouse PDR790S
User Manual
Westinghouse PDR790S
User Manual