Page 2 - ENVIRONMENTAL TIPS; INFORMATION ON DISPOSAL FOR USERS; WARNING; IMPORTANT SAFETY INSTRUCTIONS
2 3 SAFETY CONTENTS TIPS & INFORMATION TIPS AND INFORMATION Important – CHECK FOR ANY DAMAGE OR MARKS If you find the appliance is damaged or marked, you must report it within 7 days if you wish to claim for damage/ marks under the manufacturer’s warranty. This does not affect your statutory rig...
Page 3 - DESCRIPTION OF YOUR APPLIANCE
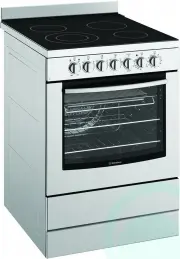
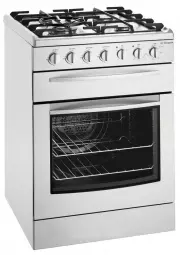
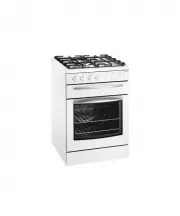
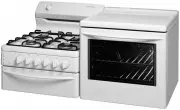
5 DESCRIPTION 4 DESCRIPTION DESCRIPTION OF YOUR APPLIANCE Model WFE517 Model WFE642 Model WFE547 Model WFE647 Model WFE616 Model WFG617 Model WFE619 Hotplate controls Hotplate controls Hotplate controls Hotplate controls Dual ring hotplate control Dual ring hotplate control Dual ring hotplate contro...
Page 4 - NOTE: You must remove the grill dish when baking in; NOTE: When the burner is correctly fitted it will sit level; INSTALLING YOUR OVEN ACCESSORIES
6 7 ACCESSORIES ACCESSORIES Grill in oven (refer to Fitting Oven Shelves) The grill dish with wire insert can be used in any of the two upper height positions (shelf positions 4 and 5) between the runners. NOTE: You must remove the grill dish when baking in the oven. Oven shelf location NOTE: The to...
Page 5 - NOTE: If the ceramic glass is cracked switch off the; OPERATING FOR THE FIRST TIME
8 9 OPERATING ACCESSORIES Ceramic hotplates The cooktop is made from ceramic glass, a tough, durable material that withstands heating and cooling without breaking. It is strong enough to hold the heaviest utensils. However, it must be remembered that as it is GLASS, it may break. Treat it accordingl...
Page 6 - NOTE: In the absence of electrical power, carry out the ignition; NOTE: In the absence of electrical power, carry out the; USING THE GAS COOKER
10 11 USING THE COOKER ACCESSORIES Lighting gas hotplate, grill and oven Electronic ignition (For models WFE616 and WFE619) These hobs are fitted with mains powered electronic ignition. When the appliance has been connected and the power is on, depressing any knob will release sparks to all burners....
Page 7 - GENERAL HINTS AND TIPS
12 13 ACCESSORIES GENERAL HINTS AND TIPS WARNING CAUTION Using the Grill General hints For best baking results preheat oven for 30 minutes. The material and finish of baking trays and dishes used will affect the way foods are baked, especially base browning. • Enamelware, anodised aluminium, dark ba...
Page 8 - OPERATING THE 120 MINUTE MECHANICAL RINGER TIMER; NOTE: If you are using water in cooking, this will turn to; USING THE OVEN
Operating your 120 minute ringer timer To set the timer, simply turn the knob clockwise to the required number of minutes. Note: For any time below ten minutes, turn the knob past the thirty minute mark, then turn it back to the required number of minutes. OPERATING THE 120 MINUTE MECHANICAL RINGER ...
Page 9 - OVEN GUIDE; Roasting Meat
OVEN GUIDE The following is intended as a guide. Cooking variation is natural and to be expected. You should experiment with times, temperatures and recipes to obtain the best results to your own taste. Get to know your oven before making a service call. Where the gas models vary from the electric m...
Page 10 - DEALING WITH COOKING PROBLEMS; NOTE: Items with high sugar content not only include jam
PROBLEM CAUSES WHAT TO DO Uneven cooking Incorrect shelf position Select shelf that puts food in centre of oven Oven tray too large Try other trays or dishes Trays not in centre Put trays in centre Air flow in oven uneven Rotate food during cooking Grill tray affecting thermostat Remove grill tray f...
Page 11 - CLEANING YOUR OVEN ACCESSORIES; SOLVING PROBLEMS
Removing and replacing the oven light WARNING WARNING Make sure the appliance is turned off before you remove or replace parts, to avoid the possibility of electric shock. CLEANING YOUR OVEN ACCESSORIES Cleaning the grill Grill tray and grill pan• Wash the grill tray and grill pan in hot soapy water...
Page 12 - INSTALLING THE APPLIANCE; and stability bolt MUST be installed on all cookers
Cabinet requirements This appliance has been designed to ‘slot-in’ to a 600mm wide gap built-in standard kitchen cabinets. As such the appliance can be installed to suit the height and depth of benches and behind the kick rail of the cabinets. This allows the cooker to integrate well into contempora...
Page 13 - Cabinet Requirements; Stabilising bolt; Installing Splashback; NOTE: When connections are made to a multi-phase; TIPS AND INFORMATION; CONNECTING TO SERVICES AND COMMISSIONING; Electrical supply connection
INSTALLING THE APPLIANCE (540mm wide product) Cabinet Requirements This appliance has been designed to ‘slot-in’ to a 540mm wide gap built-in standard kitchen cabinets. As such the appliance can be installed to suit the height and depth of benches and behind the kick rail of the cabinets. This allow...
Page 14 - Restraining Device; *Some models do not require an appliance regulator for; INSTALLATION
INSTALLATION Wiring connection for gas cooker To allow for disconnection of the appliance after installation, the plug must be accessible after installation. If the supply cord is damaged, it must be replaced by the manufacturer, its service agent or similarly qualified persons in order to avoid a h...
Page 16 - TESTING THE OPERATION OF THE GAS COOKER; Checking gas supply; Warranty
TESTING THE OPERATION OF THE GAS COOKER NOTE: You MUST test the cooker after installation, before you hand it over to the customer. You MUST have a manometer and a connecting tube. Checking gas supply 1. Check the manometer zero point is correct. 2. Connect the manometer to the cooker pressure test ...