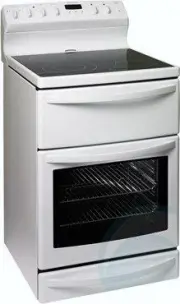
Westinghouse GXR650W - Manuals
User Manual Westinghouse GXR650W


Summary
2 3 SAFETY CONTENTS Please read the user manual carefully and store in a handy place for later reference. The symbols you will see in this booklet have these meanings: WARNING This symbol indicates information concerning your personal safety CAUTION This symbol indicates information on how to avoid ...
4 5 OPERATION FEATURES SETTING THE TIME If you have purchased a model fitted with an electronic clock, you MUST set the time of day before you can operate your appliance. ELECTRONIC CLOCK • After the appliance has been electrically connected “12.00” will be displayed and the “clock” indicator will f...
6 7 OPERATION OPERATION 2. Shelves and traysThe shelves are designed so that they have maximum travel but cannot be accidentally pulled right out. The trays are designed the same way and fit straight into the side racks.• Locate the rear edge of the shelf/tray in between 2 guide rails of the side ra...
Westinghouse Ovens Manuals
-
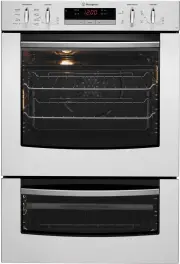
 Westinghouse DSP635S
User Manual
Westinghouse DSP635S
User Manual
-
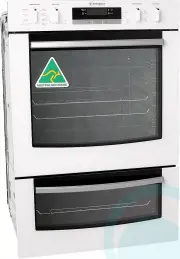
 Westinghouse DSP635W
User Manual
Westinghouse DSP635W
User Manual
-
 Westinghouse GEK1385RW
User Manual
Westinghouse GEK1385RW
User Manual
-
 Westinghouse GGR475S
User Manual
Westinghouse GGR475S
User Manual
-
 Westinghouse GGR475SLPG
User Manual
Westinghouse GGR475SLPG
User Manual
-
 Westinghouse GGR475WLPG
User Manual
Westinghouse GGR475WLPG
User Manual
-
 Westinghouse GOR474S
User Manual
Westinghouse GOR474S
User Manual
-
 Westinghouse GOR474SLPG
User Manual
Westinghouse GOR474SLPG
User Manual
-
Westinghouse GOR476S
User Manual
-
 Westinghouse GOR476SLPG
User Manual
Westinghouse GOR476SLPG
User Manual
-
 Westinghouse GOR476W
User Manual
Westinghouse GOR476W
User Manual
-
 Westinghouse GSP625WLPG
User Manual
Westinghouse GSP625WLPG
User Manual
-
 Westinghouse GXR650S
User Manual
Westinghouse GXR650S
User Manual
-
 Westinghouse GXR650WLPG
User Manual
Westinghouse GXR650WLPG
User Manual
-
 Westinghouse PAK557W
User Manual
Westinghouse PAK557W
User Manual
-
 Westinghouse PAK804W
User Manual
Westinghouse PAK804W
User Manual
-
 Westinghouse PAK806W
User Manual
Westinghouse PAK806W
User Manual
-
 Westinghouse PAK808W
User Manual
Westinghouse PAK808W
User Manual
-
 Westinghouse PDR790S
User Manual
Westinghouse PDR790S
User Manual
-
 Westinghouse PDR790W
User Manual
Westinghouse PDR790W
User Manual