Viking RVER3301-5BSS - Manuals
Viking RVER3301-5BSS Range – User Manual in PDF format online.
Manuals:
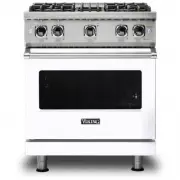
User Manual Viking RVER3301-5BSS


Summary
Congratulations We hope you will enjoy and appreciate the care and attention we have put into every detail of your new, state-of-the-artrange. Your appliance is designed to offer years of reliable service. This Use and Care Manual will provide you with the informationyou need to become familiar with...
3 Warnings Warning and Important Safety Instructions appearing in this manualare not meant to cover all possible conditions andsituations that may occur. Common sense, caution, and care must be exercised when installing, maintaining, or operatingthe appliance. ALWAYS contact the manufacturer about p...
5 Getting Started • NEVER use aluminum foil to cover oven racks or oven bottom. This could result in risk of electric shock, fire, or damage to the appliance. Use foil only as directed in this guide. • DO NOT cook directly on the oven bottom. This could result in damage to your appliance. Always use...
Viking Ranges Manuals
-
 Viking EVGR530-4BAB
User Manual
Viking EVGR530-4BAB
User Manual
-
 Viking EVGR530-4BAG
User Manual
Viking EVGR530-4BAG
User Manual
-
 Viking EVGR530-4BBK
User Manual
Viking EVGR530-4BBK
User Manual
-
 Viking EVGR530-4BSS
User Manual
Viking EVGR530-4BSS
User Manual
-
 Viking EVGR530-4BWH
User Manual
Viking EVGR530-4BWH
User Manual
-
 Viking RVDR33025BSS
User Manual
Viking RVDR33025BSS
User Manual
-
Viking RVDR33025BSSLP
User Manual
-
 Viking RVER3301-5BWH
User Manual
Viking RVER3301-5BWH
User Manual
-
 Viking RVGR33025BRE
User Manual
Viking RVGR33025BRE
User Manual
-
Viking RVGR33025BSS
User Manual
-
Viking RVGR33025BSSLP
User Manual
-
Viking RVGR33025BWH
User Manual
-
 Viking TVDR4814GDG
User Manual
Viking TVDR4814GDG
User Manual
-
Viking TVDR4816BBW
User Manual
-
Viking TVDR4816BKA
User Manual
-
Viking TVDR6618BSB
User Manual
-
 Viking VDR5304BSB
User Manual
Viking VDR5304BSB
User Manual
-
Viking VDR5304BSS
User Manual
-
Viking VDR5304BSSLP
User Manual
-
Viking VDR5304BWH
User Manual