Page 2 - Read and save these instructions; This manual contains information for:; Important Safeguards; Important
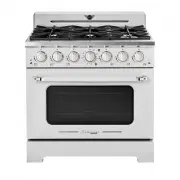
CLASSIC RETRO BY UNIQUE 36” CONVECTION GAS RANGE GAS RANGE - NG & LPG CONVERTIBLE READ AND SAVE THESE INSTRUCTIONS Have the dealer where you purchase your new range install it or have him recommend a qualified installer. Installation must conform with local codes. In the absence of local codes, ...
Page 3 - Unique Appliances; WARNING
Making sure the anti-tip bracket is installed: • Slide range forward. • Look for the anti-tip bracket securely attached to floor. • Slide range back so rear range foot is under anti-tip bracket. MANUFACTURED & CERTIFIED BY Unique Appliances 2245 Wyecroft Road #5, Oakville, Ontario, Canada L6L 5L...
Page 4 - TABLE OF CONTENTS
4 BEFORE USING YOUR GAS RANGE . . . . . . . . . . . . . . . . . . . . 5WELCOME . . . . . . . . . . . . . . . . . . . . . . . . . . . . . . . . . . 6IMPORTANT SAFEGUARDS . . . . . . . . . . . . . . . . . . . . . . . . 7SAFETY INSTRUCTIONS . . . . . . . . . . . . . . . . . . . . . . . . . . 8INSTALLAT...
Page 5 - BEFORE USING YOUR GAS RANGE; HAVE THIS RANGE INSTALLED BY A QUALIFIED INSTALLER.
5 BEFORE USING YOUR GAS RANGE WARNING HAVE THIS RANGE INSTALLED BY A QUALIFIED INSTALLER. Improper installation, adjustment, alteration, services, or maintenance can cause injury or property damage. Consult a qualified installer, service agency, or the gas supplier. BEFORE USING YOUR GAS RANGE: • Re...
Page 6 - WELCOME & CONGRATULATIONS; UNIQUE; Record these numbers for future use.
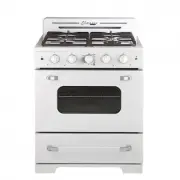
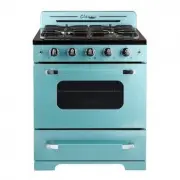
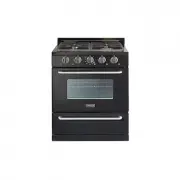
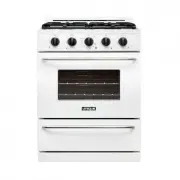
6 WELCOME & CONGRATULATIONS Congratulations on your purchase of a UNIQUE range! We are very proud of our product – and are completely committed to providing you with the best service possible. Your satisfaction is our #1 priority. Please read this manual very carefully. It contains valuable info...
Page 9 - ventilation fan or hood.; cookware may be harmful or fatal to birds.
9 UNPACKING AND HANDLING Extremely Heavy. Proper equipment and adequate manpower when move the range to avoid personal injury or damage to the unit or the floor. The unit is heavy and rests on adjustable steel legs. Failure to follow this advice may result in damage or personal injury. DO NOT lift r...
Page 11 - rating of the gas appliance pressure regulator supplied.; CAUTION; INPUT PRESSURE; NG; LPG
11 INSTALLATION AND OPERATION INSTRUCTIONS IMPORTANT Keep appliance area clear and free from combustible materials, gasoline, and other flammable vapors. Gas Supply Requirements Installation of this range must conform with local codes, or in the absence of local codes, the National Fuel Gas Code, AN...
Page 12 - CARBON MONOXIDE WARNING; the Carbon Monoxide levels appropriate for each appliance.
12 CARBON MONOXIDE WARNING Carbon Monoxide is a possible danger when using any gas powered appliance.All gas appliances MUST be installed by a licensed professional who is familiar with the Carbon Monoxide levels appropriate for each appliance. The American Gas Association publishes CO emissions for...
Page 13 - INSTALLATION INSTRUCTIONS; Levelling a Free-Standing Range; Making sure the anti-tip bracket is installed:
13 INSTALLATION INSTRUCTIONS Be sure appliance is properly installed and grounded by a qualified technician. It is the responsibility of the technician to make certain that your range is properly installed. Situations caused by improper installation are not covered under the warranty. Any expenses i...
Page 14 - sidewalls must be at least 10 inches.
14 27.3” 44.25” 36” 41” 37” Depth with Door Open INSTALLATION INSTRUCTIONS Dimensions and Clearances The range may be installed flush to the rear wall. You may install a non-combustible material on the rear wall above the range and up to the vent hood. It is not necessary to install non-combustible ...
Page 16 - 0-amp circuit breaker or time delay fuse.; Electrical Grounding Instructions:; this indoor gas cooking appliance is equipped with; Do Not; cut or removes the grounding prong from the plug.; Caution; Grounding; electrical shock hazard from the range.
16 INSTALLATION INSTRUCTIONS Electric Power Supply Requirements Your range must be electrically grounded in accordance with local codes or, in the absence of local codes, in accordance with the National Electrical Code (ANSI/NFPA 70, latest edition). In Canada, electrical grounding must be in accord...
Page 17 - HOW TO INSTALL THE BACKSPLASH
17 INSTALLATION INSTRUCTIONS Backsplash Option 1 Backsplash Option 2 1. Align the backsplash to the rear part of the cooktop as shown in the diagram. 2. Secure the backsplash to the cooktop from the back using the 8 Phillips head screws provided as shown in the diagram. HOW TO INSTALL THE BACKSPLASH...
Page 18 - HANDLE INSTALLATION INSTRUCTIONS; Step 2: Insert the assembled handle
18 HANDLE INSTALLATION INSTRUCTIONS � ] -aa-. ------------c:a----------- -F---�---�----F---�---�� ....... 1 ____________ Cl!!!lt __________ _ ----------------------- ..,. . . . . ."i � ] -aa-. ------------c:a----------- -F---�---�----F---�---�� ....... 1 ____________ Cl!!!lt __________ _ ------...
Page 19 - Connect Range to Gas Supply; inches; GAS CONNECTIONS
19 Connect Range to Gas Supply • Install a manual gas line shut-off valve in the gas line in an easily accessed location outside the range in the gas piping external to the appliance for the purpose of turning on or shutting off gas to the appliance. • Install male 1/2” flare union adapter to 1/2” N...
Page 20 - GAS RANGE CONVERSION; instructions supplied with the kit.”
20 To convert application and/or adjust from NG to LPG The range is set for use with Natural Gas (NG). The factory setting is indicated on the serial plate. When set for Natural Gas operation, the pressure regulator will regulate the gas to 4” water column pressure. When set for Liquid Propane Gas (...
Page 21 - The original orifices are Natural Gas:
21 2mm Allen Wrench 3/8 & 1/2 & 5/8” [19mm] Open End Wrench 1/8” Wide Flat Blade Screwdriver Philips Screwdriver 7mm Nut Driver 1/4 Nut Driver Adjustable Wrench The original orifices are Natural Gas: Tools Required for L.P. Conversion: GAS RANGE CONVERSION Rear Left Burner 9,000 BTU [1.36mm]...
Page 22 - Electrical shock hazard can occur and result in injury or death.; or allow it to turn during servicing.; Do not remove the spring from the regulator.; cap. Replace insert on the cap. Replace the cap on the regulator.
22 INSTRUCTIONS FOR CONVERTING RANGE TO OPERATE ON LIQUEFIED PETROLEUM GAS 1. Convert the Pressure Regulator To access the gas regulator, pull the range away from the cabinet wall. The gas regulator is located at the bottom right corner of the range. a. Electrical shock hazard can occur and result i...
Page 23 - gas. Take extra care when handling steel parts.; Care should be taken when removing and replacing gas components.
23 INSTRUCTIONS FOR CONVERTING RANGE TO OPERATE ON LIQUEFIED PETROLEUM GAS 2. Convert Top Burner for LP/Propane Gas Save the natural gas orifices removed from the appliance for possible future conversions to natural gas. You should use the following process to convert to Natural gas. Take extra care...
Page 24 - Remove 3 screws between the kick panel and the oven door; Convert Broil Burner Orifice for LP/Propane Gas; Using a 1/2” open wrench, remove the orifice from the orifice holder.
24 INSTRUCTIONS FOR CONVERTING RANGE TO OPERATE ON LIQUEFIED PETROLEUM GAS 3. Convert Oven Burner Orifice for LP/Propane Gas a. Remove 3 screws between the kick panel and the oven door (ref below 1.) . Hold the toe kick panel on both ends and slowly pull upwards and out towards your self. (ref below...
Page 25 - Remove control knobs; Care should be taken when; INSTRUCTIONS FOR CONVERTING RANGE TO OPERATE ON
25 5. Convert Gas Valves for LP/Propane Gas a. Remove control knobs (ref below 1.) . b. Turn the top burner valve fully counterclockwise (minimum position), then proceed to adjust the adjustment screw clockwise for a smaller flame and counterclockwise for a bigger flame. (ref below 2.) . 1. 2. CAUTI...
Page 26 - Reconnect Gas and Electrical Supply to Range; instructions provided with the range.; Checking for Manifold Gas Pressure; above the specified manifold pressure.; Do not use a flame to check for gas leaks; at test pressure equal to or less than 14” water column pressure
26 6. Reconnect Gas and Electrical Supply to Range Leak testing of the appliance shall be conducted according to the installation instructions provided with the range. Checking for Manifold Gas Pressure If it is necessary to check the manifold gas pressure, remove the burner cap, inner ring, outer b...
Page 27 - Air Shutter Oven Burner; To determine if the oven burner flame is proper:; burning steadily, the air shutter is adjusted correctly.
27 7. Air Shutter Oven Burner The air shutter for the oven burner may need adjustment, especially if the unit has been converted for use with LP/Propane gas. The approximate flame length of the oven burner is 1 or 1.5 inch (distinct inner blue flame). To determine if the oven burner flame is proper:...
Page 29 - COOKTOP OPERATION; Heat Settings; 6” Control Panel; clockwlse to a “Hi” position. You will hear a clicking noise; Simmer
29 COOKTOP OPERATION Push to release gas. Heat Settings Turn to Ignite and “Hi” position. 36” Control Panel Adjust to appropriate flame height. To light the surface burners, push and turn the appropriate control knob counter clockwlse to a “Hi” position. You will hear a clicking noise (the sound of ...
Page 30 - boiling and pasta cooking.
30 COOKTOP OPERATION SIMMER AND BOIL • A smaller flame will give the best simmer results. Small flames offer precise cooking performance for delicate foods, keeping food warm, melting chocolate or butter, and for cooking that need to cook over low heat for a long time. • The highest (larger) flame s...
Page 31 - FOOD SAFETY; 75°F is not recommended.; BURNER GRATES; The grates must be properly positioned before cooking
31 COOKTOP OPERATION FOOD SAFETY According to the United States Department of Agriculture: DO NOT hold foods at temperatures between 40°F to 140°F more than 2 hours. Cooking raw foods below 275°F is not recommended. Never use this appliance as a space heater to heat or warm the room, Doing so many r...
Page 32 - OVEN BURNER; Performs the normal “oven cooking” function.; GAS OVEN SETTING; off position or the desired temperature is reached in the oven.; OVEN OPERATION
32 HOW TO USE THE GAS OVENGeneral features The gas oven is provided with two burners:The Oven burner, mounted on the lower part of the ovenThe Broil burner, mounted on the upper part of the oven Using the oven for the first time It is advised to follow these instructions: • Insert shelves and broile...
Page 33 - OVEN VENT; or broiler operation - they may become hot.; OVEN FUNCTION; occurs when heat is transferred into the oven from the bake; CONVECTION BAKE; than regular cooking.
33 OVEN OPERATION OVEN VENT Do not block the ducts at the rear of the range when cooking in the oven. It is important that the flow of hot air from the oven and fresh air into the oven burner never be interrupted. Avoid touching the vent opening or nearby surfaces during oven or broiler operation - ...
Page 34 - without being cooked.
34 OVEN OPERATION OVEN THERMOSTAT - The numbers printed on the control panel indicate the increasing oven temperature value (°F). - To regulate the temperature, set the chosen number onto the control knob indicator.- The position BROIL serves only to turn on the broil burner. Note: When the range wi...
Page 35 - CONVECTION MODE; and baking utensils from the oven.; CONVECTION ROASTING; oven for more than 2 hours without being cooked.
35 CONVECTION MODE Heat is transferred from the bake burners in the bottom of the oven cavity to the oven cavity itself. The convection fan in the rear of the oven then circulates the hot air, providing even heat distribution throughout the oven. Convection cooking generally provides a more even tem...
Page 36 - OVEN LIGHT
36 OVEN OPERATION 1. When using the range for the first time or after long period of non-usage, keep pressing the knob inward for approximately 10 – 15 seconds after the burner has lit to ensure the gas valve has been accurately primed. 2. Slowly close the oven door. If the flame extinguishes for an...
Page 37 - BROILER OPERATION; NOTE: Door must be closed during broiling operation.; TO BROIL; insert
37 BROILER OPERATION NOTE: Door must be closed during broiling operation. Broiling is a method of cooking tender cuts of meat directly under the infrared broiler in the oven. Broiling in the oven is accomplished with the oven door closed. It is normal and necessary for some smoke to be present to gi...
Page 38 - their original position.; Stainless Steel Elements; stainless steel surfaces, or a little hot vinegar.; This could result in a build-up of gas which; spilled food from accumulating and becoming a fire hazard.; CARE AND MAINTENANCE
38 Grates, Main Tops, Surface Burners The grates are made of cast iron. These materials can be cleaned at the sink with detergent or soap-filled scouring pads. Do not be alarmed when the grate loses its shiny finish. The heat from the burners will cause the grates to lose their shiny finish. Clean t...
Page 40 - CORRECT REPLACEMENT OF THE BURNERS
40 CARE AND MAINTENANCE 20000 BTU Triple Crown Burner 2000/15000 BTU Burner CORRECT REPLACEMENT OF THE BURNERS It is very important to check that the burner flame spreader and the cap have been correctly positioned. Failure to do so can cause serious problems. In appliances with electric ignition, c...
Page 41 - the instructions carefully:; The oven door can easily be removed as follows:
41 OVEN RACK INSTALLATION AND REMOVAL • The oven racks are provided with a safety catch to prevent accidental removal.• They must be inserted as shown. • To pull them out remove the rack in the reverse order. REMOVING THE OVEN DOOR FOR CLEANING To facilitate oven cleaning, it is possible to remove t...
Page 42 - LEVELING THE RANGE
42 CARE AND MAINTENANCE LEVELING THE RANGE The range must be level to obtain proper operating. The four screws type leveling legs located on the corners at the bottom of range should be adjusted by turning them clockwise to make the range higher or counter-clockwise to lower the range until the rang...
Page 43 - COOKTOP
43 CARE AND MAINTENANCE COOKTOP • To avoid electrical shock or burns, turn off all controls and ensure the cooktop is cool before cleaning. • Before cleaning the cooktop, ensure that all burners are turned off and that all components are cool enough to safely touch. • Do not use harsh or abrasive cl...
Page 45 - TROUBLESHOOTING; Before you call for service, please review the potential
45 TROUBLESHOOTING Nothing works • Oven is not connected to the electrical power. • Power supply is not energized. • Have oven connected to a properly sized electrical power supply by a qualified electrician. • Have an electrician check the power supply, including the house circuit breaker, wiring a...
Page 46 - WIRING DIAGRAM
46 WIRING DIAGRAM Oven LightSwitch Oven LightLeft 2 1 C BR BA Thermostat Oven Indicator Light 13 9 5 1 14 12 8 4 Relay Broiler Safety Valve Broil Ignitor Fan Switch M Fan Bake Safety Valve Burner Ignitor E N A SW6 SW5 SW4 SW3 SW1 S6 S5 S4 S3 S1 Pulse ignition SW2 S2 Microswitch 36" Wire Diagram ...
Page 47 - following information for future reference:
47 APPLIANCE INFORMATION (manual copy - keep with your records) APPLIANCE INFORMATION (remote copy - keep with your appliance) detatch along dotted line detatch along dotted line To make care and servicing of your range easy and efficient, please record the following information for future reference...
Page 49 - NOTES; CONTACT US; register your product.
49 NOTES Toll-free 1-877-427-2266 or 1-905-827-6154 available during regular business hours, 8:30 am to 4:30 pm, EST Website www.UniqueAppliances.com Email [email protected] CONTACT US For general information or questions related to the operation, safety or the purchase of your range, please contact...
Page 50 - RATING PLATE
50 RATING PLATE Conforms to ANS1 STD Z21.1-2018 Certified to CSA STD 1.1-2018 HOUSEHOLD COOKING APPLIANCE. FOR INDOOR USE ONLY. Model: UGP-36CR Serial No: En conformité avec ANS1 STD Z21.1b-2018 Certifiés CSA STD 1.1-2018 APPAREIL DE CUISSON DOMESTIQUE. POUR USAGE INTÉRIEUR SEULEMENT. Modèle: UGP-36...


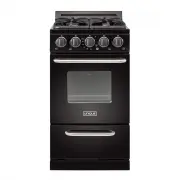 UNIQUE UGP-20G OF1 B
User Manual
UNIQUE UGP-20G OF1 B
User Manual
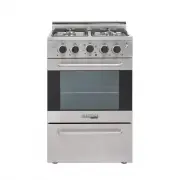
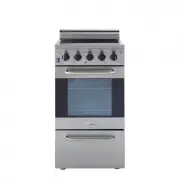 UNIQUE UGP-20V EC1 S/S
User Manual
UNIQUE UGP-20V EC1 S/S
User Manual
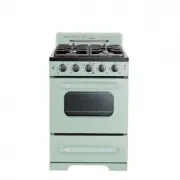
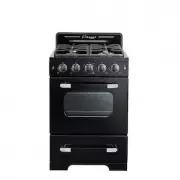 UNIQUE UGP-24CR B
User Manual
UNIQUE UGP-24CR B
User Manual
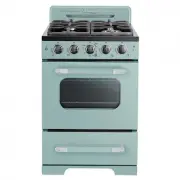
 UNIQUE UGP-24CR LG
User Manual
UNIQUE UGP-24CR LG
User Manual
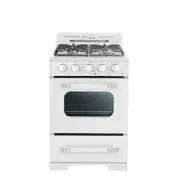 UNIQUE UGP-24CR OF1 W
User Manual
UNIQUE UGP-24CR OF1 W
User Manual
 UNIQUE UGP-24CR T
User Manual
UNIQUE UGP-24CR T
User Manual
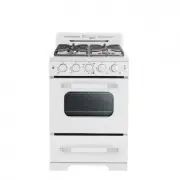 UNIQUE UGP-24CR W
User Manual
UNIQUE UGP-24CR W
User Manual
 UNIQUE UGP-24V EC S/S
User Manual
UNIQUE UGP-24V EC S/S
User Manual
 UNIQUE UGP-24V EC1 S/S
User Manual
UNIQUE UGP-24V EC1 S/S
User Manual
 UNIQUE UGP-24V PC1 S/S
User Manual
UNIQUE UGP-24V PC1 S/S
User Manual
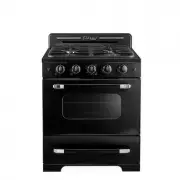 UNIQUE UGP-30CR B
User Manual
UNIQUE UGP-30CR B
User Manual
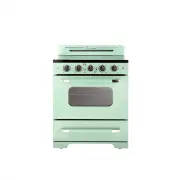 UNIQUE UGP-30CR EC LG
User Manual
UNIQUE UGP-30CR EC LG
User Manual
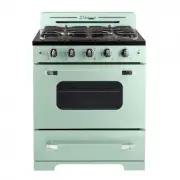 UNIQUE UGP-30CR LG
User Manual
UNIQUE UGP-30CR LG
User Manual
 UNIQUE UGP-30CR OF1 W
User Manual
UNIQUE UGP-30CR OF1 W
User Manual
 UNIQUE UGP-30CR T
User Manual
UNIQUE UGP-30CR T
User Manual
 UNIQUE UGP-30CR W
User Manual
UNIQUE UGP-30CR W
User Manual
 UNIQUE UGP-30G OF1 B
User Manual
UNIQUE UGP-30G OF1 B
User Manual
 UNIQUE UGP-30G OF1 W
User Manual
UNIQUE UGP-30G OF1 W
User Manual
 UNIQUE UGP-30G OF2 S/S
User Manual
UNIQUE UGP-30G OF2 S/S
User Manual