Page 2 - UNIQUE 24” PRESTIGE MODEL; READ AND SAVE THESE INSTRUCTIONS; Installation & Owner’s Manual; This manual contains information for:; Important Safeguards; and use of your range.; How to Obtain Service and/or Parts; may contact the service organization noted on the warranty.; Important; TO THE INSTALLER: Leave this owner’s manual with the range.; Read and Save These Instructions
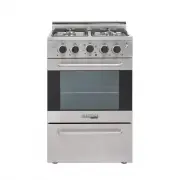
UNIQUE 24” PRESTIGE MODEL GAS RANGE - NG & LPG CONVERTIBLE READ AND SAVE THESE INSTRUCTIONS Have the dealer where you purchase your new range install it or have him recommend a qualified installer. Installation must conform with local codes. In the absence of local codes, the installation must c...
Page 3 - MANUFACTURED & CERTIFIED BY; Unique Gas Products Ltd
2245 Wyecroft Road #5 Oakville, Ontario, Canada L6L 5L7 Ph: 905-827-6154 Toll Free: 1-877-427-2266 Fax: 905-827-2027 www.UniqueOffGrid.com MANUFACTURED & CERTIFIED BY Unique Gas Products Ltd X2
Page 4 - UNIQUE GAS RANGE; Table of Contents
4 05 Important safety instructions14 Energy saving ideas15 Installation instructions16 How to install the backsplash17 Gas connections20 Wall clearances22 Gas range conversion27 Adjusting the top burner and oven flame30 Operation of range36 Alignments and adjustments37 Cleaning the range39 Care and ...
Page 5 - BEFORE USING YOUR GAS RANGE; WARNING; HAVE THIS RANGE INSTALLED BY A QUALIFIED INSTALLER.; BEFORE USING YOUR GAS RANGE:
5 BEFORE USING YOUR GAS RANGE WARNING HAVE THIS RANGE INSTALLED BY A QUALIFIED INSTALLER. Improper installation, adjustment, alteration, services, or maintenance can cause injury or prop-erty damage. Consult a qualified installer, service agency, or the gas supplier. BEFORE USING YOUR GAS RANGE: • R...
Page 6 - Welcome & Congratulations; IMPORTANT PRECAUTIONS AND RECOMMENDATIONS
6 Welcome & Congratulations Congratulations on your purchase of a UNIQUE range! We are very proud of our product – and are completely committed to providing you with the best service possible. Your satisfaction is our #1 priority. Please read this manual very carefully. It contains valuable info...
Page 7 - WARNINGS
7 READ ALL IMPORTANT SAFEGUARDS AND ALL INSTRUCTIONS BEFORE USING THE APPLIANCE. IF YOU SMELL GAS: • Open windows• Don’t touch electrical switches• Extinguish any open flame• Immediately call your gas supplier FOR YOUR SAFETY: • Keep appliance area clear and free from combustible materials gasoline ...
Page 12 - Flexible Connectors:; If the gas range/oven is connected to a gas supply with a; er for use in the event of a house fire.; must be practiced when operating and maintaining any appliance.; ELECTRICAL GROUNDING INSTRUCTIONS; and ordinances is required.; REPLACEMENT PARTS; Contact the nearest Unique parts distributor in your area.
12 Flexible Connectors: If the gas range/oven is connected to a gas supply with a metal flexible connector, move the range/oven with CAUTION for service or cleaning. Flexible connectors are not intended for repeated bending. Do not allow cleaners to make contact with flexible connectors.The connecto...
Page 13 - CARBON MONOXIDE WARNING:; heating equipment through the ANSI Std. Z21.1
13 CARBON MONOXIDE WARNING: Carbon Monoxide is a possible danger when using any gas powered appli- ance.All gas appliances MUST be installed by a licensed professional who is famil- iar with the Carbon Monoxide levels appropriate for each appliance. The American Gas Association publishes CO emission...
Page 15 - INSTALLATION INSTRUCTIONS
15 Be sure appliance is properly installed and grounded by a qualified technician. It is the responsibility of the technician to make certain that your range is properly installed. Situations caused by improper installation are not covered under the war- ranty. Any expenses incurred due to such situ...
Page 16 - HOW TO INSTALL THE BACKSPLASH
16 1. Align the backsplash to the rear part of the cooktop as shown in the diagram. 2. Secure the backsplash to the cooktop from the back using the 2 Philips head screws provided as shown in the diagram. 3. Secure the backsplash from the bottom using the Philips head screws provided as shown in the ...
Page 17 - NOTICE TO MASSACHUSETTS APPLIANCE DEALERS:; the State of Massachusetts.; NOTICE: Massachusetts law requires the following:; gas connector and
17 NOTICE TO MASSACHUSETTS APPLIANCE DEALERS: Be sure this document is included in all gas range appliances sold to consumers in the State of Massachusetts. NOTICE: Massachusetts law requires the following: • Appliances must be installed by a licensed plumber or gas fitter.• Appliances must be conne...
Page 19 - en all connections, and retest for leaks.
19 When using this on LPG gas, conversion must be made by a qualified LPG install- er before attempting to operate the range on that gas.For correct operation, the pressure of natural gas supplied to the regulator should be between 4” and 5” of water column. For LP gas, the pressure supplied must be...
Page 20 - DEPTH OF CABINETS INSTALLED ABOVE COOKING TOPS SHOULD BE 13”.; WALL CLEARANCES
20 All units must be installed in accordance to minimum rear and side wall clearance and clearances extended vertically above cooking top which are stated on the se- rial plate located at the back of the range.ANY OPENINGS IN THE WALL BEHIND THE UNIT AND IN THE FLOOR UNDER THE UNIT MUST BE SEALED.No...
Page 22 - The conversion kit must be installed by qualified service agency.; GAS RANGE CONVERSION; instructions supplied with the kit.”; ATTENTION: YOUR PRODUCT IS PRE-INSTALLED WITH NATURAL GAS
22 To convert application and/or adjust from NG to LPG The range is set for use with Natural Gas (NG). The factory setting is indicated on the serial plate. When set for Natural Gas operation, the pressure regulator will regulate the gas to 5 inches water column pressure. When set for Liquid Propane...
Page 23 - Convertible Pressure Regulator
23 MODEL NUMBER: UGP 24V PC1 S/SParts List: 1. Orifices 2. Screwdriver Convertible Pressure Regulator The range is shipped to operate on NG. LPG orifices and a special screwdriver for adjusting the minimum flame are shipped with the unit in a separate envelope with the manual. The inlet pressure of ...
Page 24 - Use a 7mm wrench to remove the orifices. Each orifice can be; Burner Orifice; up the burners to check the minimum flame height.
24 5. Replace the cap back on the regulator6. Remove the grates, burners and burner caps from the range to access the orifices. 7. Use a 7mm wrench to remove the orifices. Each orifice can be accessed easily - the larger burner orifice is located on the burner wall. Burner Orifice 8. Remove all NG o...
Page 26 - CHECKING FOR MANIFOLD GAS PRESSURE; check the operations of ignition making sure; High Altitude Applications above 2000 feet:
26 CHECKING FOR MANIFOLD GAS PRESSURE To check the manifold gas pressure, remove the burner cap and connect a ma- nometer (water gauge) or other pressure test device to the burner orifice. Use a rubber hose with inside diameter of approximately ¼” hold the end of the hose tight over the orifice. Tur...
Page 27 - ADJUSTING THE TOP BURNER AND OVEN FLAME; of air that is necessary for combustion and ventilation.
27 ADJUSTING THE TOP BURNER AND OVEN FLAME Keep appliance area clear and free from combustible materials, gaso- line, and other flammable vapors and liquids. Do not obstruct the flow of air that is necessary for combustion and ventilation. Top Burner Valves The top burners have orifices that are ded...
Page 30 - Lighting the Top Burners; utensil on the burner grate.; Choice of Burner; OPERATION OF RANGE
30 Lighting the Top Burners 1. To obtain a flame more easily, light the burner before placing a cooking utensil on the burner grate. 2. Decide which burner you’re igniting first using the screened diagram below the burner knob. The black dot indicates the position of the burner you’re igniting. 3.To...
Page 31 - Using the oven for the first time; OVEN BURNER; GAS OVEN SETTING
31 OPERATION OF RANGE (continued) HOW TO USE THE GAS OVENGeneral features The gas oven is provided with two burners: The Oven burner, mounted on the lower part of the oven The Broil burner, mounted on the upper part of the oven Using the oven for the first time It is advised to follow these instruct...
Page 32 - OVEN THERMOSTAT
32 OPERATION OF RANGE (continued) OVEN THERMOSTAT - The numbers printed on the control panel indicate the increasing oven temperature value (°F). - To regulate the temperature, set the chosen number onto the control knob indicator. - The position BROIL serves only to turn on the broil burner. NOTE: ...
Page 33 - MOISTURE
OPERATION OF RANGE (continued) 3. Press the knob inward and hold to activate the electronic ignition. Note that you will hear a “clicking” noise. Hold the knob pressed inward until the oven burner is lit. Once the oven burner is lit, release the knob.In case of power outage, you can manually light t...
Page 34 - CONVECTION MODE; the control panel. Simply push the button in to activate it.; NOTES ABOUT CONVECTION COOKING; perature and the time slightly may give the best results.
OPERATION OF RANGE (continued) CONVECTION MODE Heat is transferred from the bake burners in the bottom of the oven cavity to the oven cavity itself. The convection fan in the rear of the oven then circulates the hot air, providing even heat distribution throughout the oven. Convection cooking gen- e...
Page 36 - ALIGNMENTS AND ADJUSTMENTS
36 the electronic ignition. Note that you will hear a “clicking” noise. Hold the knob pressed inward until the oven burner is lit. Once the oven burner is lit, release the knob. In case of power outage, you can manually light the burner by press- ing the knob inward and immediately ap- proach a ligh...
Page 37 - GENERAL RECOMMENDATION; Electrical Shock Hazard; • Plug into a grounded 3-prong; cleaning. Be sure to replace the parts correctly.; Knobs; CLEANING THE RANGE
37 GENERAL RECOMMENDATION Electrical Shock Hazard • Plug into a grounded 3-prong outlet. Insure proper ground exists before using the range. • Do not remove ground prong.• Do not use an adapter or ex- tension cord.• Failure to follow these instructions can result in death, fire, or electrical shock....
Page 38 - Using Commercial Oven Cleaners; parts to their original position.; Stainless Steel Elements; stainless steel surfaces, or a little hot vinegar.
38 Using Commercial Oven Cleaners Commercial oven cleaners may be used on porcelain lined ovens; however, many cleaners are very strong, and it’s essential to follow instructions carefully. Be sure to wear rubber gloves to protect your hands.After using such cleaners, thoroughly rinse the oven with ...
Page 39 - CARE AND MAINTENANCE
Aluminum Foil in Oven NEVER cover any slots, holes or passages in the oven bottom or cover an entire rack with materials such as aluminum foil. Doing so blocks air flow through the oven and may cause carbon monoxide poisoning. Aluminum foil linings may also trap heat, causing a fire hazard. Aluminiu...
Page 40 - was purchased. In case your range was purchased from a source other; Moisture; will usually occur in geographic locations of high humidity.; BURNERS AND CAST-IRON GRIDS
CARE AND MAINTENANCE (continued) Repair Parts When repair parts are needed, contact the dealer from whom the range was purchased. In case your range was purchased from a source other than an appliance dealer, you may prefer to contact the manufacturer at the address shown in this manual. Moisture Du...
Page 42 - REMOVING THE OVEN DOOR FOR CLEANING; structions carefully:; The oven door can easily be removed as follows:
REMOVING THE OVEN DOOR FOR CLEANING To facilitate oven cleaning, it is possible to remove the door. Please follow the in- structions carefully: The oven door can easily be removed as follows: • Open the door to fully.• Lift the left and right hooks on the hinge figure (A,B).• Hold the door as shown ...
Page 43 - REPLACING THE OVEN LIGHT
CARE AND MAINTENANCE (continued) REPLACING THE OVEN LIGHT • Let the oven cavity and broil burner cool down. • Switch off the electric supply. • Remove the protective cover. • Unscrew and replace the bulb with a new one suitable for high temperature (200°~ 500°F) having the same specifications: 120V ...
Page 44 - TROUBLESHOOTING; PROBLEM
TROUBLESHOOTING PROBLEM POSSIBLE CAUSE POSSIBLE FIX Surface burners do not light. Surface control has not been com- pletely turned to the ON position. Push in and turn control to the ON position until burner ignites, then turn control to de- sired flame setting. Burner ports are clogged. Use a small...
Page 46 - WIRING DIAGRAM
Page 47 - Unique Gas Products Ltd.; Unique Gas
UNIQUE 24” PRESTIGE GAS RANGE 1 YEAR LIMITED WARRANTY CONTACT US Unique Gas Products Ltd. , warrants that this 24” Gas Range is free from defects in material and workmanship under normal usage and service under the following terms: 1. This Warranty is made only to the first purchaser (“original purc...
Page 48 - PARTS DIAGRAM AND LIST
Page 49 - PARTS LIST; Description
49 PARTS LIST Item # Description Part # 1 Backsplash UGP-G24H08-011600 2 Backsplash inner plate UGP-G24H08-011700 3 Backsplash cover UGP-G24H08-011500 4 75 burner UGP-G20A02-040100 5 130 burner UGP-G20A02-040300 6 100 burner UGP-G20A02-040200 7 55 burner UGP-G20A02-040000 8 Pan support ( left ) UGP-...
Page 53 - NOTES