UNIQUE UGP-30CR EC LG - User Manual
UNIQUE UGP-30CR EC LG Range – User Manual, read for free online in PDF format. We hope this helps you resolve any issues you may have. If you have further questions, please contact us through the contact form.


Table of Contents:
- Page 2 – This manual contains information for:; Important Safeguards; Important; may contact the service organization noted on the warranty.
- Page 3 – MANUFACTURED & CERTIFIED BY; Unique Appliances Ltd; WARNING
- Page 4 – TABLE OF CONTENTS
- Page 5 – Appliances!. We hope you will consider us for future purchases.; PLEASE READ AND SAVE THESE INSTRUCTIONS; and keep all receipts.; WELCOME
- Page 6 – IMPORTANT SAFETY NOTES
- Page 7 – WARNINGS; The preparation of food in an oven requires temperatures that; PROP 65 WARNING FOR CALIFORNIA RESIDENTS; of potential exposure to such substances; backguard of a range.; The weight of a child on an open
- Page 12 – HAVE THIS RANGE INSTALLED BY A QUALIFIED INSTALLER.; BEFORE USING YOUR ELECTRIC RANGE:; the installation instructions; BEFORE USING YOUR RANGE
- Page 13 – HOW TO INSTALL THE BACKSPLASH
- Page 14 – LEVELLING A FREE-STANDING RANGE; Making sure the anti-tip bracket is installed:
- Page 16 – BACK OF THE APPLIANCE FOR PLUG PLACEMENT
- Page 17 – Anti-Tip Bracket Location
- Page 19 – OPERATION OF RANGE; Unique Appliances / Electric Classic 30inch / Artwork; Hot Surface
- Page 20 – bake) and then select the desired temperature.; OPERATION OF OVEN
- Page 21 – USING THE OVEN; The door is hot, use the handle; BROILER; other cooking utensils from the oven.
- Page 22 – and it should be centered with the broil element.; ELECTRIC OVEN SETTING; OVEN THERMOSTAT; Never obstruct the oven vent slots on the backsplash.
- Page 23 – • Plug into a grounded 4-prong; REPLACING THE OVEN LIGHT; Oven bulb replacement is not covered by your warranty.; LEVELING THE RANGE
- Page 24 – REMOVING THE OVEN DOOR FOR CLEANING; instructions carefully:; The oven door can easily be removed as follows:; • The oven racks are provided with
- Page 26 – CLEANING THE RANGE
- Page 27 – from accumulating and becoming a fire hazard.; Cleaners and Cleaning Materials; contact the manufacturer at the address shown in this manual.; Moisture
- Page 28 – TROUBLESHOOTING
- Page 29 – WIRING DIAGRAM
- Page 30 – POWER SOURCE REQUIREMENTS; RATING LABEL
- Page 31 – WARRANTY
- Page 32 – tion for future reference:; APPLIANCE INFORMATION; (available during regular business; Website; Scan the QR Code; PRODUCT REGISTRATION
MAY22V1
OWNER’S GUIDE
serial number:
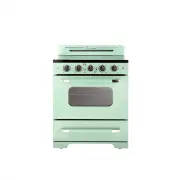
CLASSIC RETRO BY UNIQUE
30" ELECTRIC CONVECTION RANGE
30” - (76.2 cm)
MODEL NUMBER:
UGP-30CR EC W, UGP-30CR EC B, UGP-30CR EC LG, UGP-30CR EC T
5010059
"Loading the manual" means you need to wait until the file loads and becomes available for online reading. Some manuals are very large, and the time they take to appear depends on your internet speed.
Summary
Read and save these instructions Installation & Owner’s Manual This manual contains information for: • Important Safeguards • Installation • Use and Care Important TO THE OWNER OF THE RANGE: Retain this owner’s manual for future reference.TO THE INSTALLER: Leave this owner’s manual with the rang...
MANUFACTURED & CERTIFIED BY Unique Appliances Ltd 2245 Wyecroft Road #5, Oakville, Ontario, Canada L6L 5L7 www.UniqueAppliances.com WARNING To reduce the risk of tipping the appliance by abnormal usage or improper door loading, the appliance must be secured by properly installing the Anti-Tip de...
IMPORTANT SAFEGUARDS . . . . . . . . . . . . . . . . . . . . . . . . . . . . 6HOW TO INSTALL THE BACKSPLASH . . . . . . . . . . . . . . . . . . . . . . . 11INSTALLATION INSTRUCTIONS . . . . . . . . . . . . . . . . . . . . . . . . . . 12WALL CLEARANCES & ANTI-TIP LOCATION . . . . . . . . . . . . ...