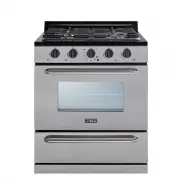
Page 2 - OFF-GRID BY UNIQUE 30” PROPANE GAS RANGE; READ AND SAVE THESE INSTRUCTIONS; Installation & Owner’s Manual; This manual contains information for:; Important Safeguards; Important; TO THE OWNER OF THE RANGE: Retain this owner’s manual for future; How to Obtain Service and/or Parts
OFF-GRID BY UNIQUE 30” PROPANE GAS RANGE LPG & NG CONVERTIBLE READ AND SAVE THESE INSTRUCTIONS The installation of the appliance must conform with local codes ANSI Z21.1b-2012, in the absence of local national Fuel Gas Code, ANSI Z233.1, and in Canada B149.2 Propane Storage and Handling Code Ins...
Page 3 - MANUFACTURED & CERTIFIED BY; UNIQUE APPLIANCES; WARNING; placing the range back in operation.
2245 Wyecroft Road #5 Oakville, Ontario, Canada L6L 5L7 Phone: 905-827-6154 Toll Free: 1-877-427-2266 Fax: 905-827-2027 www.UniqueAppliances.com MANUFACTURED & CERTIFIED BY UNIQUE APPLIANCES WARNING: If the information in this manual is not followed exactly, a fire or explosion may result causin...
Page 4 - TABLE OF CONTENTS
4 IMPORTANT SAFEGUARDS . . . . . . . . . . . . . . . . . . . . . . . . 6CARBON MONOXIDE WARNING . . . . . . . . . . . . . . . . . . . . . 12ENERGY SAVING IDEAS . . . . . . . . . . . . . . . . . . . . . . . . . . 13INSTALLATION INSTRUCTIONS . . . . . . . . . . . . . . . . . . . . . . 14HOW TO INSTALL...
Page 5 - WELCOME & CONGRATULATIONS; UNIQUE
5 WELCOME & CONGRATULATIONS Congratulations on your purchase of a UNIQUE range! We are very proud of our product – and are completely committed to providing you with the best service possible. Your satisfaction is our #1 priority. Please read this manual very carefully. It contains valuable info...
Page 6 - IF YOU SMELL GAS; The California Safe Drinking Water and Toxic Enforcement Act
6 READ ALL IMPORTANT SAFEGUARDS AND ALL INSTRUCTIONS BEFORE USING THE APPLIANCE. IF YOU SMELL GAS • Open windows • Don’t touch electrical switches • Extinguish any open flame • Immediately call your gas supplier FOR YOUR SAFETY • Keep appliance area clear and free from combustible materials gasoline...
Page 7 - Be sure a qualified technician in accordance with the; TO REDUCE THE RISK OF TIPPING OF THE RANGE, THE RANGE MUST BE SECURED; leave the oven door open when the range is unattended.; backguard of a range.; Children climbing on the range to reach the items could be; Do not allow children to climb or play around the range.; The weight of a child on an
7 PROPER INSTALLATION: Be sure a qualified technician in accordance with the National Fuel Gas Code ANSI Z223.1/NFPA54 properly installs your appliance. Install only per installation instructions provided in the literature package for this range. Be sure leveling legs are in place at the bottom corn...
Page 11 - use in the event of a house fire.; must be practiced when operating and maintaining any appliance.; On sealed burner models never attempt to operate the surface
11 Flexible Connectors: If the gas range/oven is connected to a gas supply with a metal flexible connector, move the range/oven with CAUTION for service or cleaning.Flexible connectors are not intended for repeated bending. Do not allow cleaners to make contact with flexible connectors.The connector...
Page 12 - CARBON MONOXIDE WARNING; the Carbon Monoxide levels appropriate for each appliance.
12 CARBON MONOXIDE WARNING Carbon Monoxide is a possible danger when using any gas powered appliance. All gas appliances MUST be installed by a licensed professional who is familiar with the Carbon Monoxide levels appropriate for each appliance. The American Gas Association publishes CO emissions fo...
Page 14 - INSTALLATION INSTRUCTIONS; Levelling a Free-Standing Range; Making sure the anti-tip bracket is installed:
14 INSTALLATION INSTRUCTIONS Be sure appliance is properly installed and grounded by a qualified technician. It is the responsibility of the technician to make certain that your range is properly installed. Situations caused by improper installation are not covered under the warranty. Any expenses i...
Page 15 - HOW TO INSTALL THE BACKSPLASH
15 1. Align the backsplash to the rear part of the cooktop as shown in the diagram. 2. Secure the backsplash to the cooktop from the back using the 2 Phillips head screws provided as shown in the diagram. HOW TO INSTALL THE BACKSPLASH 15 页 23 页 15 页 23 页 15 页 23 页
Page 16 - NOTICE TO MASSACHUSETTS APPLIANCE DEALERS:; State of Massachusetts.; NOTICE: Massachusetts law requires the following:; gas connector and; GAS CONNECTIONS
16 NOTICE TO MASSACHUSETTS APPLIANCE DEALERS: Be sure this document is included in all gas range appliances sold to consumers in the State of Massachusetts. NOTICE: Massachusetts law requires the following: • Appliances must be installed by a licensed plumber or gas fitter.• Appliances must be conne...
Page 17 - Installation
17 The appliance and its individual shut-off valve must be disconnected from the gas supply piping system during any pressure testing of that system at test pressures in excess of 1 / 2 psig. The appliance must be isolated from the gas supply piping system by closing its individual manual shut-off v...
Page 18 - After installation
18 For correct operation, the pressure of natural gas supplied to the regulator should be between 4” and 5” of water column. For LP gas, the pressure supplied must be between 10” and 12” of water column. When checking for correct operation of the regulator, the inlet pressure must be at least 1” mor...
Page 19 - WALL CLEARANCES
19 All units must be installed in accordance to minimum rear and side wall clearance and clearances extended vertically above cooking top which are stated on the serial plate located at the back of the range. ANY OPENINGS IN THE WALL BEHIND THE UNIT AND IN THE FLOOR UNDER THE UNIT MUST BE SEALED. No...
Page 20 - Anti-Tip Bracket Location
20 WALL CLEARANCES (continued) Anti-Tip Bracket Location
Page 21 - The conversion kit must be installed by qualified service agency.; GAS RANGE CONVERSION; in the manufacturer’s instructions supplied with the kit.”
21 To Convert and/or Adjust to Natural Gas The range is set for use with Liquefied Petroleum (LP). The factory setting is indicated on the serial plate. When set for LP Gas operation, the pressure regulator will regulate the gas to 10 inches water column pressure. When set for Natural Gas operation,...
Page 22 - Convertible Pressure Regulator
22 GAS RANGE CONVERSION (continued) Convertible Pressure Regulator The range is shipped to operate on LPG. NG orifices and a special screwdriver for adjusting the minimum flame are shipped with the unit in a separate envelope with the manual. The inlet pressure of the gas supply shall be in accordan...
Page 23 - See below for rating of orifice for each model; Adjustment location is; Natural Gas Orifices
23 10. Take the NG orifices provided and install them as shown below See below for rating of orifice for each model 11. Once all the orifices are installed, replace all burners and burner caps, then fire up the burners to check the minimum flame height. 12. Minimum flame height should be approx. 1/4...
Page 24 - correctly. Please refer to pages 21 through 24.
24 18. With a 7 mm wrench or pliers remove the orifice and replace with NG orifice. 19. Replace the burner tube, then start up the oven to check oven flame, making sure the back of the burner tube to achieve this. Once you have the bottom pan and oven door closed, and with the broiler drawer pulled ...
Page 25 - High Altitude Applications above 2,000 feet:; CHECKING FOR MANIFOLD GAS PRESSURE
25 To check the manifold gas pressure, remove the burner cap and connect a manometer (water gauge) or other pressure test device to the burner orifice. Use a rubber hose with inside diameter of approximately ¼” hold the end of the tube tight over the orifice. Turn the gas valve on. For a more accura...
Page 26 - ADJUSTING THE TOP BURNER AND OVEN FLAME; see adjustment procedure under; Cooktop Burner Operation
26 ADJUSTING THE TOP BURNER AND OVEN FLAME WARNING Keep appliance area clear and free from combustible materials, gasoline, and other flammable vapors and liquids. Do not obstruct the flow of air that is necessary for combustion and ventilation. Top Burner Valves The top burners have orifices that a...
Page 27 - Oven Valve; to convert the range back to its original fuel.; Top Burner Height
27 Oven Valve The oven control has a flame safety device built into the body of the thermostat. Presence of a gas ignition source (pilot) is verified by a flame safety probe. This flame safety probe actuates the internal safety device to allow gas into the oven burner when the oven is turned on. If ...
Page 28 - Lighting the Top Burners; the knob down until the flame lights.; OPERATION OF RANGE; OFF; PUSH
28 Lighting the Top Burners 1. To obtain a flame more easily, light the burner before placing a cooking utensil on the burner grate. 2. Decide which burner you’re igniting first using the screened diagram below the burner knob. The black dot indicates the position of the burner you’re igniting. 3. T...
Page 30 - CAUTION
30 OPERATION OF RANGE (continued) Hot Oven Restart If you turn off the oven but then decide to turn it back on before it has cooled to room temperature, the burner may not light properly. This is due to the thermostat still sensing “heated oven” and not allowing the maximum gas flow rate into the bu...
Page 31 - ALIGNMENTS AND ADJUSTMENTS
31 ALIGNMENTS AND ADJUSTMENTS Oven Burner Air Shutter Adjustment The oven burner flame should be a clean, blue flame with distinct inner cones. A soft, lazy flame with indistinct cones means too much gas or not enough air. A noisy lifting flame indicates too much air. If adjustments are necessary, y...
Page 32 - Baking; temperatures up to 350°F and 30 minutes for temperatures up to 425°F.; Oven Racks; cookware is not directly over another.; Rack Removal; rack keeper and slide the rack to the rear.; Never cover the oven racks with aluminum foil; . Such practices will trap heat and
32 Baking Follow the recipe instructions when baking. Use correct ingredients, measure them carefully, and use the correct type and size of cookware suggested in the recipe.Remember to preheat properly. Avoid opening of the oven door as much as possible when baking.When baking cakes in glass baking ...
Page 34 - BROILING; Be; . Never leave a dirty broil pan in place, always; DO NOT USE THE BROILER AREA FOR STORAGE OF COOKWARES.; openings, so do not extend foil beyond oven bottom.; If you should get a heavy spillover on the oven bottom:; bottom to become wet.
34 BROILING Preheat the broiler area and broil pan for a few minutes. No definite time can be given for broiling meats because of varying thickness, amounts of fat, and personal taste. Be careful when handling hot broiler pans; be careful of the hot grease. Serious injury can result due to spillage ...
Page 35 - sure to replace the parts correctly.; Knobs; can be used to shine the top.; CLEANING THE RANGE
35 Always keep cleaning materials and chemicals in a safe place and away from children. Know what you are using. Make sure all parts of the range are COOL before cleaning. Be sure to replace the parts correctly. Knobs Pull forward on the knobs to remove them (or use light string to place behind the ...
Page 36 - result in an explosion or fire.; Aluminum Foil in Oven and Broiler; Never cover any slots, holes or passages in the oven bottom or cover; Cleaners and Cleaning Materials
36 CLEANING THE RANGE (continued) Products of combustion from the top pilots as well as certain atmospheric conditions can create an oxidation reaction on the underside of the top. This will appear as rust or in the form of a reddish brown deposit. This will NOT AFFECT THE LIFE OF THE TOP in compari...
Page 38 - Open the door to fully.; OR DOOR COULD BE DAMAGED.
38 CARE AND MAINTENANCE (continued) DO NOT STORE FLAMMABLE MATERIAL IN THE OVEN OR IN THE BOTTOM BROILER. REMOVING THE OVEN DOOR FOR CLEANING To facilitate oven cleaning, it is possible to remove the door. Please follow the instructions carefully.The oven door is heavy - you may need help removing a...
Page 39 - HOW TO GAIN ACCESS TO THE BATTERY COMPARTMENT; Gaining access to the battery compartment:; reduce the number of times you will have to replace the batteries.; REMOVING THE KICKPLATE FOR CLEANING; cleaning underneath the range.
39 HOW TO GAIN ACCESS TO THE BATTERY COMPARTMENT Gaining access to the battery compartment: 1. Locate the kick plate at the front/bottom of the range2. The kick plate is clipped into place - simply lift up slightly and pull outwards.3. Pull away the kick plate. You now have access to the battery com...
Page 40 - TROUBLESHOOTING; PROBLEM
40 TROUBLESHOOTING PROBLEM POSSIBLE CAUSE CORRECTION Surface burner fails to light a. Clogged burner ports a. Remove burners and clean out dirt and spider webs b. Battery dead b. Replace with new D size battery c. Ignition relay defective c. Replace relay Uneven flame a. Clogged burner ports a. Remo...
Page 41 - WIRING DIAGRAM
41 WIRING DIAGRAM IGNITIONMODULE IGNITION S WIT CHES T OP BURNER IGNITION LEAD S O VEN IGNITION LEAD 1.5V DC G RR RF LF LR TSTAT MODULED’ALLUMAGE INTERRUPTEURS D'ALL UMA GE BRÛLEUR SUPÉRIEURE CÂBLES D’ ALL UMA GE CÂBLE D’ ALL UMA GE DU F OUR 1.5 V c. c. Ar. D A v. D A v. G Ar. G
Page 42 - PARTS DIAGRAM AND LIST
42 PARTS DIAGRAM AND LIST Please visit our website www.UniqueAppliances.com to view a PDF version of the schematics which will allow you to zoom in and out.
Page 46 - following information for future reference:
46 APPLIANCE INFORMATION (manual copy - keep with your records) APPLIANCE INFORMATION (remote copy - keep with your appliance) d et at ch a lo ng d o tte d lin e d et at ch a lo ng d o tte d lin e detatch along dotted line detatch along dotted line To make care and servicing of your range easy and e...
Page 47 - PROPANE GAS RANGE 1 YEAR LIMITED WARRANTY
47 detatch along dotted line detatch along dotted line OFF-GRID BY UNIQUE 30” UGP-30G OF2 PROPANE GAS RANGE 1 YEAR LIMITED WARRANTY Unique Appliances (hereafter “Unique”) warrants that this Unique gas range is free from manufacturer’s defects in material and workmanship under normal usage and servic...
Page 48 - Please visit our website for more quality Unique products:; RATING LABEL
48 For general information or questions related to the operation, safety or the purchase of your range, please contact our customer service department: Please visit our website at https://UniqueAppliances.com/product-registration/ to register your product. Toll-free 1-877-427-2266 or 1-905-827-6154 ...


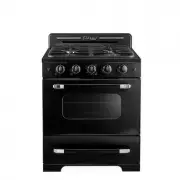
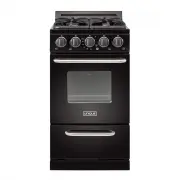 UNIQUE UGP-20G OF1 B
User Manual
UNIQUE UGP-20G OF1 B
User Manual
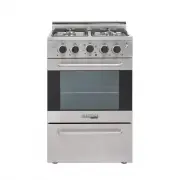
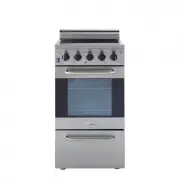 UNIQUE UGP-20V EC1 S/S
User Manual
UNIQUE UGP-20V EC1 S/S
User Manual
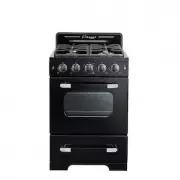 UNIQUE UGP-24CR B
User Manual
UNIQUE UGP-24CR B
User Manual
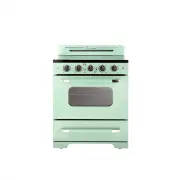
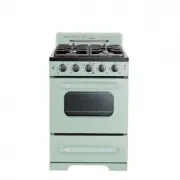 UNIQUE UGP-24CR LG
User Manual
UNIQUE UGP-24CR LG
User Manual
 UNIQUE UGP-24CR OF1 W
User Manual
UNIQUE UGP-24CR OF1 W
User Manual
 UNIQUE UGP-24CR T
User Manual
UNIQUE UGP-24CR T
User Manual
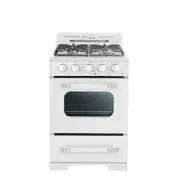
 UNIQUE UGP-24CR W
User Manual
UNIQUE UGP-24CR W
User Manual
 UNIQUE UGP-24V EC S/S
User Manual
UNIQUE UGP-24V EC S/S
User Manual
 UNIQUE UGP-24V EC1 S/S
User Manual
UNIQUE UGP-24V EC1 S/S
User Manual
 UNIQUE UGP-24V PC1 S/S
User Manual
UNIQUE UGP-24V PC1 S/S
User Manual
 UNIQUE UGP-30CR B
User Manual
UNIQUE UGP-30CR B
User Manual
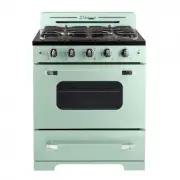
 UNIQUE UGP-30CR EC LG
User Manual
UNIQUE UGP-30CR EC LG
User Manual
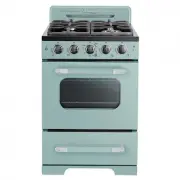
 UNIQUE UGP-30CR LG
User Manual
UNIQUE UGP-30CR LG
User Manual
 UNIQUE UGP-30CR OF1 W
User Manual
UNIQUE UGP-30CR OF1 W
User Manual
 UNIQUE UGP-30CR T
User Manual
UNIQUE UGP-30CR T
User Manual
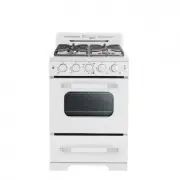
 UNIQUE UGP-30CR W
User Manual
UNIQUE UGP-30CR W
User Manual
 UNIQUE UGP-30G OF1 B
User Manual
UNIQUE UGP-30G OF1 B
User Manual
 UNIQUE UGP-30G OF1 W
User Manual
UNIQUE UGP-30G OF1 W
User Manual
 UNIQUE UGP-36CR W
User Manual
UNIQUE UGP-36CR W
User Manual