Trinity TRCI603 - Manuals

User Manual Trinity TRCI603


Summary
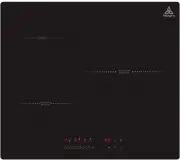
P a g e | 2 INSTRUCTION MANUAL 60 cm Hybrid Cooktop MODEL TR C I 60 3 Congratulations on the purchase of your new Hybrid Hob! We recommend that you spend some time to read this Instruction / Installation Manual in order to fully understand how to install and operate it correctly. For installation, p...
P a g e | 3 ONLINE: TRINITYAPPLIANCES.COM.AU CONTENTS 1. PACKAGE ................................................................................................................................................................. 4 1.1 IMPORTANT - CHECK FOR ANY DAMAGE OR MARKS ............................
P a g e | 4 ONLINE: TRINITYAPPLIANCES.COM.AU 1. PACKAGE When unpacking the appliance, please check that the following items are contained within the package: • 1 Hob • 1 Instruction manual • 4 Fixing screws • 4 Fixing brackets • 1 Sealing strip 1.1 IMPORTANT - CHECK FOR ANY DAMAGE OR MARKS Please th...
Trinity Hobs Manuals
-
 Trinity TRC604
User Manual
Trinity TRC604
User Manual
-
 Trinity TRC605
User Manual
Trinity TRC605
User Manual
-
 Trinity TRC775
User Manual
Trinity TRC775
User Manual
-
 Trinity TRC900CT
User Manual
Trinity TRC900CT
User Manual
-
 Trinity TRG302BK
User Manual
Trinity TRG302BK
User Manual
-
 Trinity TRG302SS
User Manual
Trinity TRG302SS
User Manual
-
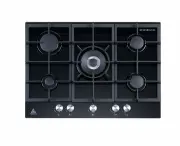
 Trinity TRG604BK
User Manual
Trinity TRG604BK
User Manual
-
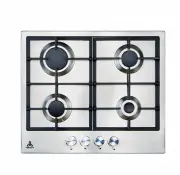 Trinity TRG604SS
User Manual
Trinity TRG604SS
User Manual
-
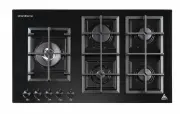
 Trinity TRG700BK
User Manual
Trinity TRG700BK
User Manual
-
 Trinity TRG700SS
User Manual
Trinity TRG700SS
User Manual
-
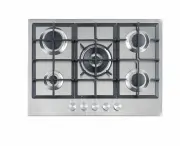
 Trinity TRG900BK
User Manual
Trinity TRG900BK
User Manual
-
 Trinity TRG900SS
User Manual
Trinity TRG900SS
User Manual
-
 Trinity TRI603
User Manual
Trinity TRI603
User Manual
-
 Trinity TRI604
User Manual
Trinity TRI604
User Manual
-
 Trinity TRI64-64N05T
User Manual
Trinity TRI64-64N05T
User Manual
-
 Trinity TRI905
User Manual
Trinity TRI905
User Manual