Page 2 - English; Select your country or region.; Checking the supplied items
GB 2 The number in parentheses indicates the number of pieces.• Camera (1)• Rechargeable battery pack NP-BN (1) (This rechargeable battery pack cannot be used with Cyber-shot that are supplied with the NP-BN1 battery pack.) • Multi-use terminal USB cable (1)• AC Adaptor AC-UB10/UB10B/UB10C/UB10D (1)...
Page 3 - Owner’s Record; Battery pack; WARNING
GB 3 GB Owner’s Record The model and serial numbers are located on the bottom. Record the serial number in the space provided below. Refer to these numbers whenever you call your Sony dealer regarding this product. Model No. DSC-TX66 Serial No. _____________________________ Model No. AC-UB10/AC-UB10...
Page 4 - AC Adaptor
GB 4 • Be sure to charge the battery pack using a genuine Sony battery charger or a device that can charge the battery pack. • Keep the battery pack out of the reach of small children.• Keep the battery pack dry.• Replace only with the same or equivalent type recommended by Sony.• Dispose of used ba...
Page 5 - Regulatory Information; Declaration of Conformity
GB 5 GB UL is an internationally recognized safety organization.The UL Mark on the product means it has been UL Listed. If you have any questions about this product, you may call: Sony Customer Information Center1-800-222-SONY (7669). The number below is for the FCC related matters only. [ Regulator...
Page 6 - For Customers in Europe
GB 6 [ Notice for the customers in the countries applying EU Directives The manufacturer of this product is Sony Corporation, 1-7-1 Konan Minato-ku Tokyo, 108-0075 Japan. The Authorized Representative for EMC and product safety is Sony Deutschland GmbH, Hedelfinger Strasse 61, 70327 Stuttgart, Germa...
Page 7 - Notice for customers in the United Kingdom
GB 7 GB [ Disposal of waste batteries (applicable in the European Union and other European countries with separate collection systems) This symbol on the battery or on the packaging indicates that the battery provided with this product shall not be treated as household waste.On certain batteries thi...
Page 8 - Identifying parts
GB 8 A Flash B Microphone C Lens cover D Speaker E Lens F Self-timer lamp/Smile Shutter lamp/AF illuminator G OLED screen/Touch panel H ON/OFF (Power) button I Power/Charge lamp J Shutter button K W/T (zoom) lever L Hook for wrist strap M Thread groove N Battery insertion slot O Battery eject lever ...
Page 9 - Inserting the battery pack; Insert the battery pack.; • While sliding the battery eject lever, insert the battery pack as
GB 9 GB Inserting the battery pack 1 Open the cover. 2 Insert the battery pack. • While sliding the battery eject lever, insert the battery pack as illustrated. Make sure that the battery eject lever locks after insertion. • Closing the cover with the battery inserted incorrectly may damage the came...
Page 10 - Charging the battery pack
GB 10 Charging the battery pack 1 Connect the camera to the AC Adaptor (supplied), using the multi-use terminal USB cable (supplied). 2 Connect the AC Adaptor to the wall outlet (wall socket). The Power/Charge lamp lights orange, and charging starts.• Turn off the camera while charging the battery.•...
Page 12 - Charging by connecting to a computer; Note
GB 12 x Charging by connecting to a computer The battery pack can be charged by connecting the camera to a computer using a multi-use terminal USB cable. • Note the following points when charging via a computer: – If the camera is connected to a laptop computer that is not connected to a power sourc...
Page 13 - Supplying power; Notes
GB 13 GB x Battery life and number of images that can be recorded and played back • The above number of images applies when the battery pack is fully charged. The number of images may decrease depending on the conditions of use. • The number of images that can be recorded is for shooting under the f...
Page 14 - Inserting a memory card (sold separately); card straight in until it clicks into place.
GB 14 • Power cannot be supplied when the battery pack is not inserted in the camera.• When the camera is connected directly to a computer or to a power outlet using the supplied AC Adaptor, power supply is available only in playback mode. If the camera is in shooting mode or while you are changing ...
Page 15 - : The memory card is inserted
GB 15 GB x Memory cards that can be used • In this manual, products in A are collectively referred to as “Memory Stick Micro” media, and products in B are collectively referred to as microSD memory card. x To remove the memory card/battery pack Memory card: Push the memory card in once to eject the ...
Page 16 - Setting the clock; Lower the lens cover.; • It may take time for the power to turn on and allow operation.; Select a desired language.
GB 16 Setting the clock 1 Lower the lens cover. The camera is turned on. The power lamp lights up green only when the camera starts up.Date & Time setting is displayed when you turn on the camera for the first time.• You can also turn on the camera by pressing the ON/OFF (Power) button. • It may...
Page 17 - Shooting still images/movies; Press the shutter button halfway down to focus.; When the image is in focus, a beep sounds and the; Press the shutter button fully down to shoot an image.
GB 17 GB Shooting still images Shooting movies • The sound of the lever operating will be recorded when the zoom function operates while shooting a movie. • Continuous shooting is possible for approximately 29 minutes at one time at the camera’s default settings and when the temperature is approxima...
Page 18 - Selecting next/previous image; Deleting an image; Touch; Returning to shooting images; Touch; Viewing images; Touch
GB 18 x Selecting next/previous image Touch (Next)/ (Previous) on the screen. • To play back movies, touch (Playback) in the center of the screen. • To zoom in, move the W/T (zoom) lever to the T side. x Deleting an image Touch (Delete) t [This Image]. x Returning to shooting images Touch on the scr...
Page 19 - displayed, you can search the guide using keywords or icons.; Introduction of other functions
GB 19 GB This camera is equipped with built-in instruction guide. This allows you to search the camera’s functions according to your needs. Other functions used when shooting or playing back can be operated touching the MENU on the screen. This camera is equipped with a Function Guide that allows yo...
Page 20 - Menu Items; Shooting
GB 20 x Menu Items Shooting Movie shooting scene Select movie recording mode. Easy Mode Shoot still images using minimal functions. Photo Creativity Change settings easily and shoot images when the shooting mode is set to [Intelligent Auto] or [Superior Auto]. Movie button Shoot movies quickly from ...
Page 21 - Viewing
GB 21 GB Viewing Illustration Effect When [Illustration] is selected in Picture Effect, sets the effect level. EV Adjust the exposure manually. ISO Adjust the luminous sensitivity. White Balance Adjust color tones of an image. Focus Select the focus method. Metering Mode Select the metering mode tha...
Page 22 - Setting items; If you touch the MENU while shooting or during playback,
GB 22 x Setting items If you touch the MENU while shooting or during playback, (Settings) is provided as a final selection. You can change the default settings on the (Settings) screen. * If a memory card is not inserted, (Internal Memory Tool) will be displayed and only [Format] can be selected. Pa...
Page 23 - Features of “PlayMemories Home”; send images by e-mail, and change the shooting date and time.; Connect the camera to a computer.
GB 23 GB The built-in software “PlayMemories Home” allows you to import still images and movies to your computer and use them.You can shoot or play back images on this camera even if you do not install “PlayMemories Home”, however, “PlayMemories Home” is required to import AVCHD movies to your compu...
Page 25 - Notes on using the camera
GB 25 GB Functions built into this camera • This manual describes each of the functions of 1080 60i-compatible devices and 1080 50i-compatible devices.To check whether your camera is a 1080 60i-compatible device or a 1080 50i-compatible device, check for the following marks on the bottom of the came...
Page 28 - Camera; Specifications
GB 28 Camera [System] Image device: 7.76 mm (1/2.3 type) Exmor R CMOS sensor Total pixel number of camera: Approx. 18.9 Megapixels Effective pixel number of camera: Approx. 18.2 Megapixels Lens: Carl Zeiss Vario-Tessar 5× zoom lensf = 4.7 mm – 23.5 mm (26 mm – 130 mm (35 mm film equivalent)) F3.5 (W...
Page 30 - Trademarks
GB 30 Trademarks • The following marks are trademarks of Sony Corporation. , “Cyber-shot,” “Memory Stick Micro” • “AVCHD” and “AVCHD” logotype are trademarks of Panasonic Corporation and Sony Corporation. • Windows is registered trademark of Microsoft Corporation in the United States and/or other co...
Page 32 - Español; Seleccione su país o región.; Comprobación de los artículos suministrados
ES 2 El número entre paréntesis indica el número de piezas.• Cámara (1)• Batería recargable NP-BN (1) (Esta batería recargable no se puede utilizar con las Cyber-shot que se suministran con la batería NP-BN1.) • Cable USB para terminal de usos múltiples (1)• Adaptador de alimentación de ca (FUENTE D...
Page 33 - Batería; AVISO
ES 3 ES Nombre del producto: Cámara DigitalModelo: DSC-TX66 Para reducir el riesgo de incendio o descarga eléctrica, no exponga la unidad a la lluvia ni a la humedad. INSTRUCCIONES DE SEGURIDAD IMPORTANTES-GUARDE ESTAS INSTRUCCIONESPELIGROPARA REDUCIR EL RIESGO DE INCENDIO O DESCARGA ELÉCTRICA, SIGA...
Page 34 - Atención para los clientes en Europa
ES 4 [ Adaptador de alimentación de ca (FUENTE DE ALIMENTACIÓN) Conecte el adaptador de ca a la toma de corriente de la pared más cercana. Si ocurriera algún problema mientras utiliza el adaptador de ca, corte inmediatamente la corriente desenchufando el cable de alimentación de la toma de corriente...
Page 36 - Identificación de las partes
ES 6 A Flash B Micrófono C Tapa del objetivo D Altavoz E Objetivo F Lámpara del autodisparador/Lámpara del captador de sonrisas/Iluminador AF G Pantalla OLED/Panel táctil H Botón ON/OFF (Alimentación) I Lámpara de alimentación/carga J Botón del disparador K Palanca W/T (zoom) L Gancho para correa de...
Page 37 - Inserción de la batería
ES 7 ES Inserción de la batería 1 Abra la tapa. 2 Inserte la batería. • Mientras desliza la palanca de expulsión de la batería, inserte la batería como se muestra en la ilustración. Asegúrese de que la palanca de expulsión de la batería se bloquea después de insertarla. • El cerrar la tapa con la ba...
Page 38 - Carga de la batería; finalizado, extraiga la batería y vuelva a insertarla.
ES 8 Carga de la batería 1 Conecte la cámara al adaptador de alimentación de ca (suministrado), utilizando el cable USB para terminal de usos múltiples (suministrado). 2 Conecte el adaptador de alimentación de ca a la toma de corriente de la pared. Se ilumina en naranja la lámpara de alimentación/ca...
Page 39 - Notas
ES 9 ES • Si la lámpara de alimentación/carga de la cámara parpadea cuando el adaptador de alimentación de ca está conectado a la toma de corriente de la pared, indica que la carga se ha detenido temporalmente porque la temperatura está fuera del rango recomendado. Cuando la temperatura vuelve dentr...
Page 40 - Carga conectando a un ordenador; Nota
ES 10 x Carga conectando a un ordenador La batería se puede cargar conectando la cámara a un ordenador utilizando el cable USB para terminal de usos múltiples. • Tenga en cuenta los puntos siguientes cuando cargue a través de un ordenador: – Si conecta la cámara a un ordenador portátil que no está c...
Page 41 - Suministro de alimentación
ES 11 ES • El número de arriba de imágenes se aplica cuando la batería está completamente cargada. El número de imágenes podrá disminuir dependiendo de las condiciones de uso. • El número de imágenes que se puede grabar es cuando las tomas se hacen en las condiciones siguientes:– Utilizando tarjeta ...
Page 43 - Tarjetas de memoria que se pueden utilizar; podrá salir de pronto rápidamente.
ES 13 ES x Tarjetas de memoria que se pueden utilizar • En este manual, los productos en A se conocen colectivamente como “Memory Stick Micro”, y los productos en B se conocen colectivamente como tarjeta de memoria microSD. 2 Inserte la tarjeta de memoria (se vende por separado). • Con el objetivo d...
Page 44 - Para extraer la tarjeta de memoria/batería; Ajuste del reloj; Baje la tapa del objetivo.; • Es posible que lleve algún tiempo en conectarse la alimentación y; Seleccione un idioma deseado.
ES 14 x Para extraer la tarjeta de memoria/batería Tarjeta de memoria: Empuje la tarjeta de memoria hacia dentro una vez para expulsar la tarjeta de memoria.Batería: Deslice la palanca de expulsión de la batería. Asegúrese de no dejar caer la batería. • No extraiga nunca la tarjeta de memoria/baterí...
Page 45 - Toma de imágenes fijas; Siga las instrucciones de la pantalla.; batería se agote más rápidamente.; Toma de imágenes fijas/películas
ES 15 ES Toma de imágenes fijas 4 Ajuste [Hora verano], [Format fecha y hora] y [Fecha y hora], después toque [Sig.]. • Medianoche se indica como 12:00 AM, y mediodía como 12:00 PM. 5 Toque [OK]. 6 Siga las instrucciones de la pantalla. • Si ajusta [Resolución visualiz.] a [Alta], es posible que la ...
Page 46 - Toma de películas; continúa grabando la película.; Toque; Visualización de imágenes; Toque; • Cuando se reproduzcan en esta cámara imágenes de una tarjeta de
ES 16 Toma de películas • El sonido de la palanca funcionando se grabará cuando se accione la función de zoom mientras se toma una película. • Se puede filmar continuamente durante 29 min (minuto) aproximadamente de una vez con los ajustes predeterminados de la cámara y cuando la temperatura es de a...
Page 47 - Selección de la imagen siguiente/anterior; Eliminación de una imagen; Para volver a la toma de imágenes; Guía en la cámara; MENU, puede buscar en la guía utilizando palabras claves o iconos.
ES 17 ES x Selección de la imagen siguiente/anterior Toque (Siguiente)/ (Anterior) en la pantalla. • Para reproducir películas, toque (Reproducir) en el centro de la pantalla. • Para acercar con zoom, mueva la palanca W/T (zoom) hacia el lado T. x Eliminación de una imagen Toque (Borrar) t [Esta ima...
Page 48 - Elementos del menú; Toma de imagen; Presentación de otras funciones
ES 18 Tocando el MENU en la pantalla se pueden emplear otras funciones usadas cuando se toma imagen o se reproduce. Esta cámara está equipada con una guía de funciones que le permite seleccionar fácilmente entre las funciones. Mientras se muestra la guía, puede utilizar varias funciones. x Elementos...
Page 50 - Visionado
ES 20 Visionado Reducc ojos cerrados Ajusta para tomar automáticamente dos imágenes y selecciona la imagen en la que los ojos no están parpadeando. SteadyShot película Ajusta la intensidad de SteadyShot en Modo película. Si cambia este ajuste, cambiará el ángulo de visión. Guía en la cámara Busca fu...
Page 51 - Elementos de ajuste; predeterminados en la pantalla
ES 21 ES x Elementos de ajuste Si toca MENU mientras toma una imagen o durante la reproducción, se proveerá (Ajustes) como selección final. Puede cambiar los ajustes predeterminados en la pantalla (Ajustes). * Si no hay insertada una tarjeta de memoria, se visualizará (Herramienta Memoria Interna) y...
Page 52 - Características de “PlayMemories Home”; en una visualización de calendario.; Instalación de aplicación de PC (Windows); Conecte la cámara a un ordenador.
ES 22 El software incorporado “PlayMemories Home” le permite importar imágenes fijas y películas a su ordenador y utilizarlas.Puede tomar o reproducir imágenes en esta cámara aunque no instale “PlayMemories Home”, sin embargo, necesitará “PlayMemories Home” para importar películas AVCHD a su ordenad...
Page 54 - Funciones incorporadas en esta cámara; Uso y cuidados; Notas sobre la utilización de la cámara
ES 24 Funciones incorporadas en esta cámara • Este manual describe cada una de las funciones de los dispositivos compatibles con 1080 60i y dispositivos compatibles con 1080 50i.Para comprobar si su cámara es un dispositivo compatible con 1080 60i o un dispositivo compatible con 1080 50i, compruebe ...
Page 57 - Cámara; Especificaciones
ES 27 ES Cámara [Sistema] Dispositivo de imagen: Sensor de 7,76 mm (tipo 1/2,3) Exmor R CMOS Número total de píxeles de la cámara: Aprox. 18,9 Megapíxeles Número efectivo de píxeles de la cámara: Aprox. 18,2 Megapíxeles Objetivo: Objetivo zoom 5× Carl Zeiss Vario-Tessarf = 4,7 mm – 23,5 mm (26 mm – ...
Page 58 - Batería recargable NP-BN
ES 28 [Pantalla] Pantalla OLED: Panorámico (16:9), 8,3 cm (tipo 3,3) Número total de puntos: Equivalente a 1 229 760 puntos [Alimentación, general] Alimentación: Batería recargable NP-BN, cc 3,6 V Adaptador de alimentación de ca (FUENTE DE ALIMENTACIÓN) AC-UB10/UB10B/UB10C/UB10D, cc 5 V Consumo (dur...
Page 59 - Marcas comerciales
ES 29 ES Marcas comerciales • Las marcas siguientes son marcas comerciales de Sony Corporation. , “Cyber-shot”, “Memory Stick Micro” • “AVCHD” y el logotipo de “AVCHD” son marcas comerciales de Panasonic Corporation y Sony Corporation. • Windows es una marca comercial registrada de Microsoft Corpora...
Page 64 - Printed in China


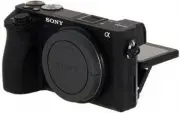 Sony Alpha 6500 (ILCE-6500)
User Manual
Sony Alpha 6500 (ILCE-6500)
User Manual
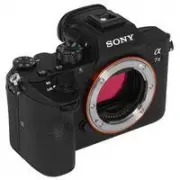 Sony Alpha 7 III
User Manual
Sony Alpha 7 III
User Manual
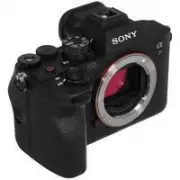 Sony Alpha 7 IV
User Manual
Sony Alpha 7 IV
User Manual
 Sony Alpha 7C
User Manual
Sony Alpha 7C
User Manual
 Sony Cyber-shot DSC-RX10
User Manual
Sony Cyber-shot DSC-RX10
User Manual
 Sony Cyber-shot DSC-W830 Pink
User Manual
Sony Cyber-shot DSC-W830 Pink
User Manual
 Sony Cyber-shot DSC-W830 Silver
User Manual
Sony Cyber-shot DSC-W830 Silver
User Manual
 Sony DCZV1/B
User Manual
Sony DCZV1/B
User Manual
 Sony DSC-F77
Manual
Sony DSC-F77
Manual
 Sony DSC-H100
User Manual
Sony DSC-H100
User Manual
 Sony DSC-H2
Manual
Sony DSC-H2
Manual
 Sony DSC-H200
Manual
Sony DSC-H200
Manual
 Sony DSC-H3
Manual
Sony DSC-H3
Manual
 Sony DSC-H300
Manual
Sony DSC-H300
Manual
 Sony DSC-H7
Manual
Sony DSC-H7
Manual
 Sony DSC-H70
User Manual
Sony DSC-H70
User Manual
 Sony DSC-H9
Manual
Sony DSC-H9
Manual
 Sony DSC-H90
User Manual
Sony DSC-H90
User Manual