Page 2 - Precautions; On power sources; Copyrights; WARNING
2 GB Caution – The use of optical instruments with this product will increase eye hazard. Do not install the appliance in a confined space, such as a bookcase or built-in cabinet. To reduce the risk of fire, do not cover the ventilation opening of the apparatus with newspapers, tablecloths, curtains...
Page 4 - Table of Contents
4 GB Table of Contents Precautions .............................................. 2About These Operating Instructions ....... 3Playable Discs/Files on a USB Device ............................................... 5 Package Contents .................................. 10Index to Parts and Control ........
Page 5 - Playable Discs/Files on a USB Device
5 GB Playable Discs/Files on a USB Device Type Disc logo Characteristics Icon DVD VIDEO • DVD VIDEO • DVD-R/DVD-RW in DVD VIDEO format or video mode • DVD+R/DVD+RW in DVD VIDEO format VR (Video Recording) mode • DVD-R/DVD-RW in VR (Video Recording) mode (except for DVD-R DL) VIDEO CD • VIDEO CD (Ver...
Page 6 - Notes on discs; MPEG4 video files; Example of discs that the system cannot play
6 GB 1) A logical format of files and folders on CD-ROMs, defined by ISO (International Organization for Standardization). 2) MP3 (MPEG1 Audio Layer 3) is a standard format defined by ISO/MPEG for compressed audio data. MP3 files must be in MPEG1 Audio Layer 3 format. 3) Files with copyright protect...
Page 7 - Notes about Multi Session CD
7 GB Note that some playback functions may not work with some DVD+RWs/DVD+Rs, even if they have been correctly finalized. In this case, view the disc by normal playback. Also some DATA CDs/DATA DVDs created in Packet Write format cannot be played. • This system can play a Multi Session CD when an MP...
Page 8 - About DivX video files; Notes about USB devices
8 GB The system will attempt to play any data with the extensions above, even if it is not in MP3/WMA/AAC/JPEG/DivX/MPEG4 format. Playing this data may generate a loud noise which could damage your speaker system. • The following can increase the time it takes to start playback: – when a DATA CD/DAT...
Page 9 - system is on may corrupt the data on the USB device.
9 GB • The playback order for the system may differ from the playback order of the connected USB device. • Always turn off the system before removing the USB device. Removing the USB device while the system is on may corrupt the data on the USB device. • Before using a USB device, make sure that no ...
Page 10 - Package Contents; Main unit; • Wall mounting parts
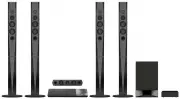
10 GB Package Contents Main unit Speaker packages • DAV-DZ310 • DAV-DZ510 • DAV-DZ610 • DAV-DZ810 • Speaker cords (1 set) For DAV-DZ310/DAV-DZ510/DAV-DZ610(red/white/green/gray/blue)For DAV-DZ810 (green/gray/blue) • Foot pads (1 set) • Wall mounting parts For DAV-DZ510 • Speaker assembly parts For D...
Page 11 - Accessories; • Remote commander
11 GB Accessories • Remote commander (remote) (1) • R6 (size AA) batteries (2) • Calibration mic (1) • FM wire antenna (aerial) (1) • Video cord (1) • HDMI cable (1) (Singapore, Indonesian, Malaysian, Filipino, Latin American, and Mexican models only) • Speaker-bottom covers (2) (DAV-DZ810 only) • O...
Page 12 - Index to Parts and Control; Disc tray; Front panel
12 GB Index to Parts and Control For more information, refer to the pages indicated in parentheses. A Disc tray B Front panel display (page 13) C (remote sensor) Receives the remote signal. Point the remote toward here when using the remote. D MASTER VOLUME control Adjusts the system’s volume. E REC...
Page 13 - Front panel display
13 GB A Karaoke indicator Lights up when the karaoke mode is on. B SLEEP indicator Flashes when the sleep timer is set. C System status display D TUNED indicator (Radio only) Lights up when a station is received. E ST indicator (Radio only) Lights up when stereo sound is received. F S-AIR indicator ...
Page 14 - jack; CAUTION; Rear panel
14 GB A SPEAKERS jacks (page 29) B HDMI OUT jack (page 30) C TV (DIGITAL IN OPTICAL) jack (DAV-DZ510/DAV-DZ610/DAV-DZ810 only) (page 30) D EZW-T100 slot (DAV-DZ810 only) (page 60) E ANTENNA (COAXIAL 75 Ω FM) jack (page 33) F TV (AUDIO IN R/L) jacks (page 30) G VIDEO OUT jack (page 30) H COMPONENT VI...
Page 15 - TV; Remote control
15 GB Number 5, VOLUME +, and H buttons have a tactile dot. Use the tactile dot as a reference when operating the remote. About the operation of the supplied remote You can operate this system and a Sony TV with the supplied remote. x System operation Press buttons marked with . x Sony TV operation ...
Page 17 - To insert the batteries; and
17 GB To insert the batteries Insert two R6 (size AA) batteries (supplied) by matching the 3 and # ends on the batteries to the markings inside the compartment. Note • Do not leave the remote in an extremely hot or humid place. • Do not use a new battery with an old one. • Do not drop any foreign ob...
Page 18 - Guide to the Control Menu; Press
18 GB Guide to the Control Menu You can use the Control Menu to select a function and to view related information. Press DISPLAY while using the “DVD/CD” or “USB” function. Each time you press DISPLAY, the Control Menu changes: 1 t 2 t 3 t 1 t ... 1 Control Menu 1 2 Control Menu 2 (appears when avai...
Page 19 - Example: Control Menu 1 when playing a DVD VIDEO.; List of Control Menu items; Control Menu; OFF
19 GB Example: Control Menu 1 when playing a DVD VIDEO. List of Control Menu items The Control Menu 1 and 2 will show different items depending on the source. For details, see the pages in parentheses in the chart below. Control Menu Item Item Name, Function, Relevant Source [TITLE] (page 41)/[SCENE...
Page 21 - List of Control Menu Items for karaoke
21 GB List of Control Menu Items for karaoke Tip • The Control Menu icon indicator lights up in yellow t when you select any item except [OFF] ([PROGRAM], [SHUFFLE], [REPEAT], [A/V SYNC], [KARAOKE MODE], and [VOCAL SELECT] only). The [ORIGINAL/PLAY LIST] indicator lights up in yellow when you select...
Page 22 - Step 1: Installing the System; Install the system by referring to the illustration below.; To attach the foot pads to the subwoofer; Getting Started; How to position the system
22 GB Gettin g Star ted Step 1: Installing the System Install the system by referring to the illustration below. To attach the foot pads to the subwoofer Note • Use caution when placing the speakers and/or speaker stands attached to the speakers on a specially treated (waxed, oiled, polished, etc.) ...
Page 23 - Pull out the speaker cord from the slot of the rear of the speaker.; When installing the speakers on a wall
23 GB Getting Star te d Caution • Contact a screw shop or installer for information regarding the wall material or screws to be used. • Use screws that are suitable for the wall material and strength. As a plaster board wall is especially fragile, attach the screws securely to a beam. Install the sp...
Page 24 - Lift the upper part of the speaker.
24 GB Gettin g Star ted 3 Remove the screw (pre-installed) at the rear of the speaker. 4 Lift the upper part of the speaker. 5 Pull out the speaker cord from the bottom of the lower part of the speaker. The removed speaker cord is used when installing the speaker on a wall. Rear of the speaker Screw...
Page 25 - To hang the speaker on a wall; Connect the speaker cord with the color tube to
25 GB Getting Star te d 6 Remove the protection paper from the speaker-bottom cover, then attach the speaker-bottom cover to the bottom of the upper part of the speaker. Note • When removing the protection paper, pull it off via the section exposed by the notch in the speaker-bottom cover. To hang t...
Page 28 - After deciding the angle, secure a screw on the lower side (
28 GB Gettin g Star ted 5 After deciding the angle, secure a screw on the lower side ( 1 ), then secure a screw on the upper side ( 2 ). Note • Make sure that the wall is sufficiently thick before installing. • Do not loosen the screws at the mounting plate or screw to secure the speaker to the moun...
Page 29 - Step 2: Connecting the System; Connecting the speakers
29 GB Getting Star te d Step 2: Connecting the System 1 Insert the connectors of the speaker cords to match the color of the SPEAKERS jacks of the unit until they click. 2 Connect the speaker cord with the color tube to 3 , and the speaker cord without the color tube to # . The subwoofer speaker cor...
Page 30 - This is the basic connection.
30 GB Gettin g Star ted 1 Connecting the video to your TV Depending on the jacks on your TV, select one of the connection methods. x Method 1: Video cord (supplied) connection This is the basic connection. x Method 2: HDMI cable * connection Picture quality will be improved compared to Method 1.If y...
Page 31 - Connecting the audio from your TV/set-top box; This is the basic connection and sends an analog audio signal.
31 GB Getting Star te d 2 Connecting the audio from your TV/set-top box To listen to TV or set-top box sound via the system, select one of the connection methods. x Method 1: Audio cord (not supplied) connection This is the basic connection and sends an analog audio signal. x Method 2: Digital optic...
Page 32 - Turn off the system by pressing; Connecting the other components
32 GB Gettin g Star ted To change the color system (PAL or NTSC) (Asian, Australian, Middle Eastern, and South African models only) Depending on your TV, you may be required to select either PAL or NTSC for the color system.The initial setting for Australian, Middle Eastern, and South African models...
Page 33 - The demonstration appears in the front panel display.; Connecting the AC power cord (mains lead)
33 GB Getting Star te d Note • After connecting the FM wire antenna (aerial), extend and keep it as horizontal as possible. 1 Connect the AC power cord (mains lead). The demonstration appears in the front panel display. 2 Press " / 1 to turn the system on, then press " / 1 again to turn off ...
Page 34 - Displayed items vary depending on the area.; Performing the Quick Setup
34 GB Gettin g Star ted Step 3: Setting up the System Displayed items vary depending on the area. 1 Turn on your TV. 2 Switch the input selector on your TV so that the signal from the system appears on the TV screen. 3 Press " / 1 to turn the system on. 4 Press without inserting a disc or connec...
Page 38 - Playing a Disc; Playback
38 GB Playing a Disc 1 Press FUNCTION repeatedly to select “DVD/CD.” The selected item appears in the front panel display. 2 Press Z to open the disc tray. 3 Place a disc on the tray, then press Z . 4 Press N to start playback. 5 Press VOLUME +/– to adjust the volume. Playing Files on a Disc/USB Dev...
Page 39 - ck; To remove the USB device; Playing a specific file
P layb a ck 39 GB 2 Load the source. x For a disc Place a disc on the tray by pressing Z to open/close the disc tray. x For a USB device Connect a USB device to the (USB) port. Note • It may take about 10 seconds before “READING” appears in the front panel display depending on the type of USB device...
Page 42 - Changing angles
42 GB 2 Press X / x to select the search method, then press . • [TITLE/SCENE/TRACK] • [CHAPTER/INDEX] • [TRACK] • [INDEX] • [FOLDER] • [FILE] Example: [CHAPTER] [** (**)] is selected (** refers to a number).The number in parentheses indicates the total number of titles, chapters, tracks, indexes, sc...
Page 43 - Dolby Digital 5.1 channel; Using the DVD’s menu
P layb a ck 43 GB Example: Dolby Digital 5.1 channel x DVD-VR You can toggle audio tracks when a disc contains multiple audio tracks. x VIDEO CD/CD/DATA CD (MP3 file)/DATA DVD (MP3 file)/USB device (audio file) You can change the sound track.• [STEREO]: The stereo sound.• [1/L]: The sound of the lef...
Page 44 - Playing in programmed order
44 GB Some Super Audio CDs consist of a 2 channel playback area and a multi-channel playback area. You can select the playback area you want to listen to. 1 Press DISPLAY while the system is in stop mode. 2 Press X / x to select [MULTI/ 2CH], then press . 3 Press X / x to select the setting, then pr...
Page 45 - To return to normal playback; Playing in random order
P layb a ck 45 GB 4 Press c . The cursor moves to the track row [T] (in this case, [01]). 5 Select the track you want to program. Ex. To set track 2 as the first programmed track Press X / x to select [02] under [T], then press . 6 To program other tracks, repeat Steps 4 to 5. 7 Press N to start Pro...
Page 46 - repeat the current file.; out from the center of the TV screen.; Playing repeatedly
46 GB To return to normal playback Press CLEAR, or select [OFF] in Step 3. Note • You cannot use Shuffle Play with a VIDEO CD or Super VCD with PBC playback. 1 Press DISPLAY during playback. 2 Press X / x to select [REPEAT], then press . 3 Press X / x to select the item to be repeated, then press . ...
Page 47 - Enjoying Karaoke; ” lights up in the front panel display.
P layb a ck 47 GB 2 Press X / x to select [INTERVAL], then press . 3 Press X / x to select a setting, then press . • [NORMAL]: You can set to the standard duration. • [FAST]: You can set the duration shorter than [NORMAL]. • [SLOW 1]: You can set the duration longer than [NORMAL]. • [SLOW 2]: You ca...
Page 49 - is output from both speakers.; ” appears as the current
P layb a ck 49 GB When playing a karaoke DVD recorded in Dolby Digital format in karaoke mode, you can turn on or off the guide vocal recorded in the karaoke track.When playing a VIDEO CD/CD in karaoke mode, you can listen to the vocals.You can also change the guide vocal channel to select different...
Page 50 - Information on the TV screen; Bit rate; Viewing playback information
50 GB Displaying the Information of a Disc/USB Device Press DISPLAY repeatedly during playback. Information on the TV screen 1 [T ** : ** : ** /C ** : ** : ** /D ** : ** : ** ] Playing time of the current title, track/chapter/disc [T- ** : ** : ** /C- ** : ** : ** /D- ** : ** : ** ] Remaining time o...
Page 51 - Playing time and current track number
P layb a ck 51 GB x DATA CD/DATA DVD/USB device (audio file) 1 Playing time and current track number 2 Track (file) name* * If an MP3 file has an ID3 tag, the system will display a title name from the ID3 tag information.The system can support ID3 ver 1.0/1.1/2.2/2.3.ID3 ver 2.2/2.3 tag information ...
Page 53 - une; You can preset 20 FM stations.; To change the preset number; Listening to the Radio; If an FM program is noisy; Tuner
T une r 53 GB Presetting Radio Stations You can preset 20 FM stations. 1 Press FUNCTION repeatedly to select “TUNER FM.” The selected item appears in the front panel display. 2 Press and hold TUNING +/– until the auto scanning starts. Scanning stops when the system tunes in a station. “TUNED” appear...
Page 55 - Enjoying Surround Sound; The selected item appears in the front panel display.; About speaker output; Sound Effect; Enjoying TV sound with the 5.1 channel surround sound effect
Sound Eff ect 55 GB Enjoying Surround Sound You can enjoy surround sound simply by selecting one of the system’s pre-programmed surround settings. 1 Press SYSTEM MENU. 2 Press X / x to select “SUR.SETTING,” then press or c . The selected item appears in the front panel display. 3 Press X / x to sele...
Page 57 - To turn off the sound effect; Enhancing compressed sound
Sound Eff ect 57 GB Selecting the Sound Effect Press SOUND MODE repeatedly during playback until the desired mode appears in the front panel display. • “AUTO”: The system automatically selects “MOVIE” or “MUSIC” to produce the sound effect depending on the source. “AUTO” appears in the front panel d...
Page 58 - Convenient Functions
58 GB Using the Control for HDMI Function for “BRAVIA” Sync This function is available on TVs with the “BRAVIA” Sync function.By connecting Sony components that are compatible with the Control for HDMI function with an HDMI cable, operation is simplified as below: – System Power Off (page 58) – One-...
Page 59 - Using the Theatre Mode
Con ven ient Func tions 59 GB (One-Touch Play) Press ONE-TOUCH PLAY Your TV turns on, your TV’s function is set to the HDMI input to which the system is connected, and the system starts playing a disc automatically.The System Audio Control function is also activated automatically. (Theatre Mode) If ...
Page 60 - Using an S-AIR Product; enjoy system sound in another room.; Remove the screws directly below the
60 GB (Language Follow) When you change the language for the on-screen display of your TV, the system’s on-screen display language is also changed. Note • When the system’s on-screen display is displayed, this function does not work. Using an S-AIR Product (DAV-DZ810 only) When you purchase the S-AI...
Page 61 - To set the ID of the unit
Con ven ient Func tions 61 GB Note • Remove the screws that are indicated in the illustration. Do not remove other screws. 2 Insert the wireless transmitter. Note • Insert the wireless transmitter with the S-AIR logo facing up. • Insert the wireless transmitter so that the V marks are aligned. • Do ...
Page 62 - For the S-AIR receiver
62 GB To set the ID of the surround amplifier Refer to the operating instructions of the surround amplifier. To set the ID of the S-AIR receiver Refer to the operating instructions of the S-AIR receiver. You can receive the system’s sound by the S-AIR receiver while the main unit is in standby mode ...
Page 63 - To cancel pairing; • “ON”: The system transmits sound by
Con ven ient Func tions 63 GB instrument, such as a paper clip, can be used.)The PAIRING indicator of the surround amplifier flashes when pairing starts.When wireless transmission is activated, the PAIRING indicator of the surround amplifier turns on and “PAIRING” and “COMPLETE” appear alternately i...
Page 64 - Notes on USB transferring; Folder and file generation rules
64 GB Notes on USB transferring • Do not connect the unit and the USB device through a USB hub. • Make sure there is enough space in the USB device for transferring. • Do not remove the USB device during transferring. • When you are transferring tracks from an audio CD, the tracks are recorded as 12...
Page 66 - Using the sleep timer; To check the remaining time; Transferring a radio program
66 GB 5 Press N to start transferring. When transferring is completed, “COMPLETE” appears in the front panel display and playback of the disc and USB device stops automatically.To cancel transferring, press x . You can transfer a radio program you are listening to onto a USB device. 1 Press FUNCTION...
Page 67 - the picture and sound.; • “SUB”: Sound of the sub language will be
Con ven ient Func tions 67 GB To cancel the sleep timer Press SLEEP repeatedly until “SLEEP OFF” appears in the front panel display. To set the sleep timer using the system menu 1 Press SYSTEM MENU. 2 Press X / x to select “SLEEP,” then press or c . The selected item appears in the front panel displ...
Page 69 - Settings
Settings 69 GB Changing the Brightness of the Front Panel Display 1 Press SYSTEM MENU. 2 Press X / x to select “DIMMER,” then press or c . The selected item appears in the front panel display. 3 Press X / x to select the brightness of the front panel display, then press . • “DIMMER OFF”: The front p...
Page 71 - Select settings according to your TV.; Settings for the display
Settings 71 GB x [AUDIO] You can switch the language of the sound track.When you select [ORIGINAL], the language given priority on the disc is selected. x [SUBTITLE] You can switch the language of the subtitles recorded on the DVD VIDEO.When you select [AUDIO FOLLOW], the language for the subtitles ...
Page 72 - You can select the picture in pause mode.; Settings for HDMI
72 GB Note • [4:3 OUTPUT] is effective only when you set [TV TYPE] in [VIDEO SETUP] to [16:9]. x [COLOR SYSTEM (VIDEO CD)] (Asian, Australian, Middle Eastern, and South African models only) You can select the color system when you play a VIDEO CD. [AUTO]: The system outputs the disc’s video signal, ...
Page 73 - size HD resolution without a black frame.; Settings for the audio
Settings 73 GB x [VOLUME LIMIT] When the System Audio Control (page 59) is activated, loud sound may be output depending on the volume level of the system. You can prevent this by limiting the maximum level of the volume when the System Audio Control function activates. [OFF]: Off.[LEVEL3]: Maximum ...
Page 75 - When you select [OTHERS; Other Settings
Settings 75 GB x [AUDIO DRC] You can compress the dynamic range of the sound track. [AUDIO DRC] is useful for watching movies at low volume late at night. [OFF]: No compression of dynamic range.[STANDARD]: The system reproduces the sound track with the kind of dynamic range that the recording engine...
Page 76 - Changing the password; Settings for the speakers
76 GB enter a new 4-digit password, replace the disc in the unit and press N . When the display for entering your password appears, enter your new password. Changing the password 1 Enter your 4-digit password using the number buttons, then press . 2 Press X / x to select [CHANGE PASSWORD t ], then p...
Page 78 - • Do not use cleaning discs or disc/lens cleaners; Additional Information
78 GB Precautions On power sources • Unplug the unit from the wall outlet (mains) if you do not intend to use it for an extended period of time. To disconnect the cord, pull it out by the plug, never by the cord. On placement • Place the system in a location with adequate ventilation to prevent heat...
Page 79 - Notes about the Discs
A d ditio n al Inf o rm at ion 79 GB On handling discs • To keep the disc clean, handle the disc by its edge. Do not touch the surface. • Do not stick paper or tape on the disc. • Do not expose the disc to direct sunlight or heat sources such as hot air ducts, or leave it in a car parked in direct s...
Page 80 - Troubleshooting; General
80 GB Troubleshooting If you experience any of the following difficulties while using the system, use this troubleshooting guide to help remedy the problem before requesting repairs. Should any problem persist, consult your nearest Sony dealer.Note that if service personnel changes some parts during...
Page 82 - Disc playback
82 GB Disc playback The sound loses stereo effect when you play a VIDEO CD, a CD, or an audio file. • Select stereo sound by pressing AUDIO (page 42). There is no sound or the volume level is very low from a certain speaker or all the speakers. • Check the surround setting (page 55). • Check the spe...
Page 86 - Specifications; Amplifier Section; Self-diagnosis Function
86 GB (When letters/numbers appear in the display) When the self-diagnosis function is activated to prevent the system from malfunctioning, a 5-character service number (e.g., C 13 50) with a combination of a letter and 4 digits appears on the TV screen or front panel display. In this case, check th...
Page 88 - Supported file format
88 GB General Power requirementsNorth American and Mexican models: 120 V AC, 60 Hz Taiwan models: 120 V AC, 50/60 Hz Argentine models: 220 V - 240 V AC, 50/60 Hz Latin American models: 110 V - 240 V AC, 50/60 Hz Other models: 220 V - 240 V AC, 50/60 Hz Power consumptionDAV-DZ310/DAV-DZ510/DAV-DZ610 ...
Page 89 - Playback Priority of File Types
A d ditio n al Inf o rm at ion 89 GB The table below describes the playback priority of file types under the [MEDIA] setting. * When using a disc, you can play MP3 files only. Playback Priority of File Types File type on a disc or USB device [MEDIA] setting [VIDEO] [MUSIC/PHOTO] [PHOTO] [MUSIC] Disc...
Page 91 - Index; Numerics; HDMI
91 GB Index Numerics 4:3 OUTPUT 71 A A/V SYNC 67ANGLE 42ATTENUATE 67AUDIO 71AUDIO (HDMI) 73AUDIO DRC 75AUDIO RETURN CHANNEL 73 AUDIO SETUP 73AUTO CALIBRATION 74AUTO STBY 69 B BACKGROUND 75BLACK LEVEL 72BLACK LEVEL (COMPONENT OUT) 72 C COLOR SYSTEM (VIDEO CD) 72 CONTROL FOR HDMI 72Control for HDMI 58...
Page 92 - Sony Corporation


 Sony BDV-E2100
Manual
Sony BDV-E2100
Manual
 Sony BDV-E280
Manual
Sony BDV-E280
Manual
 Sony BDV-E370
Manual
Sony BDV-E370
Manual
 Sony BDV-E490
Manual
Sony BDV-E490
Manual
 Sony BDV-E880
Manual
Sony BDV-E880
Manual
 Sony BDV-E980
Manual
Sony BDV-E980
Manual
 Sony BDV-IS1000
Manual
Sony BDV-IS1000
Manual
 Sony BDV-IZ1000W
Manual
Sony BDV-IZ1000W
Manual
 Sony BDV-N790W
Manual
Sony BDV-N790W
Manual
 Sony BDVN9200WB
User Manual
Sony BDVN9200WB
User Manual
 Sony DAV-S400
Manual
Sony DAV-S400
Manual
 Sony HT-CT380
User Manual
Sony HT-CT380
User Manual
 Sony HT-CT780
User Manual
Sony HT-CT780
User Manual
 Sony HTCT80
User Manual
Sony HTCT80
User Manual
 Sony HTM77
User Manual
Sony HTM77
User Manual
 Sony HTRT3
User Manual
Sony HTRT3
User Manual
 Sony HTRT5
User Manual
Sony HTRT5
User Manual