Smeg SIM1644DG - Manuals
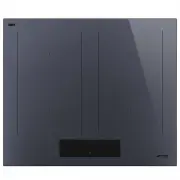
User Manual Smeg SIM1644DG


Summary
PRECAUTIONS - 27 91477A928/B e of time after they have been turned off. Do not touch the hob surfaces. • Before performing any work on the appliance, switch off the power supply. • Do not try to repair the appliance yourself or without the assistance of a qualified technician. • If the power cable b...
PRECAUTIONS - 29 91477A928/B e • The power cable must only be installed or replaced by a qualified technician. • If the power cable becomes damaged, contact technical support immediately to arrange for it to be replaced in order to avoid possible hazards. • Always use any necessary/ required persona...
30 - PRECAUTIONS 91477A928/B with current European directives. To dispose of the appliance:• Cut the power cable and remove it.• Deliver the appliance to the appropriate recycling centre for electrical and electronic equipment waste, or return it to the retailer when purchasing an equivalent product...
Smeg Hobs Manuals
-
 Smeg CIR574X3
User Manual
Smeg CIR574X3
User Manual
-
 Smeg CIR574XS3
User Manual
Smeg CIR574XS3
User Manual
-
 Smeg CIR575X
User Manual
Smeg CIR575X
User Manual
-
Smeg CIR575X
Manual
-
 Smeg CIR597XS
User Manual
Smeg CIR597XS
User Manual
-
 Smeg CIR60X
User Manual
Smeg CIR60X
User Manual
-
Smeg CIR60X
Manual
-
 Smeg CIR60XS3
User Manual
Smeg CIR60XS3
User Manual
-
 Smeg HOBD182DG
User Manual
Smeg HOBD182DG
User Manual
-
 Smeg HOBD682D1
User Manual
Smeg HOBD682D1
User Manual
-
 Smeg P106
User Manual
Smeg P106
User Manual
-
Smeg P106
Manual
-
 Smeg P1641XA
User Manual
Smeg P1641XA
User Manual
-
 Smeg P64
User Manual
Smeg P64
User Manual
-
 Smeg P652
User Manual
Smeg P652
User Manual
-
Smeg P652
Manual
-
 Smeg P663-1
User Manual
Smeg P663-1
User Manual
-
 Smeg P705ES
User Manual
Smeg P705ES
User Manual
-
 Smeg P705VT
User Manual
Smeg P705VT
User Manual
-
Smeg P705VT
Manual