Smeg SIM1644D - Manuals
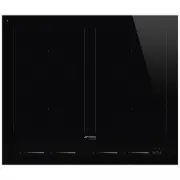
User Manual Smeg SIM1644D


Summary
PRECAUTIONS - 21 91477A937/A e the appliance, switch off the power supply. • Do not try to repair the appliance yourself or without the assistance of a qualified technician. • If the power cable becomes damaged, contact technical support immediately to arrange for it to be replaced in order to avoid...
PRECAUTIONS - 23 91477A937/A e qualified technician. • If the power cable becomes damaged, contact technical support immediately to arrange for it to be replaced in order to avoid possible hazards. • Always use any necessary/ required personal protective equipment (PPE) before performing any work on...
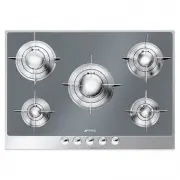
DESCRIPTION - 25 91477A937/A e DESCRIPTION General description *Power levels are approximate and may vary according to the pan used or the settings made. Cooking zones / / Front left / / Rear left / / Front right / / Rear right List of symbols: Symbol 0: cooking zone off. Symbol P: activates the boo...
Smeg Hobs Manuals
-
 Smeg CIR574X3
User Manual
Smeg CIR574X3
User Manual
-
 Smeg CIR574XS3
User Manual
Smeg CIR574XS3
User Manual
-
 Smeg CIR575X
User Manual
Smeg CIR575X
User Manual
-
Smeg CIR575X
Manual
-
 Smeg CIR597XS
User Manual
Smeg CIR597XS
User Manual
-
 Smeg CIR60X
User Manual
Smeg CIR60X
User Manual
-
Smeg CIR60X
Manual
-
 Smeg CIR60XS3
User Manual
Smeg CIR60XS3
User Manual
-
 Smeg HOBD182DG
User Manual
Smeg HOBD182DG
User Manual
-
 Smeg HOBD682D1
User Manual
Smeg HOBD682D1
User Manual
-
 Smeg P106
User Manual
Smeg P106
User Manual
-
Smeg P106
Manual
-
 Smeg P1641XA
User Manual
Smeg P1641XA
User Manual
-
 Smeg P64
User Manual
Smeg P64
User Manual
-
 Smeg P652
User Manual
Smeg P652
User Manual
-
Smeg P652
Manual
-
 Smeg P663-1
User Manual
Smeg P663-1
User Manual
-
 Smeg P705ES
User Manual
Smeg P705ES
User Manual
-
 Smeg P705VT
User Manual
Smeg P705VT
User Manual
-
Smeg P705VT
Manual