Page 2 - Instructions; General safety instructions
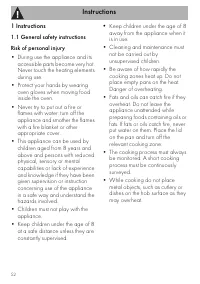
Instructions 52 1 Instructions 1.1 General safety instructions Risk of personal injury • During use the appliance and its accessible parts become very hot. Never touch the heating elements during use. • Protect your hands by wearing oven gloves when moving food inside the oven. • Never try to put ou...
Page 4 - Risk of damaging the appliance
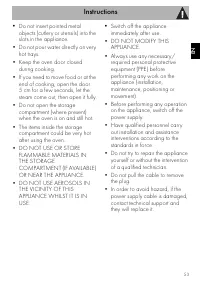
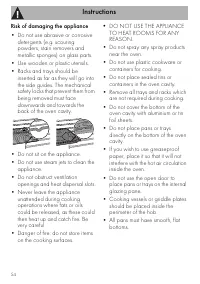
Instructions 54 Risk of damaging the appliance • Do not use abrasive or corrosive detergents (e.g. scouring powders, stain removers and metallic sponges) on glass parts. • Use wooden or plastic utensils.• Racks and trays should be inserted as far as they will go into the side guides. The mechanical ...
Page 6 - Installation
Instructions 56 Installation • THIS APPLIANCE MUST NOT BE INSTALLED IN A BOAT OR CARAVAN. • The appliance must not be installed on a pedestal. • Position the appliance into the cabinet cut-out with the help of a second person. • To prevent any possible overheating, the appliance should not be instal...
Page 7 - Manufacturer liability
Instructions 57 EN 1.2 Manufacturer liability The manufacturer declines all liability for damage to persons or property caused by:• Use of the appliance other than that specified; • failure to comply with the instructions in the user manual; • tampering with any part of the appliance; • use of non-o...
Page 8 - Plastic packaging
Instructions 58 • Deliver the appliance to the appropriate recycling centre for electrical and electronic equipment waste, or return it to the retailer when purchasing an equivalent product, on a one for one basis. Our appliances are packaged in non-polluting and recyclable materials.• Deliver the p...
Page 9 - How to read the user manual
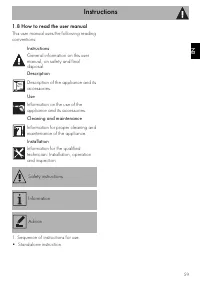
Instructions 59 EN 1.8 How to read the user manual This user manual uses the following reading conventions: 1. Sequence of instructions for use.• Standalone instruction. Instructions General information on this user manual, on safety and final disposal. Description Description of the appliance and i...
Page 10 - Description; General Description; Cooking hob
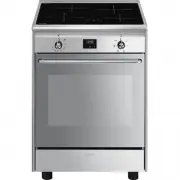
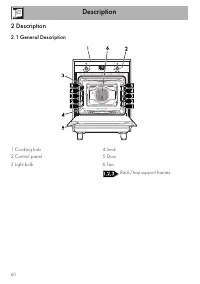
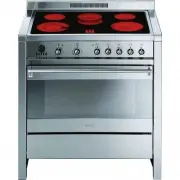
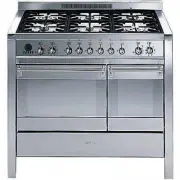
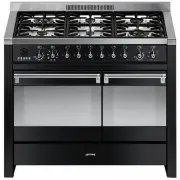
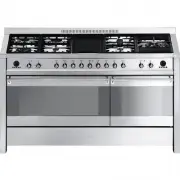
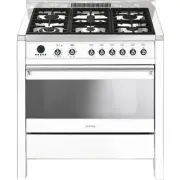
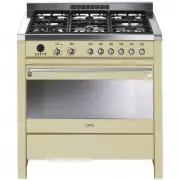
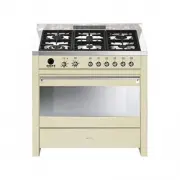
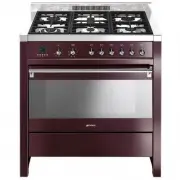
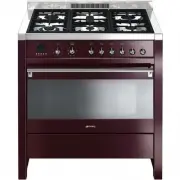
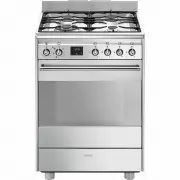
Description 60 2 Description 2.1 General Description 1 Cooking hob 2 Control panel 3 Light bulb 4 Seal 5 Door 6 Fan Rack/tray support frames
Page 11 - Advantages of induction cooking
Description 61 EN 2.2 Cooking hob * Power levels are approximate and can vary according to the pan used or the settings made. Advantages of induction cooking • Energy saving thanks to the direct transmission of energy to the pan (suitable magnetisable cookware is required) compared to traditional el...
Page 12 - from the
Description 62 2.3 Control panel 1 Temperature knob This knob allows you to select the cooking temperature. Turn the knob clockwise to the required value, between the minimum and maximum setting. 2 Indicator light The indicator light comes on to indicate that the oven is heating up. It turns off as ...
Page 13 - Cooling fan; Available accessories; Rack
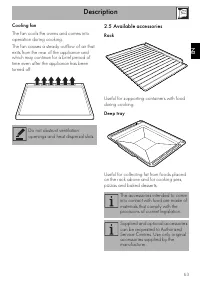
Description 63 EN Cooling fan The fan cools the ovens and comes into operation during cooking.The fan causes a steady outflow of air that exits from the rear of the appliance and which may continue for a brief period of time even after the appliance has been turned off. 2.5 Available accessories Rac...
Page 14 - Use
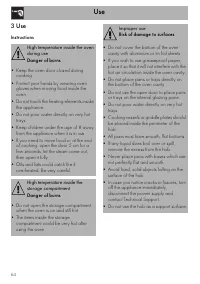
Use 64 3 Use Instructions High temperature inside the oven during use Danger of burns • Keep the oven door closed during cooking. • Protect your hands by wearing oven gloves when moving food inside the oven. • Do not touch the heating elements inside the appliance. • Do not pour water directly on ve...
Page 15 - First use
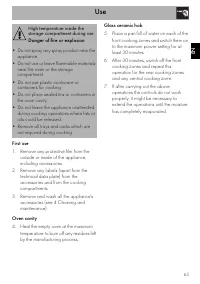
Use 65 EN First use 1. Remove any protective film from the outside or inside of the appliance, including accessories. 2. Remove any labels (apart from the technical data plate) from the accessories and from the cooking compartments. 3. Remove and wash all the appliance's accessories (see 4 Cleaning ...
Page 16 - Using the accessories; Racks and trays
Use 66 3.1 Using the accessories Racks and trays Racks and trays have to be inserted into the side guides until they come to a complete stop. The mechanical safety locks that prevent the rack from being taken out accidentally have to face downwards and towards the oven back. 3.2 Using the hob All th...
Page 17 - • Enamelled steel cookware with thick
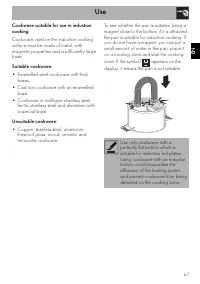
Use 67 EN Cookware suitable for use in induction cooking Cookware used on the induction cooking surface must be made of metal, with magnetic properties and a sufficiently large base. Suitable cookware: • Enamelled steel cookware with thick bases. • Cast iron cookware with an enamelled base. • Cookwa...
Page 18 - Cookware recognition; Set power level
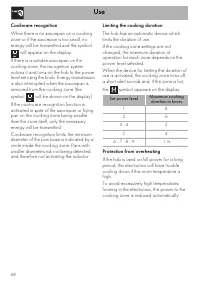
Use 68 Cookware recognition When there is no saucepan on a cooking zone or if the saucepan is too small, no energy will be transmitted and the symbol will appear on the display. If there is a suitable saucepan on the cooking zone, the recognition system notices it and turns on the hob to the power l...
Page 19 - Improper use
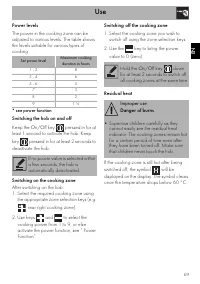
Use 69 EN Power levels The power in the cooking zone can be adjusted to various levels. The table shows the levels suitable for various types of cooking. * see power function Switching the hob on and off Keep the On/Off key pressed in for at least 1 second to activate the hob. Keep key pressed in fo...
Page 20 - Power Function
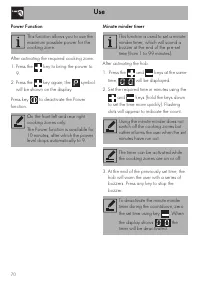
Use 70 Power Function After activating the required cooking zone: 1. Press the key to bring the power to 9. 2. Press the key again; the symbol will be shown on the display. Press key to deactivate the Power function. Minute minder timer After activating the hob: 1. Press the and keys at the same tim...
Page 21 - Cooking zone automatic switch-off timer
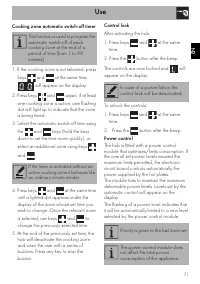
Use 71 EN Cooking zone automatic switch-off timer 1. If the cooking zone is not selected, press keys and at the same time, will appear on the display. 2. Press keys and again; if at least one cooking zone is active, one flashing dot will light up to indicate that the zone is being timed. 3. Select t...
Page 22 - Cooking guidelines
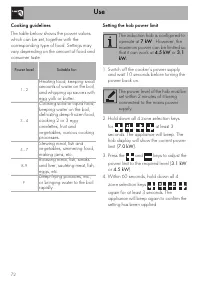
Use 72 Cooking guidelines The table below shows the power values which can be set, together with the corresponding type of food. Settings may vary depending on the amount of food and consumer taste. Setting the hob power limit 1. Switch off the cooker’s power supply and wait 10 seconds before turnin...
Page 23 - Switching on the oven; Static
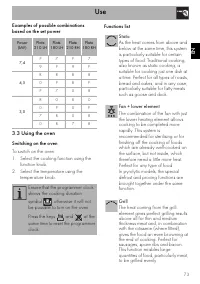
Use 73 EN Examples of possible combinations based on the set power 3.3 Using the oven Switching on the oven To switch on the oven:1. Select the cooking function using the function knob. 2. Select the temperature using the temperature knob. Functions list Power (kW) Plate 210 LH Plate 180 LH Plate 21...
Page 24 - General advice
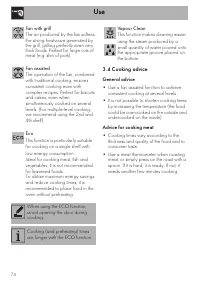
Use 74 3.4 Cooking advice General advice • Use a fan assisted function to achieve consistent cooking at several levels. • It is not possible to shorten cooking times by increasing the temperature (the food could be overcooked on the outside and undercooked on the inside). Advice for cooking meat • C...
Page 25 - Advice for defrosting and proving
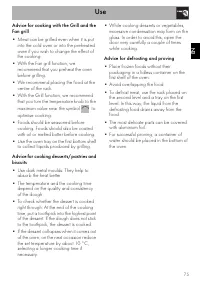
Use 75 EN Advice for cooking with the Grill and the Fan grill • Meat can be grilled even when it is put into the cold oven or into the preheated oven if you wish to change the effect of the cooking. • With the Fan grill function, we recommend that you preheat the oven before grilling. • We recommend...
Page 26 - Setting the time
Use 76 3.5 Programmer clock Value decrease key Clock key Increase key Setting the time On the first use, or after a power failure, the digits will be flashing on the appliance’s display. 1. Hold down the clock key for two seconds. The dot between the hours and the minutes flashes. 2. The time can be...
Page 27 - Timed cooking
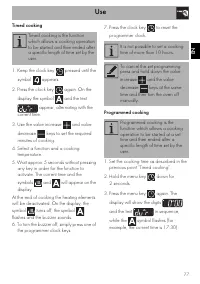
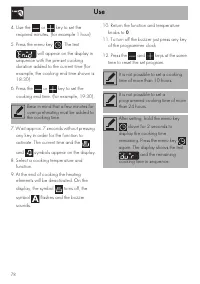
Use 77 EN Timed cooking 1. Keep the clock key pressed until the symbol appears. 2. Press the clock key again. On the display the symbol and the text appear, alternating with the current time. 3. Use the value increase and value decrease keys to set the required minutes of cooking. 4. Select a functi...
Page 29 - Minute minder timer
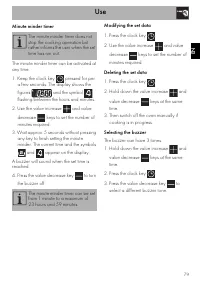
Use 79 EN Minute minder timer The minute minder timer can be activated at any time. 1. Keep the clock key pressed for per a few seconds. The display shows the figures and the symbol flashing between the hours and minutes. 2. Use the value increase and value decrease keys to set the number of minutes...
Page 30 - Cooking information table
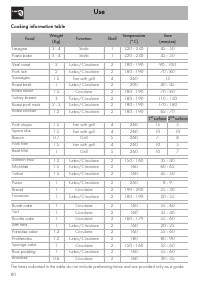
Use 80 Cooking information table Food Weight (Kg) Function Shelf Temperature (°C) Time (minutes) Lasagne 3 - 4 Static 1 220 - 230 45 - 50 Pasta bake 3 - 4 Static 1 220 - 230 45 - 50 Veal roast 2 Turbo/Circulaire 2 180 - 190 90 - 100 Pork loin 2 Turbo/Circulaire 2 180 - 190 70 - 80 Sausages 1.5 Fan w...
Page 31 - Cleaning and maintenance
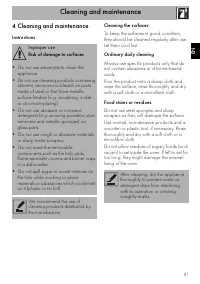
Cleaning and maintenance 81 EN 4 Cleaning and maintenance Instructions Cleaning the surfaces To keep the surfaces in good condition, they should be cleaned regularly after use. Let them cool first. Ordinary daily cleaning Always use specific products only that do not contain abrasives or chlorine-ba...
Page 32 - which may have fallen on the hob
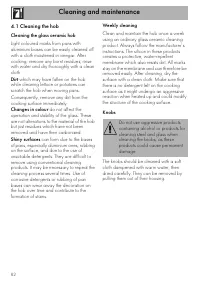
Cleaning and maintenance 82 4.1 Cleaning the hob Cleaning the glass ceramic hob Light coloured marks from pans with aluminium bases can be easily cleaned off with a cloth moistened in vinegar. After cooking, remove any burnt residues; rinse with water and dry thoroughly with a clean cloth. Dirt whic...
Page 33 - Cleaning the door; Removing the door
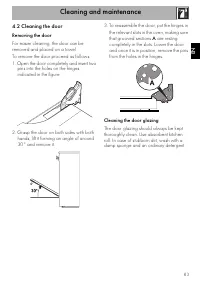
Cleaning and maintenance 83 EN 4.2 Cleaning the door Removing the door For easier cleaning, the door can be removed and placed on a towel.To remove the door proceed as follows:1. Open the door completely and insert two pins into the holes on the hinges indicated in the figure. 2. Grasp the door on b...
Page 34 - Removing the internal glass panes
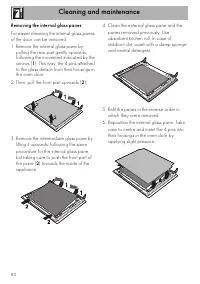
Cleaning and maintenance 84 Removing the internal glass panes For easier cleaning the internal glass panes of the door can be removed.1. Remove the internal glass pane by pulling the rear part gently upwards, following the movement indicated by the arrows ( 1 ). This way, the 4 pins attached to the ...
Page 35 - Cleaning the oven cavity; Cleaning the racks and trays
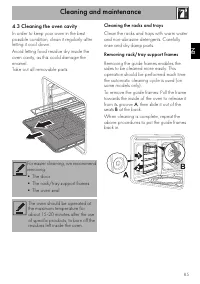
Cleaning and maintenance 85 EN 4.3 Cleaning the oven cavity In order to keep your oven in the best possible condition, clean it regularly after letting it cool down.Avoid letting food residue dry inside the oven cavity, as this could damage the enamel.Take out all removable parts. Cleaning the racks...
Page 36 - Preliminary operations
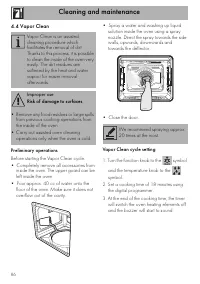
Cleaning and maintenance 86 4.4 Vapor Clean Preliminary operations Before starting the Vapor Clean cycle:• Completely remove all accessories from inside the oven. The upper guard can be left inside the oven. • Pour approx. 40 cc of water onto the floor of the oven. Make sure it does not overflow out...
Page 37 - End of the Vapor Clean cycle; Extraordinary maintenance; Replacing the internal light bulb
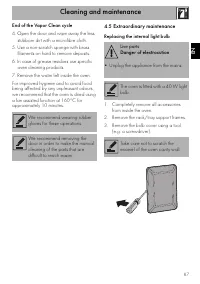
Cleaning and maintenance 87 EN End of the Vapor Clean cycle 4. Open the door and wipe away the less stubborn dirt with a microfibre cloth. 5. Use a non-scratch sponge with brass filaments on hard to remove deposits. 6. In case of grease residues use specific oven cleaning products. 7. Remove the wat...
Page 38 - Refit the cover. Ensure the moulded part
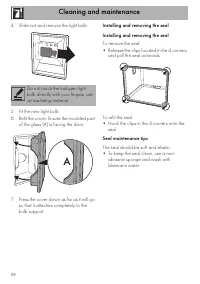
Cleaning and maintenance 88 4. Slide out and remove the light bulb. 5. Fit the new light bulb. 6. Refit the cover. Ensure the moulded part of the glass (A) is facing the door. 7. Press the cover down as far as it will go so that it attaches completely to the bulb support. Installing and removing the...
Page 39 - Installation; Heavy appliance
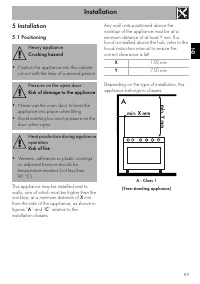
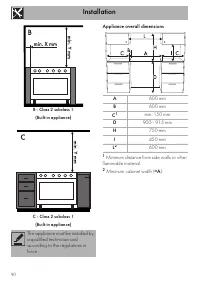
Installation 89 EN 5 Installation 5.1 Positioning This appliance may be installed next to walls, one of which must be higher than the worktop, at a minimum distance of X mm from the side of the appliance, as shown in figures “ A ” and “ C ” relative to the installation classes. Any wall units positi...
Page 40 - B - Class 2 subclass 1; Appliance overall dimensions
Installation 90 B - Class 2 subclass 1 (Built-in appliance) C - Class 2 subclass 1 (Built-in appliance) Appliance overall dimensions 1 Minimum distance from side walls or other flammable material. 2 Minimum cabinet width ( =A ). The appliance must be installed by a qualified technician and according...
Page 41 - Electrical connection
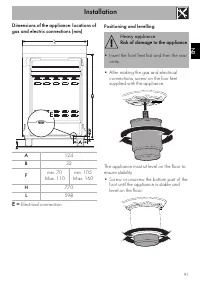
Installation 91 EN Dimensions of the appliance: locations of gas and electric connections (mm) E = Electrical connection Positioning and levelling • After making the gas and electrical connections, screw on the four feet supplied with the appliance. The appliance must sit level on the floor to ensur...
Page 42 - Fastening to the wall
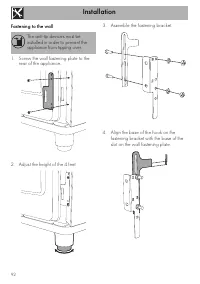
Installation 92 Fastening to the wall 1. Screw the wall fastening plate to the rear of the appliance. 2. Adjust the height of the 4 feet. 3. Assemble the fastening bracket. 4. Align the base of the hook on the fastening bracket with the base of the slot on the wall fastening plate. The anti-tip devi...
Page 43 - Align the base of the fastening bracket
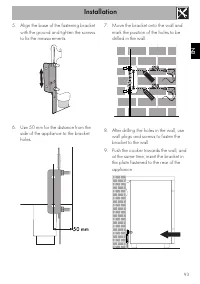
Installation 93 EN 5. Align the base of the fastening bracket with the ground and tighten the screws to fix the measurements. 6. Use 50 mm for the distance from the side of the appliance to the bracket holes. 7. Move the bracket onto the wall and mark the position of the holes to be drilled in the w...
Page 44 - Electrical connection; General information
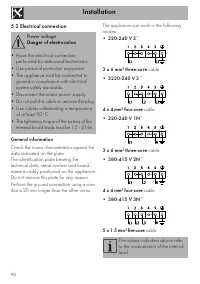
Installation 94 5.2 Electrical connection General information Check the mains characteristics against the data indicated on the plate.The identification plate bearing the technical data, serial number and brand name is visibly positioned on the appliance.Do not remove this plate for any reason.Perfo...
Page 45 - Fixed connection
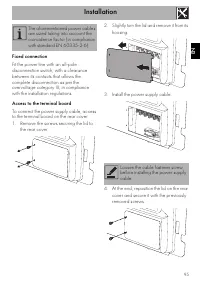
Installation 95 EN Fixed connection Fit the power line with an all-pole disconnection switch, with a clearance between its contacts that allows the complete disconnection as per the overvoltage category III, in compliance with the installation regulations. Access to the terminal board To connect the...
Page 46 - Instructions for the installer; • The plug must be accessible after
Installation 96 5.3 Instructions for the installer • The plug must be accessible after installation. Do not bend or trap the power cable. • The appliance must be installed according to the installation diagrams. • If the appliance does not work correctly after having carried out all the checks, cont...


 Smeg A1C-6
User Manual
Smeg A1C-6
User Manual
 Smeg A1C-7
User Manual
Smeg A1C-7
User Manual
 Smeg A2-8
User Manual
Smeg A2-8
User Manual
 Smeg A2BL-8
User Manual
Smeg A2BL-8
User Manual
 Smeg A5-8
User Manual
Smeg A5-8
User Manual
 Smeg B901GMXI9
User Manual
Smeg B901GMXI9
User Manual
 Smeg C95GMCA9-1
User Manual
Smeg C95GMCA9-1
User Manual
 Smeg CPF30UGGWH
User Manual
Smeg CPF30UGGWH
User Manual
 Smeg CPF36UGGWH
User Manual
Smeg CPF36UGGWH
User Manual
 Smeg CPF36UGMAN
User Manual
Smeg CPF36UGMAN
User Manual
 Smeg CPF48UGMBL
User Manual
Smeg CPF48UGMBL
User Manual
 Smeg CS19-7
User Manual
Smeg CS19-7
User Manual
 Smeg CS19A-7
User Manual
Smeg CS19A-7
User Manual
 Smeg CS19B-6
User Manual
Smeg CS19B-6
User Manual
 Smeg CS19P-6
User Manual
Smeg CS19P-6
User Manual
 Smeg CS19P-9
User Manual
Smeg CS19P-9
User Manual
 Smeg CS19RW-6
User Manual
Smeg CS19RW-6
User Manual
 Smeg CS19RW-7
User Manual
Smeg CS19RW-7
User Manual
 Smeg FS61XNG8-1
User Manual
Smeg FS61XNG8-1
User Manual