Sharp LC-32GA5E - Manuals
Sharp LC-32GA5E TV – Manual in PDF format online.
Manuals:
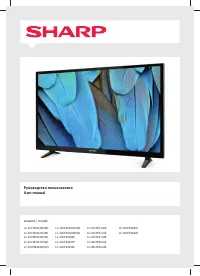
Manual Sharp LC-32GA5E


Summary
(100) (100) (50) [200] / ((200)) [115] / ((104)) [200] / ((200)) (567,9) / [700,4] / ((822,6)) (567.9) / [700.4] / ((822.6)) (556) / [638] / ((707)) (407) / [479] / ((548)) (504) / [576] / ((645)) (52) / [62] / ((62)) (278) / [307] / ((307)) (519) / [677] / ((677)) (421) / [473] / ((473)) (355) / [4...
1 ENGLISH Contents …………………………………………………………… 1 Dear SHARP customer …………………………………………… 2 Important Safety Precautions ………………………………… 2 Supplied accessories …………………………………………… 2 Preparation ………………………………………………………… 3 Setting the TV ………………………………………………… 3 Inserting the batteries ………………………………………… 4 Using the re...
2 Thank you for your purchase of the SHARP LCD colour TV product. To ensure safety and many years of trouble-free operation of your product, please read the Important Safety Precautions carefully before using this product. Dear SHARP customer • Cleaning—Unplug the AC cord from the AC outlet before c...
Sharp TVs Manuals
-
 Sharp 2T-C42BD1X
User Manual
Sharp 2T-C42BD1X
User Manual
-
 Sharp 2T-C42BG1X
User Manual
Sharp 2T-C42BG1X
User Manual
-
 Sharp 32BI3EA
User Manual
Sharp 32BI3EA
User Manual
-
 Sharp 4T-C55EL8UR
User Manual
Sharp 4T-C55EL8UR
User Manual
-
Sharp 4T-C65EL8UR
User Manual
-
 Sharp 4T-C75EL8UR
User Manual
Sharp 4T-C75EL8UR
User Manual
-
 Sharp 70CL5EA
User Manual
Sharp 70CL5EA
User Manual
-
 Sharp LC-19LE510E
User Manual
Sharp LC-19LE510E
User Manual
-
 Sharp LC-32HI3012E
User Manual
Sharp LC-32HI3012E
User Manual
-
 Sharp LC-40CFE4042E
User Manual
Sharp LC-40CFE4042E
User Manual
-
Sharp LC-43CFE4142E
User Manual
-
 Sharp LC-46LE810E
Manual
Sharp LC-46LE810E
Manual
-
Sharp LC-48CFE4042E
User Manual
-
 Sharp LC-42SH7E
Manual
Sharp LC-42SH7E
Manual
-
 Sharp LC-40LE510E
Manual
Sharp LC-40LE510E
Manual
-
 Sharp LC-32SH130E
Manual
Sharp LC-32SH130E
Manual
-
 Sharp LC-40LE810E
Manual
Sharp LC-40LE810E
Manual
-
 Sharp LC-22DV510E
User Manual
Sharp LC-22DV510E
User Manual