Shark DK012 133090H S - Manuals
Shark DK012 133090H S – User Manual in PDF format online.
Manuals:
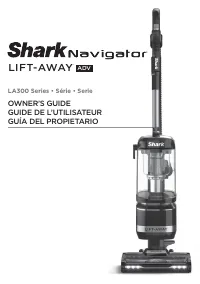
User Manual Shark DK012 133090H S


Summary
3 s h a r k c l e a n . c o . n z 2 s h a r k c l e a n . c o m . a u 1 This vacuum consists of a motorised nozzle, wand, and handheld vacuum. These components contain electrical connections, electrical wiring, and moving parts that potentially present risk to the user. 2 Before each use, carefully ...
5 s h a r k c l e a n . c o . n z 4 s h a r k c l e a n . c o m . a u ASSEMBLY 1. Insert Wand into Nozzle . 2. Insert Handheld Vacuum into wand. For proper operation, ensure all components are completely connected and clicked into place. 3. Make sure the Dock Plate is facing upright. Slide the Charg...
7 s h a r k c l e a n . c o . n z 6 s h a r k c l e a n . c o m . a u CHARGING AND STOR AGE Plug the Charger into a wall outlet. NOTE: The main unit comes with a partial charge. For maximum runtime, charge fully before first use (approximately 3.5 hours). Leaving the unit plugged in will not damage ...
Shark Manuals
-
 Shark NV356E
User Manual
Shark NV356E
User Manual
-
 Shark BU3521
User Manual
Shark BU3521
User Manual
-
Shark BU3521
Manual
-
 Shark S8201
User Manual
Shark S8201
User Manual
-
 Shark FA222
Manual
Shark FA222
Manual
-
 Shark HT202ANZ
User Manual
Shark HT202ANZ
User Manual
-
 Shark S5003D
User Manual
Shark S5003D
User Manual
-
 Shark NV141
User Manual
Shark NV141
User Manual
-
 Shark XDCKIW3500LEU
User Manual
Shark XDCKIW3500LEU
User Manual
-
Shark XDCKIW3500LEU
Manual
-
 Shark S7201
User Manual
Shark S7201
User Manual
-
Shark S7201
Manual
-
 Shark RV2410WD
User Manual
Shark RV2410WD
User Manual
-
 Shark ZD201
User Manual
Shark ZD201
User Manual
-
Shark ZD201
Manual
-
 Shark HD440ANZ
Manual
Shark HD440ANZ
Manual
-
 Shark AZ913ANZ
User Manual
Shark AZ913ANZ
User Manual
-
 Shark LA322
User Manual
Shark LA322
User Manual
-
 Shark HZ251
User Manual
Shark HZ251
User Manual
-
 Shark RV2001
User Manual
Shark RV2001
User Manual