Samsung WW11BBA046AB - Manuals
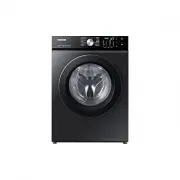
Samsung WW11BBA046AB Washing Machine – User Manual, Quick Guide, Repair Manual in PDF format online.
Manuals:
User Manual Samsung WW11BBA046AB


Summary
Engl ish English 2 Contents Safety information 4 What you need to know about the safety instructions 4 Important safety symbols 4 Important safety precautions 5 Critical installation warnings 6 Installation cautions 8 Critical usage warnings 8 Usage cautions 9 Critical cleaning warnings 12 Instructi...
Engl ish English 3 Troubleshooting 50 Checkpoints 50Information codes 54 Specifications 56 Fabric care chart 56 Protecting the environment 58 Spare parts guarantee 58 Specification sheet 59 EPREL information 61 Indicative information (According to EU 2019/2023) 61 Contact information 62 QUESTIONS ...
Engl ish English 4 Safety information Congratulations on your new Samsung washing machine. This manual contains important information on the installation, use and care of your appliance. Please take some time to read this manual to take full advantage of your washing machine’s many benefits and feat...
Quick Guide Samsung WW11BBA046AB


Summary
English 2 Safety information Accessories (not supplied) • Stacking kit: SKK-SS* ‐ Staking kit is required to stack a dryer on a washing machine. Safety information Important safety symbols What the icons and signs in this user manual mean: WARNING Hazards or unsafe practices that may result in sev...
English 3 Safety information 2. For use in Europe : This appliance can be used by children aged from 8 years and above and persons with reduced physical, sensory or mental capabilities or lack of experience and knowledge if they have been given supervision or instruction concerning use of the appl...
English 4 Safety information Critical installation warnings WARNING The installation of this appliance must be performed by a qualified technician or service company.• Failure to do so may result in electric shock, fire, an explosion, problems with the appliance, or injury.The appliance is heavy, ...
Repair Manual Samsung WW11BBA046AB


Summary
MODEL CODE WW11B*A***** WW11B*5***** WW11B*7***** WW11B*9***** WW11BBA049AB WW11BB504ATW WW11BB704DGE WW11BB904AGE WW11BBA046AE WW11BB504CAW WW11BB704AGE WW11BB904CGH WW11B1A046AE WW11BB534DAB WW11BB744DGB WW11BB944DGB WW11BB534CAE WW11BB744AGB WW11BB944AGB WW11B1534DAB WW11B1744CGE WW11BB944AGM WW1...
CONTENTS 1. Safety instructions . . . . . . . . . . . . . . . . . . . . . . . . . . . . . . . . . . . . . . . . . . . . . . . . . . . . . . . . . . . . . . . 1 1-1. Safety instruction . . . . . . . . . . . . . . . . . . . . . . . . . . . . . . . . . . . . . . . . . . . . . . . . . . . . . . .. . . ....
Safety Instructions _ 1 This Document can not be used without Samsung’s authorization. 1. SAFETY INSTRUCTIONS 1-1. SAFETY INSTRUCTIONS FOR SERVICE ENGINEERS ► Make sure to observe the following instructions to operate the product correctly and safely and prevent possible accidents and hazards while ...
Samsung Washing Machines Manuals
-
 Samsung WA10A8376GW
User Manual
Samsung WA10A8376GW
User Manual
-
 Samsung WA10H7200GW
User Manual
Samsung WA10H7200GW
User Manual
-
 Samsung WA10J7700GW
User Manual
Samsung WA10J7700GW
User Manual
-
 Samsung WA10J8700GP
User Manual
Samsung WA10J8700GP
User Manual
-
 Samsung WA10J8700GW
User Manual
Samsung WA10J8700GW
User Manual
-
 Samsung WA11M8700GV
User Manual
Samsung WA11M8700GV
User Manual
-
 Samsung WA12A8376GW
User Manual
Samsung WA12A8376GW
User Manual
-
 Samsung WA13M8700GV
User Manual
Samsung WA13M8700GV
User Manual
-
 Samsung WA13M8700GW
User Manual
Samsung WA13M8700GW
User Manual
-
 Samsung WA14A8377GV
User Manual
Samsung WA14A8377GV
User Manual
-
 Samsung WA14A8377GW
User Manual
Samsung WA14A8377GW
User Manual
-
 Samsung WA40A3005AW
User Manual
Samsung WA40A3005AW
User Manual
-
 Samsung WA40A3005AW/A4
User Manual
Samsung WA40A3005AW/A4
User Manual
-
Samsung WA41A3000AW/A4
User Manual
-
 Samsung WA44A3205AW
User Manual
Samsung WA44A3205AW
User Manual
-
 Samsung WA44A3205AW/A4
User Manual
Samsung WA44A3205AW/A4
User Manual
-
 Samsung WA44A3405AP
User Manual
Samsung WA44A3405AP
User Manual
-
 Samsung WA44A3405AV
User Manual
Samsung WA44A3405AV
User Manual
-
 Samsung WA45T3200AW
User Manual
Samsung WA45T3200AW
User Manual
-
Samsung WA45T3200AW/A4
User Manual