Page 2 - Contents; Safety information
English 2 Contents Safety information 4 What you need to know about the safety instructions 4 Important safety symbols 4 Important safety precautions 5 Critical installation warnings 6 Installation cautions 7 Critical usage warnings 8 Usage cautions 9 Critical cleaning warnings 12 Instructions about...
Page 3 - Maintenance
English 3 Maintenance 52 Drum Clean+/Drum Clean 52 Emergency drain 53 Cleaning 54Defrosting your washing machine 58 Care against an extended time of disuse 58 Troubleshooting 59 Checkpoints 59Information codes 63 Specifications 66 Fabric care chart 66 Protecting the environment 68 Spare parts guar...
Page 4 - What you need to know about the safety instructions; What the icons and signs in this user manual mean:; CAUTION; Hazards or unsafe practices that may result in; NOTE
English 4 Safety information Congratulations on your new Samsung washing machine. This manual contains important information on the installation, use and care of your appliance. Please take some time to read this manual to take full advantage of your washing machine’s many benefits and features. Wha...
Page 5 - Important safety precautions; WARNING; : This appliance can be used by children aged from 8 years; For use in Europe; : Children of less than 3 years should be kept away unless
English 5 Important safety precautions WARNING To reduce the risk of fire, electric shock, or injury to persons when using your appliance, follow basic precautions, including the following:1. This appliance is not to be used by persons (including children) with reduced physical, sensory or mental ...
Page 6 - bed and breakfast type environments; Critical installation warnings; in electric shock or fire.
Safety information English 6 9. This appliance is intended to be used in household only and it is not intended to be used such as: ‒ staff kitchen areas in shops, offices and other working environments; ‒ farm houses; ‒ by clients in hotels, motels and other residential type environments; ‒ bed and ...
Page 7 - Installation cautions
English 7 Do not install this appliance in a humid, oily or dusty location, or in a location exposed to direct sunlight or water (rain drops).Do not install this appliance in a location exposed to low temperatures.• Frost may cause the tubes to burst.Do not install this appliance in a location whe...
Page 8 - Critical usage warnings
Safety information English 8 Critical usage warnings WARNING If the appliance is flooded, turn off the water & power supplies immediately and contact your nearest service centre.• Do not touch the power plug with wet hands.• Failure to do so may result in electric shock.If the appliance generate...
Page 9 - Usage cautions; result in a water leak.
English 9 Do not attempt to repair, disassemble, or modify the appliance yourself.• Do not use a fuse (such as copper, steel wire, etc.) other than a standard fuse.• When the appliance needs to be repaired or reinstalled, contact your nearest service centre.• Failure to do so may result in electri...
Page 11 - use a sponge to clean it. Never use a metal brush.
English 11 Also, do not allow children to play around the washing machine or touch the door glass. • This may result in burns.Do not insert your hand into the detergent drawer.• This may result in injury as your hand may be caught by the detergent input device.Remove the liquid detergent guide (ap...
Page 12 - Critical cleaning warnings
Safety information English 12 Sort the laundry by colour on the basis of its colorfastness and select the recommended cycle, water temperature and additional functions.• This may result in discolouration or fabric damage.Take care that children’s fingers are not caught in the door when you close it....
Page 13 - Instructions about the WEEE; Product disposal in France
English 13 Instructions about the WEEE Correct Disposal of This Product (Waste Electrical & Electronic Equipment) (Applicable in countries with separate collection systems)This marking on the product, accessories or literature indicates that the product and its electronic accessories (e.g. cha...
Page 14 - Installation; What’s included
English 14 Installation Follow these instructions carefully to ensure proper installation of the washing machine and to prevent accidents when doing laundry. What’s included Make sure all the parts are included in the product package. If you have a problem with the washing machine or the parts, cont...
Page 16 - Installation requirements; Electrical supply and grounding; Water supply; Drain
Installation English 16 Installation requirements Electrical supply and grounding • Use an individual branch circuit specific to the washing machine. To ensure proper grounding, the washing machine comes with a power cord featuring a three-prong grounding plug for use in a properly installed and gro...
Page 17 - Flooring; Water temperature; Minimum clearance for stable operation:
English 17 Flooring For best performance, the washing machine must be installed on a solid floor. Wood floors may need to be reinforced to minimise vibration and/or unbalanced loads. Carpeting and soft tile surfaces do not resist vibration well and may cause the washing machine to move slightly du...
Page 18 - STEP 1
Installation English 18 Step-by-step installation NOTE While unpacking the washing machine, lift the washing machine from the foam base. Make sure the drum support was removed from the bottom of the washing machine. STEP 1 Select a location Location requirements:• Solid, level surface without carpe...
Page 19 - STEP 2
English 19 STEP 2 Remove the shipping bolts Unpack the product package and remove all shipping bolts. NOTE Number of shipping bolts may differ depending on the model. WARNING • Packaging materials can be dangerous to children. Dispose all packaging material (plastic bags, polystyrene, etc.) out o...
Page 20 - Insert the; STEP 3; Gently slide the washing machine into position.
Installation English 20 B 3. Insert the bolt caps (B) to the holes (marked with circle in the figure). STEP 3 Adjust the levelling feet 1. Gently slide the washing machine into position. Excessive force may damage the levelling feet. 2. Level the washing machine by manually adjusting the levelling ...
Page 21 - When levelling is complete, tighten the nuts using; STEP 4; Connecting to a threaded water tap; Connect the water hose to the water tap, and then
English 21 3. When levelling is complete, tighten the nuts using the spanner. CAUTION When installing the product make sure the levelling feet is not pressing the power cord. CAUTION Make sure all the levelling feet are seating on the floor surface to avoid the washing machine from moving or gener...
Page 22 - Connect the other end of the water hose to the; Remove the
Installation English 22 2. Connect the other end of the water hose to the inlet valve on the back of the washing machine, and then turn it to the right to tighten. 3. Slowly open the water tap and check if there are any leaks around the connection areas. If there are water leaks, repeat step 1 and 2...
Page 24 - inserting the tap into the adaptor.; For models with an additional hot water inlet:; Connect the red end of the hot water hose to the
Installation English 24 NOTE • After connecting the water hose to the adaptor, pull the water hose down to check if it is connected properly. • Use a popular type of water taps. If the tap is square-shaped or too big, remove the spacer ring before inserting the tap into the adaptor. For models with ...
Page 25 - STEP 5; Over the edge of a wash basin
English 25 STEP 5 Position the drain hose The drain hose can be positioned in three ways: A Over the edge of a wash basin The drain hose must be placed between 60 cm and 90 cm (*) above from the floor. To keep the spout of the drain hose bent, use the supplied plastic hose guide (A) . Secure the ...
Page 26 - In a sink drain pipe branch; STEP 6; is originally designed to be
Installation English 26 In a sink drain pipe branch The drain pipe branch must be above the sink siphon so that the end of the hose is at least 60 cm above the ground.(*) : 60 cm CAUTION Remove the lid on the sink drain pipe branch before connecting the drain pipe to it. STEP 6 Power on Plug the po...
Page 27 - Before you start; Initial setup; Navigation dial; Run Calibration; Settings; Suomi
English 27 Before you start NOTE Before doing your laundry for the first time, you must run a complete wash cycle without any items in the drum. Initial setup • When you turn on the washing machine for the first time, the screen shows the initial setup process. Follow the on-screen instructions to...
Page 28 - Laundry guidelines; Sort the laundry according to these criteria:; Empty all the pockets of your laundry items; closed and fixed with a string.; through and tear other laundry items.
Before you start English 28 Laundry guidelines STEP 1 Sort Sort the laundry according to these criteria: • Care Label: Sort the laundry into cottons, mixed fibres, synthetics, silks, wools, and rayon.• colour: Separate whites from colours.• Size: Mixing different sized items together in the drum im...
Page 30 - Laundry capsules; Put the capsule in the bottom of the empty drum
Before you start English 30 Laundry capsules To get the best results from using laundry capsules, please follow these instructions. 1. Put the capsule in the bottom of the empty drum towards the rear. 2. Put the laundry in the drum on top of the capsule. CAUTION For cycles using cold water or cycles...
Page 31 - Detergent recommendation; Recommended
English 31 Detergent recommendation The recommendations apply to the temperature ranges given in the cycle chart. Recommended Liquid detergent only – Not recommended Powder detergent only Cycle Detergent Temp. (°C) Universal Delicates and woollens Specialist Eco 40-60 - - 40~60 AI Wash (ap...
Page 32 - Detergent drawer guidelines; Dispenser; ” section on; C. Manual detergent compartment; • Do not exceed the
Before you start English 32 Detergent drawer guidelines With the automatic dispensing option on, the washing machine dispenses an adequate amount of detergent or fabric softener for each load. See below for details: A C B A. Dispenser - You can only use liquid detergent in this dispenser. B. Dispens...
Page 33 - To apply washing agents to the auto dispenser
English 33 CAUTION • Do not operate the washing machine without the dispenser or in the detergent drawer. - A water leak may cause electric shock or injury. • Do not use the following types of detergent in the drawer. - Tablet, capsule, ball, or net types. • Do not use gel-type or viscous detergen...
Page 36 - Operations; Control panel; Power
English 36 Operations NOTE The cycle and function names that appeared in this manual may differ from your product. Control panel WW**B*7*****, WW**B*5***** 01 03 02 04 10 05 06 07 08 09 WW**B*9***** 01 03 02 04 10 11 05 06 07 08 09 01 Power Tap to turn the washing machine on or off.• If you do not m...
Page 37 - Icon descriptions; Smart Control
English 37 04 Display The display shows current cycle information and estimated time remaining, or an information message when a problem occurs. NOTE The actual washing time may differ from the estimated time initially displayed on the control panel upon cycle selection. 05 OK Tap to confirm your ...
Page 38 - Operating a cycle
Operations English 38 Operating a cycle WW**B*7*****, WW**B*5***** 2 5 3 4 6 1 WW**B*9***** 2 5 3 4 5 6 1 1. Tap to turn on the washing machine. 2. Turn the Navigation dial to select the cycle you want. - For more information on Cycle overview , see page 39 . 3. Tap , , or to change the default cycl...
Page 39 - Cycle overview
English 39 Cycle overview Cycle Description Max load (kg) Eco 40-60 • For cleaning normally soiled cotton items which are declared to be washable at 40 °C or 60 °C, together in the same cycle. This cycle is used to assess the compliance with the EU Ecodesign legislation. • This cycle is set as a d...
Page 41 - Cycle; temperatures and longer duration.
English 41 Cycle Description Max load (kg) Drum Clean (applicable models only) • Cleans the drum by removing dirt and bacteria from it.• Perform once every 40 washes with no detergent or bleach applied. Notification message appears after every 40 washes. • Make sure the drum is empty.• Do not use ...
Page 42 - Options; Using Options
Operations English 42 Options Using Options 1. Tap . 2. Turn the Navigation dial to select the desired additional function. 3. Tap to change the selected function’s settings or start the function. NOTE • To return to the main screen, tap again or turn the Navigation dial to select Back and tap . • I...
Page 43 - Bubble Soak
English 43 Bubble Soak This function helps remove a wide variety of stubborn stains. With Bubble Soak selected, laundry is thoroughly soaked in water bubbles for effective washing. 1. Select a cycle and change the cycle settings as necessary. 2. Tap . 3. Turn the Navigation dial to select Bubble S...
Page 44 - Delay End; Child Lock
Operations English 44 Delay End You can set the washing machine to finish your wash automatically at a later time, choosing a delay of between 1 to 24 hours (in 1 hour or 10 minutes increments). The hour displayed indicates the time the wash will finish. 1. Select a cycle and change the cycle settin...
Page 45 - Using Settings
English 45 Settings Using Settings 1. Tap and hold for 3 seconds. 2. Turn the Navigation dial and select the desired system setting, and then tap . 3. Tap to change or run the selected setting. NOTE To return to the main screen, tap again or turn the Navigation dial to select Back and tap . Water ...
Page 47 - AI Pattern
English 47 AI Pattern This function saves frequently used cycles and settings. When you turn the function on, the washing machine remembers the cycles you use most and their settings (Temp., Rinse, Spin) and displays them in frequency order. 1. Tap and hold for 3 seconds. 2. Turn the Navigation di...
Page 48 - Language; Factory Reset
Operations English 48 Language You can change the system language. 1. Tap and hold for 3 seconds. 2. Turn the Navigation dial to select Language , and then tap . 3. Turn the Navigation dial to select the desired language, and then tap . Factory Reset You can reset the washing machine. 1. Tap and hol...
Page 49 - Special features
English 49 Special features Smart control (applicable models only) You can connect to the SmartThings app and control your washing machine remotely. Connecting your washing machine1. Download and open the SmartThings app on your smartphone or tablet (Android & iOS). 2. Tap to turn on the washi...
Page 50 - SmartThings; Download
Operations English 50 • In some circumstances, only the Door Lock icon may be illuminated. SmartThings Wi-Fi connection On your smartphone or tablet, go to Settings and turn on the wireless connection and select an AP (Access Point).• This appliance supports the Wi-Fi 2.4 GHz protocols. Download On ...
Page 51 - Open Source Announcement; indicative information.
English 51 Open Source Announcement The software included in this product contains open source software. You may obtain the complete corresponding source code for a period of three years after the last shipment of this product by contacting our support team via http://opensource.samsung.com (Pleas...
Page 53 - Emergency drain; TYPE 1: Gently press the top area of the; filter; TYPE 2: Push down the latch of the; filter cover
English 53 Emergency drain In case of a power failure, drain the water inside the drum before taking out the laundry. A A 1. Power off and unplug the washing machine from the electrical outlet. 2. Open the filter cover (A) . - TYPE 1: Gently press the top area of the filter cover (A) to open. - TY...
Page 54 - Cleaning; Surface of the washing machine
Maintenance English 54 Cleaning Surface of the washing machine Use a soft cloth with a nonabrasive household detergent. Do not spray water onto the washing machine. Mesh filter Clean the mesh filter of the water hose once or twice a year. 1. Turn off the washing machine, and unplug the power cord. 2...
Page 55 - Debris filter
English 55 Debris filter It is advisable to clean the debris filter every 2 months to prevent its clogging. A clogged debris filter may reduce the bubble effect. 1. Turn off the washing machine, and unplug the power cord. 2. Drain the remaining water inside the drum. See the Emergency drain sectio...
Page 56 - Detergent drawer
Maintenance English 56 NOTE • The “ Clean drain filter ” message appears on the control panel display after every 100 washes. • If the pump filter is clogged, an information code of “ Clean drain filter ” appears on the screen. CAUTION • Make sure the filter knob is closed properly after cleaning th...
Page 58 - Defrosting your washing machine; Care against an extended time of disuse
Maintenance English 58 Defrosting your washing machine The washing machine may freeze when it drops below 0 °C. 1. Turn off the washing machine, and unplug the power cord. 2. Pour warm water over the water tap to loosen the water hose. 3. Disconnect the water hose, and soak it in warm water. 4. Pour...
Page 59 - Troubleshooting; Checkpoints; Problem; noises to check the door lock and will do quick drain.
English 59 Troubleshooting If there is any problem, check the information message on the LCD screen and follow the on-screen instructions.If the problem persists, please contact the service center. Checkpoints If you encounter a problem with the washing machine, first check the table below and try...
Page 62 - Make sure the end of the drain hose is not placed on the floor.; Stains on the clothes.
Troubleshooting English 62 Problem Action Leaks water. • Make sure the door is properly closed.• Make sure all hose connections are tight.• Make sure the end of the drain hose is correctly inserted and secured to the drain system. • Avoid overloading.• Use high efficiency (HE) detergent to prevent o...
Page 63 - Information codes; Code; ” check message will be shown
English 63 Information codes If the washing machine fails to operate, you may see an information code on the screen. Check the table below and try the suggestions. Code Action Clean drain filter Water is not draining.• Make sure the drain hose is not frozen or clogged.• Make sure the drain hose is...
Page 66 - Specifications; Fabric care chart; Washing; Bleaching
English 66 Specifications Fabric care chart The following symbols provide garment care direction. The Clothing care labels include symbols for drying, bleaching, drying and ironing, or dry cleaning when necessary. The use of symbols ensures consistency among garment manufacturers of domestic and imp...
Page 67 - Ironing; Professional care; • Generally, the line under the symbol indicates
English 67 Ironing Iron at maximum sole plate temperature of 200 °C.Iron at maximum sole plate temperature of 150 °C.Iron at maximum sole plate temperature of 110 °C. Caution when using steam irons (work without steam).Do not iron. NOTE The dots indicate the temperature ranges for ironing (regulat...
Page 68 - Protecting the environment; detergent dispensers.
Specifications English 68 Protecting the environment • This appliance is manufactured from recyclable materials. If you decide to dispose of it, please observe local waste disposal regulations. Cut off the power cord so that the appliance cannot be connected to a power source. Remove the lid so that...
Page 69 - Specification sheet; Type
English 69 Specification sheet “*” Asterisk(s) means variant model and can be varied (0-9) or (A-Z). A B D E C Type Front loading washing machine Model name WW1*B******* Dimensions A (Width) 600 mm B (Height) 850 mm C (Depth) 600 mm D (Depth+Door frame thickness) 630 mm E 1080 mm Water pressure 50...
Page 71 - EPREL information
English 71 Indicative information (According to EU 2019/2023) Model Cycles Capacity (kg) Program Time (HH:MM) Energy Consumption (kWh/Cycle) Water Consumption (L/cycle) Maximum Temperature (°C) Remaining Moisture Content (%) Spinning Speed (RPM) WW1*B******* Eco 40-60 11 4:00 1.061 95.4 33 53.9 14...
Page 72 - Contact information; QUESTIONS OR COMMENTS?; COUNTRY
English 72 Contact information QUESTIONS OR COMMENTS? COUNTRY CALL OR VISIT US ONLINE AT UK 0333 000 0333 www.samsung.com/uk/support IRELAND (EIRE) 0818 717100 www.samsung.com/ie/support GERMANY 06196 77 555 77 www.samsung.com/de/support FRANCE 01 48 63 00 00 www.samsung.com/fr/support SPAIN 91 175 ...
Page 73 - оператори
English 73 COUNTRY CALL OR VISIT US ONLINE AT BULGARIA 0800 111 31 - Безплатен за всички оператори *3000 - Цена на един градски разговор или според тарифата на мобилният оператор 09:00 до 18:00 - Понеделник до Петък www.samsung.com/bg/support ROMANIA 0800872678 - Apel gratuit *8000 - Apel tarifat ...
Page 74 - Memo


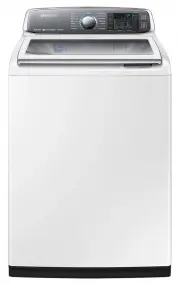
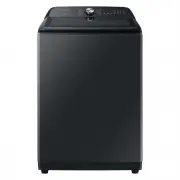
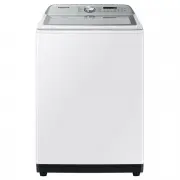 Samsung WA10A8376GW
User Manual
Samsung WA10A8376GW
User Manual
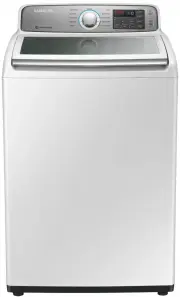 Samsung WA10H7200GW
User Manual
Samsung WA10H7200GW
User Manual
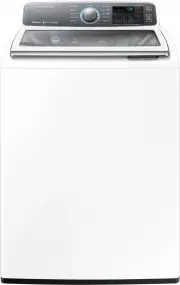 Samsung WA10J7700GW
User Manual
Samsung WA10J7700GW
User Manual
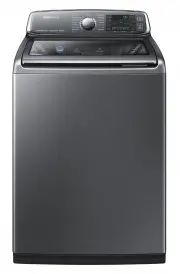 Samsung WA10J8700GP
User Manual
Samsung WA10J8700GP
User Manual
 Samsung WA10J8700GW
User Manual
Samsung WA10J8700GW
User Manual
 Samsung WA11M8700GV
User Manual
Samsung WA11M8700GV
User Manual
 Samsung WA12A8376GW
User Manual
Samsung WA12A8376GW
User Manual
 Samsung WA13M8700GV
User Manual
Samsung WA13M8700GV
User Manual
 Samsung WA13M8700GW
User Manual
Samsung WA13M8700GW
User Manual
 Samsung WA14A8377GV
User Manual
Samsung WA14A8377GV
User Manual
 Samsung WA14A8377GW
User Manual
Samsung WA14A8377GW
User Manual
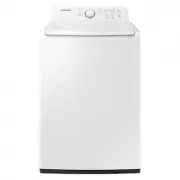 Samsung WA40A3005AW
User Manual
Samsung WA40A3005AW
User Manual
 Samsung WA40A3005AW/A4
User Manual
Samsung WA40A3005AW/A4
User Manual
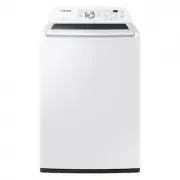 Samsung WA44A3205AW
User Manual
Samsung WA44A3205AW
User Manual
 Samsung WA44A3205AW/A4
User Manual
Samsung WA44A3205AW/A4
User Manual
 Samsung WA44A3405AP
User Manual
Samsung WA44A3405AP
User Manual
 Samsung WA44A3405AV
User Manual
Samsung WA44A3405AV
User Manual
 Samsung WA45T3200AW
User Manual
Samsung WA45T3200AW
User Manual