Page 2 - Contents; Safety information
English English 2 Contents Safety information 4 What you need to know about the safety instructions 4 Important safety symbols 4 Important safety precautions 5 Critical installation warnings 6 Installation cautions 7 Critical usage warnings 8 Usage cautions 9 Critical cleaning warnings 12 Installati...
Page 3 - Maintenance
English English 3 Maintenance 48 Drum clean+ 48 Emergency drain 49 Cleaning 50Defrosting your washing machine 54 Care against an extended time of disuse 54 Troubleshooting 55 Checkpoints 55Information codes 59 Specifications 62 Fabric care chart 62 Protecting the environment 62 Spare parts guarant...
Page 4 - What you need to know about the safety instructions; What the icons and signs in this user manual mean:; CAUTION; CAUTION
English English 4 Safety information Congratulations on your new Samsung washing machine. This manual contains important information on the installation, use and care of your appliance. Please take some time to read this manual to take full advantage of your washing machine’s many benefits and featu...
Page 5 - Important safety precautions; WARNING; : This appliance can be used by children aged from 8 years; For use in Europe; : Children of less than 3 years should be kept away unless
English English 5 Important safety precautions WARNING To reduce the risk of fire, electric shock, or injury to persons when using your appliance, follow basic precautions, including the following:1. This appliance is not to be used by persons (including children) with reduced physical, sensory or...
Page 6 - bed and breakfast type environments; Critical installation warnings; Unplug the power plug and clean it with a dry cloth.
English Safety information English 6 9. This appliance is intended to be used in household only and it is not intended to be used such as: ‒ staff kitchen areas in shops, offices and other working environments; ‒ farm houses; ‒ by clients in hotels, motels and other residential type environments; ‒ ...
Page 7 - Installation cautions
English English 7 Do not install this appliance in a humid, oily or dusty location, or in a location exposed to direct sunlight or water (rain drops).Do not install this appliance in a location exposed to low temperatures. • Frost may cause the tubes to burst. Do not install this appliance in a lo...
Page 8 - Critical usage warnings
English Safety information English 8 Critical usage warnings WARNING If the appliance is flooded, turn off the water & power supplies immediately and contact your nearest service centre. • Do not touch the power plug with wet hands. • Failure to do so may result in electric shock. If the applian...
Page 9 - Failure to do so may result in electric shock or fire.; Usage cautions; If the glass is broken, it may result in injury.
English English 9 Do not attempt to repair, disassemble, or modify the appliance yourself. • Do not use a fuse (such as copper, steel wire, etc.) other than a standard fuse. • When the appliance needs to be repaired or reinstalled, contact your nearest service centre. • Failure to do so may result...
Page 10 - This may result in injury due to a malfunction.
English Safety information English 10 Ensure that the rubber seal and front door glass are not contaminated by a foreign substance (e.g. waste, thread, hair, etc.). • If a foreign substance is caught in the door or the door is not completely closed, it may cause a water leak. Open the water tap and ...
Page 12 - This may result in discolouration or fabric damage.; Critical cleaning warnings
English Safety information English 12 Sort the laundry by colour on the basis of its colorfastness and select the recommended cycle, water temperature and additional functions. • This may result in discolouration or fabric damage. Take care that children’s fingers are not caught in the door when you...
Page 13 - Installation; What’s included
English English 13 Installation Follow these instructions carefully to ensure proper installation of the washing machine and to prevent accidents when doing laundry. What’s included Make sure all the parts are included in the product package. If you have a problem with the washing machine or the p...
Page 14 - NOTE
English Installation English 14 Spanner Bolt caps Hose guide Cold water hose Hot water hose Liquid detergent guide (applicable models only) Accessories (not supplied) Bracket-Stacking kit Bracket-Stacking kit (Part # SKK-DF) WW7*T4*****, WW**T4*****, WW**T5*****, WW8*T6*****, WW8*T7*****, WW9*T6****...
Page 15 - Installation requirements; Electrical supply and grounding; Do NOT use an extension cord.; Water supply; Make sure water taps are easily accessible.; Drain
English English 15 Installation requirements Electrical supply and grounding • AC 220-240 V / 50 Hz fuse or circuit breaker is required. • Use an individual branch circuit specific to the washing machine. To ensure proper grounding, the washing machine comes with a power cord featuring a three-pro...
Page 16 - Flooring; Water temperature; Minimum clearance for stable operation:
English Installation English 16 Flooring For best performance, the washing machine must be installed on a solid floor. Wood floors may need to be reinforced to minimise vibration and/or unbalanced loads. Carpeting and soft tile surfaces do not resist vibration well and may cause the washing machine ...
Page 17 - STEP 1; STEP 2
English English 17 Step-by-step installation STEP 1 Select a location Location requirements: • Solid, level surface without carpeting or flooring that may obstruct ventilation • Away from direct sunlight • Adequate room for ventilation and wiring • The ambient temperature is always higher than th...
Page 19 - Insert the
English English 19 B 3. Insert the bolt caps (B) to the holes (marked with circle in the figure). U-PJT_WASHER-MD_SimpleUX_DC68-04220A-01_AU_EN(����+�7.5��).indd 19 2020/9/29 13:02:28
Page 20 - STEP 3; Gently slide the washing machine into position.
English Installation English 20 STEP 3 Adjust the levelling feet 1. Gently slide the washing machine into position. Excessive force may damage the levelling feet. 2. Level the washing machine by manually adjusting the levelling feet. 3. When levelling is complete, tighten the nuts using the spanner...
Page 21 - STEP 4; Connecting to a threaded water tap; Connect the water hose to the water tap, and then; Connect the other end of the water hose to the
English English 21 STEP 4 Connect the water hose The provided water hose may differ depending on the model. Please follow the instruction according to the provided water hose. Connecting to a threaded water tap 1. Connect the water hose to the water tap, and then turn it to the right to tighten. ...
Page 22 - Connecting to a non-threaded water tap
English Installation English 22 Connecting to a non-threaded water tap A B 1. Remove the adaptor (A) from the water hose (B) . 2. Use a Phillips screwdriver to loosen four screws on the adaptor. C 3. Hold the adaptor and turn part (C) in the arrow direction to loosen it by 5 mm (*). C 4. Insert the ...
Page 25 - STEP 5; The drain hose can be positioned in three ways:; Over the edge of a wash basin; . Secure the guide to the wall using a hook to; In a drain pipe; Drain standpipe requirements:
English English 25 STEP 5 Position the drain hose The drain hose can be positioned in three ways: A Over the edge of a wash basin The drain hose must be placed between 60 cm and 90 cm (*) above from the floor. To keep the spout of the drain hose bent, use the supplied plastic hose guide (A) . Sec...
Page 26 - In a sink drain pipe branch; STEP 6; Environment
English Installation English 26 In a sink drain pipe branch The drain pipe branch must be above the sink siphon so that the end of the hose is at least 60 cm above the ground.(*) : 60 cm CAUTION Remove the lid on the sink drain pipe branch before connecting the drain pipe to it. STEP 6 Power on Plu...
Page 27 - Before you start; Initial setup; Navigation dial; Run Calibration; Calibration
English English 27 Before you start Initial setup • When you turn on the washing machine for the first time, the screen shows the initial setup process. Follow the on-screen instructions to complete it. • Initial setup will not repeat after you’ve completed it. • The initial setup includes languag...
Page 28 - Laundry guidelines; Sort the laundry according to these criteria:; Empty all the pockets of your laundry items
English Before you start English 28 Laundry guidelines STEP 1 Sort Sort the laundry according to these criteria: • Care Label: Sort the laundry into cottons, mixed fibres, synthetics, silks, wools, and rayon. • colour: Separate whites from colours. • Size: Mixing different sized items together in t...
Page 29 - Unbalanced laundry may reduce the spinning performance.
English English 29 STEP 5 Determine the load capacity Do not overload the washing machine. Overloading may cause the washing machine to not wash properly. For the load capacity for the type of clothing, see page 36 . NOTE When washing bedding or bedding covers, the wash time may be lengthened or ...
Page 30 - Laundry capsules; Put the capsule in the bottom of the empty drum
English Before you start English 30 Laundry capsules To get the best results from using laundry capsules, please follow these instructions. 1. Put the capsule in the bottom of the empty drum towards the rear. 2. Put the laundry in the drum on top of the capsule. CAUTION For cycles using cold water o...
Page 31 - Detergent drawer guidelines; Prewash compartment; To apply washing agents to the manual dispenser; compartment
English English 31 Detergent drawer guidelines The manual dispenser models provide a three-compartment dispenser: the left compartment for the main wash, the centre for fabric softeners, and the right for the preliminary wash. A 1. Prewash compartment : Apply prewash detergent. 2. Main-wash compar...
Page 33 - To use liquid detergent manually (applicable models only); detergent to the container below the marked; max line
English English 33 To use liquid detergent manually (applicable models only) A First insert the provided liquid detergent container in the main-wash compartment . Then, apply liquid detergent to the container below the marked max line (A) . U-PJT_WASHER-MD_SimpleUX_DC68-04220A-01_AU_EN(����+�7.5��...
Page 34 - Operations; Control panel; E Cotton
English English 34 Operations Control panel E Cotton Optimal energy efficiency 01 03 02 04 10 05 06 07 08 09 01 Power Tap to turn the washing machine on or off. • If you do not manipulate the control panel for 10 minutes after the washing machine is turned on, the washing machine automatically turns...
Page 35 - Icon descriptions; Operating a cycle
English English 35 Icon descriptions Wi-Fi • This icon indicates that the washing machine is connected to Wi-Fi. Smart Control • This icon indicates that Smart Control is on. • For more information on Smart Control, see page 44 . Door Lock • This icon indicates the door is locked and cannot be ope...
Page 36 - Cycle overview
English Operations English 36 Cycle overview Cycle Description Max load (kg) Cotton • For cottons, bed linens, table linens, underwear, towels, or shirts. The washing time and the rinse count are automatically adjusted according to the load. • For cleaning lightly soiled cotton items at a nominal te...
Page 38 - For best performance, use liquid detergent.
English Operations English 38 Cycle Description Max load (kg) Colours • Featuring additional rinses and reduced spinning to ensure that the laundry is washed gently and rinsed thoroughly. 4 Synthetics • For fabrics that are made of polyester(diolen, trevira), polyamide (perlon, nylon), or the like. ...
Page 39 - Additional functions; Using Additional Functions
English English 39 Additional functions Using Additional Functions 1. Tap . 2. Turn the Navigation dial to select the desired additional function. 3. Tap to change the selected function’s settings or start the function. NOTE • To return to the main screen, tap again or turn the Navigation dial to ...
Page 40 - My Cycles
English Operations English 40 My Cycles Add or remove cycles to create a personal cycle list. 1. Tap . 2. Turn the Navigation dial to select My Cycles , and then tap . - You can only edit a cycle to create a personal cycle when the washing machine is not operating. 3. Turn the Navigation dial to sel...
Page 41 - System functions; Using System Functions
English English 41 System functions Using System Functions 1. Tap and hold for 3 seconds. 2. Turn the Navigation dial and select the desired system function, and then tap . 3. Tap to change the selected function’s settings or start the function. NOTE To return to the main screen, tap again or turn...
Page 42 - Language
English Operations English 42 Wi-Fi You can turn the washing machine's Wi-Fi on or off. 1. Tap and hold for 3 seconds. 2. Turn the Navigation dial to select Wi-Fi , and then tap . 3. Tap to select On or Off . - The washing machine's Wi-Fi is off as a factory default setting. However, the washing mac...
Page 43 - Special features
English English 43 Special features AddWash (applicable models only) To add laundry after the wash starts, use the AddWash door. 1. Tap and hold to stop the wash cycle. 2. Press the upper area of the AddWash door to unlock the door. The door will move inward slightly when you press it and then ope...
Page 44 - AddWash door is open
English Operations English 44 • When the AddWash door closes, the door seals up and no water can leak. However, you may encounter what appears to be water leak around the door - some residual water remaining around the AddWash door may form water drops. This is normal. • Neither the main door nor th...
Page 45 - Stay Connect; standby power saving mode after completing a cycle.; In some circumstances, only the Door Lock icon may be illuminated.
English English 45 Stay Connect Set up the Stay Connect function in your SmartThings app to keep Smart Control turned on at the end of a cycle. Your washing machine stays connected to the app so you can send additional instructions, whether you are at home or away. 1. If you turn on the Stay Conne...
Page 46 - SmartThings; Download
English Operations English 46 SmartThings Wi-Fi connection On your smartphone or tablet, go to Settings and turn on the wireless connection and select an AP (Access Point). • This appliance supports the Wi-Fi 2.4 GHz protocols. Download On an app market (Google Play Store, Apple App Store, Samsung G...
Page 47 - Open Source Announcement
English English 47 Open Source Announcement The software included in this product contains open source software. You may obtain the complete corresponding source code for a period of three years after the last shipment of this product by contacting our support team via http://opensource.samsung.co...
Page 49 - Emergency drain; filter cover
English English 49 Emergency drain In case of a power failure, drain the water inside the drum before taking out the laundry. 1. Power off and unplug the washing machine from the electrical outlet. 2. Gently press the top area of the filter cover to open. A 3. Put an empty, spacious container arou...
Page 50 - Cleaning; Surface of the washing machine
English Maintenance English 50 Cleaning Surface of the washing machine Use a soft cloth with a nonabrasive household detergent. Do not spray water onto the washing machine. AddWash door A 1. Open the AddWash door. 2. Use a wet cloth to clean the AddWash door. - Do not use cleaning agents. Discoloura...
Page 51 - Mesh filter
English English 51 Mesh filter Clean the mesh filter of the water hose once or twice a year. 1. Turn off the washing machine, and unplug the power cord. 2. Close the water tap. 3. Loosen and disconnect the water hose from the back of the washing machine. Cover the hose with a cloth to prevent wate...
Page 52 - Debris filter
English Maintenance English 52 Debris filter It is advisable to clean the debris filter every 2 months to prevent its clogging. A clogged debris filter may reduce the bubble effect. 1. Turn off the washing machine, and unplug the power cord. 2. Drain the remaining water inside the drum. See the Emer...
Page 53 - Detergent drawer; release lever
English English 53 Detergent drawer 1. While holding down the release lever inside the drawer, slide open the drawer. 2. Clean the drawer components in flowing water using a soft brush. 3. Clean the drawer recess using a soft brush. 4. Reinsert the liquid detergent container to the drawer. 5. Slid...
Page 54 - Defrosting your washing machine; Care against an extended time of disuse
English Maintenance English 54 Defrosting your washing machine The washing machine may freeze when it drops below 0 °C. 1. Turn off the washing machine, and unplug the power cord. 2. Pour warm water over the water tap to loosen the water hose. 3. Disconnect the water hose, and soak it in warm water....
Page 55 - Troubleshooting; Checkpoints; Problem
English English 55 Troubleshooting If there is any problem, check the information message on the LCD screen and follow the on-screen instructions.If the problem persists, please contact the service center. Checkpoints If you encounter a problem with the washing machine, first check the table below...
Page 59 - Information codes
English English 59 Information codes If the washing machine fails to operate, you may see an information code on the screen. Check the table below and try the suggestions. Code Action Check drainage Water is not draining. • Make sure the drain hose is not frozen or clogged. • Make sure the drain h...
Page 61 - Code
English English 61 Code Action AC6 Check communications between the main and the inverter PBAs. • Depending on the state, the machine may automatically returns to normal operation. • Turn the machine off, and restart the cycle. • If the information code remains, contact a customer service centre. ...
Page 62 - Specifications; Fabric care chart
English English 62 Specifications Fabric care chart The following symbols provide garment care directions. The care labels include four symbols in this order: washing, bleaching, drying and ironing (and dry cleaning when necessary). The use of symbols ensures consistency among garment manufacturers ...
Page 63 - Spare parts guarantee; Type
English English 63 Spare parts guarantee We guarantee that the following spare parts will be available to professional repairers and end-users for a minimum period of 10 years after placing the last unit of the model on the market. • Door, door hinges and seals, other seals, door locking assembly,...
Page 64 - AUSTRALIA
QUESTIONS OR COMMENTS? COUNTRY CALL OR VISIT US ONLINE AT AUSTRALIA 1300 362 603 (Other) www.samsung.com/au/support NEW ZEALAND 0800 726 786 (All Product) www.samsung.com/nz/support DC68-04220A-01 U-PJT_WASHER-MD_SimpleUX_DC68-04220A-01_AU_EN(����+�7.5��).indd 64 2020/9/29 13:02:51


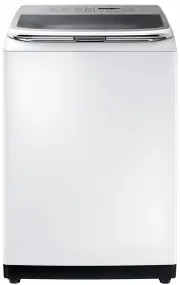
 Samsung WA10A8376GW
User Manual
Samsung WA10A8376GW
User Manual
 Samsung WA10H7200GW
User Manual
Samsung WA10H7200GW
User Manual
 Samsung WA10J7700GW
User Manual
Samsung WA10J7700GW
User Manual
 Samsung WA10J8700GP
User Manual
Samsung WA10J8700GP
User Manual
 Samsung WA10J8700GW
User Manual
Samsung WA10J8700GW
User Manual
 Samsung WA11M8700GV
User Manual
Samsung WA11M8700GV
User Manual
 Samsung WA12A8376GW
User Manual
Samsung WA12A8376GW
User Manual
 Samsung WA13M8700GV
User Manual
Samsung WA13M8700GV
User Manual
 Samsung WA13M8700GW
User Manual
Samsung WA13M8700GW
User Manual
 Samsung WA14A8377GV
User Manual
Samsung WA14A8377GV
User Manual
 Samsung WA14A8377GW
User Manual
Samsung WA14A8377GW
User Manual
 Samsung WA40A3005AW
User Manual
Samsung WA40A3005AW
User Manual
 Samsung WA40A3005AW/A4
User Manual
Samsung WA40A3005AW/A4
User Manual
 Samsung WA44A3205AW
User Manual
Samsung WA44A3205AW
User Manual
 Samsung WA44A3205AW/A4
User Manual
Samsung WA44A3205AW/A4
User Manual
 Samsung WA44A3405AP
User Manual
Samsung WA44A3405AP
User Manual
 Samsung WA44A3405AV
User Manual
Samsung WA44A3405AV
User Manual
 Samsung WA45T3200AW
User Manual
Samsung WA45T3200AW
User Manual