Page 2 - Contents; Safety information
English 2 Contents Contents Safety information 4 What you need to know about the safety instructions 4 Important safety symbols 4 Important safety precautions 5 Critical installation warnings 9 Installation cautions 10 Critical usage warnings 11 Usage cautions 12 Critical cleaning warnings 16 Instru...
Page 3 - Maintenance
English 3 Contents Maintenance 53 Eco drum clean 53 Smart Check 54 Emergency drain 55 Cleaning 56Recovery from freezing 61 Care against an extended time of disuse 61 Troubleshooting 62 Checkpoints 62Information codes 67 Specifications 70 Fabric care chart 70 Protecting the environment 71 Specificati...
Page 4 - What you need to know about the safety instructions; What the icons and signs in this user manual mean:
English 4 Safety information Congratulations on your new Samsung washing machine. This manual contains important information on the installation, use and care of your appliance. Please take some time to read this manual to take full advantage of your washing machine’s many benefits and features. Wha...
Page 5 - Important safety precautions; WARNING; This appliance is not intended for use by persons (including
English 5 Safety information These warning signs are here to prevent injury to yourself and others.Please follow them explicitly.After reading this manual, store it in a safe place for future reference. Read all instructions before using the appliance. As with any equipment that uses electricity and...
Page 6 - For use in Europe
Safety information English 6 Safety information 4. If the supply cord is damaged, it must be replaced by the manufacturer, its service agent or similarly qualified persons in order to avoid a hazard. 5. The new hose-sets supplied with the appliance are to be used and that old hose-sets should not be...
Page 8 - This appliance is intended to be used in household only and it is
Safety information English 8 Safety information 23. This appliance is intended to be used in household only and it is not intended to be used such as: - staff kitchen areas in shops, offices and other working environments; - farm houses;- by clients in hotels, motels and other residential type envir...
Page 9 - Critical installation warnings
English 9 Safety information Critical installation warnings WARNING The installation of this appliance must be performed by a qualified technician or service company.• Failure to do so may result in electric shock, fire, an explosion, problems with the product, or injury. The appliance is heavy, the...
Page 10 - Installation cautions; CAUTION
Safety information English 10 Safety information Do not install this appliance in a location where gas may leak.• This may result in electric shock or fire. Do not use an electric transformer.• This may result in electric shock or fire. Do not use a damaged power plug, damaged power cord, or loose w...
Page 11 - Critical usage warnings
English 11 Safety information Critical usage warnings WARNING If the appliance is flooded, turn off the water & power supplies immediately and contact your nearest service centre.• Do not touch the power plug with wet hands.• Failure to do so may result in electric shock. If the appliance genera...
Page 12 - Usage cautions
Safety information English 12 Safety information Do not let children or the infirm use this washing machine without proper supervision. Do not let children climb in or onto the appliance.• This may result in electric shock, burns or injury. Do not insert your hand or a metal object under the washing...
Page 16 - Critical cleaning warnings; Instructions about the WEEE; (Applicable in countries with separate collection systems)
Safety information English 16 Safety information Critical cleaning warnings WARNING Do not clean the appliance by spraying water directly onto it. Do not use a strong acidic cleaning agent. Do not use benzene, thinner or alcohol to clean the appliance.• This may result in discolouration, deformation...
Page 17 - What’s included; Installation
English 17 Installation Follow these instructions carefully to ensure proper installation of the washing machine and to prevent accidents when doing laundry. What’s included Make sure all the parts are included in the product package. If you have a problem with the washing machine or the parts, cont...
Page 19 - Installation requirements; Electrical supply and grounding; Water supply; Drain
English 19 Installation Installation requirements Electrical supply and grounding • AC 220-240 V / 50 Hz fuse or circuit breaker is required. • Use an individual branch circuit specific to the washing machine. To ensure proper grounding, the washing machine comes with a power cord featuring a three-...
Page 20 - Flooring; Water temperature; Minimum clearance for stable operation:
Installation English 20 Installation Flooring For best performance, the washing machine must be installed on a solid floor. Wood floors may need to be reinforced to minimise vibration and/or unbalanced loads. Carpeting and soft tile surfaces are not a good resistance to vibrations and may cause the ...
Page 21 - STEP 1; Select a location; STEP 2; Remove the shipping bolts; Unpack the product package and remove all shipping bolts.
English 21 Installation Step-by-step installation STEP 1 Select a location Location requirements:• Solid, level surface without carpeting or flooring that may obstruct ventilation• Away from direct sunlight• Adequate room for ventilation and wiring• The ambient temperature is always higher than the ...
Page 23 - STEP 3; Adjust the levelling feet; STEP 4; Connect the water hose
English 23 Installation STEP 3 Adjust the levelling feet 1. Gently slide the washing machine into position. Excessive force may damage the levelling feet. 2. Level the washing machine by manually adjusting the levelling feet. 3. When levelling is complete, tighten the nuts using the spanner. STEP 4 ...
Page 27 - STEP 5; Position the drain hose; The drain hose can be positioned in three ways:
English 27 Installation STEP 5 Position the drain hose The drain hose can be positioned in three ways: A Over the edge of a wash basin The drain hose must be placed at a height of between 60 cm and 90 cm (*) from the floor. To keep the spout of the drain hose bent, use the supplied plastic hose guid...
Page 28 - STEP 6; Power on; Power
Installation English 28 Installation In a sink drain pipe branch The drain pipe branch mush be above the sink siphone so that the end of the hose is at least 24 in. (60 cm) above the ground.(*) : 24 in. (60 cm) STEP 6 Power on Plug the power cord into a wall socket featuring an AC 220-240 V / 50 Hz ...
Page 29 - Before you start; Initial settings; Delay End; Laundry guidelines; Sort; Sort the laundry according to these criteria:
English 29 Before you start Initial settings Run Calibration (recommended) Calibration ensures accurate weight detection by the washing machine. Make sure the drum is empty before running Calibration. 1. Power off, and then power on the washing machine. 2. Press and hold Temp. and Delay End simultan...
Page 30 - Empty pockets; Empty all the pockets of your laundry items; Use a laundry net; brassieres may break through and tear other laundry items.; Determine the load capacity; NOTE
Before you start English 30 Before you start STEP 2 Empty pockets Empty all the pockets of your laundry items • Metal objects such as coins, pins, and buckles on clothing may damage other laundry items as well as the drum. Turn clothing with buttons and embroideries inside out • If trousers or jacke...
Page 31 - Apply a proper detergent type
English 31 Before you start STEP 6 Apply a proper detergent type The type of detergent depends on the type of fabric (cotton, synthetic, delicate items, wool), colour, wash temperature, and degree of soiling. Make sure to use the laundry detergent that is designed for automatic washing machines. NOT...
Page 33 - Detergent drawer guidelines; Auto Detergent
English 33 Before you start Detergent drawer guidelines The automatic dispenser models provide a three-compartment dispenser: two compartments for auto dispensing and another part for manual input. With Auto Detergent and Auto Softener enabled, the washing machine dispenses an adequate amount of det...
Page 34 - To apply washing agents to the auto dispenser
Before you start English 34 Before you start • Do not use the following types of detergent in the drawer: - Tablet or capsule types- Ball or net types • To prevent the compartment from clogging, concentrated or highly-enriched agents (fabric softener or detergent) must be diluted with water before b...
Page 36 - Control panel; Operations
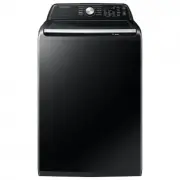
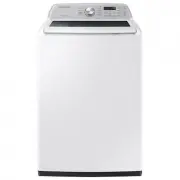
English 36 Operations Control panel The actual design of the control panel may differ with the model. 01 02 02 03 04 05 09 08 06 07 12 11 10 01 Cycle Selector Turn the dial to select a cycle. 02 Display The display shows current cycle information and estimated time remaining, or an information code ...
Page 38 - Simple steps to start; Standard steps; To change the cycle during operation
Operations English 38 Operations Simple steps to start Standard steps 1 4 4 6 2 3 5 1. Press Power to turn on the washing machine. 2. Select a cycle in the cycle panel. 3. Change the cycle settings ( Temp. , Rinse , and Spin ) as necessary. 4. Press Options or Dry Option to add desired options. Avai...
Page 39 - Drying only
English 39 Operations Drying only Follow these steps to dry damp laundry or laundry that has just finished washing. 1 2 3 1. Press Power to turn on the washing machine. 2. Press Dry Option repeatedly until a desired dry level is set. 3. Press and hold Start/Pause (Hold to Start) . To change the cycl...
Page 40 - Cycle overview; Standard cycles
Operations English 40 Operations Cycle overview Standard cycles Cycle Description & Max load (kg) COTTON • For cottons, bed linens, table linens, underwear, towels, or shirts. The washing time and the rinse count are automatically adjusted according to the load. MAX SYNTHETICS • For blouses or s...
Page 41 - Dry cycles
English 41 Operations Cycle Description & Max load (kg) HYGIENE STEAM • Cotton and linen fabric which have been in direct contact with the skin, e.g. underwear. For optimum hygiene results select a temperature of 60 °C or above. • Steam cycles feature allergy care and bacteria elimination (steri...
Page 42 - Options
Operations English 42 Operations Options Option Description Pre Wash • This will add a preliminary washing cycle before the main wash cycle. Intensive • For badly soiled laundry. The operation time for each cycle is longer than normal. Bubble Soak Press to activate/deactivate the Bubble Soak functio...
Page 43 - Load sensor
English 43 Operations Delay End You can set the washing machine to finish your wash automatically at a later time, choosing a delay of between 1 to 24 hours (in 1 hour increments). The hour displayed indicates the time the wash will finish. 1. Select a cycle with necessary settings. 2. Press Delay E...
Page 44 - Special features; AddWash
Operations English 44 Operations Special features AddWash When the AddWash indicator is on, you can stop operation of the machine and put additional laundry or softener into the drum. The Add Door opens by more than 130° for easy access. 1. Press Start/Pause (Hold to Start) to stop operation. 2. Pre...
Page 46 - Settings; Child Lock
Operations English 46 Operations Settings Child Lock To prevent children or infants from accidentally starting or setting the washing machine, Child Lock locks all buttons except for the Power button. To activate Child Lock • Press and hold Dose per Wash and Dose per Rinse simultaneously for 3 secon...
Page 47 - Auto dispense; Detergent
English 47 Operations Auto dispense Detergent 1. To select an input level, press Dose per Wash to cycle through the settings: Less > Standard > More.- If you choose More, the rinse process will be added once more. 2. To select a water hardness level, press and hold Dose per Wash to cycle throu...
Page 48 - SmartThings; Download
Operations English 48 Operations SmartThings Wi-Fi connection On your smartphone, go to the Settings and turn on the wireless connection and select an AP (Access Point). NOTE • This device is designed for household use only (Class B), and can be used in all residential areas. • This device may cause...
Page 49 - Log in; To register your device to SmartThings
English 49 Operations • The app is subject to change without notice for improved performance. Log in You must first log into SmartThings with your Samsung account. To create a new Samsung account, follow the instructions on the app. You don’t need a separate app to create your account. NOTE If you h...
Page 52 - Open Source Announcement
Operations English 52 Operations Open Source Announcement The software included in this product contains open source software. You may obtain the complete corresponding source code for a period of three years after the last shipment of this product by sending an email to mailto:[email protected]...
Page 53 - Eco drum clean; ECO DRUM CLEAN reminder; ECO DRUM CLEAN
English 53 Maintenance Keep the washing machine clean to prevent deteriorated performance and to preserve its life cycle. Eco drum clean Perform this cycle regularly to clean the drum by removing bacteria from it. This cycle heats the water between 60 °C and 70 °C, and it also removes accumulated di...
Page 54 - Smart Check; Rinse
Maintenance English 54 Maintenance Smart Check To enable this function, you must first download the Samsung Smart Washer app at the Play Store or the App Store, and install it on a mobile device featuring a camera function. The Smart Check function has been optimised for Galaxy & iPhone series (...
Page 55 - Emergency drain; filter
English 55 Maintenance Emergency drain In case of a power failure, drain the water inside the drum before taking out the laundry. 1. Power off and unplug the washing machine from the electrical outlet. 2. Gently press the top area of the filter cover to open. A 3. Put an empty, spacious container ar...
Page 56 - Cleaning; Surface of the washing machine; locking
Maintenance English 56 Maintenance Cleaning Surface of the washing machine Use a soft cloth with a nonabrasive household detergent. Do not spray water onto the washing machine. Add Door A 1. Open the Add Door. 2. Use a wet cloth to clean the Add Door. - Do not use cleaning agents. Discolouration may...
Page 57 - Mesh filter
English 57 Maintenance Mesh filter Clean the mesh filter of the water hose once or twice a year. 1. Turn off the washing machine, and unplug the power cord. 2. Close the water tap. 3. Loosen and disconnect the water hose from the back of the washing machine. Cover the hose with a cloth to prevent wa...
Page 58 - Pump filter
Maintenance English 58 Maintenance Pump filter It is advisable to clean the pump filter 5 or 6 times a year to prevent its clogging. A clogged pump filter may reduce the bubble effect. 1. Turn off the washing machine, and unplug the power cord. 2. Drain the remaining water inside the drum. See the E...
Page 59 - Detergent drawer; While holding down the
English 59 Maintenance Detergent drawer 1. While holding down the release lever on the inner of the drawer, slide open the drawer. 2. Remove both the detergent compartment and the softener compartment as shown. CAUTION Use caution when removing the drawer. Remaining washing agents may spill out. 3. ...
Page 61 - Recovery from freezing; Care against an extended time of disuse; Cycle Selector
English 61 Maintenance Recovery from freezing The washing machine may freeze when it drops below 0 °C. 1. Turn off the washing machine, and unplug the power cord. 2. Pour warm water over the water tap to loosen the water hose. 3. Disconnect the water hose, and soak it in warm water. 4. Pour warm wat...
Page 62 - Troubleshooting; Checkpoints; Problem
English 62 Troubleshooting Checkpoints If you encounter a problem with the washing machine, first check the table below and try the suggestions. Problem Action Does not start. • Make sure the washing machine is plugged in.• Make sure the door is properly closed.• Make sure the water taps are open.• ...
Page 67 - Information codes; Code
English 67 Troubleshooting Information codes If the washing machine fails to operate, you may see an information code on the screen. Check the table below and try the suggestions. Code Action 4C Water is not supplied.• Make sure the water taps are open.• Make sure the water hoses are not clogged.• M...
Page 70 - Fabric care chart; Specifications
English 70 Specifications Fabric care chart The following symbols provide garment care directions. The care labels include four symbols in this order: washing, bleaching, drying and ironing (and dry cleaning when necessary). The use of symbols ensures consistency among garment manufacturers of domes...
Page 71 - Protecting the environment
English 71 Specifications Protecting the environment • This appliance is manufactured from recyclable materials. If you decide to dispose of this appliance, please observe local waste disposal regulations. Cut off the power cord so that the appliance cannot be connected to a power source. Remove the...
Page 72 - Specification sheet; Type
Specifications English 72 Specifications Specification sheet “*” Asterisk(s) means variant model and can be varied (0-9) or (A-Z). Type Front loading washing machine Model name WD10N84**** Wash and spin capacity 10.0 kg Dry capacity 6.0 kg Dimensions W600 x D600 x H850 (mm) Water pressure 50 kPa - 8...
Page 75 - Memo
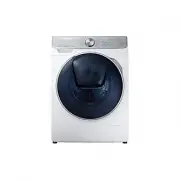


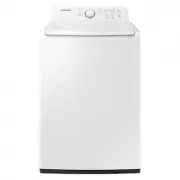
 Samsung WA10J8700GW
User Manual
Samsung WA10J8700GW
User Manual
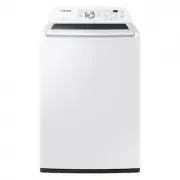
 Samsung WA12A8376GW
User Manual
Samsung WA12A8376GW
User Manual
 Samsung WA13M8700GV
User Manual
Samsung WA13M8700GV
User Manual
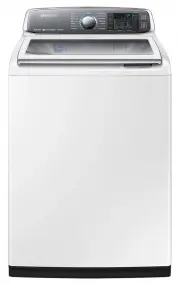
 Samsung WA40A3005AW
User Manual
Samsung WA40A3005AW
User Manual
 Samsung WA40A3005AW/A4
User Manual
Samsung WA40A3005AW/A4
User Manual
 Samsung WA44A3205AW
User Manual
Samsung WA44A3205AW
User Manual
 Samsung WA44A3205AW/A4
User Manual
Samsung WA44A3205AW/A4
User Manual
 Samsung WA44A3405AP
User Manual
Samsung WA44A3405AP
User Manual
 Samsung WA44A3405AV
User Manual
Samsung WA44A3405AV
User Manual
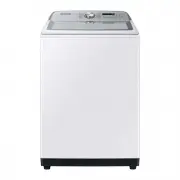
 Samsung WA45T3200AW
User Manual
Samsung WA45T3200AW
User Manual
 Samsung WA45T3400AP
User Manual
Samsung WA45T3400AP
User Manual
 Samsung WA45T3400AV
User Manual
Samsung WA45T3400AV
User Manual
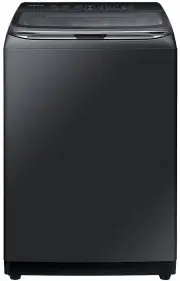
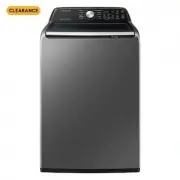
 Samsung WA46CG3505AV
User Manual
Samsung WA46CG3505AV
User Manual
 Samsung WA46CG3505AVA4
User Manual
Samsung WA46CG3505AVA4
User Manual
 Samsung WA46CG3505AW
User Manual
Samsung WA46CG3505AW
User Manual
 Samsung WA47CG3500AV
User Manual
Samsung WA47CG3500AV
User Manual
 Samsung WA47CG3500AW
User Manual
Samsung WA47CG3500AW
User Manual