Samsung WA85F7S6DRA - Manuals
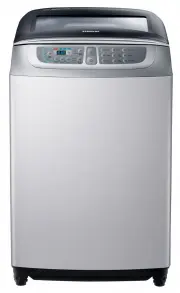
User Manual Samsung WA85F7S6DRA


Summary
2_features features • Wobble Technology The Wobble Technology provides enhanced fabric protection by controlling the fl ow of water in an innovative way.Wobble Technology cleans even delicate fabrics thoroughly, eliminating tangles and preventing fabric damage caused by friction. • Digital Inverter M...
4_safety instructions safety instructions Please note that the following precautions for safety intend to prevent unpredictable danger and damage by helping the proper use in safety.When using hot water in washing, please make sure that the water should not exceed 50°C. • Plastic parts may be deform...
safety instructions_5 This appliance should be positioned so that the power plug, the water supply taps, and the drain pipes are accessible. For washing machines with ventilation openings on the base, ensure that the opening is not obstructed by a carpet or any other obstacles. Please use the new ho...
Samsung Washing Machines Manuals
-
 Samsung WA10A8376GW
User Manual
Samsung WA10A8376GW
User Manual
-
 Samsung WA10H7200GW
User Manual
Samsung WA10H7200GW
User Manual
-
 Samsung WA10J7700GW
User Manual
Samsung WA10J7700GW
User Manual
-
 Samsung WA10J8700GP
User Manual
Samsung WA10J8700GP
User Manual
-
 Samsung WA10J8700GW
User Manual
Samsung WA10J8700GW
User Manual
-
 Samsung WA11M8700GV
User Manual
Samsung WA11M8700GV
User Manual
-
 Samsung WA12A8376GW
User Manual
Samsung WA12A8376GW
User Manual
-
 Samsung WA13M8700GV
User Manual
Samsung WA13M8700GV
User Manual
-
 Samsung WA13M8700GW
User Manual
Samsung WA13M8700GW
User Manual
-
 Samsung WA14A8377GV
User Manual
Samsung WA14A8377GV
User Manual
-
 Samsung WA14A8377GW
User Manual
Samsung WA14A8377GW
User Manual
-
 Samsung WA40A3005AW
User Manual
Samsung WA40A3005AW
User Manual
-
 Samsung WA40A3005AW/A4
User Manual
Samsung WA40A3005AW/A4
User Manual
-
Samsung WA41A3000AW/A4
User Manual
-
 Samsung WA44A3205AW
User Manual
Samsung WA44A3205AW
User Manual
-
 Samsung WA44A3205AW/A4
User Manual
Samsung WA44A3205AW/A4
User Manual
-
 Samsung WA44A3405AP
User Manual
Samsung WA44A3405AP
User Manual
-
 Samsung WA44A3405AV
User Manual
Samsung WA44A3405AV
User Manual
-
 Samsung WA45T3200AW
User Manual
Samsung WA45T3200AW
User Manual
-
Samsung WA45T3200AW/A4
User Manual