Page 2 - Contents; Safety information
Engl ish English 2 Contents Safety information 4 What you need to know about the safety instructions 4 Important safety symbols 4 Important safety precautions 5 CALIFORNIA PROPOSITION 65 WARNING 5 Critical installation warnings 6 Installation cautions 7 Critical usage warnings 7 Usage cautions 9 Cri...
Page 3 - Maintenance
Engl ish English 3 Maintenance 50 SELF CLEAN 50 Cleaning the exterior 51 Cleaning the interior 51 Care for an extended period of non-use 51 Pet hair filter (applicable models only) 52 Cleaning the mesh filter 54 Cleaning the detergent drawer 55 Troubleshooting 57 Checkpoints 57Information codes 61...
Page 4 - SAVE THESE INSTRUCTIONS; What you need to know about the safety instructions
Engl ish SAVE THESE INSTRUCTIONS English 4 Safety information Congratulations on your new Samsung washer. This manual contains important information on the installation, use, and care of your appliance. Please take some time to read this manual to take full advantage of your washer’s many benefits a...
Page 5 - Important safety precautions; CALIFORNIA PROPOSITION 65 WARNING; WARNING
Engl ish SAVE THESE INSTRUCTIONS English 5 Important safety precautions WARNING To reduce the risk of fire, electric shock, or injury to persons when using your appliance, follow basic precautions, including the following: 1. Read all instructions before using this appliance. 2. Do not wash or dry...
Page 6 - Critical installation warnings
Engl ish SAVE THESE INSTRUCTIONS Safety information English 6 Critical installation warnings WARNING Plug the power cord into a wall socket that meets local electrical specifications. Use the socket for this appliance only. Do not use an extension cord.• Sharing a wall socket with other appliances, ...
Page 7 - Installation cautions; Critical usage warnings
Engl ish SAVE THESE INSTRUCTIONS English 7 Do not hook the power cord over a metal object, place a heavy object on the power cord, insert the power cord between objects, or push the power cord into the space behind the appliance.• This may result in electric shock or fire.Do not pull the power cor...
Page 9 - Usage cautions
Engl ish SAVE THESE INSTRUCTIONS English 9 Usage cautions CAUTION If the washer is contaminated by a foreign substance such as detergent, dirt, food waste, etc., unplug the power plug and clean the washer using a damp, soft cloth.• Failing to do so may result in discoloration, deformation, damage,...
Page 11 - Critical cleaning warnings
Engl ish SAVE THESE INSTRUCTIONS English 11 Do not wash throw rugs or doormats in the washer.• If you wash throw rugs or doormats, the sand will accumulate inside the washer. It may result in error such as no draining. Critical cleaning warnings WARNING Do not clean the appliance by spraying water...
Page 12 - Regulatory notice; FCC Notice; FCC RADIATION EXPOSURE STATEMENT:
Engl ish SAVE THESE INSTRUCTIONS English 12 Regulatory notice FCC Notice CAUTION Any changes or modifications not expressly approved by the party responsible for compliance could void the user’s authority to operate the equipment.This device complies with Part 15 of FCC Rules. Operation is Subject t...
Page 13 - IC Notice; IC RADIATION EXPOSURE STATEMENT:
Engl ish SAVE THESE INSTRUCTIONS English 13 IC Notice The term “IC” before the radio certification number only signifies that Industry Canada technical specifications were met. Operation is subject to the following two conditions: 1. This device may not cause interference, and 2. This device must ...
Page 14 - Open Source Announcement
Engl ish SAVE THESE INSTRUCTIONS Regulatory notice English 14 Open Source Announcement The software included in this product contains open source software.The following URL http://opensource.samsung.com/opensource/SMART_TP1_0/seq/0 leads to open source license information as related to this product....
Page 15 - Installation; Unpacking your washer
Engl ish English 15 Installation Follow these instructions carefully to ensure proper installation of your washer and to prevent accidents when using it. WARNING Certain internal parts are intentionally not grounded and may present a risk of electric shock only during servicing. Service personnel ...
Page 16 - What’s included
Engl ish Installation English 16 What’s included Make sure all the parts are included in the product package. If you have a problem with the washer or the parts, contact the Samsung customer care center at 1-800-SAMSUNG (1-800-726-7864) or your retailer. 01 02 03 04 06 05 08 14 13 07 11 12 10 09 01 ...
Page 17 - Parts supplied
Engl ish English 17 13 Detergent drawer 14 Power cord Parts supplied Hose guide User manual Water intake cap Cable tie Tools needed for installation Wrench Phillips screwdriver Level Adjustable pliers Measuring tape NOTE • If you lose an accessory and want to purchase a replacement, contact the Sa...
Page 18 - Installation requirements; Electrical supply and grounding; Water supply
Engl ish Installation English 18 Installation requirements Electrical supply and grounding • AC 120 V / 60 Hz / 15 AMP fuse or circuit breaker is required.• Use an individual branch circuit. Connect only the washer to the circuit.To ensure proper grounding, the washer comes with a power cord featuri...
Page 19 - Drain; Water temperature
Engl ish English 19 Drain Samsung recommends a standpipe 39 in. (990 mm) high. The drain hose must be connected through the hose clip to the standpipe, and the standpipe must fully cover the drain hose. Flooring For best performance, the washer must be installed on a solid floor. Wood floors may n...
Page 20 - Clearance requirement
Engl ish Installation English 20 Clearance requirement This clearance requirement is applicable for washers only. NOTE • For the dryer's clearance requirement, see the dryer’s user manual. • If the washer and dryer have different clearance requirements, use the one with the larger value. Alcove or c...
Page 21 - STEP 1
Engl ish English 21 Step-by-step installation STEP 1 Select a location Location requirements:• A solid, level surface without carpeting or flooring that may obstruct ventilation• No direct sunlight• Adequate room for ventilation and wiring• Ambient temperature always higher than the freezing poin...
Page 23 - STEP 3
Engl ish English 23 5. Open the water taps, and check for leaks. STEP 3 Connect the drain hose To a Laundry Tub or Drain Pipe1. Check the height (A) of your drain system and make sure the minimum and maximum heights shown below are met. Minimum 39 in. (99 cm) Maximum 96 in. (245 cm) NOTE • Make s...
Page 24 - STEP 4
Engl ish Installation English 24 * A (*): Min. 6 in. (152 mm), Max. 8 in. (203 mm) 3. Route the drain hose to the drain system. CAUTION • If using a standpipe, make sure the standpipe and drain hose connection is not airtight. • If using a standpipe, make sure the drain hose is inserted at least 6 i...
Page 27 - STEP 5
Engl ish English 27 STEP 5 Power on Plug the power cord into an AC 120 V / 60 Hz / 15 AMP approved electrical outlet protected by a 15-amp fuse or circuit breaker. Then, press Power to turn on the washer. STEP 6 Run a test cycle Run a test cycle as follows to check if your washer is properly ins...
Page 28 - Before you start; Initial settings
Engl ish English 28 Before you start Initial settings Run Calibration (recommended) Calibration ensures accurate weight detection by the washer. Make sure the tub is empty before running calibration. 1. Press Power to turn on the washer. 2. Press and hold Temp. and Delay End simultaneously for 3 sec...
Page 32 - STEP 6
Engl ish Before you start English 32 STEP 6 Add the correct detergent type The type of detergent you use - general purpose, specifically for woolens, etc. - depends on the type of fabric (cotton, synthetic, delicate items, wool), color, wash temperature, and degree of soiling. Regardless of the spe...
Page 33 - Detergent drawer guidelines
Engl ish English 33 Detergent drawer guidelines The washer provides a two-compartment dispenser for detergent and fabric softener. The bleach compartment is located on the left side of the tub. B A C A. Softener compartment : Add a recommended amount of fabric softener into the softener compartmen...
Page 34 - To add washing agents to the detergent drawer
Engl ish Before you start English 34 To add washing agents to the detergent drawer 1. Open the lid. 2. Slide open the detergent drawer. 3. Add liquid laundry detergent to the liquid detergent container in the main wash compartment. CAUTION Make sure the liquid detergent container is inserted in the ...
Page 35 - To use powdered detergent; To use the bleach compartment
Engl ish English 35 To use powdered detergent First, remove the provided liquid detergent container from the detergent compartment. Then, add powdered detergent to the detergent compartment according to the detergent manufacturer’s instructions. CAUTION Do not add powdered detergent to the liquid ...
Page 36 - Operations; Control panel
Engl ish English 36 Operations WARNING To reduce the risk of fire, electric shock, or injury to persons, read the Safety information before operating this appliance. Control panel WA5*CG715*** 01 02 03 04 05 06 13 14 07 10 08 12 09 11 WA5*CG710*** 01 02 03 04 05 06 13 14 07 10 08 11 09 12 01 Cycle S...
Page 39 - Simple steps to start; To change the cycle during operation
Engl ish English 39 Simple steps to start 1 2 3 4 5 1. Press Power to turn on the washer. 2. Turn the Cycle Selector to select a cycle. 3. Change the cycle settings ( Temp. , Rinse , Spin , and Soil ) as necessary. 4. Select desired options as necessary. 5. Press and hold Start/Pause (Hold to Star...
Page 40 - Cycle overview
Engl ish Operations English 40 Cycle overview NOTE The washer detects the weight of the items and automatically adjusts the optimal water level, washing time, rinse counts, and spin counts. (This may not be applicable on some cycles.) Cycle Description NORMAL • For cottons, bed linens, table linens,...
Page 42 - Cycle chart
Engl ish Operations English 42 Cycle chart Use this chart to set the best cycle and options for you laundry. NOTE Setting Temp. Rinse Spin Soil : factory setting 5 : Hot (Level 5) 5 : 5 times (Level 5) 5 : High (Level 5) 5 : Heavy (Level 5) : can be selected 4 : (Level 4) 4 : (Level 4) 4 : (Leve...
Page 44 - Special features
Engl ish Operations English 44 Special features Active Waterjet (for prewash) You can use the Active Waterjet function to hand-wash your items before you put them in the washer. 1. Press Power to turn on your washer. 2. Open the lid. 3. Press Active Waterjet to supply water. 4. Hand-wash the items. ...
Page 45 - Delay End; Sound Off
Engl ish English 45 Delay End You can set the washer to finish your wash automatically at a later time by choosing a delay of between 1 to 24 hours (in 1 hour increments). The hour displayed indicates the time the wash will finish. 1. Select a cycle. Then, change the cycle settings if necessary. 2...
Page 46 - Child Lock
Engl ish Operations English 46 Child Lock The Child Lock function locks the washer door to prevent children from climbing into and suffocating inside the tub. Activating the Child Lock function Press and hold Temp. and Rinse simultaneously for approximately 3 seconds. • When you activate the Child L...
Page 47 - DOWNLOADED cycle
Engl ish English 47 DOWNLOADED cycle You can choose from more cycles available on the SmartThings app on your smartphone. 1. On your smartphone, select the DOWNLOADED cycle. - You can choose from PERM PRESS, WOOL, ECO COLD, DENIM, and POWER RINSE. 2. Press Power on your washer. 3. Turn the Cycle S...
Page 48 - SmartThings; Download
Engl ish Operations English 48 SmartThings Wi-Fi connection On your smartphone, go to Settings and turn on the wireless connection and select an AP (Access Point). • This appliance supports the Wi-Fi 2.4 GHz protocols. Download On an app market (Google Play Store, Apple App Store, Samsung Galaxy App...
Page 49 - Smart Care
Engl ish English 49 Smart Care To enable this function, you must first download the Samsung Smart Washer/Dryer app from the Play Store or the App Store and install it on a mobile device that has a camera function. The Smart Care function has been optimized for Galaxy and iPhone mobile devices (app...
Page 50 - SELF CLEAN; SELF CLEAN reminder
Engl ish English 50 Maintenance Keep the washer clean for best performance and to lengthen its life cycle. WARNING Certain internal parts are intentionally not grounded and may present a risk of electric shock only during servicing. Service personnel – Do not contact the following parts while the ap...
Page 51 - Cleaning the exterior; Care for an extended period of non-use
Engl ish English 51 Cleaning the exterior 1. Turn off the water taps after finishing the day’s washing. This will shut off the water supply to your washer and prevent the unlikely possibility of damage from escaping water. Leave the lid open to allow the inside of your washer to dry out. 2. Use a ...
Page 54 - Cleaning the mesh filter
Engl ish Maintenance English 54 Cleaning the mesh filter Clean the mesh filters in the water inlets once or twice a year. 1. Turn off the washer, and then unplug the power cord. 2. Close the water taps. 3. Loosen and disconnect the water hoses from the back of the washer. Cover the end of each hose ...
Page 55 - Cleaning the detergent drawer
Engl ish English 55 Cleaning the detergent drawer 1. Fully pull out the detergent drawer. 2. To remove, pull the detergent drawer while pushing the ends of each side in. 3. Remove the inserts from the compartments. Rinse the inserts and the drawer in warm water and clean with a soft brush. Untitle...
Page 57 - Troubleshooting; Checkpoints
Engl ish English 57 Troubleshooting Checkpoints If you encounter a problem with the washer, first check the table below and try the suggestions. Problem Action Does not turn on. • Make sure your home electrical system is providing electrical power that matches the requirements of the washer. See p...
Page 61 - Information codes
Engl ish English 61 Information codes The washer may display information codes to help you understand what is occurring with your washer better. Code Meaning 1C The Water Level sensor is not working properly.• Turn off the washer, unplug it, wait 30 seconds, and then plug the washer in again. If t...
Page 64 - Specifications; Fabric care chart
Engl ish English 64 Specifications Fabric care chart The following symbols provide garment care direction. The clothing care labels include symbols for drying, bleaching, drying and ironing, or dry cleaning when necessary. The use of symbols ensures consistency among garment manufacturers of domesti...
Page 65 - Warning symbols for laundering; Helping the environment
Engl ish English 65 Warning symbols for laundering Do not wash Do not wring Do not bleach Do not tumble dry No steam (added to iron) Do not iron Dry-clean Dry-clean Do not dry-clean Line dry/Hang to dry Drip dry Dry flat Helping the environment • Your washer is manufactured from recyclable materia...
Page 66 - Declaration of conformity; Specification sheet
Engl ish Specifications English 66 Declaration of conformity This appliance complies with UL2157. Specification sheet Type Top loading washer Model name WA55CG7100**WA54CG7150** WA54CG7105**WA54CG7150** WA53CG7155** Water pressure (psi (kPa)) 20-116 (137-800) 20-116 (137-800) Spin revolution 750 rpm...
Page 67 - SAMSUNG WASHER
English 67 LIMITED WARRANTY (U.S.A.) SAMSUNG WASHER LIMITED WARRANTY TO ORIGINAL CONSUMER PURCHASER WITH PROOF OF PURCHASE This SAMSUNG brand product, as supplied and distributed by SAMSUNG ELECTRONICS AMERICA, INC. (SAMSUNG) and delivered new, in the original carton to the original consumer purch...
Page 68 - EXCLUSION OF IMPLIED WARRANTIES
LIMITED WARRANTY (U.S.A.) English 68 This limited warranty covers manufacturing defects in materials or workmanship encountered in normal household, noncommercial use of this product and shall not cover the following: damage that occurs in shipment, delivery, installation, and uses for which this pr...
Page 69 - LIMITATION OF REMEDIES
English 69 LIMITATION OF REMEDIES YOUR SOLE AND EXCLUSIVE REMEDY IS PRODUCT REPAIR, PRODUCT REPLACEMENT, OR REFUND OF THE PURCHASE PRICE AT SAMSUNG’S OPTION, AS PROVIDED IN THIS LIMITED WARRANTY. SAMSUNG SHALL NOT BE LIABLE FOR SPECIAL, INCIDENTAL OR CONSEQUENTIAL DAMAGES, INCLUDING BUT NOT LIMITE...
Page 70 - LIMITED WARRANTY TO ORIGINAL PURCHASER
English 70 Warranty (CANADA) SAMSUNG WASHER LIMITED WARRANTY TO ORIGINAL PURCHASER This SAMSUNG brand product, as supplied and distributed by SAMSUNG ELECTRONICS CANADA, INC. (SAMSUNG) and delivered new, in the original carton to the original consumer purchaser, is warranted by SAMSUNG against manuf...


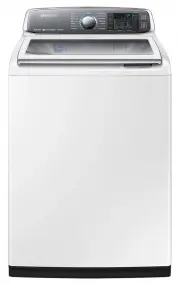
 Samsung WA10A8376GW
User Manual
Samsung WA10A8376GW
User Manual
 Samsung WA10H7200GW
User Manual
Samsung WA10H7200GW
User Manual
 Samsung WA10J7700GW
User Manual
Samsung WA10J7700GW
User Manual
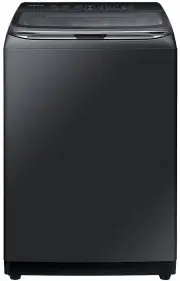
 Samsung WA10J8700GP
User Manual
Samsung WA10J8700GP
User Manual
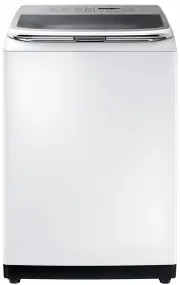
 Samsung WA10J8700GW
User Manual
Samsung WA10J8700GW
User Manual
 Samsung WA11M8700GV
User Manual
Samsung WA11M8700GV
User Manual
 Samsung WA12A8376GW
User Manual
Samsung WA12A8376GW
User Manual
 Samsung WA13M8700GV
User Manual
Samsung WA13M8700GV
User Manual
 Samsung WA13M8700GW
User Manual
Samsung WA13M8700GW
User Manual
 Samsung WA14A8377GV
User Manual
Samsung WA14A8377GV
User Manual
 Samsung WA14A8377GW
User Manual
Samsung WA14A8377GW
User Manual
 Samsung WA40A3005AW
User Manual
Samsung WA40A3005AW
User Manual
 Samsung WA40A3005AW/A4
User Manual
Samsung WA40A3005AW/A4
User Manual
 Samsung WA44A3205AW
User Manual
Samsung WA44A3205AW
User Manual
 Samsung WA44A3205AW/A4
User Manual
Samsung WA44A3205AW/A4
User Manual
 Samsung WA44A3405AP
User Manual
Samsung WA44A3405AP
User Manual
 Samsung WA44A3405AV
User Manual
Samsung WA44A3405AV
User Manual
 Samsung WA45T3200AW
User Manual
Samsung WA45T3200AW
User Manual