Page 2 - Contents
Engl ish English 2 Contents Safety information 4 What you need to know about the safety instructions 4 Important safety symbols 4 Important safety precautions 5 CALIFORNIA PROPOSITION 65 WARNING 5 Critical installation warnings 6 Installation cautions 7 Critical usage warnings 7 Usage cautions 9 Cri...
Page 4 - SAVE THESE INSTRUCTIONS; What you need to know about the safety instructions
Engl ish SAVE THESE INSTRUCTIONS English 4 Safety information Congratulations on your new Samsung washer. This manual contains important information on the installation, use, and care of your appliance. Please take some time to read this manual to take full advantage of your washer’s many benefits a...
Page 5 - Important safety precautions; CALIFORNIA PROPOSITION 65 WARNING; WARNING
Engl ish SAVE THESE INSTRUCTIONS English 5 Important safety precautions WARNING To reduce the risk of fire, electric shock, or injury to persons when using your appliance, follow basic precautions, including the following: 1. Read all instructions before using this appliance. 2. Do not wash or dry ...
Page 6 - Critical installation warnings
Engl ish SAVE THESE INSTRUCTIONS Safety information English 6 Critical installation warnings WARNING Plug the power cord into a wall socket that meets local electrical specifications. Use the socket for this appliance only. Do not use an extension cord.• Sharing a wall socket with other appliances, ...
Page 7 - Installation cautions; Critical usage warnings
Engl ish SAVE THESE INSTRUCTIONS English 7 Do not hook the power cord over a metal object, place a heavy object on the power cord, insert the power cord between objects, or push the power cord into the space behind the appliance.• This may result in electric shock or fire.Do not pull the power cord...
Page 9 - Usage cautions
Engl ish SAVE THESE INSTRUCTIONS English 9 Usage cautions CAUTION If the washer is contaminated by a foreign substance such as detergent, dirt, food waste, etc., unplug the power plug and clean the washer using a damp, soft cloth.• Failing to do so may result in discoloration, deformation, damage, ...
Page 11 - Critical cleaning warnings
Engl ish SAVE THESE INSTRUCTIONS English 11 Do not wash throw rugs or doormats in the washer.• If you wash throw rugs or doormats, the sand will accumulate inside the washer. It may result in error such as no draining. Critical cleaning warnings WARNING Do not clean the appliance by spraying water ...
Page 12 - Installation; Unpacking your washer
Engl ish English 12 Installation Follow these instructions carefully to ensure proper installation of your washer and to prevent accidents when using it. WARNING Certain internal parts are intentionally not grounded and may present a risk of electric shock only during servicing. Service personnel – ...
Page 13 - What’s included
Engl ish English 13 What’s included Make sure all the parts are included in the product package. If you have a problem with the washer or the parts, contact the Samsung customer care center at 1-800-SAMSUNG (1-800-726-7864) or your retailer. 01 02 03 05 04 06 11 09 10 08 07 01 Drain hose 02 Hose gu...
Page 14 - Parts supplied
Engl ish Installation English 14 Parts supplied Hose guide User manual Water intake cap Cable tie Parts not supplied Water hoses Tools needed for installation Wrench Phillips screwdriver Level Adjustable pliers Measuring tape NOTE • If you lose an accessory and want to purchase a replacement, contac...
Page 15 - Installation requirements; Electrical supply and grounding; Water supply
Engl ish English 15 Installation requirements Electrical supply and grounding • AC 120 V / 60 Hz / 15 AMP fuse or circuit breaker is required.• Use an individual branch circuit. Connect only the washer to the circuit.To ensure proper grounding, the washer comes with a power cord featuring a three-p...
Page 16 - Drain; Water temperature
Engl ish Installation English 16 Drain Samsung recommends a standpipe 39 in. (990 mm) high. The drain hose must be connected through the hose clip to the standpipe, and the standpipe must fully cover the drain hose. Flooring For best performance, the washer must be installed on a solid floor. Wood f...
Page 17 - Clearance requirement
Engl ish English 17 Clearance requirement This clearance requirement is applicable for washers only. NOTE • For the dryer's clearance requirement, see the dryer’s user manual. • If the washer and dryer have different clearance requirements, use the one with the larger value. Alcove or closet instal...
Page 18 - STEP 1
Engl ish Installation English 18 Step-by-step installation STEP 1 Select a location Location requirements:• A solid, level surface without carpeting or flooring that may obstruct ventilation• No direct sunlight• Adequate room for ventilation and wiring• Ambient temperature always higher than the fr...
Page 20 - STEP 3
Engl ish Installation English 20 5. Open the water taps, and check for leaks. STEP 3 Connect the drain hose To a Laundry Tub or Drain Pipe1. Check the height (A) of your drain system and make sure the minimum and maximum heights shown below are met. Minimum 39 in. (99 cm) Maximum 96 in. (245 cm) NO...
Page 21 - STEP 4
Engl ish English 21 * A (*): Min. 6 in. (152 mm), Max. 8 in. (203 mm) 3. Route the drain hose to the drain system. CAUTION • If using a standpipe, make sure the standpipe and drain hose connection is not airtight. • If using a standpipe, make sure the drain hose is inserted at least 6 in. (152 mm) ...
Page 23 - STEP 5
Engl ish English 23 With the leg ring in place, use the leveling leg to adjust the height of the washer. STEP 5 Power on Plug the power cord into an AC 120 V / 60 Hz / 15 AMP approved electrical outlet protected by a 15-amp fuse or circuit breaker. Then, press POWER to turn on the washer. STEP 6 ...
Page 24 - Before you start; Initial setup
Engl ish English 24 Before you start Initial setup Run calibration (recommended) Calibration ensures accurate weight detection by the washer. Make sure the tub is empty before running calibration. 1. Press POWER to turn on the washer. 2. Press and hold Temp. and Soil simultaneously for 3 seconds. 3....
Page 27 - STEP 6
Engl ish English 27 STEP 6 Add the correct detergent type The type of detergent you use - general purpose, specifically for woolens, etc. - depends on the type of fabric (cotton, synthetic, delicate items, wool), color, wash temperature, and degree of soiling. Regardless of the specific type of de...
Page 28 - Detergent drawer guidelines
Engl ish Before you start English 28 Detergent drawer guidelines The washer provides a two-compartment dispenser for detergent and fabric softener. The bleach compartment is located on the left side of the tub. B A C A. Softener compartment : Add a recommended amount of fabric softener into the soft...
Page 29 - To add washing agents to the detergent drawer
Engl ish English 29 To add washing agents to the detergent drawer 1. Open the lid. 2. Slide open the detergent drawer. 3. Add liquid laundry detergent to the liquid detergent container in the detergent compartment. CAUTION • Make sure the liquid detergent container is inserted in the detergent comp...
Page 30 - To use powdered detergent; To use the bleach compartment
Engl ish Before you start English 30 To use powdered detergent First, remove the provided liquid detergent container from the detergent compartment. Then, add powdered detergent to the detergent compartment according to the detergent manufacturer’s instructions. CAUTION Do not add powdered detergent...
Page 31 - Operations; Control panel
Engl ish English 31 Operations WARNING To reduce the risk of fire, electric shock, or injury to persons, read the Safety information before operating this appliance. Control panel 01 02 03 04 05 06 07 01 Cycle Selector Turn the dial to select a cycle. (For more information about wash cycles, see pa...
Page 32 - Icon descriptions
Engl ish Operations English 32 05 Soil Press to change the soil level for the current cycle.• Heavy : For heavily soiled loads. • Normal : For moderately soiled loads. This setting is best for most loads. • Light : For lightly soiled loads. NOTE The cycle time will be extended when increasing the so...
Page 33 - Simple steps to start; To change the cycle during operation
Engl ish English 33 Simple steps to start 1 2 3 5 1. Press POWER to turn on the washer. 2. Turn the Cycle Selector to select a cycle. 3. Change the cycle settings ( Temp. , Spin , and Soil ) as necessary. 4. Select desired options as necessary. 5. Press START/PAUSE . To change the cycle during oper...
Page 34 - Cycle overview
Engl ish Operations English 34 Cycle overview NOTE The washer detects the weight of the items and automatically adjusts the optimal water level, washing time, rinse counts, and spin counts. (This may not be applicable on some cycles.) Cycle Description NORMAL • For cottons, bed linens, table linens,...
Page 36 - Cycle chart
Engl ish Operations English 36 Cycle chart Use this chart to set the best cycle and options for your laundry. NOTE Setting Temp. Spin Soil : factory setting H : Hot H : High L : Light : can be selected W : Warm M : Medium N : Normal E : Eco Warm L : Low H : Heavy C : Cool NS : No Spin CD : Cold ...
Page 38 - Special features; Child Lock
Engl ish Operations English 38 Special features ATC (Auto Temperature Control) ATC enables the washer to control water temperatures in each washing cycle using the internal thermistor. It is designed to maintain certain washing temperatures for best results. NOTE • If you select NORMAL or HEAVY DUTY...
Page 39 - Smart Care
Engl ish English 39 Deactivating the Child Lock function Press and hold both Temp. and Spin simultaneously for approximately 3 seconds. • When you deactivate the Child Lock function, the Child Lock indicator is turned off. • The Child Lock function prevents children or the infirm from accidently op...
Page 40 - Maintenance; Self Clean; SELF CLEAN reminder
Engl ish English 40 Maintenance Keep the washer clean for best performance and to lengthen its life cycle. WARNING Certain internal parts are intentionally not grounded and may present a risk of electric shock only during servicing. Service personnel – Do not contact the following parts while the ap...
Page 41 - Cleaning the exterior; Care for an extended period of non-use
Engl ish English 41 Cleaning the exterior 1. Turn off the water taps after finishing the day’s washing. This will shut off the water supply to your washer and prevent the unlikely possibility of damage from escaping water. Leave the lid open to allow the inside of your washer to dry out. 2. Use a s...
Page 42 - Cleaning the mesh filter
Engl ish Maintenance English 42 Cleaning the mesh filter Clean the mesh filters in the water inlets once or twice a year. 1. Turn off the washer, and then unplug the power cord. 2. Close the water taps. 3. Loosen and disconnect the water hoses from the back of the washer. Cover the end of each hose ...
Page 43 - Cleaning the detergent drawer
Engl ish English 43 Cleaning the detergent drawer 1. Fully pull out the detergent drawer. 2. To remove, pull the detergent drawer while pushing the ends of each side in. 3. Remove the inserts from the compartments. Rinse the inserts and the drawer in warm water and clean with a soft brush. Untitled...
Page 45 - Checkpoints
Engl ish English 45 Troubleshooting Checkpoints If you encounter a problem with the washer, first check the table below and try the suggestions. Problem Action Does not turn on. • Make sure your home electrical system is providing electrical power that matches the requirements of the washer. See pa...
Page 49 - Information codes
Engl ish English 49 Information codes The washer may display information codes to help you understand what is occurring with your washer better. Code Action 1C The Water Level sensor is not working properly.• Turn off the washer, unplug it, wait 30 seconds, and then plug the washer in again. If the...
Page 52 - Specifications; Fabric care chart
Engl ish English 52 Specifications Fabric care chart The following symbols provide garment care direction. The clothing care labels include symbols for drying, bleaching, drying and ironing, or dry cleaning when necessary. The use of symbols ensures consistency among garment manufacturers of domesti...
Page 53 - Warning symbols for laundering; Helping the environment
Engl ish English 53 Warning symbols for laundering Do not wash Do not wring Do not bleach Do not tumble dry No steam (added to iron) Do not iron Dry-clean Dry-clean Do not dry-clean Line dry/Hang to dry Drip dry Dry flat Helping the environment • Your washer is manufactured from recyclable material...
Page 54 - Declaration of conformity; Specification sheet
Engl ish Specifications English 54 Declaration of conformity This appliance complies with UL2157. Specification sheet Type Top loading washer Model name WA50B5100** WA49B5105** Water pressure (psi (kPa)) 20-116 (137-800) Spin revolution 750 rpm NET weight (lb (kg)) 130.1 (59.0) 132.3 (60.0) Power co...
Page 56 - EXCLUSION OF IMPLIED WARRANTIES
LIMITED WARRANTY (U.S.A.) English 56 This limited warranty covers manufacturing defects in materials or workmanship encountered in normal household, noncommercial use of this product and shall not cover the following: damage that occurs in shipment, delivery, installation, and uses for which this pr...
Page 57 - LIMITATION OF REMEDIES
English 57 LIMITATION OF REMEDIES YOUR SOLE AND EXCLUSIVE REMEDY IS PRODUCT REPAIR, PRODUCT REPLACEMENT, OR REFUND OF THE PURCHASE PRICE AT SAMSUNG’S OPTION, AS PROVIDED IN THIS LIMITED WARRANTY. SAMSUNG SHALL NOT BE LIABLE FOR SPECIAL, INCIDENTAL OR CONSEQUENTIAL DAMAGES, INCLUDING BUT NOT LIMITED...
Page 58 - Memo
Page 61 - Lavadora; Manual del usuario
Lavadora Manual del usuario WA50B5100**/WA49B5105** Untitled-1 1 2022-06-20 3:25:42
Page 62 - Contenido
Español Español 2 Contenido Información sobre seguridad 4 Lo que necesita saber sobre las instrucciones de seguridad 4 Símbolos de seguridad importantes 4 Precauciones de seguridad importantes 5 PROPOSICIÓN 65 DE CALIFORNIA: ADVERTENCIA 5 Advertencias fundamentales para la instalación 6 Precauciones...
Page 64 - CONSERVE ESTAS INSTRUCCIONES; Lo que necesita saber sobre las instrucciones de seguridad
Español CONSERVE ESTAS INSTRUCCIONES Español 4 Información sobre seguridad Felicitaciones por la compra de la nueva lavadora Samsung. Este manual contiene información importante acerca de la instalación, el uso y el cuidado del electrodoméstico. Lea detenidamente estas instrucciones a fin de aprovec...
Page 65 - Precauciones de seguridad importantes; figuran a continuación:; PROPOSICIÓN 65 DE CALIFORNIA: ADVERTENCIA
Español CONSERVE ESTAS INSTRUCCIONES Español 5 Precauciones de seguridad importantes ADVERTENCIA Para reducir el riesgo de incendio, descarga eléctrica o lesiones físicas cuando usa este electrodoméstico, siga las instrucciones de seguridad básicas que figuran a continuación: 1. Lea todas las instr...
Page 66 - Advertencias fundamentales para la instalación
Español CONSERVE ESTAS INSTRUCCIONES Información sobre seguridad Español 6 Advertencias fundamentales para la instalación ADVERTENCIA Enchufe el cable de alimentación a un tomacorriente de pared que cumpla con las especificaciones eléctricas locales. Utilice el tomacorriente solo con este electrodom...
Page 67 - Precauciones para la instalación; Advertencias fundamentales para el uso
Español CONSERVE ESTAS INSTRUCCIONES Español 7 No tuerza ni ate el cable de alimentación.No cuelgue el cable de alimentación de un objeto metálico, no le coloque objetos pesados encima, no lo inserte entre objetos ni lo empuje en el espacio detrás del electrodoméstico.• Puede provocar una descarga ...
Page 69 - Precauciones de uso
Español CONSERVE ESTAS INSTRUCCIONES Español 9 • ADVERTENCIA : Si no sigue estas instrucciones rigurosamente, el electrodoméstico podría quedar desnivelado y vibrar de modo anormal, lo que podría causar lesiones físicas, daños materiales o daños al electrodoméstico. Precauciones de uso PRECAUCIÓN S...
Page 71 - Advertencias fundamentales para la limpieza
Español CONSERVE ESTAS INSTRUCCIONES Español 11 No lave prendas grandes como ropa de cama dentro de una red.• De lo contrario, se pueden producir lesiones personales por las vibraciones anormales.• Coloque los artículos más pequeños, como las medias y la lencería, dentro de una red.No utilice deter...
Page 72 - Instalación; Desempaque de la lavadora
Español Español 12 Instalación Siga detenidamente estas instrucciones para asegurar una adecuada instalación de la lavadora y evitar accidentes al usarla. ADVERTENCIA Algunas piezas internas no están conectadas a tierra intencionalmente y pueden presentar un riesgo de descarga eléctrica solo durante...
Page 73 - Componentes
Español Español 13 Componentes Asegúrese de que todos los componentes estén incluidos en el paquete. Si tiene algún problema con la lavadora o las piezas, comuníquese con el centro de atención al cliente de Samsung al 1-800-SAMSUNG (1-800-726-7864) o con el vendedor. 01 02 03 05 04 06 11 09 10 08 0...
Page 74 - Piezas suministradas
Español Instalación Español 14 Piezas suministradas Guía de la manguera Manual del usuario Tapón de la entrada de agua Sujetacables Piezas no suministradas Mangueras de agua Herramientas necesarias para la instalación Llave inglesa Destornillador Phillips Nivelador Pinzas ajustables Cinta de medir N...
Page 75 - Requisitos de instalación; Suministro eléctrico y conexión a tierra; Suministro de agua
Español Español 15 PRECAUCIÓN • No vuelva a utilizar las mangueras viejas, ya que pueden tener fugas o reventarse y provocar inundaciones o daños materiales. • Asegúrese de que las arandelas de goma estén insertadas en cada unión de las dos mangueras de agua. Requisitos de instalación Suministro el...
Page 76 - Drenaje; Temperatura del agua
Español Instalación Español 16 Drenaje Samsung recomienda una toma de agua de 39 pulgadas (990 mm) de altura. La manguera de drenaje debe conectarse a la toma de agua a través del gancho, y la toma de agua debe cubrir totalmente la manguera de drenaje. Piso Para un mejor desempeño, la lavadora debe ...
Page 77 - Requisito de espacio libre
Español Español 17 Requisito de espacio libre Este requisito de espacio libre solo se aplica a las lavadoras. NOTA • Para el requisito de espacio libre para secadoras, consulte el manual del usuario de la secadora.• En caso de que la lavadora y la secadora tengan distintos requisitos de espacio lib...
Page 78 - Instalación paso a paso; PASO 1
Español Instalación Español 18 Instalación paso a paso PASO 1 Seleccionar una ubicación Requisitos de la ubicación:• Una superficie sólida y nivelada sin alfombras ni revestimientos para pisos que puedan obstruir la ventilación• No expuesta a la luz directa del sol• Espacio suficiente para la venti...
Page 80 - PASO 3
Español Instalación Español 20 5. Abra las llaves de agua y verifique que no haya pérdidas. PASO 3 Conectar la manguera de drenaje A un tambor de lavado o a una cañería de drenaje1. Verifique la altura (A) de su sistema de drenaje y asegúrese de que se cumplan las alturas mínimas y máximas. Mínimo ...
Page 81 - PASO 4
Español Español 21 * A (*): Mín. 6 in (152 mm), Máx. 8 in (203 mm) 3. Direccione la manguera de drenaje hacia el sistema de drenaje. PRECAUCIÓN • En caso de utilizar una toma de agua, asegúrese de que la conexión de la toma de agua y la manguera de drenaje no esté hermetizada. • Si utiliza una toma...
Page 83 - PASO 5
Español Español 23 Con el anillo de la pata en su posición, use la pata niveladora para ajustar la altura de la lavadora. PASO 5 Encendido Enchufe el cable de alimentación a un tomacorriente de 120 V CA / 60 Hz / 15 A aprobado y protegido por un disyuntor o fusible de 15 A. Luego, presione POWER (...
Page 84 - Antes de comenzar; Configuración inicial; PASO 1 Clasificar; PASO 2
Español Español 24 Antes de comenzar Configuración inicial Ejecutar la calibración (recomendado) La Calibración asegura que la lavadora detecte el peso con precisión. Asegúrese de que el tambor esté vacío antes de ejecutar la calibración. 1. Presione POWER (ENCENDER/APAGAR) para poner en funcionamie...
Page 87 - PASO 6
Español Español 27 PASO 6 Agregar el tipo de detergente adecuado El tipo de detergente a utilizar (para uso general, específico para lana, etc.) depende del tipo de tejido (algodón, sintético, prendas delicadas, lana), el color, la temperatura de lavado y el nivel de suciedad. Independientemente d...
Page 88 - Pautas para el cajón para detergente
Español Antes de comenzar Español 28 Pautas para el cajón para detergente La lavadora está equipada con un dispensador de dos compartimientos para detergente y suavizante. El compartimiento para el blanqueador está del lado izquierdo del tambor. B A C A. Compartimiento para el suavizante : Vierta la...
Page 89 - Para agregar productos de lavado en el cajón para detergente
Español Español 29 Para agregar productos de lavado en el cajón para detergente 1. Abra la tapa. 2. Deslice el cajón para detergente para abrirlo. 3. Agregue detergente líquido en el contenedor correspondiente en el compartimiento para detergente. PRECAUCIÓN • Asegúrese de que el contenedor para de...
Page 90 - Para utilizar detergente en polvo; Para utilizar el compartimiento para el blanqueador
Español Antes de comenzar Español 30 Para utilizar detergente en polvo Primero retire el contenedor para detergente líquido provisto del compartimiento para el detergente. Luego, agregue detergente en polvo en el compartimiento para el detergente siguiendo las instrucciones del fabricante de deterge...
Page 91 - Funcionamiento; Panel de control
Español Español 31 Funcionamiento ADVERTENCIA Para reducir el riesgo de incendio, descarga eléctrica o lesiones personales, lea Información sobre seguridad antes de poner en funcionamiento el electrodoméstico. Panel de control 01 02 03 04 05 06 07 01 Selector de ciclos Gire la perilla para seleccio...
Page 92 - Descripción de los íconos
Español Funcionamiento Español 32 04 Spin (Centrifugado) Presione para cambiar la velocidad de centrifugado del ciclo seleccionado.• High (Alto) : Utiliza un proceso de centrifugado más fuerte que elimina la humedad, por lo que no es adecuado para telas sin arrugas y que no necesitan planchado ni pa...
Page 93 - Pasos sencillos para comenzar; Para cambiar el ciclo durante el funcionamiento
Español Español 33 Pasos sencillos para comenzar 1 2 3 5 1. Presione POWER (ENCENDER/APAGAR) para poner en funcionamiento la lavadora. 2. Gire el selector de ciclos para seleccionar un ciclo. 3. Cambie los ajustes del ciclo ( Temp. (Temperatura) , Spin (Centrifugado) y Soil (Suciedad) ) según sea n...
Page 94 - Descripción de los ciclos
Español Funcionamiento Español 34 Descripción de los ciclos NOTA La lavadora detecta el peso de las prendas y ajusta automáticamente el nivel óptimo de agua, tiempo de lavado, cantidad de enjuagues y duración del centrifugado. (Puede no aplicarse a algunos ciclos). Ciclo Descripción NORMAL • Para ro...
Page 96 - Tabla de ciclos
Español Funcionamiento Español 36 Tabla de ciclos Use esta tabla para configurar el mejor ciclo y las mejores opciones para su ropa. NOTA Ajuste Temp. (Temperatura) Spin (Centrifugado) Soil (Suciedad) : configuración de fábrica H : Hot (Caliente) H : High (Alto) L : Light (Poco sucia) : se puede...
Page 98 - Funciones especiales; ATC (control automático de la temperatura)
Español Funcionamiento Español 38 Funciones especiales ATC (control automático de la temperatura) La función ATC permite a la lavadora controlar la temperatura del agua en cada ciclo de lavado mediante el termistor interno. Está diseñada para mantener ciertas temperaturas de lavado a fin de obtener ...
Page 100 - Mantenimiento; Autolimpieza; Recordatorio de AUTOLIMPIEZA
Español Español 40 Mantenimiento Mantenga la lavadora limpia para lograr un mejor rendimiento y prolongar su vida útil. ADVERTENCIA Algunas piezas internas no están conectadas a tierra intencionalmente y pueden presentar un riesgo de descarga eléctrica solo durante el servicio técnico. Personal del ...
Page 101 - Limpieza del exterior
Español Español 41 Limpieza del exterior 1. Cierre las llaves del agua después de finalizar el lavado del día. Esto cerrará el suministro de agua a la lavadora y evitará la improbable posibilidad de que se produzcan daños a causa de un derrame de agua. Deje la tapa abierta para que el interior de l...
Page 102 - Limpieza del filtro de malla
Español Mantenimiento Español 42 Limpieza del filtro de malla Limpie los filtros de malla de las entradas de agua una o dos veces por año. 1. Apague la lavadora y, luego, desenchufe el cable de alimentación. 2. Cierre las llaves de agua. 3. Afloje y desconecte las mangueras de agua de la parte trase...
Page 103 - Limpieza del cajón para detergente
Español Español 43 Limpieza del cajón para detergente 1. Abra por completo el cajón para el detergente. 2. Para retirarlo, tire del cajón para el detergente mientras empuja hacia adentro los extremos laterales. 3. Retire los insertos de los compartimentos. Enjuague los insertos y el cajón con agua ...
Page 105 - Verificaciones
Español Español 45 Solución de problemas Verificaciones Si tiene algún problema con la lavadora, primero consulte la tabla siguiente y pruebe las sugerencias. Problema Medida No enciende. • Asegúrese de que la corriente que provee el sistema eléctrico doméstico coincida con los requisitos de la lav...
Page 109 - Códigos de información
Español Español 49 Códigos de información La lavadora puede mostrar códigos de información para ayudarle a comprender mejor cuál es el problema. Código Medida 1C El sensor de nivel de agua no está funcionando bien.• Apague la lavadora, desenchúfela, aguarde 30 segundos y vuelva a enchufarla. Si el ...
Page 112 - Especificaciones; Tabla de indicaciones sobre telas
Español Español 52 Especificaciones Tabla de indicaciones sobre telas Los siguientes símbolos ofrecen indicaciones acerca de las prendas. La etiqueta de indicaciones de la prenda incluye símbolos para secado, blanqueado, secado y planchado, o limpieza en seco cuando son necesarios. El uso de símbolo...
Page 113 - Símbolos de advertencia para el lavado; Ayuda al medioambiente
Español Español 53 Símbolos de advertencia para el lavado No lavar No retorcer No usar blanqueador No secar en secadora Sin vapor (agregado a la plancha) No planchar Limpiar en seco Limpiar en seco No limpiar en seco Secar colgado/tender Colgar para que escurra Secar en posición horizontal Ayuda al...
Page 114 - Declaración de conformidad; Hoja de especificaciones
Español Especificaciones Español 54 Declaración de conformidad Este electrodoméstico cumple con la norma UL2157. Hoja de especificaciones Tipo Lavadora de carga superior Nombre del modelo WA50B5100** WA49B5105** Presión de agua (psi (kPa)) 20-116 (137-800) Revolución del centrifugado 750 rpm Peso NE...
Page 115 - LAVADORA SAMSUNG
Español 55 Garantía limitada (Estados Unidos) LAVADORA SAMSUNG Untitled-1 55 2022-06-20 3:25:52 GARANTÍA LIMITADA AL COMPRADOR ORIGINAL CON PRUEBA DE COMPRA El presente producto de la marca SAMSUNG, tal como lo provee y distribuye SAMSUNG ELECTRONICS AMERICA, INC. (SAMSUNG) y lo entrega como nuevo,...
Page 116 - EXCLUSIÓN DE GARANTÍAS IMPLÍCITAS
Garantía limitada (Estados Unidos) Español 56 La presente garantía limitada cubre defectos de fabricación de los materiales o la mano de obra que ocurran durante el uso normal y doméstico de este producto y no cubrirá lo siguiente: daños que ocurran durante el envío, entrega e instalación y usos par...
Page 117 - LIMITACIÓN DE RECURSOS
Español 57 LIMITACIÓN DE RECURSOS EL ÚNICO Y EXCLUSIVO RECURSO ES LA REPARACIÓN DEL PRODUCTO, EL REEMPLAZO DEL PRODUCTO O LA DEVOLUCIÓN DEL IMPORTE DE COMPRA, A DISCRECIÓN DE SAMSUNG, CONFORME A ESTA GARANTÍA LIMITADA. SAMSUNG NO SERÁ RESPONSABLE POR DAÑOS ESPECIALES, IMPREVISTOS O DERIVADOS, INCLU...
Page 118 - Notas


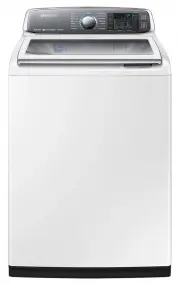
 Samsung WA10A8376GW
User Manual
Samsung WA10A8376GW
User Manual
 Samsung WA10H7200GW
User Manual
Samsung WA10H7200GW
User Manual
 Samsung WA10J7700GW
User Manual
Samsung WA10J7700GW
User Manual
 Samsung WA10J8700GP
User Manual
Samsung WA10J8700GP
User Manual
 Samsung WA10J8700GW
User Manual
Samsung WA10J8700GW
User Manual
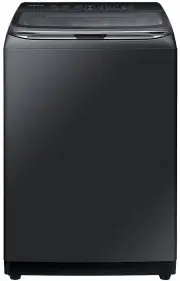
 Samsung WA11M8700GV
User Manual
Samsung WA11M8700GV
User Manual
 Samsung WA12A8376GW
User Manual
Samsung WA12A8376GW
User Manual
 Samsung WA13M8700GV
User Manual
Samsung WA13M8700GV
User Manual
 Samsung WA13M8700GW
User Manual
Samsung WA13M8700GW
User Manual
 Samsung WA14A8377GV
User Manual
Samsung WA14A8377GV
User Manual
 Samsung WA14A8377GW
User Manual
Samsung WA14A8377GW
User Manual
 Samsung WA40A3005AW
User Manual
Samsung WA40A3005AW
User Manual
 Samsung WA40A3005AW/A4
User Manual
Samsung WA40A3005AW/A4
User Manual
 Samsung WA44A3205AW
User Manual
Samsung WA44A3205AW
User Manual
 Samsung WA44A3205AW/A4
User Manual
Samsung WA44A3205AW/A4
User Manual
 Samsung WA44A3405AP
User Manual
Samsung WA44A3405AP
User Manual
 Samsung WA44A3405AV
User Manual
Samsung WA44A3405AV
User Manual
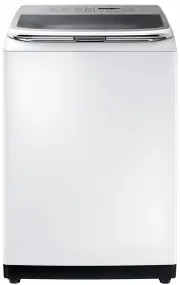
 Samsung WA45T3200AW
User Manual
Samsung WA45T3200AW
User Manual