Page 2 - Contents
2 English C ontents Contents Safety information 4 What you need to know about the safety instructions 4 Important safety symbols 4 Important safety precautions 5 Installation 11 Unpacking your washer 11 Overview of your washer 12 Basic location requirements 14 Important note to installer 18 Step-by-...
Page 3 - Specifications
English 3 C ontents Specifications 53 Fabric care chart 53 Helping the environment 55 Specification sheet 56 Cycle chart 57 WA7700J_WA10J7700GW-03520R-04_SA.indd 3 2016/5/12 11:20:21
Page 4 - Safety information; What you need to know about the safety instructions
4 English Saf ety inf ormation Safety information Congratulations on your new Samsung washer. This manual contains important information on the installation, use and care of your appliance. Please take some time to read this manual to take full advantage of your washer’s many benefits and features. ...
Page 5 - Important safety precautions
English 5 Saf ety inf ormation These warning signs are here to prevent injury to yourself and others. Please follow them explicitly. After reading this manual, store it in a safe place for future reference. Read all instructions before using the appliance. As with any equipment that uses electricity...
Page 6 - CAUTION
6 English Saf ety inf ormation Safety information If the supply cord is damaged, it must be replaced by the manufacturer, its service agent or similarly qualified persons in order to avoid a hazard. This appliance should be positioned so that the power plug, the water supply taps, and the drain pipe...
Page 8 - Installation cautions; Critical usage warnings
8 English Saf ety inf ormation Safety information Installation cautions CAUTION This appliance should be positioned in such a way that the power plug is easily accessible. • Failure to do so may result in electric shock or fire due to electric leakage. Critical usage warnings WARNING If the applianc...
Page 9 - Usage cautions
English 9 Saf ety inf ormation Do not attempt to repair, disassemble, or modify the appliance yourself. • Do not use a fuse (such as copper, steel wire, etc.) other than a standard fuse. • When the appliance needs to be repaired or reinstalled, contact your nearest service centre. • Failure to do so...
Page 10 - Critical cleaning warnings
10 English Saf ety inf ormation Safety information Critical cleaning warnings WARNING Do not clean the appliance by spraying water directly onto it. Do not use the strong acid cleaning agent. Before cleaning or performing maintenance, unplug the appliance from the wall socket. • Failure to do so may...
Page 11 - Installation; Unpacking your washer
English 11 Ins tallation Installation Follow these instructions carefully to ensure proper installation of the washer and to prevent accidents when using it. Unpacking your washer Unpack your washer and inspect it for shipping damage. Make sure you have received all the items shown below. If your wa...
Page 12 - Overview of your washer
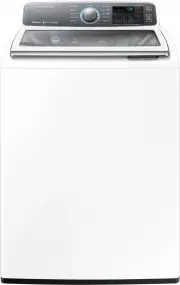
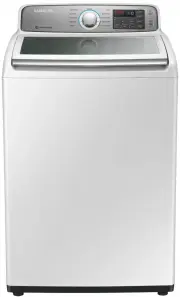
12 English Ins tallation Installation Overview of your washer Make sure all the parts are included in the product package. If you have a problem with the washer or the parts, contact a local Samsung customer center or the retailer. 03 10 12 13 11 09 07 08 02 01 04 14 05 06 WA7700J_WA10J7700GW-03520R...
Page 13 - Parts supplied
English 13 Ins tallation 01 Drain hose 02 Hose guide 03 Lid 04 Built-in sink 05 Filter-rear 06 Filter-front 07 Tub 08 Water Jet 09 Leveling feet 10 Water hose (Cold) 11 Water hose (Hot) 12 Control panel 13 Detergent drawer 14 Power cord Parts supplied Hose guide User manual Plastic zip hose tie Wate...
Page 14 - Basic location requirements; Electrical; Grounding; Water
14 English Ins tallation Installation Basic location requirements Electrical • 220-240 Volt 50 Hz fuse or circuit breaker. • Individual branch circuit serving only your Washer is recommended. • Your washer is equipped with a power cord. CAUTION Never use an extension cord. Grounding Electrical groun...
Page 15 - Drain facility
English 15 Ins tallation The water faucets must be within 4 feet (122 cm) to the back of your Washer to match the inlet hoses provided with your Washer. NOTE Accessory inlet hoses are available in various lengths up to 10 feet (275 cm) for faucets that are further away from the back of your washer.T...
Page 17 - Required dimensions for Installation
English 17 Ins tallation Required dimensions for Installation C B A A 27.0 in (68.6 cm) B 39.2 in (99.5 cm) C 44.1 in (112.0 cm) B A A 29.3 in (74.4 cm) B 44.1 in (112.0 cm) A A 59.8 in (152.0 cm) B A C C A* 48.0 in 2 (310.0 cm 2 ) B* 24.0 in 2 (155.0 cm 2 ) C 3.0 in (7.6 cm) NOTE * Required spacing...
Page 18 - Important note to installer; Installation flow chart; STEP 1; Selecting a location
18 English Ins tallation Installation Important note to installer Please read the following instructions carefully before installing your washer.These instructions should be retained for future reference.We recommend you hire a professional to install this washer. Installation flow chart Removing th...
Page 19 - STEP 2; Connecting the water supply hose
English 19 Ins tallation STEP 2 Connecting the water supply hose B A CAUTION Before installing the water supply hoses, make sure there are rubber gaskets (B) inside the couplings (A) at both ends of each new water hose. Installing the water supply hoses without rubber gaskets can cause water leakage...
Page 22 - STEP 3; Connecting the drain hose
22 English Ins tallation Installation STEP 3 Connecting the drain hose A A The end of the drain hose can be positioned in three ways: Over the edge of a wash basin Secure the hose guide (A) to the side of the basin wall with a hook or to the tap with a piece of string to prevent the drain hose from ...
Page 23 - STEP 4; Leveling your washer
English 23 Ins tallation A * NOTE Connect the hose guide (A) within 4 in (10 cm)* from the end of the drain hose. If the drain hose is extended more than 4 in (10 cm) beyond the end of the hose guide, mold or microorganisms could spread to the inside of the washer. NOTE The drain hose can be install...
Page 24 - STEP 5; Powering your washer
24 English Ins tallation Installation B C 3. If the washer is level, the pulsator (A) is positioned at the center of the water as shown in the figure. If not, level your washer by turning the front leveling feet clockwise or counterclockwise as necessary. NOTE Turn the front leveling feet clockwise ...
Page 25 - STEP 6; STEP 7; Calibration Mode
English 25 Ins tallation STEP 6 Running a test cycle Run a test cycle as follows to check if your washer is properly installed. 1. Load about 6 pounds of laundry into the tub. 2. Press Power to turn on your washer. 3. Select Rinse+Spin by turning the Cycle Selector . 4. Press Start/Pause to start th...
Page 26 - Operating instructions; Loading your washer
26 English O perating ins truc tions Operating instructions WARNING To reduce the risk of fire, electric shock, or injury to persons when using your appliance, follow basic precautions, including the following: Loading your washer • Fill the tub with dry, unfolded clothes evenly around in order to e...
Page 27 - Getting started
English 27 O perating ins truc tions To input a blanket Fold the blanket into the blanket-specific net as shown, and then insert in the tub below the plastic area of the tub. CAUTION Make sure the laundry is inserted completely. • Any exposed part of the laundry may cause damage to the machine or th...
Page 28 - Washing a load of laundry; Control panel
28 English W ashing a load o f laundry Washing a load of laundry WARNING To reduce the risk of fire, electric shock, or injury to persons, read the IMPORTANT SAFETY INSTRUCTIONS before operating this appliance. Control panel 01 02 03 04 05 06 07 08 09 10 11 01 Cycle Selector Turn the Cycle Selector ...
Page 29 - Cycle overview
English 29 W ashing a load o f laundry 06 Delay End Delay the end of any cycle for up to 19 hours in one-hour increments. Displayed hour indicates the time the wash will be ended. 07 Wash Press this button to only perform a wash cycle or to adjust the washtime. 08 Rinse Press this button to only per...
Page 30 - Options; Child Lock
30 English W ashing a load o f laundry Washing a load of laundry Cycle Description HEAVY DUTY For sturdy, colorfast fabrics and heavily soiled garments. WATER SAVING This is a specially designed cycle that enables you to wash laundry effectively with the minimum amount of water.Water saving, water l...
Page 31 - Sound
English 31 W ashing a load o f laundry • If the water level in the tub is above the safe water level and the Child Lock function is turned on while the door is open, “ CL ” is displayed on the LED display even if the power of the washer is turned off and the washer drains water by force. • Even if t...
Page 32 - Delay End; Mist Shower
32 English W ashing a load o f laundry Washing a load of laundry Garment Plus You can add or take out laundry items evenafter the wash has started, as long as the Garment Plus indicator is on. Pressing Start/Pause unlocks the lid. If you open the lid and want to continue the wash cycle,close the lid...
Page 33 - Washing clothes using the cycle selector; Pause Option
English 33 W ashing a load o f laundry NOTE Precautions when using Smart Check• If light from a light bulb, fluorescent bulb, or lamp is reflected on the display panel of the washer, the smartphone may not be able to recognize the panel or error message easily. • If you hold the smartphone at too la...
Page 34 - When the cycle is finished:
34 English W ashing a load o f laundry Washing a load of laundry When the cycle is finished: After the total cycle has finished, the power will turn off automatically. 1. Open the lid. 2. Remove laundry. ATC (Auto Temperature Control) ATC is the control function that the washer controls water temper...
Page 35 - The basics
English 35 W ashing a load o f laundry The basics Prewash (Water Jet & Built-in sink) Water Jet and Built-in sink help you handwash before the washing machine starts operation. Water Jet is available only when the door is open with the water level set to less than High. For prewashing, use the B...
Page 37 - Detergent use
English 37 W ashing a load o f laundry Detergent use • The use a good quality top loader detergent is recommended. • It is also important to:Pre–treat stains before washing.Sort clothes by color.Sort clothes by the amount of soiling.Avoid overloading. NOTE • When using powdered detergent it is recom...
Page 38 - Features; Automatic dispenser
38 English W ashing a load o f laundry Washing a load of laundry Features Automatic dispenser Your washer has separate compartments for dispensing detergent and color-safe bleach andfabric softener. Add all laundry additives to their respective compartments before starting your washer.The automatic ...
Page 41 - Maintaining your washer; Cleaning the exterior
English 41 M aint aining y our w asher Maintaining your washer Cleaning the exterior 1. Turn off the water faucets after finishing the day’s washing. This will shut off the water supply to your washer and prevent the unlikely possibility of damage from escaping water. Leave the lid open to allow the...
Page 42 - Preserving the top cover and the front frame; Cleaning the; built-in sink and lint filter
42 English M aint aining y our w asher Maintaining your washer Preserving the top cover and the front frame Do not place any heavy or sharp objects or a detergent box on the washer. They can scratch or damage the top cover of the unit. NOTE Since the entire washer has a high-gloss finish, the surfac...
Page 43 - Cleaning the dispensers
English 43 M aint aining y our w asher Cleaning the dispensers The automatic dispenser may need to be cleaned periodically due to laundry additive buildup. 1. Pull the dispenser drawer straight back until it stops. 2. Push the ends of each side of the case at the same time. When you feel the ends pu...
Page 45 - Tub clean
English 45 M aint aining y our w asher Tub clean TUB CLEAN is a self-cleaning cycle that removes mold that may occur inside the washer. 1. Press Power . 2. Select TUB CLEAN . Once TUB CLEAN is selected, the only function that can be set is Delay End. 3. Press Start/Pause . TUB CLEAN begins. CAUTION ...
Page 46 - Troubleshooting; Checkpoints
46 English Tr ouble shoo ting Troubleshooting Checkpoints If you encounter a problem with the washer, first check the table below and try the suggestions. Problem Action Does not turn on. • Make sure you use rated power for the product. • Make sure the power cord is completely plugged in. • Check th...
Page 50 - Information codes
50 English Tr ouble shoo ting Troubleshooting If a problem persists, contact a local Samsung service center. Information codes The washer may display information codes to help you understand what is occurring with your washer better. No Code Action 1 1C The WaterLevel sensor is not working properly....
Page 53 - Wash cycle; Bleach
English 53 Specific ations Specifications Fabric care chart The following symbols provide garment care direction. The clothing care labels include symbols for drying, bleaching, drying and ironing, or dry cleaning when necessary. The use of symbols ensures consistency among garment manufacturers of ...
Page 54 - Heat setting
54 English Specific ations Specifications Heat setting High Medium Low Any heat No heat / Air Iron dry or steam temperatures High Medium Low Warning symbols for laundering Do not wash Do not wring Do not bleach Do not tumble dry No steam (added to iron) Do not iron Dry-clean Dry-clean Do not dry-cle...
Page 55 - Helping the environment
English 55 Specific ations Helping the environment • Your washer is manufactured from recyclable materials. If you decide to dispose of it, please observe local waste disposal regulations. Cut off the power cord so that the appliance cannot be connected to a power source. Remove the lid so that anim...
Page 56 - Specification sheet
56 English Specific ations Specifications Specification sheet C D B A Type Top loading washer Dimensions (inches (cm)) A. Height 44.1 (112.0) B. Width 27.0 (68.6) C. Height with lid open 59.8 (152.0) D. Depth 29.3 (74.4) Capacity (kg) 12 Water pressure (psi (kPa)) 20 - 116 (137 - 800) NET weight (kg...
Page 57 - Cycle chart
English 57 Specific ations Cycle chart Use this chart to set the best cycle and options for you laundry. NOTE Setting Water Level Temp. Activ Dual Wash : factory setting 1 5 H: Hot Drain : can be selected 2 6 W: Warm Water Save 3 7 C: Cold 4 Cycle Water Level Temp. 1 2 3 4 5 6 7 H W C COTTON ...
Page 59 - Memo
Memo WA7700J_WA10J7700GW-03520R-04_SA.indd 59 2016/5/12 11:20:38
Page 60 - QUESTIONS OR COMMENTS?
QUESTIONS OR COMMENTS? COUNTRY CALL OR VISIT US ONLINE AT AUSTRALIA 1300 362 603 www.samsung.com/au/support DC68-03520R-04 WA7700J_WA10J7700GW-03520R-04_SA.indd 60 2016/5/12 11:20:38


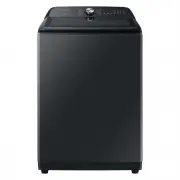
 Samsung WA10A8376GW
User Manual
Samsung WA10A8376GW
User Manual
 Samsung WA10H7200GW
User Manual
Samsung WA10H7200GW
User Manual
 Samsung WA10J8700GP
User Manual
Samsung WA10J8700GP
User Manual
 Samsung WA10J8700GW
User Manual
Samsung WA10J8700GW
User Manual
 Samsung WA11M8700GV
User Manual
Samsung WA11M8700GV
User Manual
 Samsung WA12A8376GW
User Manual
Samsung WA12A8376GW
User Manual
 Samsung WA13M8700GV
User Manual
Samsung WA13M8700GV
User Manual
 Samsung WA13M8700GW
User Manual
Samsung WA13M8700GW
User Manual
 Samsung WA14A8377GV
User Manual
Samsung WA14A8377GV
User Manual
 Samsung WA14A8377GW
User Manual
Samsung WA14A8377GW
User Manual
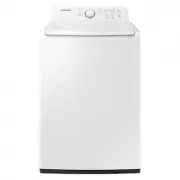 Samsung WA40A3005AW
User Manual
Samsung WA40A3005AW
User Manual
 Samsung WA40A3005AW/A4
User Manual
Samsung WA40A3005AW/A4
User Manual
 Samsung WA44A3205AW
User Manual
Samsung WA44A3205AW
User Manual
 Samsung WA44A3205AW/A4
User Manual
Samsung WA44A3205AW/A4
User Manual
 Samsung WA44A3405AP
User Manual
Samsung WA44A3405AP
User Manual
 Samsung WA44A3405AV
User Manual
Samsung WA44A3405AV
User Manual
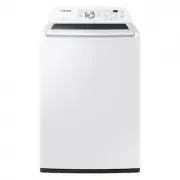
 Samsung WA45T3200AW
User Manual
Samsung WA45T3200AW
User Manual
 Samsung WA45T3400AP
User Manual
Samsung WA45T3400AP
User Manual