Page 2 - informazioni sulla sicurezza; INFORMAZIONI SULLA SICUREZZA; SIMBOLI DI AVVERTENZA/ATTENZIONE UTILIZZATI; ALTRI SIMBOLI UTILIZZATI
02_ informazioni sulla sicurezza informazioni sulla sicurezza INFORMAZIONI SULLA SICUREZZA Prima di utilizzare il prodotto, leggere attentamente questo manuale e conservarlo per future • consultazioni.Poiché queste istruzioni coprono diversi modelli del prodotto, le caratteristiche dell’aspirapolver...
Page 3 - INFORMAZIONI IMPORTANTI SULLA SICUREZZA; INFORMAZIONI GENERALI; BASE DI RICARICA
informazioni sulla sicurezza _03 INFORMAZIONI IMPORTANTI SULLA SICUREZZA Durante l’uso di apparecchiature elettriche, è necessario seguire alcune precauzioni di base, tra le quali: LEGGERE TUTTE LE ISTRUZIONI D’USO PRIMA DI UTILIZZARE IL ROBOT ASPIRAPOLVERE. Scollegare l'apparecchio dalla presa di c...
Page 4 - ROBOT ASPIRAPOLVERE
04_ informazioni sulla sicurezza ROBOT ASPIRAPOLVERE Non aspirare oggetti rigidi, appuntiti o taglienti come vetro, chiodi, viti, monete o simili. • Non utilizzare senza fi ltro. Durante la manutenzione dell’unità, non inserire dita o altri oggetti nel • comparto della ventola per evitare lesioni in ...
Page 5 - indice
indice _05 indice INFORMAZIONI SULLA SICUREZZA 02 06 Alimentazione07 Operazioni preliminari 10 In uso 11 Pulizia e Manutenzione CARATTERISTICHE DEL PRODOTTO 13 MONTAGGIO DELL'ASPIRAPOLVERE 15 15 Componenti16 Nomenclatura delle parti FUNZIONAMENTO DELL'ASPIRAPOLVERE 20 20 Installazione del robot aspi...
Page 6 - ALIMENTAZIONE
06_ informazioni sulla sicurezza ALIMENTAZIONE ATTENZIONE Non piegare eccessivamente il cavo di alimentazione né posizionarvi sopra oggetti pesanti che potrebbero danneggiarlo. La mancata osservanza di questa precauzione può causare - incendi o scosse elettriche. ATTENZIONE Accertarsi di rimuovere e...
Page 7 - OPERAZIONI PRELIMINARI
informazioni sulla sicurezza _07 0 1 INFORMAZIONI SULLA SICUREZZA OPERAZIONI PRELIMINARI AVVERTENZA Prima di attivare il robot aspirapolvere, accertarsi che la vaschetta di raccolta polvere sia inserita. Se la vaschetta di raccolta polvere non è inserita, il robot - aspirapolvere non funzionerà. AVV...
Page 10 - IN USO
10_ informazioni sulla sicurezza IN USO AVVERTENZA Il robot aspirapolvere non può essere utilizzato su tappeti spessi. Potrebbero verifi carsi problemi di funzionamento. - Potrebbero verifi carsi danni ai tappeti. - AVVERTENZA Non usare il robot aspirapolvere su tavoli o su altre superfi ci rialzate da...
Page 11 - PULIZIA E MANUTENZIONE
informazioni sulla sicurezza _11 0 1 INFORMAZIONI SULLA SICUREZZA AVVERTENZA Non spostare il robot aspirapolvere afferrandolo dalla vaschetta di raccolta polvere. La vaschetta di raccolta polvere potrebbe staccarsi causando - lesioni fi siche o gravi danni al prodotto. NOTA Il robot aspirapolvere pot...
Page 13 - COMODA FUNZIONE VIRTUAL GUARD; PULIZIA DELICATA DI OGNI ANGOLO; caratteristiche del prodotto
caratteristiche del prodotto _13 COMODA FUNZIONE VIRTUAL GUARD È possibile restringere il raggio d'azione del robot aspirapolvere a una zona delimitata usando la modalità Fence (barriera virtuale). Cosa si intende per riconoscimento della • forma del soffi tto (Visionary mapping plus™)? Questa funzio...
Page 14 - AUTO RICARICA
14_ caratteristiche del prodotto AUTO RICARICA Quando il livello di carica della batteria è basso, il robot aspirapolvere si dirige automaticamente verso la base di ricarica per effettuare automaticamente un ciclo di ricarica rapida. FUNZIONE AUTOMATICA DI SVUOTAMENTO DELLA POLVERE DEL ROBOT ASPIRAP...
Page 15 - COMPONENTI; Altri componenti; montaggio dell'aspirapolvere; Unità principale
montaggio _15 02 MONT AGGIO COMPONENTI Altri componenti ■ (Batterie tipo AAA) (Batterie tipo AAA) Manuale dell’utente / 2 batterie VIRTUAL GUARD Filtro di ricambio Spazzola per pulizia Guida di avvio rapido Spazzola per tappeti montaggio dell'aspirapolvere Unità principale ■ Base di ricarica ■ (Staz...
Page 16 - NOMENCLATURA DELLE PARTI; Parte anteriore
16_ montaggio NOMENCLATURA DELLE PARTI Parte anteriore Parte inferiore Parte laterale Unità principale ■ Sensore Virtual Guard Sensore Virtual Guard Pulsante di espulsione Pulsante di espulsione vaschetta di raccolta vaschetta di raccolta polvere polvere Telecamera Telecamera Sensore ostacoli Sensor...
Page 17 - VIRTUAL GUARD
montaggio _17 02 MONT AGGIO Base di ricarica (Stazione) ■ VIRTUAL GUARD ■ Pulsante di alimentazione Pulsante di alimentazione Pulsante di rimozione Pulsante di rimozione vaschetta di raccolta polvere vaschetta di raccolta polvere Pulsante di attivazione/disattivazione Pulsante di attivazione/disatti...
Page 18 - Telecomando
18_ montaggio Telecomando ■ Installazione delle batterie del telecomando ■ Al momento dell'acquisto del prodotto, le batterie non sono installate nel telecomando.Installare le batterie (tipo AAA) prima dell'uso. 1 1 2 2 3 3 Sollevare il coperchio del vano batterie nella parte posteriore del telecoma...
Page 19 - PARTI DEL DISPLAY; Pannello del display
montaggio _19 02 MONT AGGIO PARTI DEL DISPLAY Numero 1. Mostra il timer, lo stato di avanzamento e i codici di errore mediante numeri, lettere e simboli grafi ci. - Programma settimanale 2. Quando si imposta un programma settimanale per iniziare la pulizia a partire dall'ora specifi cata - del giorno ...
Page 20 - INSTALLAZIONE DEL ROBOT ASPIRAPOLVERE; Ordine d'installazione; funzionamento dell'aspirapolvere
20_ funzionamento INSTALLAZIONE DEL ROBOT ASPIRAPOLVERE Ordine d'installazione Accensione e spegnimento 1. Per utilizzare il robot aspirapolvere, è necessario portare l'interruttore di alimentazione situato nella parte inferiore dell'unità principale in posizione di accensione "On". Installa...
Page 21 - Installazione della base di ricarica
funzionamento _21 03 FUNZIONAMENTO Installazione della base di ricarica Installare la base di ricarica su una superfi cie 1. piana. Non devono essere presenti ostacoli e dislivelli entro un raggio 2. di 0,5 m a sinistra e a destra ed entro 1 m sul davanti. Installare la base di ricarica in una posizi...
Page 22 - Inserimento della spazzola per tappeti
22_ funzionamento Informazioni su come utilizzare la funzione di svuotamento automatico Portare il pulsante di alimentazione in posizione On. 1. Portare il pulsante della funzione di svuotamento automatico 2. in posizione On. Se il pulsante di svuotamento automatico è in posizione ❈ Off, l'aspirapol...
Page 23 - Ricarica in corso
funzionamento _23 03 FUNZIONAMENTO Ricarica in corso Al momento dell’acquisto del prodotto, la batteria è completamente scarica ed è necessario caricarla completamente prima dell’utilizzo. Accendere l'apparecchio premendo l'interruttore posto nella parte inferiore. Una volta allineati i contatti di ...
Page 24 - Informazioni sulla batteria
24_ funzionamento NOTA Al momento dell'acquisto del prodotto, sono necessari circa 180 minuti per effettuare una ricarica • completa della batteria al fi ne di garantire un'autonomia di funzionamento di circa 100 minuti.Se la ricarica viene effettuata quando la batteria è surriscaldata, il tempo nece...
Page 25 - Impostazione orario
funzionamento _25 03 FUNZIONAMENTO Impostazione orario L'orologio visualizza l'ora corrente. È possibile modifi care l'ora corrente attenendosi alla seguente procedura. È possibile impostare l'orario solamente tramite telecomando. ■ Telecomando Sequenza di confi gurazione Lampeggia Lampeggia Premere i...
Page 26 - Installazione di VIRTUAL GUARD
26_ funzionamento Installazione di VIRTUAL GUARD È possibile restringere il raggio d'azione del robot aspirapolvere a una zona delimitata usando la modalità Fence (barriera virtuale). Funzionamento pulsanti Sequenza confi gurazione 1. Modalità Fence (barriera virtuale): La spia rossa lampeggia. - Off...
Page 28 - UTILIZZO DEL ROBOT ASPIRAPOLVERE; Avviare/Interrompere la pulizia; Utilizzo dei pulsanti
28_ funzionamento UTILIZZO DEL ROBOT ASPIRAPOLVERE Avviare/Interrompere la pulizia È possibile attivare o disattivare tutte le funzioni del robot aspirapolvere. Ogni funzione viene eseguita solo se l’interruttore di ■ alimentazione è su On.Quando il robot aspirapolvere è in funzione, premere il puls...
Page 29 - Ricarica
funzionamento _29 03 FUNZIONAMENTO Ricarica Premendo il pulsante Recharging (Ricarica), il robot aspirapolvere torna alla base di ricarica per ricaricare le batterie. Quando il robot aspirapolvere è in funzione, premere il pulsante ■ ( ) per annullare l'operazione e premere il pulsante di ricarica. ...
Page 30 - Pulizia automatica; Modalità Normale
30_ funzionamento Pulizia automatica Il robot aspirapolvere si muove autonomamente ed esegue la pulizia automatica della casa fi no al suo completamento. Se si preme il pulsante Start/Stop (Avvio/Arresto) sull'unità principale ■ o sul telecomando senza selezionare alcuna modalità di pulizia, verrà au...
Page 31 - Pulizia Spot
funzionamento _31 03 FUNZIONAMENTO Pulizia Spot È possibile effettuare la pulizia di una zona specifi ca contenente ad esempio briciole di pane o di biscotti, polvere o simili. Spostare il robot aspirapolvere nella posizione in cui si desidera ■ eseguire una pulizia spot. Pulsante sull'unità principa...
Page 32 - Pulizia Max
32_ funzionamento Pulizia Max Il robot aspirapolvere si sposta automaticamente ed esegue la pulizia fi no a esaurimento della carica delle batterie e il livello di carica visualizzato è uno. Se la pulizia inizia quando il robot aspirapolvere è inserito nella base ■ di ricarica, il tempo necessario pe...
Page 33 - Pulizia manuale
funzionamento _33 03 FUNZIONAMENTO Pulizia manuale È possibile spostare il robot aspirapolvere per pulire una zona specifi ca usando direttamente il telecomando. Spostare il robot aspirapolvere nella posizione in cui si desidera ■ eseguire una pulizia manuale.La pulizia manuale può essere eseguita so...
Page 34 - Programmazione del timer
34_ funzionamento Programmazione del timer In questa modalità, è possibile programmare l'avvio di un ciclo di pulizia a partire da una determinata ora. Un ciclo di pulizia programmato viene eseguito solo quando ■ l'aspirapolvere è inserito nella base di ricarica. Telecomando Sequenza di confi gurazio...
Page 35 - Programma settimanale
funzionamento _35 03 FUNZIONAMENTO Programma settimanale In questa modalità, è possibile programmare l'avvio di un ciclo di pulizia a partire da una determinata ora nei giorni della settimana specifi cati. Un ciclo di pulizia programmato viene eseguito solo quando ■ l'aspirapolvere è inserito nella b...
Page 37 - FUNZIONI AGGIUNTIVE; Uso delle funzioni aggiuntive
funzionamento _37 03 FUNZIONAMENTO FUNZIONI AGGIUNTIVE Uso delle funzioni aggiuntive È possibile utilizzare il robot in modo più pratico ed effi cace applicando le altre funzioni di pulizia. Le funzioni aggiuntive possono essere confi gurate solo con il telecomando. ■ Modalità Turbo Ogni volta che si ...
Page 38 - PULIZIA DEL ROBOT ASPIRAPOLVERE; Rispettare i metodi di pulizia e manutenzione; manutenzione strumenti e fi ltri
38_ manutenzione PULIZIA DEL ROBOT ASPIRAPOLVERE Rispettare i metodi di pulizia e manutenzione Se l’interruttore di alimentazione è danneggiato, contattare un ■ tecnico dell’assistenza per evitare eventuali incidenti.Non utilizzare strumenti o dispositivi meccanici non previsti dal ■ produttore che ...
Page 39 - Pulizia della vaschetta di raccolta polvere e dei fi ltri
manutenzione _39 04 MANUTENZIONE Pulizia della vaschetta di raccolta polvere e dei fi ltri Per prima cosa, svuotare la vaschetta di raccolta polvere prima di pulirla. Durante l'estrazione della vaschetta, prestare attenzione a non ■ rovesciare la polvere raccolta.Svuotare la vaschetta nei seguenti ca...
Page 40 - SVUOTAMENTO AUTOMATICO DELLA VASCHETTA DI RACCOLTA POLVERE
40_ manutenzione SVUOTAMENTO AUTOMATICO DELLA VASCHETTA DI RACCOLTA POLVERE Rimuovere la vaschetta di raccolta polvere nella direzione della 1. freccia. Spingere verso il basso la levetta di bloccaggio per aprire il 2. coperchio della vaschetta di raccolta polvere.Aprire il coperchio dopo aver posiz...
Page 43 - Pulizia della spazzola principale
manutenzione _43 04 MANUTENZIONE Pulire periodicamente il lato inferiore dell’Autosvuotamento. 7. PULIZIA DEL ROBOT ASPIRAPOLVERE Pulizia della spazzola principale Spegnere l’unità mediante l'interruttore di alimentazione posto nella parte inferiore prima di pulire il robot aspirapolvere. Dal moment...
Page 46 - Pulizia delle ruote di guida
46_ manutenzione Pulizia delle ruote di guida Spegnere sempre l’unità mediante l'interruttore di alimentazione posto nella parte inferiore prima di pulire il robot. Se il robot aspirapolvere improvvisamente inizia a procedere a zig ■ zag, verifi care che non vi siano corpi estranei incastrati fra le ...
Page 47 - CHECKLIST PRIMA DI CONTATTARE L'ASSISTENZA; risoluzione dei problemi
risoluzione dei problemi _47 05 RISOLUZIONE DEI PROBLEMI CHECKLIST PRIMA DI CONTATTARE L'ASSISTENZA Anomalia Checklist Misure correttive Il robot aspirapolvere non funziona prima della pulizia. La vaschetta di raccolta è inserita • correttamente? Montare la vaschetta di raccolta • polvere. L’interru...
Page 50 - RISOLUZIONE DEI PROBLEMI MEDIANTE CODICI DI ERRORE
50_ risoluzione dei problemi RISOLUZIONE DEI PROBLEMI MEDIANTE CODICI DI ERRORE CODICE DI ERRORE CAUSA SOLUZIONE Il robot aspirapolvere è • rimasto intrappolato o si è bloccato durante il funzionamento. Spegnere il robot mediante l'interruttore di • alimentazione posto nella parte inferiore e sposta...
Page 51 - specifi che del prodotto
specifi che del prodotto _51 06 SPECIFICHE DEL PRODOTTO 80 mm (altezza) 80 mm (altezza) 350 mm (lunghezza) 350 mm (lunghezza) 350 mm (larghezza) 350 mm (larghezza) 357 mm (larghezza) 357 mm (larghezza) 560 mm 560 mm (lunghezza) (lunghezza) 260 mm (altezza) 260 mm (altezza) Unità principale Base di ri...
Page 52 - OPEN SOURCE ANNOUNCEMENT
OPEN SOURCE ANNOUNCEMENT Some software components of this product incorporate source code covered under the BSD.And this software is based in part on the work of the Independent JPEG Group. OpenCV : ■ IMPORTANT : READ BEFORE DOWNLOADING, COPYING, INSTALLING OR USING.By downloading, copying, installi...
Page 53 - memo
memo DJ68-00632B.indb 53 DJ68-00632B.indb 53 2012.1.19 11:51:44 AM 2012.1.19 11:51:44 AM
Page 55 - Benutzerhandbuch; imagine; Produkt registrieren und gewinnen unter
SR8980 Deutsch Robo-Sauger Benutzerhandbuch imagine the possibilities Wir freuen uns, dass Sie sich für ein Samsung-Produktentschieden haben! Produkt registrieren und gewinnen unter www.samsung.com/register Dieses Handbuch ist zu 100% auf Recyclingpapier gedruckt. ✻ Lesen Sie die Anweisungen sorgfäl...
Page 56 - Sicherheitsinformationen; SICHERHEITSINFORMATIONEN; WEITERE VERWENDETE SYMBOLE
02_ Sicherheitsinformationen Sicherheitsinformationen SICHERHEITSINFORMATIONEN Bitte lesen Sie die Bedienungsanleitung gründlich durch, und bewahren Sie sie zum späteren • Nachschlagen auf.Da die folgenden Hinweise zum Betrieb für verschiedene Modelle gelten, können die • Eigenschaften Ihres Staubsa...
Page 57 - WICHTIGE HINWEISE ZUR SICHERHEIT; ALLGEMEIN
Sicherheitsinformationen _03 WICHTIGE HINWEISE ZUR SICHERHEIT Beim Umgang mit Elektrogeräten sind einige grundlegende Vorsichtsmaßnahmen wie u.a. die folgenden zu beachten: LESEN SIE VOR DER VERWENDUNG IHRES ROBO-SAUGERS SÄMTLICHE ANWEISUNGEN GRÜNDLICH DURCH. Ziehen Sie den Stecker aus der Steckdose...
Page 59 - Inhalt
Inhalt _05 Inhalt SICHERHEITSINFORMATIONEN 02 06 Netzanschluss07 Vor Inbetriebnahme 10 Beim Betrieb 11 Reinigung und Wartung GERÄTEMERKMALE 13 ÜBERSICHT ÜBER DAS GERÄT 15 15 Bestandteile des Geräts16 Bezeichnungen der Teile BETRIEB DES GERÄTS 20 20 Inbetriebnahme des Robo-Saugers 20 Anweisungen zur ...
Page 60 - NETZANSCHLUSS
06_ Sicherheitsinformationen NETZANSCHLUSS WARNUNG Vermeiden Sie übermäßiges Verdrehen des Kabels. Keine schweren Gegenstände auf das Kabel stellen, da dieses sonst brechen kann. Andernfalls besteht die Gefahr von Stromschlägen oder Brand. - WARNUNG Entfernen Sie Schmutz und Wasser vom Netzstecker. ...
Page 61 - VOR INBETRIEBNAHME
Sicherheitsinformationen _07 01 SICHERHEITSINFORMA TIONEN VOR INBETRIEBNAHME VORSICHT Stellen Sie vor dem Aktivieren des Robo-Saugers sicher, dass der Staubbehälter eingesetzt ist. Wenn der Staubbehälter nicht eingesetzt wurde, kann der Robo- - Sauger nicht in Betrieb genommen werden. VORSICHT Verwe...
Page 64 - BEIM BETRIEB
10_ Sicherheitsinformationen BEIM BETRIEB VORSICHT Sie können den Robo-Sauger nicht auf hochfl origen Teppichen einsetzen. Es kann zu Beschädigungen am Robo-Sauger kommen. - Dies kann zu Schäden am Teppich führen. - VORSICHT Verwenden Sie den Robo-Sauger nicht auf Tischen oder anderen hochliegenden B...
Page 65 - REINIGUNG UND WARTUNG
Sicherheitsinformationen _11 01 SICHERHEITSINFORMA TIONEN VORSICHT Tragen Sie den Robo-Sauger niemals am Griff des Staubbehälters. Dabei kann der Staubbehälter herausgezogen werden, was - Verletzungen oder schwerste Schäden am Gerät zur Folge haben kann. HINWEIS Möglicherweise kann der Robo-Sauger s...
Page 67 - MEHR BEQUEMLICHKEIT DURCH DIE VIRTUAL GUARD-FUNKTION; GRÜNDLICHE ECKENREINIGUNG; Gerätemerkmale
Gerätemerkmale _13 MEHR BEQUEMLICHKEIT DURCH DIE VIRTUAL GUARD-FUNKTION Sie können den Betrieb des Robo-Saugers mit einem elektronischen Zaun (virtuelle Wand oder) auf einen bestimmten Bereich beschränken. Was ist die Deckenerkennungsfunktion • (Visionary mapping plus™)? Diese Funktion erkennt die F...
Page 69 - BESTANDTEILE DES GERÄTS; Weiteres Zubehör; Übersicht über das Gerät; Ladestation
Übersicht _15 02 ÜBERSICHT BESTANDTEILE DES GERÄTS Weiteres Zubehör ■ (Batterien Typ AAA) (Batterien Typ AAA) Benutzerhandbuch / 2 Batterien VIRTUAL GUARD Ersatzfi lter Reinigungsbürste Kurzanleitung Spezialzubehör für Teppichreinigung Übersicht über das Gerät Robo-Sauger ■ Ladestation ■ Fernbedienun...
Page 70 - BEZEICHNUNGEN DER TEILE; Vorderseite
16_ Übersicht BEZEICHNUNGEN DER TEILE Vorderseite Unterseite Seite Robo-Sauger ■ Virtual GUARD- Virtual GUARD- Sensor Sensor Freigabeschalter für Freigabeschalter für Staubbehälter Staubbehälter Kamera Kamera Hindernissensor Hindernissensor Freigabeschalter für Freigabeschalter für Staubbehälter Sta...
Page 72 - Fernbedienung
18_ Übersicht Fernbedienung ■ Einsetzen der Batterien für die Fernbedienung ■ Die Fernbedienung wird beim Kauf ohne Batterien geliefert.Setzen Sie vor Gebrauch Alkali-Batterien (Typ AAA) ein. 1 1 2 2 3 3 Nehmen Sie die Abdeckung des Batteriefachs an der Rückseite der Fernbedienung ab, dazu die Verri...
Page 73 - ANZEIGE; Anzeige
Übersicht _19 02 ÜBERSICHT ANZEIGE Ziffernanzeige 1. Zeigt den Timer, den Fortschritt und eventuelle Fehlercodes mit Hilfe von Ziffern, Buchstaben - und Symbolen an. Wocheneinstellung 2. Wenn Sie eine wöchentliche Reinigung für einen bestimmten Tag zu einer bestimmten Uhrzeit - programmiert haben, w...
Page 74 - INBETRIEBNAHME DES ROBO-SAUGERS; Anweisungen zur Inbetriebnahme; Betrieb des Geräts
20_ Betrieb INBETRIEBNAHME DES ROBO-SAUGERS Anweisungen zur Inbetriebnahme Ein- und Ausschalten des Geräts 1. Um den Robo-Sauger zu verwenden, müssen Sie das Gerät am Hauptschalter an der Geräteunterseite einschalten. Installieren der Ladestation 2. Um den Robo-Sauger aufzuladen, müssen Sie zuerst d...
Page 75 - Installieren der Ladestation
Betrieb _21 03 BETRIEB Installieren der Ladestation Stellen Sie die Ladestation auf einer ebenen 1. Fläche auf. Im Bereich der Ladestation, d.h. 0,5 m seitlich und 1 m nach 2. vorn dürfen sich keinerlei Hindernisse oder Absätze befi nden. Stellen Sie die Ladestation an einer Stelle auf, die für den R...
Page 76 - Spezialzubehör für Teppichreinigung anbringen
22_ Betrieb Verwendung der automatischen Entleerungsfunktion für den Staubbehälter Schalten Sie den Netzschalter ein. 1. Stellen Sie die Ein/Aus-Taste für die autom. Entleerfunktion 2. auf „On“ (Ein). Steht die Taste für die autom. Entleerfunktion nicht auf ❈ „On“ (Ein), kann der Staubbehälter des S...
Page 77 - Laden
Betrieb _23 03 BETRIEB Laden Wenn Sie das Gerät erwerben, ist der Akku vollständig entladen, und Sie müssen den Robo-Sauger manuell aufl aden. Schalten Sie die Stromversorgung am Hauptschalter an der Geräteunterseite ein. Nachdem Sie die Ladekontakte an Gerät und 1. Ladestation aufeinander ausgericht...
Page 78 - Informationen zum Akku
24_ Betrieb HINWEISE Wenn Sie den Akku nach dem Kauf des Geräts erstmals laden, dauert es etwa 180 Minuten, • den Akku vollständig aufzuladen; die Ladung reicht für etwa 100 Minuten Betriebszeit.Die Ladezeit kann zunehmen, wenn Sie den Akku in überhitztem Zustand aufl aden. • Maßnahmen bei Störungen ...
Page 79 - Einstellen der Uhrzeit
Betrieb _25 03 BETRIEB Einstellen der Uhrzeit An der Uhr wird die aktuelle Uhrzeit angezeigt. Sie können die Uhrzeit wie folgt einstellen. Die Uhrzeiteinstellung kann nur über die Fernbedienung vorgenommen werden. ■ Fernbedienung Konfi guration Blinkt Blinkt Drücken Sie die Taste Clock. 1. Die aktuel...
Page 80 - Einstellen des VIRTUAL GUARD
26_ Betrieb Einstellen des VIRTUAL GUARD Sie können den Betrieb des Robo-Saugers mit dem Zaunmodus (virtuelle Wand) auf einen bestimmten Bereich beschränken. Bedienung der Tasten Modusanzeige 1. Zaunmodus (virtuelle Wand): Die rote Anzeige blinkt. - Aus: Die Anzeige leuchtet nicht mehr. - Einstellen...
Page 82 - BETRIEB DES ROBO-SAUGERS; Sauger
28_ Betrieb BETRIEB DES ROBO-SAUGERS Ein- und Ausschalten des Robo-Saugers Sie können alle Funktionen des Robo-Saugers aktivieren bzw. deaktivieren. Die Funktionen des Robo-Saugers sind verfügbar, nachdem ■ das Gerät mit dem Hauptschalter eingeschaltet wurde. Ist der Robo-Sauger in Betrieb, drücken ...
Page 83 - Aufl aden
Betrieb _29 03 BETRIEB Aufl aden Durch Drücken der Ladetaste (Recharging) können Sie den Robo-Sauger zum Ladegerät zurückkehren lassen, um den Akku aufzuladen. Ist der Robo-Sauger in Betrieb, drücken Sie die Taste ( ■ ) , um den laufenden Betrieb zu unterbrechen. Drücken Sie dann die Ladetaste (Recha...
Page 84 - Automatisches Saugen; Normalbetrieb
30_ Betrieb Automatisches Saugen Der Robo-Sauger bewegt sich selbsttätig und säubert automatisch das Haus, bis der Saugvorgang abgeschlossen ist. Wenn Sie die Taste Start/Stop am Gerät oder auf der Fernbedienung ■ drücken, ohne einen Reinigungsmodus zu wählen, beginnt der Robo-Sauger im Automatikmod...
Page 85 - Punktsaugen
Betrieb _31 03 BETRIEB Punktsaugen Sie können ganz einfach einen bestimmten Bereich reinigen, in dem sich z. B. viele Krümel, Staub usw. befi nden. Bewegen Sie den Robo-Sauger an die Stelle, wo die Punktreinigung ■ durchgeführt werden soll. Tasten am Robo- Sauger Tasten auf der Fernbedienung Konfi gur...
Page 86 - MAXIMALSAUGEN
32_ Betrieb MAXIMALSAUGEN Der Robo-Sauger bewegt sich automatisch und macht sauber, bis der Akku fast leer ist und nur noch eine Ladestufe angezeigt wird (blinkt). Wenn der Saugvorgang gestartet wird, während der Robo-Sauger ■ an die Ladestation angedockt ist, reduziert sich die Zeit für das Zurückf...
Page 87 - Manuelles Saugen
Betrieb _33 03 BETRIEB Manuelles Saugen Sie können den Robo-Sauger mit der Fernbedienung selbst steuern, um eine bestimmte Stelle zu reinigen. Bewegen Sie den Robo-Sauger an die Stelle, wo die manuelle ■ Reinigung durchgeführt werden soll.Manuelles Saugen kann nur über die Fernbedienung gesteuert ■ ...
Page 88 - Startzeitvorwahl
34_ Betrieb Startzeitvorwahl Sie können den Robo-Sauger in diesem Modus so programmieren, dass er zu einer bestimmten Zeit zu saugen beginnt. Das Reinigen mit Startzeitvorwahl kann nur dann ausgeführt ■ werden, wenn der Robo-Sauger an die Ladestation angedockt ist. Fernbedienung Konfi guration Blinkt...
Page 89 - Wocheneinstellung
Betrieb _35 03 BETRIEB Wocheneinstellung Sie können den Robo-Sauger in diesem Modus so programmieren, dass er an einem bestimmten Wochentag zu einem bestimmten Zeitpunkt zu saugen beginnt. Das Reinigen mit Startzeitvorwahl kann nur dann ausgeführt ■ werden, wenn der Robo-Sauger an die Ladestation an...
Page 91 - SPEZIALFUNKTIONEN; Verwenden von Spezialfunktionen
Betrieb _37 03 BETRIEB SPEZIALFUNKTIONEN Verwenden von Spezialfunktionen Die Spezialfunktionen machen die Verwendung des Robo-Saugers noch einfacher und bequemer. Die Einstellung der Spezialfunktionen kann nur über die Fernbedienung vorgenommen werden. ■ Turbomodus Wenn Sie auf der Fernbedienung die...
Page 92 - REINIGEN DES ROBO-SAUGERS; Hinweise zu Reinigung und Wartung; Reinigen der Sensorfenster und der Kamera; Wartung von Zubehör und Filtern
38_ Wartung REINIGEN DES ROBO-SAUGERS Hinweise zu Reinigung und Wartung Wenn der Hauptschalter am Sauger beschädigt ist, wenden Sie ■ sich an den Kundendienst von Samsung, damit keine Unfalle passieren.Benutzen Sie keine Hilfsmittel oder mechanischen Vorrichtungen, ■ die nicht vom Hersteller install...
Page 93 - Reinigen des Staubbehälters und der Filter
Wartung _39 04 W A R TUNG Reinigen des Staubbehälters und der Filter Entleeren Sie vor dem Reinigen den Staubbehälter. Wenn Sie den Staubbehälter herausnehmen, achten Sie sorgfältig ■ darauf, den Staub aus dem Behälter nicht zu verschütten.Leeren Sie den Staubbehälter in folgenden Situationen: ■ Sta...
Page 95 - REINIGEN DER FILTER AN DER AUTOMATISCHEN ENTLEERSTATION
Wartung _41 04 W A R TUNG REINIGEN DER FILTER AN DER AUTOMATISCHEN ENTLEERSTATION 1 1 1 2 2 3 3 Nehmen Sie den Staubbehälter in Pfeilrichtung heraus. Ziehen Sie die Filterhalterung in Pfeilrichtung heraus. Nehmen Sie den Filter am Staubbehälter ab. 4 4 5 5 6 6 Nach Abnehmen des Filters vom Staubbehä...
Page 96 - REINIGEN DES BODENS DER AUTOMATISCHEN ENTLEERSTATION
42_ Wartung REINIGEN DES BODENS DER AUTOMATISCHEN ENTLEERSTATION Drehen Sie die Station herum, damit der Boden nach 1. oben zeigt. Nehmen Sie die 6 Befestigungsschrauben wie in der Abbildung gezeigt mit Hilfe einer Münze heraus. Nehmen Sie dieBodenabdeckung 2. der Entleerstation mit Hilfe einer Münz...
Page 97 - REINIGEN DER HAUPTBÜRSTE
Wartung _43 04 W A R TUNG Unterseite der Entleerstation regelmäßig reinigen. 7. REINIGEN DES ROBO-SAUGERS REINIGEN DER HAUPTBÜRSTE Schalten Sie stets den Hauptschalter an der Geräteunterseite aus, ehe Sie den Robo-Sauger reinigen. Da der Staub aus dem Staubbehälter herausfallen kann, • entfernen Sie...
Page 100 - Reinigen der Antriebsräder
46_ Wartung Reinigen der Antriebsräder Schalten stets den Hauptschalter an der Geräteunterseite aus, ehe Sie den Robo-Sauger reinigen. Wenn der Robo-Sauger plötzlich im Zickzack zu fahren beginnt, ■ kann es sein, dass Fremdstoffe an den Antriebsrädern haften. Zum Reinigen der Antriebsräder legen Sie...
Page 101 - CHECKLISTE ZUR SELBSTHILFE; Fehlersuche
Fehlersuche _47 05 FEHLERSUCHE CHECKLISTE ZUR SELBSTHILFE Störung Checkliste Maßnahme Der Robo-Sauger lässt sich nicht in Betrieb nehmen. Ist der Staubbehälter eingesetzt? • Setzen Sie den Staubbehälter ein. • Ist der Hauptschalter • eingeschaltet? Schalten Sie das Gerät am • Hauptschalter ein. Wird...
Page 104 - FEHLERCODES UND FEHLERBEHEBUNG
50_ Fehlersuche FEHLERCODES UND FEHLERBEHEBUNG Fehlercode Ursache Fehlerbehebung Der Robo-Sauger hat sich • beim Fahren verfangen, verklemmt oder hängt fest. Schalten Sie das Gerät am Hauptschalter an • der Geräteunterseite aus und bringen Sie den Robo-Sauger an eine andere Stelle. Fremdstoffe (Schn...
Page 105 - Technische Daten
Technische Daten _51 06 TECHNISCHE DATEN 80 mm (Höhe) 80 mm (Höhe) 350 mm (Länge) 350 mm (Länge) 350 mm (Breite) 350 mm (Breite) 357 mm (Breite) 357 mm (Breite) 560 mm (Länge) 560 mm (Länge) 260 mm (Höhe) 260 mm (Höhe) Robo-Sauger Ladestation Klassifi kation Bezeichnung SR8980* SERIE Mechanisch Durch...
Page 109 - Vacuum Cleaning Robot; user manual
SR8980 English Vacuum Cleaning Robot user manual imagine the possibilities Thank you for purchasing a Samsung product.To receive a more complete service, please register your product at www.samsung.com/register This manual is made with 100% recycled paper. ✻ Before operating this unit, please read t...
Page 110 - safety information; SAFETY INFORMATION; CAUTION/WARNING SYMBOLS USED; OTHER SYMBOLS USED
02_ safety information safety information SAFETY INFORMATION Before operating the appliance, please read this manual thoroughly and retain it for your • reference.Because these following operating instructions cover various models, the characteristics of your • vacuum cleaner may differ slightly fro...
Page 111 - IMPORTANT SAFETY INSTRUCTIONS; GENERAL; BATTERY CHARGER
safety information _03 IMPORTANT SAFETY INSTRUCTIONS When using an electrical appliance, basic precautions should be observed, including the following: READ ALL INSTRUCTIONS BEFORE USING YOUR VACUUM CLEANING ROBOT. Unplug from outlet when not in use and before conducting maintenance. WARNING: to red...
Page 112 - VACUUM CLEANING ROBOT
04_ safety information VACUUM CLEANING ROBOT Do not pick up hard or sharp objects such as glass, nails, screws, coins, and etc. • Do not use without a fi lter in place. When servicing the unit, never put fi ngers or other objects • into the fan chamber in case the unit accidentally turns on.Do not put...
Page 113 - contents
contents _05 contents SAFETY INFORMATION 02 06 Power Related 07 Before Use 10 In Use 11 Cleaning and Maintenance PRODUCT FEATURES 13 ASSEMBLING THE CLEANER 15 15 Components16 Name of each part OPERATING THE CLEANER 20 20 Installing the vacuum cleaning robot 20 Installation order 20 Turning the Power...
Page 114 - POWER RELATED
06_ safety information POWER RELATED WARNING Do not bend the power cord forcefully or place a heavy object on it that could break it. This may result in fi re or electric shock. - WARNING Make sure to remove any dust or water from the power plug. Failing to do so may result in a malfunction or electr...
Page 115 - BEFORE USE
safety information _07 01 SAFETY INFORMA TION BEFORE USE CAUTION Before activating the vacuum cleaning robot, make sure that the dust bin is assembled. If the dust bin is not inserted, vacuum cleaning robot will not - operate. CAUTION Never use vacuum cleaning robot in locations with combustible mat...
Page 118 - IN USE
10_ safety information IN USE CAUTION You cannot use the vacuum cleaning robot on thick carpets. This may result in problems with the vacuum cleaning robot. - This may result in damage to carpets. - CAUTION Do not use the vacuum cleaning robot on a table or other high locations. This may result in d...
Page 119 - CLEANING AND MAINTENANCE
safety information _11 01 SAFETY INFORMA TION CAUTION Do not move the robotic vacuum cleaner holding the dustbin part. This may cause the dustbin to separate, resulting in injury or - serious damage to the product. NOTE Vacuum cleaning robot may not be able to continue its operation if it is stuck a...
Page 121 - CONVENIENT VIRTUAL GUARD FUNCTION; DELICATE CLEANING OF EVERY CORNER; product features
product features _13 CONVENIENT VIRTUAL GUARD FUNCTION You can confi ne the vacuum cleaning robot to a particular section by using the Fence (virtual wall) mode. What is ceiling shape recognition (Visionary • mapping plus™)? This function recognizes the shape of the ceiling using the camera on top to...
Page 122 - AUTO CHARGING
14_ product features AUTO CHARGING When the battery is low, the vacuum cleaning robot is automatically guided to the charger to enable it to perform a quick auto charge. THE AUTO DUST EMPTYING FUNCTION OF THE VACUUM CLEANING ROBOT When the vacuum cleaning robot returns to the auto-emptier after clea...
Page 123 - COMPONENTS; Others Components; assembling the cleaner; Main Body
assembling _15 02 ASSEMBLING COMPONENTS Others Components ■ (AAA-Type Batteries) (AAA-Type Batteries) User Manual / 2 Battery VIRTUAL GUARD Spare Filter Cleaning Brush Quick Start Guide Accessory for Carpet assembling the cleaner Main Body ■ Charger (Station) ■ Remote Control ■ DJ68-00632B(EN-3).ind...
Page 124 - NAME OF EACH PART; Front
16_ assembling NAME OF EACH PART Front Bottom Side Main unit ■ Virtual Guard Sensor Virtual Guard Sensor Dustbin Eject Button Dustbin Eject Button Camera Camera Obstacle Sensor Obstacle Sensor Dustbin Eject Button Dustbin Eject Button Dust bin Dust bin Driving Wheel Driving Wheel Power Switch Power ...
Page 126 - Remote Control
18_ assembling Remote Control ■ Installing the Remote Control Batterise ■ Batteries are not installed in the remote control when purchasing the product.Install the batteries (type AAA) before use. 1 1 2 2 3 3 Lift the battery compartment cover at the back of the remote control, while pressing the lo...
Page 127 - DISPLAY PART; Display panel
assembling _19 02 ASSEMBLING DISPLAY PART Number Display 1. Shows the timer display, progress status, and error codes using numbers, letters and graphics. - Weekly Reservation 2. When you set a weekly reservation to start cleaning from the specifi ed time on the specifi ed day - of the week, the icon ...
Page 128 - INSTALLING THE VACUUM CLEANING ROBOT; Installation order; operating the cleaner
20_ operating INSTALLING THE VACUUM CLEANING ROBOT Installation order Turning the Power Switch on or off 1. To use the vacuum cleaning robot, you must turn on the Power Switch at the bottom of the main unit. Installing the Charger 2. To charge the vacuum cleaning robot, you must fi rst install the ch...
Page 129 - Installing the charger
operating _21 03 OPERA TING Installing the charger Install the charger on a fl at surface. 1. There should be no obstacles and cliffs 0.5m to the left and 2. right and within 1 m of the front. Install the charger in a location where it can be easily accessed by 3. the vacuum cleaning robot. Arrange t...
Page 130 - Learn about how to use the Auto Empty function
22_ operating Learn about how to use the Auto Empty function Turn on the Power button. 1. Turn on the Auto Empty button. 2. If the Auto Empty button is turned off, the cleaner does not ❈ carry out the Auto Empty function.If the dust bin was fi lled by dust, the vacuum cleaning robot ❈ return to the A...
Page 132 - About the Battery
24_ operating NOTE When the product is initially purchased, it will take about 180 minutes to fully charge the • battery and will run for about 100 minutes.When charging the battery while the battery is over-heated, the charging time can increase. • Measures to take when charging is not smooth. • Wh...
Page 133 - Setting the Time
operating _25 03 OPERA TING Setting the Time The clock displays the current time. You can change the current time with the following steps. You can only set the time using the remote control. ■ Remote Control Confi guration Sequence Blinks Blinks Press the Clock button. 1. The current time is display...
Page 134 - Installing the VIRTUAL GUARD
26_ operating Installing the VIRTUAL GUARD You can confi ne the vacuum cleaning robot to a particular section by using Fence (virtual wall) mode. Button operations Lamp operations 1. Fence (virtual wall) Mode: The red lamp fl ashes. - Off :The lamp is turned off. - Turn the Power Button on 2. Whenever...
Page 136 - USING THE VACUUM CLEANING ROBOT; Starting/Stopping Cleaning; Using the main unit
28_ operating USING THE VACUUM CLEANING ROBOT Starting/Stopping Cleaning You can run or stop all vacuum cleaning robot functions. Each vacuum cleaning robot function only runs when the ■ Power Switch is turned on. When the vacuum cleaning robot is operating, press the ( ■ ) button to cancel the oper...
Page 137 - Recharging
operating _29 03 OPERA TING Recharging You can have the vacuum cleaning robot return to the charger to charge the battery by using the Recharging button. When the vacuum cleaning robot is operating, press the ( ■ ) button to cancel the operation and press the Recharging button. Press the Recharging ...
Page 138 - Auto Cleaning; Normal Mode
30_ operating Auto Cleaning The vacuum cleaning robot will move by itself and automatically clean the house until cleaning is completed once. If you press the Start/Stop button on the main unit or remote control ■ without selecting a cleaning mode, an automatic cleaning run starts.If cleaning begins...
Page 139 - Spot Cleaning
operating _31 03 OPERA TING Spot Cleaning You can conveniently clean a specifi c area that has a a lot of cookie crumbs, dust, and etc. Move the vacuum cleaning robot to the location where you want to ■ perform a spot clean. Main unit button Remote control button Confi guration Sequence Normal Mode No...
Page 140 - Max Cleaning
32_ operating Max Cleaning The vacuum cleaning robot automatically moves and cleans until the battery runs out and the battery level fl ashes only one level. If cleaning begins when the vacuum cleaning robot is docked with ■ the charger station, the time to return to the charger is decreased since th...
Page 141 - Manual Cleaning
operating _33 03 OPERA TING Manual Cleaning You can move the vacuum cleaning robot to clean a particular location directly by using the remote control. Move the vacuum cleaning robot to the location where you want to ■ perform manual cleaning.You can manually clean using the remote control only. ■ R...
Page 142 - Timer Reservation
34_ operating Timer Reservation In this mode, you can schedule the cleaner to start a once-off cleaning run from a particular time. A scheduled cleaning run is only performed when the cleaner is ■ docked to the charger station. Remote Control Confi guration Sequence Blinks Blinks Blinks Blinks Decrea...
Page 143 - Weekly Reservation
operating _35 03 OPERA TING Weekly Reservation In this mode, you can schedule the cleaner to start a once-off cleaning run from the specifi ed time on the specifi ed days of the week. A scheduled cleaning run is only performed when the cleaner is ■ docked to the charging station. Remote Control Confi g...
Page 145 - ADDITIONAL FUNCTIONS; Using additional functions
operating _37 03 OPERA TING ADDITIONAL FUNCTIONS Using additional functions You can use the cleaning robot more easily and conveniently using various additional functions. You can only confi gure the additional functions with the remote control. ■ Turbo Mode Each time you press the Turbo button, the ...
Page 146 - CLEANING THE VACUUM CLEANING ROBOT; Please keep the cleaning and maintenance methods in mind; Cleaning the Sensor Window and the Camera; maintain tools and fi lters
38_ maintain CLEANING THE VACUUM CLEANING ROBOT Please keep the cleaning and maintenance methods in mind When the Power Switch is damaged, please contact the service ■ agent so that it does not cause any accidents.Do not use any means or mechanical devices not installed by the ■ manufacturer that co...
Page 147 - Cleaning the Dust Bin and the Filters
maintain _39 04 MAINT AIN Cleaning the Dust Bin and the Filters First, empty the dust bin before cleaning it. When separating the dust bin, take care not to spill the dust out of the ■ dust bin.Empty the dust bin in the following cases. ■ When dust has accumulated inside the dust bin. 1. When the su...
Page 148 - EMPTYING THE AUTO-EMPTIER DUSTBIN
40_ maintain EMPTYING THE AUTO-EMPTIER DUSTBIN Remove the dustbin in the direction of the arrow. 1. Slide the locking bar downward to open the dustbin cover. 2. Open the cover after positioning the dustbin over a wastebasket. ❈ Slide the locking bar downward to open the dustbin cover. Shake the dust...
Page 149 - CLEANING THE FILTER OF THE AUTO-EMPTIER DUSTBIN
maintain _41 04 MAINT AIN CLEANING THE FILTER OF THE AUTO-EMPTIER DUSTBIN 1 1 1 2 2 3 3 Remove the dustbin in the direction of the arrow. Pull the holding part of the fi lter in the direction of the arrow. Remove the fi lter from the dustbin. 4 4 5 5 6 6 After removing the dustbin, shake the dust from...
Page 150 - CLEANING THE BOTTOM OF THE AUTO-EMPTIER
42_ maintain CLEANING THE BOTTOM OF THE AUTO-EMPTIER Turn the auto-emptier over so that its bottom is facing 1. upward. Then open the 6 fi xing screws using a coin as shown in the fi gure. Remove the bottom cover from the 2. auto-emptier using a coin, and then clean the bottom cover. Clean the bottom ...
Page 151 - Cleaning the Power Brush
maintain _43 04 MAINT AIN Cleaning the lower side of the Auto-Emptier periodically. 7. CLEANING THE VACUUM CLEANING ROBOT Cleaning the Power Brush You must turn off the Power Switch at the bottom of the main unit before cleaning the vacuum cleaning robot. Because the dust in the dust bin may come ou...
Page 153 - Cleaning the Edge-Cleaning Side rotating Brush
maintain _45 04 MAINT AIN Cleaning the Edge-Cleaning Side rotating Brush You must turn off the Power Switch at the bottom of the main unit before cleaning the vacuum cleaning robot. Check whether the side rotating brush is bent or whether there 1. are any foreign substances stuck on the brush. Weari...
Page 154 - Cleaning the Driving Wheel
46_ maintain Cleaning the Driving Wheel You must turn off the Power Switch at the bottom of the main unit before cleaning the robot. If the vacuum cleaning robot suddenly starts to zigzag, there may be ■ foreign substances stuck on the driving wheel. When cleaning the driving wheel, place a soft clo...
Page 155 - CHECKLIST BEFORE SVC CALLS; troubleshooting
troubleshooting _47 05 TROUBLESHOOTING CHECKLIST BEFORE SVC CALLS Symptom Checklist Measure to Take Vacuum cleaning robot does not operate at all before cleaning. Is the dust bin assembled? • Install the dust bin. • Is the Power Switch turned on? • Turn on the Power Switch. • Is cleaning mode • in t...
Page 158 - TROUBLESHOOTING FOR ERROR CODES
50_ troubleshooting TROUBLESHOOTING FOR ERROR CODES ERROR CODE CAUSE SOLUTION Vacuum cleaning robot is • caught, stuck or trapped while navigating. Turn off the Power Switch at the bottom and • move the vacuum cleaning robot to a different location. A foreign substance (string, • paper, toy etc.) is...
Page 159 - product specifi cation
product specifi cation _51 06 PRODUCT SPECIFICA TION 80 mm (Height) 80 mm (Height) 350 mm (Length) 350 mm (Length) 350 mm (Width) 350 mm (Width) 357 mm (Width) 357 mm (Width) 560 mm (Length) 560 mm (Length) 260 mm (Height) 260 mm (Height) Main Body Charger (Station) Classifi cation Item SR8980* SERIES...
Page 165 - Robotski sesalnik; Uporabniški priročnik; svet; izdelek registrirajte na
SR8980 Slovenščina Robotski sesalnik Uporabniški priročnik svet novih možnosti Zahvaljujemo se vam za nakup Samsungovegaizdelka.Če želite popolnejšo ponudbo storitev, izdelek registrirajte na www.samsung.com/register Ta priročnik je izdelan iz 100% recikliranega papirja. ✻ Pred uporabo izdelka pozor...
Page 166 - varnostne informacije; VARNOSTNE INFORMACIJE; UPORABLJENA SIMBOLA ZA OPOZORILO/POZOR; DRUGI UPORABLJENI SIMBOLI
02_ varnostne informacije varnostne informacije VARNOSTNE INFORMACIJE Pred uporabo naprave pazljivo preberite priročnik in ga shranite za prihodnjo uporabo. • Ker so ta navodila namenjena različnim modelom, bodo značilnosti vašega sesalnika morda • drugačne od tistih v tem priročniku. UPORABLJENA SI...
Page 167 - POMEMBNA VARNOSTNA NAVODILA; PRED UPORABO ROBOTSKEGA SESALNIKA PREBERITE VSA NAVODILA.; POLNILNIK BATERIJE
varnostne informacije _03 POMEMBNA VARNOSTNA NAVODILA Ko uporabljate električni aparat, upoštevajte naslednje osnovne varnostne ukrepe: PRED UPORABO ROBOTSKEGA SESALNIKA PREBERITE VSA NAVODILA. Izključite sesalnik iz vtičnice, če ga ne uporabljate in pred vzdrževanjem. OPOZORILO: za zmanjšanje nevar...
Page 168 - ROBOTSKI SESALNIK
04_ varnostne informacije ROBOTSKI SESALNIK Ne sesajte trdih ali ostrih predmetov, kot so steklo, žeblji, vijaki, kovanci ipd. • Sesalnika ne uporabljajte brez nameščenega fi ltra. Med servisiranjem izdelka ne vstavljajte • prstov ali predmetov v prostor z ventilatorjem, saj se lahko izdelek nehote v...
Page 169 - vsebina
vsebina _05 vsebina VARNOSTNE INFORMACIJE 02 06 Napajanje07 Pred uporabo 10 Med uporabo 11 Čiščenje in vzdrževanje ZNAČILNOSTI IZDELKA 13 SESTAVA SESALNIKA 15 15 Sestavni deli 16 Ime posameznega dela UPORABA SESALNIKA 20 20 Namestitev robotskega sesalnika 20 Vrstni red namestitve 20 Vklop ali izklop...
Page 170 - NAPAJANJE
06_ varnostne informacije NAPAJANJE OPOZORILO Ne prepogibajte napajalnega kabla in nanj ne postavljajte težkih predmetov, ki bi ga lahko poškodovali. To lahko povzroči požar ali električni udar. - OPOZORILO Z napajalnega vtiča odstranite morebitni prah ali vodo. V nasprotnem lahko pride do okvare al...
Page 171 - PRED UPORABO
varnostne informacije _07 01 V ARNOSTNE INFORMACIJE PRED UPORABO POZOR Pred uporabo robotskega sesalnika se prepričajte, da je posoda za prah sestavljena. Če posoda za prah ni nameščena, robotski sesalnik ne bo deloval. - POZOR Robotskega sesalnika ne uporabljajte v prostorih z vnetljivimi materiali...
Page 174 - MED UPORABO
10_ varnostne informacije MED UPORABO POZOR Robotskega sesalnika ne smete uporabljati na debelih preprogah. To lahko poškoduje robotski sesalnik. - To lahko poškoduje preproge. - POZOR Robotskega sesalnika ne uporabljajte na mizi in drugih privzdignjenih površinah. Če izdelek pade na tla, se utegne ...
Page 175 - ČIŠČENJE IN VZDRŽEVANJE
varnostne informacije _11 01 V ARNOSTNE INFORMACIJE POZOR Robotskega sesalnika ne prijemajte za posodo za prah, kadar ga prestavljate. Posoda za prah bi se lahko snela, kar bi utegnilo povzročiti hude - poškodbe ali okvaro izdelka. OPOMBA Robotski sesalnik ne more nadaljevati sesanja, če ne more pre...
Page 177 - PRIROČNA FUNKCIJA NAVIDEZNEGA ČUVAJA; značilnosti izdelka
značilnosti izdelka _13 PRIROČNA FUNKCIJA NAVIDEZNEGA ČUVAJA Robotski sesalnik lahko omejite na določeno območje tako, da uporabite način Fence (Ograja; navidezna stena). Kaj je prepoznavanje oblike stropa • (Visionary mapping plus™)? Ta funkcija preko kamere na vrhu sesalnika prepozna obliko stropa...
Page 178 - SAMODEJNO POLNJENJE
14_ značilnosti izdelka SAMODEJNO POLNJENJE Ko je raven napolnjenosti baterije nizka, se robotski sesalnik samodejno usmeri proti polnilniku, kjer se nato izvede hitro samodejno polnjenje. FUNKCIJA ROBOTSKEGA SESALNIKA ZA SAMODEJNO PRAZNJENJE POSODE ZA PRAH Ko se robotski sesalnik po čiščenju vrne n...
Page 179 - SESTAVNI DELI; Drugi sestavni deli; sestava sesalnika; Osrednja enota
sestavljanje _15 02 SEST A VLJANJE SESTAVNI DELI Drugi sestavni deli ■ (bateriji vrste AAA) (bateriji vrste AAA) Uporabniški priročnik /2 bateriji NAVIDEZNI ČUVAJ Dodatni fi lter Čistilna krtača Navodila za hitro uporabo Dodatek za preproge sestava sesalnika Osrednja enota ■ Polnilnik (postaja) ■ Dal...
Page 180 - IME POSAMEZNEGA DELA; Zgornja stran
16_ sestavljanje IME POSAMEZNEGA DELA Zgornja stran Spodnja stran Stranski del Glavna enota ■ Senzor Navideznega Senzor Navideznega Čuvaja Čuvaja Gumb za ločevanje Gumb za ločevanje posode za prah posode za prah Kamera Kamera Senzor za ovire Senzor za ovire Gumb za ločevanje Gumb za ločevanje posode...
Page 181 - NAVIDEZNI ČUVAJ
sestavljanje _17 02 SEST A VLJANJE Polnilnik (postaja) ■ NAVIDEZNI ČUVAJ ■ Gumb za napajanje Gumb za napajanje Gumb za odstranjevanje Gumb za odstranjevanje posode za prah posode za prah Gumb za izbiro vklopa/izklopa Gumb za izbiro vklopa/izklopa samodejnega praznjenja samodejnega praznjenja Odprtin...
Page 182 - Daljinski upravljalnik
18_ sestavljanje Daljinski upravljalnik ■ Namestitev baterij v daljinski upravljalnik ■ Ob nakupu izdelka v daljinskem upravljalniku ni baterij.Pred uporabo vstavite baterije (vrsta AAA). 1 1 2 2 3 3 Pritisnite jeziček zaklepa in dvignite pokrov prostora za baterije na hrbtni strani daljinskega upra...
Page 183 - ZASLON; Nadzorna plošča
sestavljanje _19 02 SEST A VLJANJE ZASLON Zaslon s številkami 1. Prikaz časovnika, stanja napredka in kod napak s številkami, črkami in grafi ko. - Tedenski urnik 2. Ko nastavite tedensko sesanje, ki se začne ob nastavljenem času na določen dan v tednu, se - ikona za izbrani dan v tednu vklopi. Indik...
Page 184 - NAMESTITEV ROBOTSKEGA SESALNIKA; Vrstni red namestitve; uporaba sesalnika
20_ uporaba NAMESTITEV ROBOTSKEGA SESALNIKA Vrstni red namestitve Vklop ali izklop stikala za napajanje 1. Za uporabo robotskega sesalnika vklopite stikalo za napajanje na dnu glavne enote. Namestitev polnilnika 2. Za polnjenje robotskega sesalnika najprej namestite polnilnik.Ob nakupu izdelka je ba...
Page 185 - Namestitev polnilnika
uporaba _21 03 UPORABA Namestitev polnilnika Polnilnik namestite na ravno površino. 1. Poskrbite, da 0,5 m levo in desno od polnilnika ter 1 m pred 2. njim ne bo ovir ali stopnic. Polnilnik namestite na mesto, kjer bo robotski sesalnik zlahka 3. dostopal do njega. Napajalni kabel napeljite ob steni....
Page 186 - Naučite se uporabljati funkcijo samodejnega praznjenja
22_ uporaba Naučite se uporabljati funkcijo samodejnega praznjenja Vklopite gumb za napajanje. 1. Vklopite gumb za samodejno praznjenje. 2. Če je gumb za samodejno praznjenje izklopljen, sesalnik ne ❈ izvede funkcije samodejnega praznjenja.Če je zbiralnik prahu poln, se robotski sesalnik vrne do ❈ p...
Page 187 - Polnjenje
uporaba _23 03 UPORABA Polnjenje Ob nakupu izdelka je baterija popolnoma prazna, zato morate robotski sesalnik napolniti ročno. Izklopite in vklopite stikalo za napajanje na spodnji strani izdelka. Ko poravnate kontakte za polnjenje na glavni enoti 1. s kontakti za polnjenje na polnilni enoti, vstav...
Page 188 - Baterija
24_ uporaba OPOMBA Ob nakupu izdelka bo prvo polnjenje baterije trajalo približno 180 minut, baterija pa bo • delovala približno 100 minut.Polnjenje pregrete baterije lahko poveča čas polnjenja. • Ukrepi, ko polnjenje ni ustrezno. • Ko samodejno polnjenje robotskega sesalnika ni mogoče, preverite na...
Page 189 - Nastavitev časa
uporaba _25 03 UPORABA Nastavitev časa Ura prikazuje trenutni čas. Trenutni čas lahko spremenite z naslednjim postopkom. Uro je mogoče nastaviti samo z daljinskim upravljalnikom. ■ Daljinski upravljalnik Potek nastavitve Utripa Utripa Pritisnite gumb za uro. 1. Prikaže se trenutni čas. - Utripa Utri...
Page 190 - Namestitev NAVIDEZNEGA ČUVAJA
26_ uporaba Namestitev NAVIDEZNEGA ČUVAJA Robotski sesalnik lahko omejite na določeno območje tako, da uporabite način Fence (Ograja; navidezna stena). Delovanje gumbov Delovanje lučke načina 1. Način Fence (Ograja; navidezna stena): utripa rdeča lučka. - Off (Izklopljeno): lučka je izklopljena. - N...
Page 192 - UPORABA ROBOTSKEGA SESALNIKA; Zagon/ustavitev sesanja; Uporaba gumbov
28_ uporaba UPORABA ROBOTSKEGA SESALNIKA Zagon/ustavitev sesanja Zaženete ali zaustavite lahko vse funkcije robotskega sesalnika. Funkcije robotskega sesalnika delujejo samo, če je stikalo za ■ napajanje vklopljeno. Med delovanjem robotskega sesalnika pritisnite gumb ( ■ ) da prekličete delovanje in...
Page 194 - Samodejno sesanje; Običajni način
30_ uporaba Samodejno sesanje Robotski sesalnik se samodejno premika in sesa, dokler niso posesani vsi prostori. Če pritisnete gumb Start/Stop (Zagon/ustavitev) na glavni enoti ali ■ daljinskem upravljalniku, ne da bi izbrali način sesanja, se zažene samodejno sesanje.Če se sesanje začne, ko je robo...
Page 195 - Sesanje območja
uporaba _31 03 UPORABA Sesanje območja Ta način omogoča sesanje določenega območja, kjer je polno drobtinic piškotov, prahu itd. Robotski sesalnik prestavite v prostor, kjer želite izvesti sesanje ■ območja. Gumb glavne enote Gumb daljinskega upravljalnika Potek nastavitve Običajni način Običajni na...
Page 196 - Maksimalno sesanje
32_ uporaba Maksimalno sesanje Robotski sesalnik se samodejno premika in sesa, dokler se ne izprazni baterija in utripa lučka najnižje ravni napolnjenosti. Če se sesanje začne, ko je robotski sesalnik priključen na polnilnik, se ■ sesalnik hitreje vrne k polnilniku, saj si med sesanjem zapomni svoje...
Page 197 - Ročno sesanje
uporaba _33 03 UPORABA Ročno sesanje Robotski sesalnik lahko z daljinskim upravljalnikom premaknete v prostor, ki ga želite posesati. Robotski sesalnik prestavite v prostor, kjer želite opraviti ročno ■ sesanje.Ročno sesanje je mogoče samo z daljinskim upravljalnikom. ■ Gumb daljinskega upravljalnik...
Page 198 - Sesanje po urniku
34_ uporaba Sesanje po urniku V tem načinu lahko določite enkratno izvajanje sesanja ob izbranem času. Sesanje po urniku se izvede samo, če je sesalnik priključen na ■ polnilno postajo. Daljinski upravljalnik Potek nastavitve Utripa Utripa Utripa Utripa Zmanjšaj Zmanjšaj Povečaj Povečaj Pritisnite g...
Page 199 - Tedenski urnik
uporaba _35 03 UPORABA Tedenski urnik V tem načinu lahko določite enkratno izvajanje sesanja ob izbranem času in za izbrane dni v tednu. Sesanje po urniku se izvede samo, če je sesalnik priključen na ■ polnilno postajo. Daljinski upravljalnik Potek nastavitve Način pripravljenosti V načinu pripravlj...
Page 201 - DODATNE FUNKCIJE; Uporaba dodatnih funkcij
uporaba _37 03 UPORABA DODATNE FUNKCIJE Uporaba dodatnih funkcij Dodatne funkcije omogočajo preprostejšo in priročnejšo uporabo robotskega sesalnika. Dodatne funkcije lahko nastavite samo z daljinskim upravljalnikom. ■ Turbonačin Ko pritisnete gumb Turbo, se na nadzorni plošči izmenjaje vklaplja in ...
Page 202 - ČIŠČENJE ROBOTSKEGA SESALNIKA; Upoštevajte načine čiščenja in vzdrževanja; Čiščenje okenca senzorja in kamere; vzdrževanje nastavkov in fi ltra
38_ vzdrževanje ČIŠČENJE ROBOTSKEGA SESALNIKA Upoštevajte načine čiščenja in vzdrževanja Če je stikalo za napajanje poškodovano, stopite v stik s servisnim ■ zastopnikom, da se izognete nezgodam.Ne uporabljajte sredstev ali mehanskih naprav, ki jih ni namestil ■ proizvajalec in bi utegnile poškodova...
Page 203 - Čiščenje posode za prah in fi ltrov
vzdrževanje _39 04 VZDRŽEV ANJE Čiščenje posode za prah in fi ltrov Pred čiščenjem izpraznite posodo za prah. Pri snemanju posode za prah pazite, da ne raztresete prahu iz posode ■ za prah.Izpraznite posodo za prah v teh primerih: ■ Ko se posoda za prah napolni. 1. Če se moč sesanja nenadoma zmanjša....
Page 204 - PRAZNJENJE POSTAJO ZA SAMODEJNO PRAZNJENJE PRAHU IZ SESALNIKA
40_ vzdrževanje PRAZNJENJE POSTAJO ZA SAMODEJNO PRAZNJENJE PRAHU IZ SESALNIKA Odstranite posodo za prah v smeri puščice. 1. Potisnite ročico za zaklepanje navzdol, če želite odpreti pokrov 2. posode za prah.Postavite posodo nad koš za smeti in odprite pokrov. Potisnite ❈ ročico za zaklepanje navzdol...
Page 207 - Čiščenje zmogljive krtače
vzdrževanje _43 04 VZDRŽEV ANJE Redno praznite spodnji del postaje za samodejno praznjenje. 7. ČIŠČENJE ROBOTSKEGA SESALNIKA Čiščenje zmogljive krtače Pred čiščenjem robotskega sesalnika morate vedno izklopiti stikalo na spodnji strani glavne enote. Da ne bi raztresli prahu iz posode za prah, pred č...
Page 209 - Čiščenje stranske vrtljive krtače za sesanje robov
vzdrževanje _45 04 VZDRŽEV ANJE Čiščenje stranske vrtljive krtače za sesanje robov Pred čiščenjem robotskega sesalnika morate vedno izklopiti stikalo na spodnji strani glavne enote. Preverite, ali je stranska vrtljiva krtača zvita in ali se je na njej 1. nabrala nesnaga. Z gumijastimi rokavicami pri...
Page 210 - Čiščenje pogonskega kolesca
46_ vzdrževanje Čiščenje pogonskega kolesca Pred čiščenjem robota morate vedno izklopiti stikalo na spodnji strani glavne enote. Če začne robotski sesalnik nenadoma začne begati, je vzrok morda ■ nesnaga, ki ovira pogonsko kolesce. Ko želite očistiti pogonsko kolesce, na tla položite mehko krpo in 1...
Page 211 - KAJ JE TREBA PREVERITI, PREDEN POKLIČETE SERVISERJA; odpravljanje težav
odpravljanje težav _47 05 ODPRA VLJANJE TEŽA V KAJ JE TREBA PREVERITI, PREDEN POKLIČETE SERVISERJA Znak Preverite Rešitev Robotski sesalnik se pred sesanjem sploh ne zažene. Ali je posoda za prah nameščena? • Namestite posodo za prah. • Ali je stikalo za napajanje • vklopljeno? Vklopite stikalo za n...
Page 214 - ODPRAVLJANJE TEŽAV S POMOČJO KOD NAPAK
50_ odpravljanje težav ODPRAVLJANJE TEŽAV S POMOČJO KOD NAPAK KODA NAPAKE VZROK REŠITEV Robotski sesalnik se med • krmarjenjem zagozdi. Izklopite stikalo za napajanje na spodnji strani • in prestavite robotski sesalnik na drugo mesto. V zmogljivo krtačo so se • zagozdili predmeti (vrvica, papir, igr...
Page 215 - specifi kacije izdelka
specifi kacije izdelka _51 06 SPECIFIKACIJE IZDELKA 80 mm (višina) 80 mm (višina) 350 mm (dolžina) 350 mm (dolžina) 350 mm (širina) 350 mm (širina) 357 mm (širina) 357 mm (širina) 560 mm (dolžina) 560 mm (dolžina) 260 mm (višina) 260 mm (višina) Osrednja enota Polnilnik (postaja) Klasifi kacija Elemen...
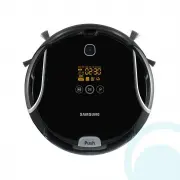


 Samsung SC18M2120SB
User Manual
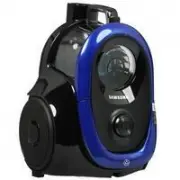
Samsung SC18M2120SB
User Manual
 Samsung SC8870
User Manual
Samsung SC8870
User Manual
 Samsung SR8845
User Manual
Samsung SR8845
User Manual
 Samsung SR8855
User Manual
Samsung SR8855
User Manual
 Samsung VCMA18AV
User Manual
Samsung VCMA18AV
User Manual
 Samsung VS15A6032R7
User Manual
Samsung VS15A6032R7
User Manual
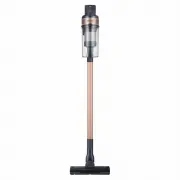
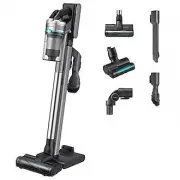 Samsung Jet 90 Pet
User Manual
Samsung Jet 90 Pet
User Manual
 Samsung SC07H40F1V
User Manual
Samsung SC07H40F1V
User Manual
 Samsung SC07K41F0VR
User Manual
Samsung SC07K41F0VR
User Manual
 Samsung SC07K51L9H1
User Manual
Samsung SC07K51L9H1
User Manual
 Samsung SC07M25M9WD
User Manual
Samsung SC07M25M9WD
User Manual
 Samsung SC08F70HQ
User Manual
Samsung SC08F70HQ
User Manual
 Samsung SC08F70HR
User Manual
Samsung SC08F70HR
User Manual
 Samsung SC21F50HD
User Manual
Samsung SC21F50HD
User Manual
 Samsung SC21F60JD
User Manual
Samsung SC21F60JD
User Manual