Samsung NZ84F7NC6AB - Manuals
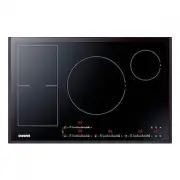
User Manual Samsung NZ84F7NC6AB


Summary
English - 2 contents INSTALLING THE HOB 9 9 Safety instructions for the installer 10 Connecting to the mains power supply 12 Installing into the countertop PARTS AND FEATURES 15 15 Cooking zones 15 Control panel 16 Components 16 Induction heating 17 The key features of your appliance 18 Safety shuto...
English - 3 using this manual Please take the time to read this owner’s manual, paying particular attention to the safety information contained in the following section, before using your appliance. Keep this manual for future reference. If transferring ownership of the appliance, please remember to...
English - 4 safety instructions The safety aspects of this appliance comply with all accepted technical and safety standards. However, as manufacturers we also believe it is our responsibility to familiarize you with the following safety instructions. WARNING This appliance is not intended for use b...
Samsung Hobs Manuals
-
 Samsung NA30N6555TG
User Manual
Samsung NA30N6555TG
User Manual
-
 Samsung NA30N6555TS
User Manual
Samsung NA30N6555TS
User Manual
-
 Samsung NA30N7755TG
User Manual
Samsung NA30N7755TG
User Manual
-
 Samsung NA30N7755TS
User Manual
Samsung NA30N7755TS
User Manual
-
 Samsung NA30R5310FS
User Manual
Samsung NA30R5310FS
User Manual
-
 Samsung NA36N6555TS
User Manual
Samsung NA36N6555TS
User Manual
-
 Samsung NA36N7755TG
User Manual
Samsung NA36N7755TG
User Manual
-
 Samsung NA36N7755TS
User Manual
Samsung NA36N7755TS
User Manual
-
 Samsung NA36R5310FS
User Manual
Samsung NA36R5310FS
User Manual
-
 Samsung NZ30A3060UK
User Manual
Samsung NZ30A3060UK
User Manual
-
 Samsung NZ30A3060UK/AA
User Manual
Samsung NZ30A3060UK/AA
User Manual
-
 Samsung NZ30K6330RG
User Manual
Samsung NZ30K6330RG
User Manual
-
 Samsung NZ30K6330RS
User Manual
Samsung NZ30K6330RS
User Manual
-
 Samsung NZ30K7570RG
User Manual
Samsung NZ30K7570RG
User Manual
-
 Samsung NZ30K7570RS
User Manual
Samsung NZ30K7570RS
User Manual
-
 Samsung NZ30K7880UG
User Manual
Samsung NZ30K7880UG
User Manual
-
 Samsung NZ30K7880US
User Manual
Samsung NZ30K7880US
User Manual
-
 Samsung NZ30R5330RK
User Manual
Samsung NZ30R5330RK
User Manual
-
 Samsung NZ36C3060UK
User Manual
Samsung NZ36C3060UK
User Manual
-
 Samsung NZ36K6430RS
User Manual
Samsung NZ36K6430RS
User Manual