Samsung HW-Q70R - Manuals
Samsung HW-Q70R Sound Bar – User Manual in PDF format online.
Manuals:
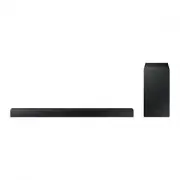
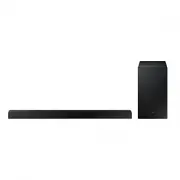
User Manual Samsung HW-Q70R


Summary
ENG - ii SAFETY INFORMATION SAFETY WARNINGS TO REDUCE THE RISK OF ELECTRIC SHOCK, DO NOT REMOVE THE COVER (OR BACK). NO USER-SERVICEABLE PARTS ARE INSIDE. REFER SERVICING TO QUALIFIED SERVICE PERSONNEL.Refer to the table below for an explanation of symbols which may be on your Samsung product. CAUTI...
ENG - iii However, if there is no alternative to cutting off the plug, remove the fuse and then safely dispose of the plug. Do not connect the plug to a mains socket as there is a risk of shock hazard from the bared flexible cord. Never attempt to insert bare wires directly into a mains socket. A pl...
ENG - iv CONTENTS 01 Checking the Components 2 Inserting Batteries before using the Remote Control (AA batteries X 2) ------------------------- 2 02 Product Overview 3 Front Panel / Right Side Panel of the Soundbar ------------------------- 3 Bottom Panel of the Soundbar ------------------------- 4 ...
Samsung Sound Bars Manuals
-
 Samsung HW-A650
User Manual
Samsung HW-A650
User Manual
-
 Samsung HW-B450
User Manual
Samsung HW-B450
User Manual
-
 Samsung HW-S61
User Manual
Samsung HW-S61
User Manual
-
 Samsung HW-A430
User Manual
Samsung HW-A430
User Manual
-
 Samsung HW-A440
User Manual
Samsung HW-A440
User Manual
-
 Samsung HW-A450
User Manual
Samsung HW-A450
User Manual
-
 Samsung HW-A460
User Manual
Samsung HW-A460
User Manual
-
 Samsung HW-A530
User Manual
Samsung HW-A530
User Manual
-
 Samsung HW-A550
User Manual
Samsung HW-A550
User Manual
-
 Samsung HW-B540
User Manual
Samsung HW-B540
User Manual
-
 Samsung HW-B550
User Manual
Samsung HW-B550
User Manual
-
 Samsung HW-B650
User Manual
Samsung HW-B650
User Manual
-
 Samsung HW-B660
User Manual
Samsung HW-B660
User Manual
-
 Samsung HW-C400
User Manual
Samsung HW-C400
User Manual
-
 Samsung HW-C410
User Manual
Samsung HW-C410
User Manual
-
 Samsung HW-C430
User Manual
Samsung HW-C430
User Manual
-
Samsung HW-C440
User Manual
-
 Samsung HW-C450
User Manual
Samsung HW-C450
User Manual
-
Samsung HW-C460
User Manual
-
 Samsung HW-D350
User Manual
Samsung HW-D350
User Manual