Samsung HW-J7500R - Manuals
Samsung HW-J7500R Sound Bar – User Manual, Quick Guide in PDF format online.
Manuals:
User Manual Samsung HW-J7500R


Summary
2 GETTING STARTED SAFETY INFORMATION SAFETY WARNINGS TO REDUCE THE RISK OF ELECTRIC SHOCK, DO NOT REMOVE THE COVER (OR BACK). NO USER-SERVICEABLE PARTS ARE INSIDE. REFER SERVICING TO QUALIFIED SERVICE PERSONNEL. CAUTION RISK OF ELECTRIC SHOCK. DO NOT OPEN. This symbol indicates that high voltage is ...
ENG 3 GETTING STARTED WARNING: DO NOT INGEST BATTERY. CHEMICAL BURN HAZARD. The remote control supplied with this product contains a coin/button cell battery. If the coin/button cell battery is swallowed, it can cause severe internal burns in just 2 hours and can lead to death. Keep new and used bat...
4 GETTING STARTED ● Figures and illustrations in this User Manual are provided for reference only and may differ from actual product appearance. ● An administration fee may be charged if either(a) an engineer is called out at your request and there is no defect with the product (i.e. where the user ...
Quick Guide Samsung HW-J7500R


Summary
· 1 · English SAFETY INFORMATION SAFETY WARNINGS TO REDUCE THE RISK OF ELECTRIC SHOCK, DO NOT REMOVE THE COVER (OR BACK). NO USER-SERVICEABLE PARTS ARE INSIDE. REFER SERVICING TO QUALIFIED SERVICE PERSONNEL. CAUTION RISK OF ELECTRIC SHOCK DO NOT OPEN This symbol indicates that high voltage is presen...
· 2 · English Wiring the Main Power Supply Plug (UK Only) IMPORTANT NOTICE The mains lead on this equipment is supplied with a moulded plug incorporating a fuse. The value of the fuse is indicated on the pin face of the plug and if it requires replacing, a fuse approved to BS1362 of the same rating ...
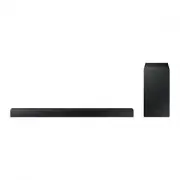
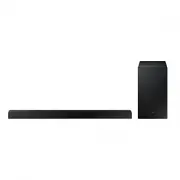
· 3 · English CHECKING THE COMPONENTS Subwoofer 1 Power Cord Soundbar Main Unit 2 AC/DC Adapter 3 Power Cord Remote Control / Battery c Use Cat 7 (*STP Type) cable for the connection. * Shielded Twist Pair CONNECTING ELECTRICAL POWER Use the power components ( 1 , 2 , 3 ) to connect the power suppli...
Samsung Sound Bars Manuals
-
 Samsung HW-A650
User Manual
Samsung HW-A650
User Manual
-
 Samsung HW-B450
User Manual
Samsung HW-B450
User Manual
-
 Samsung HW-S61
User Manual
Samsung HW-S61
User Manual
-
 Samsung HW-A430
User Manual
Samsung HW-A430
User Manual
-
 Samsung HW-A440
User Manual
Samsung HW-A440
User Manual
-
 Samsung HW-A450
User Manual
Samsung HW-A450
User Manual
-
 Samsung HW-A460
User Manual
Samsung HW-A460
User Manual
-
 Samsung HW-A530
User Manual
Samsung HW-A530
User Manual
-
 Samsung HW-A550
User Manual
Samsung HW-A550
User Manual
-
 Samsung HW-B540
User Manual
Samsung HW-B540
User Manual
-
 Samsung HW-B550
User Manual
Samsung HW-B550
User Manual
-
 Samsung HW-B650
User Manual
Samsung HW-B650
User Manual
-
 Samsung HW-B660
User Manual
Samsung HW-B660
User Manual
-
 Samsung HW-C400
User Manual
Samsung HW-C400
User Manual
-
 Samsung HW-C410
User Manual
Samsung HW-C410
User Manual
-
 Samsung HW-C430
User Manual
Samsung HW-C430
User Manual
-
Samsung HW-C440
User Manual
-
 Samsung HW-C450
User Manual
Samsung HW-C450
User Manual
-
Samsung HW-C460
User Manual
-
 Samsung HW-D350
User Manual
Samsung HW-D350
User Manual