Page 2 - English; Safety Information; Safety Warnings; WARNING; CLASS 1 LASER PRODUCT; CAUTION; Wiring the Main Power Supply Plug (UK Only)
2 English Safety Information Safety Warnings TO REDUCE THE RISK OF ELECTRIC SHOCK, DO NOT REMOVE THE COVER(OR BACK).NO USER-SERVICEABLE PARTS ARE INSIDE. REFER SERVICING TO QUALIFIED SERVICE PERSONNEL. CAUTION RISK OF ELECTRIC SHOCK DO NOT OPEN This symbol indicates “dangerous voltage” inside the pr...
Page 3 - Precautions; Viewing TV using the 3D function
English 3 Precautions Ensure that the AC power supply in your house complies with the identifi cation sticker located on the back of your product. Install your product horizontally, on a suitable base (furniture), with enough space around it for ventilation (7.5~10cm). Do not place the product on amp...
Page 4 - Cautions on Handling and Storing Discs; Holding discs; Do not touch the playback side of the disc.; Disc Storage; Do not keep in direct sunlight; Do not load cracked or scratched discs.; Handling and Storing Discs; Licence
4 English Cautions on Handling and Storing Discs Small scratches on the disc may reduce sound and picture quality or cause skipping. Be especially careful not to scratch discs when handling them. Holding discs Do not touch the playback side of the disc. Hold the disc by the edges so that fi ngerprint...
Page 5 - Contents; SAFETY INFORMATION
English 5 Contents SAFETY INFORMATION 2 2 Safety Warnings 3 Precautions4 Cautions on Handling and Storing Discs 4 Licence4 Copyright GETTING STARTED 7 7 Icons that will be used in manual8 Disc Types and Characteristics 12 Accessories13 Description13 Front Panel 14 Rear Panel 15 Remote Control CONNEC...
Page 6 - SETUP
6 English SETUP 43 43 Security43 BD Parental Rating 43 DVD Parental Rating 43 Change Password 43 General43 Front Display 43 Network Remote Control 44 Support44 Software Upgrade 45 Contact Samsung BASIC FUNCTIONS 46 46 Playing a Disc 46 Using the Disc menu / Title menu / Popup menu 47 Playing the Tit...
Page 7 - Icons that will be used in manual; This product is compatible with the PAL colour system only.; Getting Started
English 7 01 Getting Started Icons that will be used in manual Make sure to check the following terms before reading the user manual. Term Logo Icon Definition BD-ROM h This involves a function available on a BD-ROM. BD-RE/-R z This involves a function available on a BD-RE/-R disc recorded in the BD...
Page 8 - Disc Types and Characteristics; Blu-ray Disc Compatibility; Discs that cannot be played; Logos of Discs that can be played
8 English Getting Started Disc Types and Characteristics Blu-ray Disc Compatibility Blu-ray is a new and evolving format. Accordingly, disc compatibility issues are possible. Not all discs are compatible and not every disc will play back. For additional information, refer to the Disc Types and Chara...
Page 9 - Region Code; Disc Types
English 9 01 Getting Started Region Code Both the product and the discs are coded by region. These regional codes must match in order to play the disc. If the codes do not match, the disc will not play. Disc Type Region Code Area Blu-ray A North America, Central America, South America, Korea, Japan,...
Page 10 - Disc Format; Using JPEG disc; Supported File Formats; Video File Support
10 English Getting Started Disc Format Using JPEG disc CD-R/-RW, DVD-RW/-R recorded with UDF or JOLIET format can be played back.Only JPEG fi les with the ".jpg", ".JPG", ".jpeg" or "JPEG" extension can be displayed.Progressive JPEG is supported. DVD-RW/-R (V) This is ...
Page 11 - Restrictions; GMC 2 or higher not supported.; Audio decoder; Music File Support
English 11 01 Getting Started File Extension Container Video Codec Audio Codec Resolution *.vro VRO VOB MPEG2 AC3 MPEG LPCM 1920x1080 MPEG1 352x288 *.mpg *.mpeg PS MPEG1 AC3 MPEG LPCM AAC 352x288 MPEG2 1920x1080 H.264 1920x1080 *.ts *.tp *.trp TS MPEG2 AC3 AAC MP3 DD+ HE-AAC 1920x1080 H.264 1920x108...
Page 12 - Accessories; Check for the supplied accessories below.; Notes on USB connection; Bigger the image resolution, the longer the
12 English Getting Started Accessories Check for the supplied accessories below. Video Cable FM Antenna iPod Dock User's Manual FUNCTION TV SOURCE POWER DISC MENU MENU TITLE MENU MUTE SFE MODE VOL TUNING /CH TOOLS RETURN EXIT INFO A B HUB C D TUNER MEMORY S/W LEVEL D ĺ D MO/ST D SOUND DSP PL vTuner ...
Page 13 - Description; Front Panel; Turns the product on and off.
English 13 01 Getting Started Description Front Panel 1 POWER BUTTON ( ) Turns the product on and off. 2 FUNCTION BUTTON The mode switches as follows : BD/DVD D. IN AUX R. IPOD W. IPOD H. IN1 H. IN2 FM 3 DISPLAY Displays the playing status, time, etc. 4 STOP BUTTON Stops disc playback. 5 PLAY/PAUSE ...
Page 14 - Connect the iPod dock connector here.; Rear Panel
14 English Getting Started 1 WIRELESS LAN JACK Can be used for network based services (see pages 62~71), BD-LIVE and software upgrade with a wireless LAN adapter. 2 LAN TERMINAL Can be used for network based services (see pages 62~71), BD-LIVE and software upgrade under the network connection. 3 iPo...
Page 15 - Remote Control; Tour of the Remote Control
English 15 01 Getting Started Remote Control Tour of the Remote Control FUNCTION TV SOURCE POWER DISC MENU MENU TITLE MENU MUTE SFE MODE VOL TUNING /CH TOOLS RETURN EXIT INFO A B HUB C D MO/ST D ĺ D SMART SEARCH iPod SYNC vTuner D SOUND REPEAT FULL SCREEN 1 2 4 5 6 7 8 0 9 POPUP RECEIVER SLEEP BD TV...
Page 16 - Installing batteries in the Remote Control
16 English Getting Started Installing batteries in the Remote Control NOTE Make sure to match the “+” and “–” ends of the batteries with the diagram inside the compartment.Assuming typical TV usage, the batteries last for about one year.The remote control can be used up to approximately 7 meters in ...
Page 17 - Connections; Connecting the Speakers; Front Speakers; ei; Centre Speaker; hj; Subwoofer
English 17 02 Connections Connections This section involves various methods of connecting the product to other external components. Before moving or installing the product, be sure to turn off the power and disconnect the power cord. Connecting the Speakers Front Speakers ei Place these speakers in ...
Page 18 - Speaker Components; Refer to page 19 to install the Speakers on the Tallboy Stand.
18 English Connections Speaker Components Speaker Components Assembled Speakers FRONT (L) (R) CENTRE STAND STAND BASE SUBWOOFER HT-D5530 HT-D5530 CENTRE SPEAKER SUBWOOFER FRONT SPEAKER SCREW (5X15): 2EA SCREW (4X20): 8EA NOTE Refer to page 19 to install the Speakers on the Tallboy Stand. ✎ SPEAK...
Page 19 - Installing the Speakers on the Tallboy Stand; Connecting The Speakers; Press down the terminal tab on the back of the speaker.
English 19 02 Connections FRONT SPEAKERS OUT SPEAKER IMPEDANCE : 3 VIDEO OUT SURROUND SUBWOOFER CENTER FRONT SURROUND ONENT OUT VIDEO OUT NT OUT FRONT SPEAKERS OUT SPEAKER IMPEDANCE : 3 SURROUND SUBWOOFER CENTER FRONT SURROUND Centre Speaker Front Speaker (R) Subwoofer Surround Speaker (R) Front Spe...
Page 20 - Connecting the Optional Wireless Receiver Module; WIRELESS
20 English Connections Connecting the Optional Wireless Receiver Module To connect the surround speakers wirelessly, you have to purchase the wireless receiver module and TX card from your Samsung retailer. This product should be connected with the SWA-5000 only. Wireless Receiver Module (SWA-5000) ...
Page 22 - Connecting External Devices/your TV via HDMI; HDMI OUT : Connecting to a TV with an HDMI Cable (BEST QUALITY); HDMI OUT; DVD or Blu-ray Player
22 English Connections Connecting External Devices/your TV via HDMI HDMI is the standard digital interface for connecting to devices such as a TV, projector, DVD player, Blu-ray player, set top box, and more. Because HDMI is all digital, you'll enjoy digital quality video and sound as it was origina...
Page 23 - HDMI IN : Connecting to an External Component with an HDMI Cable; HDMI Auto Detection Function
English 23 02 Connections HDMI IN : Connecting to an External Component with an HDMI Cable Connect an HDMI cable (not supplied) from the HDMI IN jack on the back of the product to the HDMI OUT jack on your digital device. Press the FUNCTION button to select H. IN1 or H. IN2 input. The mode switches ...
Page 24 - and Y) Jacks on the back of the product to the; METHOD 2; METHOD 1
24 English Connections METHOD 1 : Component Video (BETTER QUALITY) If your television is equipped with Component Video inputs, connect a Component video cable (not supplied) from the Component Video Output (P R , P B and Y) Jacks on the back of the product to the Component Video Input Jacks on your ...
Page 25 - Connecting Audio from External Components; OPTICAL : Connecting an External Digital Component; AUX : Connecting an External Analogue Component; If the external analogue
English 25 02 Connections Connecting Audio from External Components OPTICAL : Connecting an External Digital Component Digital signal components such as a Cable Box/Satellite receiver (Set-Top Box). Connect the Digital Input (OPTICAL) on the product to the Digital Output of the external digital comp...
Page 26 - Connecting to the Network; using an Wireless router or IP router for the connection.; Cable Network
26 English Connections Connecting to the Network This product enables you to view network based services (See pages 62~71) such as Smart Hub and BD-LIVE, as well as receive software upgrades when a network connection is made. We recommend using an Wireless router or IP router for the connection. For...
Page 27 - Wireless Network; You can connect to the network with a Wireless IP sharer.; Wireless IP sharer; Connecting the FM Antenna
English 27 02 Connections Wireless Network You can connect to the network with a Wireless IP sharer. A wireless AP/IP router is required to make a wireless network connection. Connect the wirelessLAN adapter to the Wireless LAN Adapter on the rear panel of the product. Set the network options. (See ...
Page 28 - Setup; Initial Settings; My Contents
28 English Setup Initial Settings Turn on your TV after connecting the product.When you connect and turn on the product to a TV for the fi rst time, the Initial Settings screen appears. Initial Settings | On-Screen Language m Move " Enter Select a language for the on-screen displays. Български Hr...
Page 29 - Accessing the Settings Menu
English 29 03 Setup Accessing the Settings Menu DISC MENU MENU TITLE MENU TOOLS RETURN EXIT INFO TUNER POPUP DISC MENU TITLE MENU TOOLS INFO TUNER POPUP 1 2 4 3 1 MENU Button : Press to move to the Home menu. 2 RETURN Button : Return to the previous menu. 3 ENTER / DIRECTION Button : Move the cursor...
Page 30 - D Settings; D Blu-ray Playback Mode; : Automatically detect if a connected TV has; Screen Size
30 English Setup Display You can confi gure various display options such as the TV Aspect Ratio, Resolution, etc. 3D Settings Select whether to play a Blu-ray Disc with 3D contents in 3D Mode. Settings Display Audio Network System Language Security General Support 3D Settings HDMI Deep Colour : Auto ...
Page 31 - TV Aspect; Resolution
English 31 03 Setup TV Aspect Depending on the type of television you have, you may want to adjust the screen size setting. 16:9 Original : Select when you connect the product to a 16:9 TV screen. The product will display all content in its original aspect ratio.Content formatted in 4:3 will be disp...
Page 32 - Resolution according to the output mode
32 English Setup Resolution according to the output mode Blu-ray Disc/E-contents/Digital Contents playback Output Setup HDMI / connected HDMI / not connected HDMI Mode Component/ VIDEO Mode Component Mode VIDEO Mode Blu-ray Disc E-contents/ Digital contents Blu-ray Disc E-contents/ Digital contents ...
Page 33 - HDMI Colour Format
English 33 03 Setup NOTE If the TV you connected to the product does not support Movie Frame or the resolution you selected, the message “If no pictures are shown after the selection, please wait for 15 seconds. And then, the resolution will be reverted to the previous value automatically. Would you...
Page 34 - Distance; Test Tone; Audio; Speaker Settings; Level
34 English Setup Distance If the speakers cannot be placed at equal distances from the listening position, you can adjust the delay time of the audio signals from the front, centre, surround and subwoofer speakers. You can set the Speaker Distance between 1ft(0.3m) and 30ft(9.0m). Settings Display A...
Page 35 - Musical Auto Calibration; Musical Auto Calibration Mode; User EQ
English 35 03 Setup Musical Auto Calibration By setting the Musical Auto Calibration (MAC) function just once when you relocate or install the product, you can have the product automatically recognize the distance between speakers, levels between channels, and frequency characteristics to create a 5...
Page 36 - HDMI Audio; Audio Return Channel; Auto; Digital Output; PCM
36 English Setup HDMI Audio The audio signals transmitted over the HDMI Cable can be toggled On/Off. Off : Video is transmitted over the HDMI connection cable only, and audio is output through your product speakers only. On : Both video and audio signals are transmitted over the HDMI connection cabl...
Page 37 - Digital Output Selection; Dynamic Range Control
English 37 03 Setup Digital Output Selection Setup PCM Bitstream (Unprocessed) Bitstream (Re-encoded DTS) Bitstream (Re-encoded Dolby D) Connection HDMI supported AV receiver HDMI supported AV receiver HDMI supported AV receiver HDMI supported AV receiver Audio Stream on Blu-ray Disc PCM Up to 7.1ch...
Page 38 - Audio Sync; Network Settings; Wired Network
38 English Setup Audio Sync Video may look slower than the audio when the product is connected to a digital TV. If this occurs, adjust the audio delay time to match the video. You can set the audio delay time between 0 msec and 300 msec. Set it to the optimal status. Network Before you begin, contac...
Page 41 - One Foot Connection; Network Status; BD-LIVE Internet Connection
English 41 03 Setup WPS(PBC) The easiest way to set up the wireless network connection is using the WPS(PBC) function or the One Foot Connection function. If your wireless router has a WPS(PBC) button, follow these steps: Press the ▲▼ buttons to select WPS(PBC) . Settings Display Audio Network Syste...
Page 42 - DivX® Video On Demand
42 English Setup System Initial Settings By using the Initial Settings function, you can set the language, Musical Auto Calibration, Network Settings, etc. For more information about the Initial Settings function, refer to the Initial Settings section of this user manual. (See page 28) Anynet+ (HDMI...
Page 43 - Language; If you forgot your password; General
English 43 03 Setup Reset All settings will revert to the default except for the network and Smart Hub settings. You need enter the password for this function. NOTE The default password is 0000. Language You can select the language you prefer for the Home menu, disc menu, etc. On-Screen Menu : Selec...
Page 44 - Support; Software Upgrade; By Internet
44 English Setup Start the application on your portable device. The application should fi nd your product and display it on a list. Select the product. If this is the fi rst time you are using the function, it will ask you to allow or deny remote control of the product. Select Allow. Follow the instru...
Page 45 - By Disc; Contact Samsung
English 45 03 Setup By Disc To upgrade by Disc, follow these steps: Visit www.samsung.com/bluraysupport. Download the latest disc software upgrade zip archive to your computer. Unzip the zip archive to your computer. You should have a single folder with the same name as the zip fi le. Write the folde...
Page 46 - Basic Functions; Playing a Disc; Playback; Playback related buttons; PLAY; Disc Structure; Popup menu; Using the Disc Menu; hZ
46 English Basic Functions Playing a Disc Playback Insert a disc into the disc slot with the disc's label facing up. Press the PLAY ( ► ) button. Playback related buttons PLAY ( ► ) Starts playback. STOP ( ) Stops playback. If you press the button once : The stop position is memorized.If you press...
Page 47 - Using the Title Menu; Playing the Title List; Searching for a Desired Scene; Skipping Chapters; hzZyx
English 47 04 Basic Functions Using the Title Menu Z During playback, press the TITLE MENU button on the remote control. Press the ◄ ► buttons to make the desired selection, then press the ENTER button. NOTE Depending on the disc, the menu items may differ and this menu may not be available.The Titl...
Page 48 - Slow Motion Play/Step Motion Play; Slow Motion Play; pause; Step Motion Play; Repeat Playback; Repeat the Title or Chapter; Repeat the disc title or chapter.; Repeat the Section; hzZy
48 English Basic Functions Slow Motion Play/Step Motion Play Slow Motion Play hzZyx In pause ( ) mode, press the SEARCH ( ) button.If you press the SEARCH ( ) button, the playback speed is reduced to * 1/8 * 1/4 * 1/2 To return to normal speed playback, press the PLAY ( ► ) button. NOTE No sou...
Page 49 - Using the TOOLS button; Moving to a Desired Scene Directly; Selecting the Audio Language; hzZx; Selecting the Subtitle Language; hZx
English 49 04 Basic Functions Using the TOOLS button During playback, you can operate disc menu by pressing the TOOLS button. TOOLS Menu Screen Tools < Change " Enter ' Return Title Search 1/2 Chapter Search : 1/20 Time Search : 00:00:13/01:34:37 Picture Settings : Normal Audio : 1/4 ENG Mult...
Page 50 - Caption Function; Changing the Camera Angle; Selecting the Picture Settings; Setting the BONUSVIEW
50 English Basic Functions Caption Function x You must have some experience with video extraction and editing in order to use this feature properly. To use the caption function, save the caption fi le (*.smi) in the same fi le name as that of the DivX media fi le (*.avi) within the same folder.Example....
Page 51 - Listening to Music; ow
English 51 04 Basic Functions Listening to Music ow Buttons on the Remote Control used for Music Playback MUTE REPEAT FULL SCREEN 1 2 4 5 6 7 8 0 9 RDS DISPLAY TA PTY+ PTY SEARCH PTY- MUTE FULL SCREEN RDS DISPLAY TA 2 3 1 0 ! 9 @ TOOLS RETURN EXIT INFO A B HUB C D MO/ST 2D ĺ D SMART SEARCH iPod SYNC...
Page 52 - Playlist
52 English Basic Functions Playing an Audio CD (CD-DA)/MP3 Insert an Audio CD (CD-DA) or an MP3 Disc into the disc slot. For an Audio CD (CD-DA), the fi rst track will be played automatically. For an MP3 disc, press the ◄► buttons to select Music , then press the ENTER button. Audio CD (CD-DA)/MP3 Sc...
Page 53 - Sound Mode
English 53 04 Basic Functions TRACK 002 03:56 TRACK 004 04:02 TRACK 006 03:40 TRACK 008 03:52 1/2 Page Audio CD | Music Close Edit Mode ( ) Page Tools " Select ' Return TRACK 001 00:43 TRACK 003 04:41 TRACK 005 03:43 TRACK 007 04:06 Selected Items : 3 Select a desired track and press the TOOLS b...
Page 54 - Dolby Pro Logic; Mode; iPod SYNC; Playing back a Picture; Viewing Photo Files
54 English Basic Functions Dolby Pro Logic II Mode You can select the desired Dolby Pro Logic II audio mode. Press the PL II button. MUSIC When listening to music, you can experience sound effects as if you are listening to the actual performance. MOVIE Adds realism to the movie soundtrack. PROLOGIC...
Page 55 - Playing back a USB Storage Device
English 55 04 Basic Functions Using the TOOLS button During the slide show playback, you can use various function by pressing the TOOLS button. Pause Slide Show Slide Show Speed : Normal Slide Show Effect : Blind Background Music : Off Background Music Setting Zoom Rotate Picture Settings Informatio...
Page 56 - Listening to Radio; Using buttons on the Remote Control; Presetting Stations; About RDS broadcasting; receive FM stations
56 English Basic Functions Listening to Radio Using buttons on the Remote Control Press the FUNCTION button to select FM . Tune in to the desired station. Preset Tuning 1 : You must fi rst add a desired frequency as a preset. Press the STOP ( ) button to select PRESET and then press the TUNING/CH (...
Page 57 - To show the RDS signals; About characters shown in the display; STOP; PTY SEARCH
English 57 04 Basic Functions To show the RDS signals You can see the RDS signals the station sends on the display. Press the RDS DISPLAY button while listening to an FM station. Each time you press the button, the display change to show you the following information : PS NAME RT CT Frequency PS (Pr...
Page 58 - Connecting iPod/iPhone Using the USB Cable; AUX; Connecting iPod/iPhone Using the Dock
58 English Basic Functions Connecting iPod/iPhone Using the USB Cable If the system is connected to iPod/iPhone, you can play music in iPod/iPhone using the system. ASC IN 5V 500mA ASC IN 50 Connect iPod/iPhone using the USB cable to the front USB port. Your iPod is automatically turned on. “iPod” m...
Page 59 - Watching a Movie; Use iPod/iPhone with a Wireless Dock
English 59 04 Basic Functions Watching a Movie You can play video fi les stored in the iPod player by connecting it to the product. Connect the iPod dock connector to the iPod Jack on the rear panel of the product.In the iPod screen, move to Videos > Settings , then set the TV Out option and the T...
Page 60 - Operation status of the charging; GREEN LED ON; iPod/iPhone Models You Can Use with
60 English Basic Functions Operation status of the charging cradle's LED Display Function GREEN LED ON Power on /Charging completed RED LED ON Charging. NOTE The LED indicates the charging state of the built-in battery in the wireless iPod transmitter.Check the charging state of iPod/iPhone by check...
Page 61 - How to Link the Wireless Transmitter; ID SET; Operation status of the wireless
English 61 04 Basic Functions How to Link the Wireless Transmitter with the Main Unit Turn off your Home Cinema. Press the 4 , 7 , 6 , 3 buttons on the remote control in order. The Power LED blinks once. Connect the iPod/iPhone to the Wireless transmitter. STAND BY LIN K CHA RGE Turn on the iPod/iPh...
Page 62 - Network Services; Using Smart Hub; Starting Smart Hub the First Time
62 English Network Services You can enjoy various network services such as Smart Hub or BD-LIVE by connecting the product to your network. Read the following instructions before using any network service. Connect the product to the network.(see pages 26~27) Confi gure the network settings. (see pages...
Page 63 - Smart Hub at a Glance
English 63 05 Network Services Smart Hub at a Glance xxxxxxxx Contents 1 xxxxxxxx Contents 6 xxxxxxxx Contents 5 xxxxxxxx Contents 4 xxxxxxxx Contents 3 xxxxxxxx Contents 2 xxxxxxxx Contents 7 xxxxxxxx Contents 8 xxxxxxxx Contents 9 xxxxxxxx Contents 10 xxxxxxxx Contents 11 xxxxxxxx Contents 12 xxxx...
Page 64 - Using the Keypad; Entering Text, Numbers and Symbols
64 English Network Services Using the Keypad Through your remote, you can use the On-Screen Keypad to enter letters, numbers, and symbols. . , – abc def 1 2 3 ghi jkl mno 4 5 6 pqrs tuv wxyz 7 8 9 Shift Delete 0 b Input Method / Language: English T9 ab Ab AB 1 1 4 5 2 6 3 1 The current keypad.Use ...
Page 65 - Account Log In
English 65 05 Network Services When done, press the ENTER button to select OK , and then press the ENTER button again. The Login screen re-appears. Select Confi rm password , and then press the ENTER button. Repeat Steps 7 and 8. When the Login screen re-appears, select Create Account , and then pres...
Page 66 - Service Manager
66 English Network Services Register Service Account If you have existing accounts with any of the providers listed by the Register Service Account function, you can associate the provider account and the provider account password with your Smart TV Account. If you associate the account, you will be...
Page 67 - Properties
English 67 05 Network Services After a few moments, Smart Hub automatically resets. The screen may go black, then Smart Hub re-appears. In a few moments, it starts the re-initialization procedure. To complete the re-initialization, go to Step 4 in Starting Smart Hub for the First Time. (See page 62)...
Page 68 - Move to Folder
68 English Network Services Move to Folder The Move to Folder function lets you move a application to a folder. To use the Move to Folder function, follow these steps: Press the YELLOW (C) button on your remote. Select a application, and then press the ENTER button. Press the ▲▼◄► to select Move to ...
Page 69 - Unlock; Samsung Apps; For Pay Apps; Accessing the Samsung Apps Screen
English 69 05 Network Services Unlock Press the YELLOW (C) button on your remote. Press the ▲▼◄► to select a locked application, and then press the ENTER button. Press the ▲▼◄► to select Unlock, and then press the ENTER button. The Security window appears. Enter the Parental Security Code (See page ...
Page 70 - Using the Samsung Apps Screen; Samsung Apps by category; ENTER
70 English Network Services Using the Samsung Apps Screen To use the Samsung Apps screen, follow these steps: Press the ◄► buttons to move to the category list on the left. Press the ▲▼ to highlight a category. In a few seconds, the Samsung Apps screen displays the applications in that category. The...
Page 71 - Using vTuner Function; Press the; Using the AllShare Function
English 71 05 Network Services Using the coloured buttons on your remote with Samsung Apps RED (A) (Login) : To log into your Smart TV Account. GREEN (B) (Thumbnail/List View) : To toggle applications between Thumbnail and List view. BLUE (D) (Sort By) : To sort the applications in a category by Rec...
Page 72 - Other Information; Troubleshooting
72 English Other Information Troubleshooting Refer to the chart below when this product does not function properly. If the problem you are experiencing is not listed below or if the instruction below does not help, turn off the product, disconnect the power cord and contact the nearest authorized de...
Page 73 - Symptom
English 73 06 Other Information Symptom Check/Remedy Aspect ratio cannot be changed. • You can play 16:9 BD/DVDs in 16:9 Wide mode, 4:3 Letter Box mode, or 4:3 Pan - Scan mode, but 4:3 BD/DVDs can be seen in 4:3 ratio only. Refer to the Blu-ray Disc jacket and then select the appropriate function. •...
Page 74 - Video is played intermittently.
74 English Other Information Symptom Check/Remedy PC Share Manager function I can see folders shared through the PC Share Manager, but I cannot see the fi les. • Since it shows only fi les corresponding to the Image, Music, and Movie categories, fi les that do not correspond to these categories may not...
Page 75 - Specifi cations; Disc
English 75 06 Other Information Specifi cations General Weight 3.5 kg Dimensions 429.3 (W) x 58.4 (H) x 325.1 (D) mm Operating Temperature Range +5°C to +35°C Operating Humidity Range 10 % to 75 % FM Tuner Signal/noise ratio 55 dB Usable sensitivity 12 dB Total harmonic distortion 0.5 % Disc BD (Blu-...
Page 76 - Speaker
76 English Other Information HT-D5500 Speaker Speaker system 5.1ch speaker system Front Surround Centre Subwoofer Impedance 3 Ω 3 Ω 3 Ω 3 Ω Frequency range 140Hz~20kHz 140Hz~20kHz 140Hz~20kHz 40Hz ~ 160Hz Output sound pressure level 86dB/W/M 86dB/W/M 86dB/W/M 88dB/W/M Rated input 165W 165W 170W 170W...
Page 78 - Correct disposal of batteries in this product
Correct Disposal of This Product (Waste Electrical & Electronic Equipment) (Applicable in the European Union and other European countries with separate collection systems) This marking on the product, accessories or literature indicates that the product and its electronic accessories (e.g. charg...
Page 79 - Système Home Entertainment; imaginez; Pour obtenir notre service complet, veuillez
Système Home Entertainment Blu-ray™ 5,1 canaux Manuel d'utilisation imaginez les possibilités Merci d'avoir acheté ce produit Samsung. Pour obtenir notre service complet, veuillez enregistrer votre produit sur www.samsung.com/register HT-D5500HT-D5530HT-D5550 HT-D5500_FRA_1226.indd 1 HT-D5500_FRA_12...
Page 80 - Français; Consignes de sécurité; Avertissements de sécurité; AVERTISSEMENT; PRODUIT LASER DE CLASSE 1; ATTENTION
2 Français Consignes de sécurité Avertissements de sécurité POUR RÉDUIRE LES RISQUES D’ÉLECTROCUTION, NE RETIREZ JAMAIS LE CAPOT (NI L’ARRIÈRE). LES PIÈCES DE CE PRODUIT NE SONT PAS RÉPARABLES PAR L’UTILISATEUR. VEUILLEZ CONTACTER UN TECHNICIEN QUALIFIÉ POUR TOUTE RÉPARATION. ATTENTION RISQUE D’ÉLEC...
Page 81 - Précautions; Regarder la télévision en 3D
Français 3 Précautions Assurez-vous que l'alimentation en c.a. de votre habitation est conforme à la plaque d'identifi cation située au dos de votre appareil.Posez votre appareil à plat sur un meuble stable en veillant à laisser un espace de 7,5 à 10 cm autour de l'appareil afi n d’assurer sa ventilat...
Page 82 - Manipulation et rangement des disques - Précautions; Manipulation des disques; Ne touchez pas la face de lecture du disque.; Rangement des disques; Rangez-les dans un endroit frais et aéré.; Évitez les salissures sur les disques.; Manipulation et rangement des disques
4 Français Manipulation et rangement des disques - Précautions De petites érafl ures sur un disque risquent de réduire la qualité du son et de l’image ou de les faire sauter. Prenez garde à ne pas rayer les disques lorsque vous les manipulez. Manipulation des disques Ne touchez pas la face de lecture...
Page 83 - Table des matières; CONSIGNES DE SÉCURITÉ
Français 5 FRANÇAIS Table des matières CONSIGNES DE SÉCURITÉ 2 2 Avertissements de sécurité 3 Précautions4 Manipulation et rangement des disques - Précautions 4 Licence4 Droit d’auteur PRISE EN MAIN 7 7 Icônes utilisées dans ce guide8 Types de disques et caractéristiques 12 Accessoires13 Description...
Page 84 - CONFIGURATION
6 Français Table des matières CONFIGURATION 43 43 Sécurité43 Contrôle parent. BD 43 Contrôle parent. DVD 43 Modif. mot de passe 43 Général43 Affi chage du lecture 43 Télécommande réseau 44 Assistance44 Mise à jour du logiciel 45 Contacter Samsung FONCTIONS DE BASE 46 46 Lecture d’une vidéo 46 Utilisa...
Page 85 - Icônes utilisées dans ce guide; Les disques NTSC ne sont pas lus.; Prise en main
Français 7 01 Prise en main Icônes utilisées dans ce guide Assurez-vous de consulter les défi nitions des termes suivants avant de lire le guide d’utilisation. Terme Logo Icône Définition BD-ROM h Indique une fonction disponible sur les BD-ROM. BD-RE/-R z Indique une fonction disponible sur les BD-RE...
Page 86 - Types de disques et caractéristiques; Compatibilité des disques Blu-ray; Les disques qui ne peuvent pas être lus; Logos des disques pouvant être lus
8 Français Prise en main Types de disques et caractéristiques Compatibilité des disques Blu-ray Le disque Blu-ray est un nouveau format, en constante évolution. Par conséquent, il existe des problèmes de compatibilité qui y sont associés. Tous les disques ne sont pas uniformément compatibles et la l...
Page 87 - Code régional; Type de disque
Français 9 01 Prise en main Code régional L’appareil et les disques possèdent des codes régionaux. Ces codes régionaux doivent correspondre pour pouvoir lire un disque. S’ils sont différents, le disque ne peut pas être lu. Type de disque Code régional Zone Blu-ray A Amérique du Nord, Amérique centra...
Page 88 - Format du disque; Utilisation d'un disque JPEG; Le JPEG progressif est pris en charge.; Formats de fi chiers pris en charge; Prise en charge des fi chiers vidéo
10 Français Prise en main Format du disque Utilisation d'un disque JPEG Les CD-R/-RW, DVD-RW/-R enregistrés au format UDF ou JOLIET peuvent être lus. Seuls les fi chiers ayant les extensions « .jpg », « .JPG », « .jpeg » ou « JPEG » peuvent être affi chés. Le JPEG progressif est pris en charge. DVD-RW...
Page 89 - Prise en charge des fi chiers musicaux
Français 11 01 Prise en main Extension de fichier Conteneur Codec vidéo Codec audio Résolution *.vro VRO VOB MPEG2 AC3 MPEG LPCM 1920x1080 MPEG1 352x288 *.mpg *.mpeg PS MPEG1 AC3 MPEG LPCM AAC 352x288 MPEG2 1920x1080 H.264 1920x1080 *.ts *.tp *.trp TS MPEG2 AC3 AAC MP3 DD+ HE-AAC 1920x1080 H.264 192...
Page 90 - Notes sur la connexion USB; Périphériques pris en charge:; Accessoires; Vérifi ez que vous disposez bien des accessoires suivants.
12 Français Prise en main Notes sur la connexion USB Périphériques pris en charge: Support de stockage USB, lecteur MP3, caméra numérique, lecteur de carte USB Prise en charge non assurée pour les dossiers ou fi chiers dont le nom excède 125 caractères.Un fi chier de sous-titre supérieur à 300 Ko ne p...
Page 91 - Panneau avant
Français 13 01 Prise en main Description Panneau avant 1 TOUCHE DE MISE EN MARCHE/ARRÊT ( ) Pour allumer ou éteindre le produit. 2 TOUCHES DE FONCTION Le mode change dans l’ordre suivant : BD/DVD D. IN AUX R. IPOD W. IPOD H. IN1 H. IN2 FM 3 ÉCRAN D’AFFICHAGE Permet d’affi cher l’état de la lecture, l...
Page 92 - Panneau arrière
14 Français Prise en main Panneau arrière FRONT SPEAKERS OUT SPEAKER IMPEDANCE : 3 FM ANT WIRELESS VIDEO OUT AUX IN SURROUND SUBWOOFER CENTER FRONT SURROUND COMPONENT OUT iPod HDMI OUT DIGITAL AUDIO IN OPTICAL HDMI IN LAN WIRELESS LAN 2 3 4 5 6 7 8 9 10 11 12 13 1 1 PRISE WIRELESS LAN (LAN SANS FIL)...
Page 93 - Télécommande; Boîtier de la télécommande
Français 15 01 Prise en main FUNCTION TV SOURCE POWER DISC MENU MENU TITLE MENU MUTE SFE MODE VOL TUNING /CH TOOLS RETURN EXIT INFO A B HUB C D MO/ST D ĺ D SMART SEARCH iPod SYNC vTuner D SOUND REPEAT FULL SCREEN 1 2 4 5 6 7 8 0 9 POPUP RECEIVER SLEEP BD TV TUNER MEMORY DSP RDS DISPLAY TA PTY+ PTY S...
Page 94 - Installation des piles dans la télécommande; Réglage de la télécommande; Appuyez sur la touche; Liste des codes par marque de téléviseur
16 Français Prise en main Installation des piles dans la télécommande REMARQUE Assurez-vous que la position des extrémités « + » et « – » des piles correspond à la position illustrée dans le compartiment.Pour une utilisation normale du téléviseur, les piles devraient durer environ un an.La portée de...
Page 95 - Connexion des enceintes; Branchements; Position de l’appareil; Enceintes avant; Enceinte centrale; Caisson de graves
Français 17 02 Branchements Cette section décrit différentes méthodes de connexion de l’appareil aux autres périphériques externes.Avant de déplacer ou d'installer l'appareil, assurez-vous de le mettre hors tension et de débrancher le cordon d'alimentation. Connexion des enceintes Branchements Posit...
Page 96 - Composants des enceintes
18 Français Branchements Composants des enceintes Composants des enceintes Enceintes assemblées (G) (D) CENTRALE BASE DU SOCLE CAISSON DE GRAVES HT-D5530 HT-D5530 REMARQUE Reportez-vous en page 19 pour installer les enceintes sur le pied Tallboy. ✎ CÂBLE D’ENCEINTE AMBIOPHONIQUE (G) (D) HT-D5500...
Page 97 - Installations des enceintes sur le socle Tallboy
Français 19 02 Branchements FRONT SPEAKERS OUT SPEAKER IMPEDANCE : 3 VIDEO OUT SURROUND SUBWOOFER CENTER FRONT SURROUND ONENT OUT VIDEO OUT NT OUT FRONT SPEAKERS OUT SPEAKER IMPEDANCE : 3 SURROUND SUBWOOFER CENTER FRONT SURROUND Installations des enceintes sur le socle Tallboy * HT-D5530 uniquement ...
Page 98 - Connexion du module récepteur sans fi l proposé en option; Ce produit devrait être uniquement connecté au système SWA-5000.
20 Français Branchements Connexion du module récepteur sans fi l proposé en option Pour raccorder les enceintes ambiophoniques sans fi l, vous devez vous procurer le module récepteur sans fi l et la carte émettrice auprès de votre revendeur Samsung. Ce produit devrait être uniquement connecté au systèm...
Page 100 - ENTRÉE HDMI; Lecteur de DVD ou Blu-ray
22 Français Branchements Connexion de périphériques externes et du téléviseur via l’interface HDMI HDMI est une interface numérique standard qui permet de connecter des appareils tels qu’un téléviseur, un projecteur, un lecteur de DVD, un lecteur Blu-ray, un boîtier décodeur et bien plus encore. L’i...
Page 101 - Appuyez sur le bouton; Fonction Détection auto HDMI
Français 23 02 Branchements HDMI IN (ENTRÉE HDMI) : Connexion à un composant externe via un câble HDMI Servez-vous d’un câble HDMI (non fourni) pour relier la prise HDMI IN (ENTRÉE HDMI) située à l’arrière du produit à la prise HDMI OUT (SORTIE HDMI) de l’appareil numérique. Appuyez sur le bouton FU...
Page 102 - d'entrée vidéo en composante de votre téléviseur.; MÉTHODE 2; MÉTHODE 1
24 Français Branchements MÉTHODE 1 : Vidéo en composante (BONNE QUALITÉ) Si votre téléviseur est doté de prises d'entrée vidéo en composante, branchez les fi ches d’une des extrémités d’un câble vidéo en composante (non compris) aux prises de sortie vidéo en composante (P R , P B et Y) situées à l’ar...
Page 103 - Connexion audio de composants externes; OPTIQUE : Connexion d’un composant numérique externe; AUX : Connexion d’un composant analogique externe; Si le composant
Français 25 02 Branchements Connexion audio de composants externes OPTIQUE : Connexion d’un composant numérique externe Il s’agit de composants des signaux numériques tels qu’une boîte de raccordement de câble ou un récepteur satellitaire (Boîtier décodeur). Connectez l’entrée numérique Digital Inpu...
Page 104 - Connexion au réseau; Réseau câblé
26 Français Branchements Connexion au réseau Ce produit vous permet de visionner les services basés sur le réseau (voir pages 62~71) tels que Smart Hub ou BD-LIVE, et de recevoir les mises à niveau logicielles lorsque la connexion au réseau est établie. Nous vous recommandons d’utiliser un routeur s...
Page 105 - Connexion de l’antenne FM; Réseau sans fi l; age IP sans fi l
Français 27 02 Branchements Connexion de l’antenne FM Branchez l’antenne FM fournie à la prise ANTENNE FM. Déplacez progressivement le fi l de l’antenne jusqu’à trouver une position dans laquelle la réception est acceptable, ensuite fi xez le fi l solidement à un mur ou une autre surface rigide. REMARQ...
Page 106 - Confi guration; Paramètre initial; Mon contenu
28 Français Confi guration Paramètre initial Allumez le téléviseur après avoir branché le produit. Lors de sa première connexion au téléviseur, le produit s'allume automatiquement et l'écran Paramètres initiaux apparaît. Initial Settings | On-Screen Language m Move " Enter Select a language for t...
Page 107 - Pour accéder au menu Paramètres
Français 29 03 Confi guration Pour accéder au menu Paramètres DISC MENU MENU TITLE MENU TOOLS RETURN EXIT INFO TUNER POPUP DISC MENU TITLE MENU TOOLS INFO TUNER POPUP 1 2 4 3 1 Bouton MENU : Appuyez sur ce bouton pour accéder au menu Accueil. 2 Bouton RETURN : Permet de revenir au menu précédent. 3 B...
Page 108 - Paramètres 3D; Mode lecture 3D Blu-ray; : permet de détecter automatiquement si le; Taille écran
30 Français Confi guration Affi chage Vous pouvez confi gurer les diverses options d'affi chage telles que Format image, Défi nition, etc. Paramètres 3D Vous pouvez choisir de lire ou non un disque Blu-ray comportant des contenus 3D en mode 3D. Paramètres Affi chage Audio Réseau Système Langue Sécurité Gé...
Page 109 - Format écran
Français 31 03 Confi guration Format écran Selon le type de téléviseur que vous possédez, vous pouvez ajuster le réglage de la taille de l'écran. 16:9 Original : Sélectionnez cette option lorsque vous connectez le produit à un téléviseur au format d'écran 16:9. Tous les contenus s'affi cheront selon l...
Page 110 - Résolution selon le mode de sortie
32 Français Confi guration Résolution selon le mode de sortie Lecture du disque Blu-ray/des e-contenus/des contenus numériques Sortie Confi guration HDMI / connecté HDMI / non connecté Mode HDMI Mode Composante/ VIDÉO Mode Composante Mode VIDÉO Disque Blu-ray E-content/ Contenus numériques Disque Blu-...
Page 111 - Format couleurs HDMI
Français 33 03 Confi guration REMARQUE Si le téléviseur connecté au produit ne prend pas en charge la fonction Fréquence cinéma ou la résolution sélectionnée, le message suivant apparaîtra : « Si aucune image ne s'affi che après la sélection, veuillez patienter 15 secondes. La résolution reprend ensui...
Page 112 - Test tonalité; Appuyez sur les boutons ◄, ► pour sélectionner; Niveau; • Le niveau de volume peut être réglé par pas de
34 Français Confi guration Distance Si les enceintes ne peuvent être positionnées à égale distance du point d’écoute, vous pourrez régler le délai d’attente des signaux audio émis depuis les enceintes avant, avant supérieure, ambiophonique et le caisson de graves. La distance entre les enceintes peut...
Page 113 - Étalonnage auto pour la musique
Français 35 03 Confi guration Étalonnage auto pour la musique Il suffi t de régler une seule fois la fonction Musical Auto Calibration (Étalonnage auto pour la musique) (MAC) lorsque vous déplacez ou installez le produit ; ce dernier reconnaîtra automatiquement la distance entre les enceintes, les dif...
Page 114 - Audio HDMI; Sortie numérique
36 Français Confi guration Audio HDMI Il est possible de basculer les signaux audio transmis via le câble HDMI entre les états Activ./Désact.. Arrêt : La vidéo est transmise via le câble de connexion HDMI uniquement, alors que le signal audio est émis par les enceintes du produit uniquement. Activé :...
Page 115 - Sélections de l’option Sortie numérique; La sortie sera émise sur LPCM 2 ca.; Contrôle de la dynamique; : Le Réglage de la plage dynamique sera
Français 37 03 Confi guration Sélections de l’option Sortie numérique Configuration PCM Bitstream (non traité) Bitstream (DTS réencodé) Bitstream (Dolby D. réencodé) Connexion Récepteur AV prenant en charge l'interface HDMI Récepteur AV prenant en charge l'interface HDMI Récepteur AV prenant en charg...
Page 116 - Paramètres réseau; Réseau câble
38 Français Confi guration Sync. audio L’image vidéo peut défi ler plus lentement que le son lorsque le produit est connecté à un téléviseur numérique. Lorsque cela se produit, il faut régler le temps de retard audio de manière à ce qu'il corresponde à l’image vidéo. Vous pouvez régler le temps de ret...
Page 119 - État du réseau; Connexion internet BD-LIVE
Français 41 03 Confi guration WPS(PBC) La méthode la plus simple pour confi gurer la connexion réseau sans fi l consiste à utiliser les fonctions WPS(PBC) ou One Foot Connection. Si votre routeur sans fi l dispose d'un bouton WPS(PBC) , suivez les étapes suivantes : Appuyez sur les boutons ▲▼ pour sélec...
Page 120 - DivX® Vidéo à la demande
42 Français Confi guration Système Paramètre initial Vous pouvez exécuter la fonction Paramètres initiaux pour régler les options de langue, Étalonnage auto pour la musique, les Paramètres réseau, etc.Pour obtenir de plus amples informations sur la fonction Paramètres initiaux, reportez-vous à la sec...
Page 121 - Réinitialisation; Langue; Si vous avez oublié votre mot de passe; Général; Affi chage du lecture
Français 43 03 Confi guration Réinitialisation Tous les paramètres sont rétablis sur leur valeur d'origine par défaut sauf en ce qui concerne les paramètres réseau et Smart Hub. Vous devez saisir le mot de passe pour cette fonction. REMARQUE Le mot de passe par défaut est 0000. Langue Vous pouvez sél...
Page 122 - Assistance; Mise à jour du logiciel; Ces quatre méthodes sont expliquées ci-après.; Via Internet; USB; Sélectionnez
44 Français Confi guration Lancez l'application sur votre appareil portable. L'application devrait détecter le produit et l'affi cher au sein d'une liste.Sélectionnez le produit.Si vous utilisez cette fonction pour la première fois, le système vous demandera d'autoriser ou de refuser la télécommande d...
Page 123 - Via disque; Contacter Samsung
Français 45 03 Confi guration Via disque Pour effectuer la mise à niveau par Disque, suivez les étapes suivantes : Visitez www.samsung.com/bluraysupport. Téléchargez sur l'ordinateur le dossier compressé de la mise à niveau la plus récente du disque. Dézippez le dossier compressé sur l'ordinateur. Vo...
Page 124 - Fonctions de base; Lecture d’une vidéo; Lecture; Boutons liés à la lecture; LECTURE; Structure des disques; Utilisation du Menu du disque/Menu de; Utilisation du Menu du disque; de la
46 Français Fonctions de base Lecture d’une vidéo Lecture Insérez un disque dans le logement du disque, en ayant sa face imprimée orientée vers le haut.Appuyez sur le bouton LECTURE ( ► ). Boutons liés à la lecture LECTURE ( ► ) Permet de démarrer la lecture. ARRÊT ( ) Permet d'arrêter la lecture....
Page 125 - Utilisation de Menu Titre; Lecture de Liste de titres; Recherche d'une scène; Saut de chapitre
Français 47 04 Fonctions de base Utilisation de Menu Titre Z Durant la lecture, appuyez sur le bouton TITLE MENU de la télécommande.Appuyez sur les boutons ▲▼◄► pour effectuer la sélection souhaitée, puis appuyez sur le bouton ENTRÉE . REMARQUE Les éléments de menu peuvent varier selon le disque et ...
Page 126 - Lecture au ralenti / Lecture pas à pas; Lecture au ralenti; Lecture pas à pas; Répétition de la lecture; Répétition de la section
48 Français Fonctions de base Lecture au ralenti / Lecture pas à pas Lecture au ralenti hzZyx En mode Pause ( ), appuyez sur le bouton RECH. ( ). Si vous appuyez sur le bouton RECH. ( ) la vitesse de lecture sera réduite à * 1/8 * 1/4 * 1/2 Pour reprendre la lecture à une vitesse normale, appu...
Page 127 - Utilisation du bouton TOOLS; Accès direct à la scène souhaitée; Sélection de la langue audio; Sélection de la langue des sous-titres
Français 49 04 Fonctions de base Utilisation du bouton TOOLS Pendant la lecture, vous pouvez commander le menu du disque en appuyant sur le bouton TOOLS . Écran du menu OUTILS Outils < Changer " Entrer ' Retour Recherche titre 1/2 Rech. chapitre : 1/20 Recher. temps : 00:00:13/01:34:37 Réglag...
Page 128 - Fonction Légende aption Function; Changement d'angle de la caméra; Sélection des Paramètres de l'image; Paramétrage de BONUSVIEW
50 Français Fonctions de base Fonction Légende aption Function x Cette fonction nécessite de posséder de bonnes connaissances dans le domaine de l’extraction et du montage vidéo.Pour utiliser la fonction Caption (Légende), enregistrez le fi chier de légendes (*.smi) sous le même nom que le support Di...
Page 129 - Écouter de la musique
Français 51 04 Fonctions de base Écouter de la musique ow Boutons de la télécommande servant à l'écoute de musique MUTE REPEAT FULL SCREEN 1 2 4 5 6 7 8 0 9 RDS DISPLAY TA PTY+ PTY SEARCH PTY- MUTE FULL SCREEN RDS DISPLAY TA 2 3 1 0 ! 9 @ TOOLS RETURN EXIT INFO A B HUB C D MO/ST 2D ĺ D SMART SEARCH ...
Page 130 - Liste d’écoute
52 Français Fonctions de base Lecture d'un CD audio (CD-DA)/MP3 Insérez un CD audio (CD-DA) ou un disque MP3 dans le tiroir disque. Sur un CD audio (CD-DA), la première piste s'exécute automatiquement. Sur un disque MP3, appuyez sur les boutons ◄► et sélectionnez Musique , puis appuyez sur le bouton...
Page 131 - Mode Son; Fonction DSP (Processeur de
Français 53 04 Fonctions de base Piste 002 03:56 Piste 004 04:02 Piste 006 03:40 Piste 008 03:52 1/2 Page CD audio | Musique Fermer Mode édit. ( ) Page Outils " Choisir ' Retour Piste 001 00:43 Piste 003 04:41 Piste 005 03:43 Piste 007 04:06 Eléments sélec. : 3 Sélectionnez la piste souhaitée pu...
Page 132 - Mode Dolby Pro Logic; Lecture d’image; Visionnage de fi chiers photo
54 Français Fonctions de base Mode Dolby Pro Logic II Vous pouvez sélectionner le mode Dolby Pro Logic II audio que vous souhaitez. Appuyez sur le bouton PL II . MUSIC Lorsque vous écoutez de la musique, vous bénéfi ciez des effets sonores que vous percevriez si vous assistiez en personne au concert....
Page 133 - Lecture de contenu à partir d'un
Français 55 04 Fonctions de base Utilisation du bouton TOOLS Durant la lecture en mode diaporama, vous pouvez utiliser différentes fonctions en appuyant sur le bouton TOOLS . Suspendre diaporama Vlt. diaporama : Normal Effet du diaporama : Fade Fond musical : Off Paramètres de musique de fond Zoom P...
Page 134 - Écoute de la radio; Utilisation des boutons de la télécommande; Préréglage des stations radio; Utilisation de la radiodiffusion de données
56 Français Fonctions de base Écoute de la radio Utilisation des boutons de la télécommande Appuyez sur le bouton FUNCTION pour sélectionner FM . Sélectionnez la station de votre choix. Syntonisation préréglée 1 : Vous devez d’abord ajouter une fréquence de votre choix à titre de préréglage. Appuyez...
Page 135 - Pour affi cher les signaux RDS; À propos des caractères affi chés à l’écran; ARRÊT
Français 57 04 Fonctions de base Pour affi cher les signaux RDS Vous pouvez voir les signaux RDS envoyés par la station à l’écran. Appuyez sur le bouton RDS DISPLAY tout en écoutant une station FM. Chaque fois que vous appuyez sur ce bouton, l’affi chage change d’apparence pour vous apporter les infor...
Page 136 - Connexion d’un iPod/iPhone à l’aide; Connexion d’un iPod/iPhone via la
58 Français Fonctions de base Connexion d’un iPod/iPhone à l’aide d’un câble USB Si le système est connecté à l’iPod/iPhone, vous pouvez lire la musique sur l’iPod/iPhone en utilisant le système. ASC IN 5V 500mA ASC IN 50 Connectez l’iPod/iPhone au port USB situé à l’avant de l’appareil, à l’aide du...
Page 137 - Utilisation de l’iPod/iPhone avec une station d’accueil; Chargement de l'émetteur sans fi l; Lecture d’un fi lm
Français 59 04 Fonctions de base Utilisation de l’iPod/iPhone avec une station d’accueil dock sans fi l (vendue séparément) pour iPod/iPhone Vous pourrez obtenir une qualité musicale plus raffi née via les enceintes si le signal audio de l’iPod/iPhone est transmis à l’aide d’un émetteur sans fi l. Pour...
Page 138 - État de fonctionnement du témoin; DEL du socle de chargement; Écran d’affi chage; Modèles iPod/iPhone susceptibles d’être
60 Français Fonctions de base État de fonctionnement du témoin DEL du socle de chargement Écran d’affi chage Fonction TÉMOIN DEL VERT ALLUMÉ Mise sous tension / Chargement terminé(e) TÉMOIN DEL ROUGE ALLUMÉ Chargement en cours. REMARQUE Le témoin DEL indique l'état de chargement de la pile intégrée ...
Page 139 - Liaison de l’émetteur sans fi l avec
Français 61 04 Fonctions de base État de fonctionnement du témoin DEL de l’émetteur sans fi l CHAR GE STANDB Y LIN K STANDB Y LINK Écran d’affi chage Fonction LIAISON (Témoin DEL bleu) STANDBY (Témoin DEL rouge) TÉMOIN DEL ALLUMÉ Appariement réussi MISE EN VEILLE LED BLINK (Clignotement long) Traitem...
Page 140 - Services réseau; Utilisation de Smart Hub; Allez sur le menu Accueil.; , puis appuyez sur le; pour les
62 Français Services réseau Vous pouvez bénéfi cier de différents services réseau tel que Smart Hub ou BD-LIVE en connectant le produit au réseau. Lisez les instructions suivantes avant d’utiliser un service réseau. Connectez le produit au réseau.(voir pages 26~27) Confi gurez les paramètres réseau. (...
Page 142 - Utilisation du clavier numérique; Saisie de texte, de chiffres et de symboles
64 Français Services réseau Utilisation du clavier numérique Grâce à votre télécommande, vous pouvez utiliser le clavier numérique à l'écran pour saisir les lettres, les chiffres et les symboles. . , – abc def 1 2 3 ghi jkl mno 4 5 6 pqrs tuv wxyz 7 8 9 Maj. Supprimer 0 b Mode de saisie / Langue: En...
Page 143 - Connexion au compte
Français 65 05 Services réseau Une fois l'opération terminée, appuyez sur le bouton ENTRÉE pour sélectionner OK , puis appuyez à nouveau sur le bouton ENTRÉE . L’écran Connexion apparaît à nouveau. Sélectionnez Confi rmer le MDP. , puis appuyez sur le bouton ENTRÉE . Répétez les étapes 7 et 8. Lorsqu...
Page 144 - Si vous avez appuyé sur; Gestionnaire de services
66 Français Services réseau Enreg. compte de service Si vous tenez un compte auprès d'un fournisseur répertorié dans la liste fournie par la fonction Inscr. compte de service, vous pourrez associer le compte de ce fournisseur et le mot de passe y afférent à votre compte Smart TV. En associant le com...
Page 145 - Propriétés
Français 67 05 Services réseau Au bout d'un moment, Smart Hub est automatiquement réinitialisé. L'écran peut devenir noir, puis Smart Hub réapparaît. La procédure de réinitialisation débutera dans un moment. Pour terminer la réinitialisation, allez à l'étape 4 de la section Démarrage de Smart Hub po...
Page 147 - Applications Samsung; Applications payantes; Accès à l'écran Apps Samsung
Français 69 05 Services réseau Déver. Appuyez sur le bouton JAUNE (C) de la télécommande. Appuyez sur ▲▼◄► pour sélectionner une application verrouillée, puis appuyez sur le bouton ENTRÉE . Appuyez sur ▲▼◄► pour sélectionner Déverrouiller, puis appuyez sur le bouton ENTRÉE . La fenêtre Sécurité appa...
Page 148 - Utilisation de l'écran Apps Samsung; Vous pouvez également utiliser le bouton; Les applications Samsung par catégorie; Les catégories suivantes sont disponibles :; Mon compte; Appuyez sur ◄ pour quitter l'option Aide.
70 Français Services réseau Utilisation de l'écran Apps Samsung Pour utiliser l'écran Accès à l'écran Apps Samsung, suivez les étapes suivantes : Appuyez sur boutons ◄► pour passer à la liste des catégories à gauche. Appuyez sur ▲▼ pour mettre en surbrillance une catégorie. Au bout de quelques secon...
Page 149 - Utilisation de la fonction vTuner; Utilisation de la fonction AllShare
Français 71 05 Services réseau Utilisation des touches de couleur de votre télécommande avec Apps Samsung ROUGE (A) (Connexion) : Pour vous connecter à votre compte Smart TV. VERT (B) (Affi chage Vignettes/Affi chage Liste) : Pour faire basculer l'affi chage des applications entre l'Affi chage de l'inde...
Page 150 - Autres informations; Dépannage; La lecture ne démarre pas.
72 Français Autres informations Dépannage Reportez-vous au tableau ci-dessous lorsque le produit ne fonctionne pas correctement. Si le problème auquel vous êtes confronté n’est pas répertorié dans la liste ou si les instructions fournies ne permettent pas de le résoudre, éteignez le produit, débranc...
Page 151 - Problème
Français 73 06 Autres informations Problème Vérifi cation/Solution Il est impossible de changer le format d’écran. • Vous pouvez lire les disques Blu-ray/DVD au format 16:9 respectivement en mode 16:9 large, 4:3 panoramique, ou 4:3 plein écran, toutefois les disques Blu-ray/DVD au format 4:3 ne sont ...
Page 152 - La lecture vidéo est discontinue.
74 Français Autres informations Problème Vérifi cation/Solution Fonction PC Share Manager Je peux affi cher les dossiers partagés grâce à PC Share Manager mais pas les fi chiers. • Normalement, seuls les fi chiers correspondant aux catégories Image, Musique et Cinéma s’affi chent, les fi chiers n’apparten...
Page 153 - Caractéristiques; Informations; Disque
Français 75 06 Autres informations Caractéristiques Informations générales Poids 3,5 kg Dimensions 429,3 (L) x 58,4 (H) x 325,1 (P) mm Plage de températures de fonctionnement +5°C à +35°C Plage de taux d’humidité de fonctionnement 10 % à 75 % Syntoniseur FM Rapport signal/bruit 55 dB Sensibilité uti...
Page 154 - Enceinte
76 Français Autres informations HT-D5500 Enceinte Système d'enceintes Système d’enceintes 5+1 canaux Avant Ambiophonique Centrale Caisson de graves Impédance 3 Ω 3 Ω 3 Ω 3 Ω Gamme de fréquences 140 Hz à 20 kHz 140 Hz à 20 kHz 140 Hz à 20 kHz 140 Hz à 160 kHz Niveau de pression acoustique de sortie 8...
Page 156 - Elimination des batteries de ce produit
Les bons gestes de mise au rebut de ce produit (Déchets d’équipements électriques et électroniques) (Applicable dans les pays de l’Union Européenne et dans d’autres pays européens pratiquant le tri sélectif) Ce symbole sur le produit, ses accessoires ou sa documentation indique que ni le produit, ni...
Page 157 - Bedienungsanleitung; Erleben; Vielen Dank, dass Sie sich für dieses Produkt von Samsung
5.1CH Blu-ray™ Heimkino-System Bedienungsanleitung Erleben Sie die Möglichkeiten Vielen Dank, dass Sie sich für dieses Produkt von Samsung entschieden haben. Um unseren umfassenden Service nutzen zu können, registrieren Sie Ihr Produkt unter www.samsung.com/register HT-D5500HT-D5530HT-D5550 HT-D5500...
Page 158 - Deutsch; Sicherheitsinformationen; Sicherheitshinweise; WARNUNG; LASERPRODUKT DER KLASSE 1; ACHTUNG
2 Deutsch Sicherheitsinformationen Sicherheitshinweise ZUR VERMEIDUNG VON STROMSCHLÄGEN DARF DIESES GERÄT NICHT GEÖFFNET WERDEN.ES ENTHÄLT KEINE BAUTEILE, DIE VOM BENUTZER GEWARTET WERDEN KÖNNEN. LASSEN SIE REPARATUREN NUR VON QUALIFIZIERTEM FACHPERSONAL DURCHFÜHREN. ACHTUNG STROMSCHLAGGEFAHR! NICHT...
Page 159 - Vorsichtsmaßnahmen; D-Funktionen für das Fernsehen verwenden
Deutsch 3 Vorsichtsmaßnahmen Stellen Sie sicher, dass die Stromversorgung in Ihrem Haus den auf der Rückseite Ihres Produkts angegebenen Anforderungen entspricht. Stellen Sie den Player horizontal auf einer geeigneten Unterlage (Möbel) auf, so dass um ihn herum ausreichend Platz (7,5-10 cm) zur Belü...
Page 160 - Lizenz; Halten der Disks; Berühren Sie nicht die Wiedergabeseite einer Disk.; Verwenden und Lagern von Disks; Säubern Sie die Disk von innen nach außen.
4 Deutsch Lizenz Dolby sowie das Doppel-D-Symbol sind Handelsmarken der Dolby Laboratories. "INFOS ZU DIVX VIDEO: DivX® ist ein digitales Videoformat, das von der Firma DivX, Inc. hergestellt wurde. Dieses Gerät ist offi ziell von DivX® zertifi ziert und gibt DivX-Videodateien wieder. Nähere Infor...
Page 161 - Inhalt; SICHERHEITSINFORMATIONEN
Deutsch 5 Inhalt SICHERHEITSINFORMATIONEN 2 2 Sicherheitshinweise3 Vorsichtsmaßnahmen4 Vorsichtsmaßnahmen beim Verwenden und Lagern von Datenträgern 4 Lizenz4 Copyright ERSTE SCHRITTE 7 7 Symbole in dieser Bedienungsanleitung8 Disk-Typen und Merkmale 12 Zubehör13 Beschreibung13 Vorderseite14 Rücksei...
Page 162 - EINSTELLUNG
6 Deutsch EINSTELLUNG 43 43 Sicherheit43 BD-Sicherungsstufe43 DVD-Sicherungsstufe43 Passwort ändern. 43 Allgemein43 Frontdisplay43 Netzwerk-Fernbedienung44 Unterstützung44 Software-Update45 Samsung kontaktieren GRUNDFUNKTIONEN 46 46 Ein Video wiedergeben 46 Verwenden des Diskmenüs/Titelmenüs/ Popup-...
Page 163 - Symbole in dieser Bedienungsanleitung; Dieser Player ist nur mit dem PAL-Farbsystem kompatibel.; Erste Schritte
Deutsch 7 01 Erste Schritte Symbole in dieser Bedienungsanleitung Informieren Sie sich vor dem Lesen der Bedienungsanleitung über die nachstehenden Begriffe. Begriff Logo Symbol Erklärung BD-ROM h Hier handelt es sich um eine Funktion, die bei BD-ROMs zur Verfügung steht. BD-RE/-R z Hier handelt es ...
Page 164 - Disk-Typen und Merkmale; Nicht abspielbare Disks; Logos von abspielbaren Disks; Dolby Digital Plus
8 Deutsch Erste Schritte Disk-Typen und Merkmale Blu-ray-Disk-Kompatibilität Blu-ray ist ein neues, sich noch weiterentwickelndes Format. Infolgedessen können Kompatibilitätsprobleme auftreten. Nicht alle Disks sind kompatibel, und nicht jedes Format kann wiedergegeben werden. Weitere Informationen ...
Page 165 - Regionalcode; Disktypen
Deutsch 9 01 Erste Schritte Regionalcode Das Produkt und die DVDs sind nach Regionen codiert. Diese Regionalcodes müssen übereinstimmen, damit die Disk wiedergegeben werden kann. Disktyp Regionalcode Region Blu-ray A North America, Central America, South America, Korea, Japan, Taiwan, Hong Kong und ...
Page 166 - Unterstützte Dateiformate; Unterstützte Videodatei
10 Deutsch Erste Schritte Disk-Format JPEG-Disks verwenden Es wird die Wiedergabe von CD-R/-RW, DVD-RW/-R aufgenommen in den Formaten UDF oder JOLIET unterstützt.Es können nur Dateien mit den Erweiterungen „.jpg", „.JPG", „.jpeg" oder „JPEG" angezeigt werden.Progressive JPEG wird unt...
Page 167 - Beschränkungen; Unterstützte Musikdatei
Deutsch 11 01 Erste Schritte Dateierweiterung Ballastbehälter Video Codec Audio Codec Auflösung *.vro VRO VOB MPEG2 AC3 MPEG LPCM 1920x1080 MPEG1 352x288 *.mpg *.mpeg PS MPEG1 AC3 MPEG LPCM AAC 352x288 MPEG2 1920x1080 H.264 1920x1080 *.ts *.tp *.trp TS MPEG2 AC3 AAC MP3 DD+ HE-AAC 1920x1080 H.264 19...
Page 168 - Notizen zu USB-Anschluss; Zubehör; Videokabel
12 Deutsch Erste Schritte Notizen zu USB-Anschluss Unterstützte Geräte: USB-Speichermedien, MP3-Spieler, digitale Kamera, USB Kartenleser Werden nicht unterstützt wenn ein Ordner oder eine Datei mehr als 125 Zeichen enthält.Eine Untertiteldatei größer als 300 KB kann möglicherweise nicht ordnungsgem...
Page 169 - Beschreibung; Vorderseite
Deutsch 13 01 Erste Schritte Beschreibung Vorderseite ASC IN 5V500mA 1 3 2 4 5 10 11 6 7 12 8 9 1 TASTE EIN-/AUSSCHALTEN ( ) Schaltet das Produkt ein/aus. 2 TASTE FUNKTION Der Modus wechselt in folgender Reihenfolge: BD/DVD D. IN AUX R. IPOD W. IPOD H. IN1 H. IN2 FM 3 ANZEIGE Zeigt den Wiedergabesta...
Page 170 - Rückseite; NETZWERKANSCHLUSS
14 Deutsch Erste Schritte Rückseite FRONT SPEAKERS OUT SPEAKER IMPEDANCE : 3 FM ANT WIRELESS VIDEO OUT AUX IN SURROUND SUBWOOFER CENTER FRONT SURROUND COMPONENT OUT iPod HDMI OUT DIGITAL AUDIO IN OPTICAL HDMI IN LAN WIRELESS LAN 2 3 4 5 6 7 8 9 10 11 12 13 1 1 WLAN-ANSCHLUSS Kann für netzwerkbasiert...
Page 171 - Fernbedienung; Übersicht der Fernbedienung
Deutsch 15 01 Erste Schritte Fernbedienung Übersicht der Fernbedienung FUNCTION TV SOURCE POWER DISC MENU MENU TITLE MENU MUTE SFE MODE VOL TUNING /CH TOOLS RETURN EXIT INFO A B HUB C D MO/ST D ĺ D SMART SEARCH iPod SYNC vTuner D SOUND REPEAT FULL SCREEN 1 2 4 5 6 7 8 0 9 POPUP RECEIVER SLEEP BD TV ...
Page 172 - Fernbedienung einrichten; Fernsehgerät mit der Fernbedienung steuern; Markencodeliste des Fernsehgeräts
16 Deutsch Erste Schritte Sie können die Lautstärke anpassen und stabilisieren. (Digital-Signalprozessor) * Batteriegröße: AAA HINWEIS Achten Sie darauf, dass die Pole “+” und “–” der Batterien wie im Batteriefach angezeigt ausgerichtet sind.Bei normaler Nutzung des Fernsehers halten die Batterien u...
Page 173 - Rückwärtige Surround-; Lautsprecher anschließen; Anschlüsse
Deutsch 17 02 Anschlüsse Front-Lautsprecher ei Platzieren Sie diese Lautsprecher vor Ihrer Hörposition, so dass sie nach innen zeigen (in einem Winkel von ca. 45°) und auf Sie ausgerichtet sind. Platzieren Sie die Lautsprecher so, dass die Hochtöner sich auf einer Höhe mit Ihren Ohren befi nden. Rich...
Page 174 - Lautsprecherkomponenten
18 Deutsch Anschlüsse Lautsprecherkomponenten Lautsprecherkomponenten Zusammengesetzte Lautsprecher FRONT (L) (R) CENTER STANDFUSS BODENPLATTE SUBWOOFER HT-D5530 HT-D5530 CENTER-LAUTSPRECHER SUBWOOFER FRONT-LAUTSPRECHER SCHRAUBE (5 X 15): 2 S TK . SCHRAUBE (4 X 20): 8 S TK . HINWEIS Weitere Inform...
Page 175 - Anschließen der Lautsprecher; Zum Installieren der Lautsprecher auf dem Tallboy-Stand.
Deutsch 19 02 Anschlüsse Anschließen der Lautsprecher Drücken Sie die Anschlusslasche an der Rückseite des Lautsprechers herunter. Führen Sie das schwarze Kabel in den schwarzen Anschluss (-) und das rote Kabel in den roten Anschluss (+) ein. Lassen Sie die Lasche dann wieder los. Beachten Sie beim ...
Page 176 - Dieses Produkt sollte nur an einen SWA-5000 angeschlossen werden.
20 Deutsch Anschlüsse Anschluss des optionalen drahtlosen Empfängermoduls einrichten Wenn Sie die Surround-Lautsprecher über eine Funkverbindung anschließen möchten, müssen Sie bei Ihrem Samsung-Händler ein drahtloses Empfängermodul und eine TX-Karte erwerben. Dieses Produkt sollte nur an einen SWA-...
Page 177 - Anbringen des Ferritringkerns am Netzkabel Des Hausgeräts
Deutsch 21 02 Anschlüsse ACHTUNG Verwenden Sie ausschließlich die für das Produkt vorgesehene Karte. Bei Verwendung einer anderen TX-Karte kann das Hauptgerät beschädigt werden oder die Karte lässt sich nicht mehr leicht entfernen.TX-Karte nicht umgedreht oder in verkehrter Richtung einstecken.TX-Ka...
Page 178 - Externe Geräte/Ihr TV über HDMI anschließen
22 Deutsch Anschlüsse Externe Geräte/Ihr TV über HDMI anschließen HDMI ist ein standardisiertes digitales Interface zur Verbindung von Geräten wie TV, Projektor, DVD-Player, Blu-ray-Player, Settopbox und anderen. Da HDMI völlig digital ist, werden Sie ein digitales Qualitätsvideo und den Klang so ge...
Page 179 - HDMI IN: Anschluss an ein Externen Component mit dem HDMI-Kabel.; Drücken Sie die Taste; Funktion Automatische HDMI-Erkennung; Rauschen auf dem Bildschirm angezeigt.
Deutsch 23 02 Anschlüsse HDMI IN: Anschluss an ein Externen Component mit dem HDMI-Kabel. Verbinden Sie ein HDMI-Kabel (nicht mitgeliefert) über die HDMI IN (HDMI EINGANGS) -Buchse an der Rückseite des Produkts mit der HDMI OUT Ausgangsbuchse Ihres Geräts. Drücken Sie die Taste FUNCTION , um H. IN1 ...
Page 180 - und Y) an der Rückseite des Produkts über ein Komponentenvideo-; METHODE 2; METHODE 1
24 Deutsch Anschlüsse METHODE 1: Component-Video (BESSERE QUALITÄT) Falls Ihr Fernsehgerät über einen Komponentenvideo-Eingang verfügt, verbinden Sie das Komponentenvideo-Kabeln (P R , P B und Y) an der Rückseite des Produkts über ein Komponentenvideo- Kabel (nicht mitgeliefert) mit den entsprechend...
Page 181 - Externe Audiokomponenten anschließen; OPTICAL (OPTISCH): Anschließen eines digitalen externen Geräts; AUX : Anschließen eines analogen externen Geräts; Falls das externe, analoge Gerät
Deutsch 25 02 Anschlüsse Externe Audiokomponenten anschließen OPTICAL (OPTISCH): Anschließen eines digitalen externen Geräts Digitale Geräte sind z. B. ein Kabelanschluss/Satellitenempfänger (Set-Top-Box). Verbinden Sie den Digitaleingang (OPTISCH) des Produkts mit dem Digitalausgang der externen Di...
Page 182 - Anschluss an das Netzwerk
26 Deutsch Anschlüsse Anschluss an das Netzwerk Dieses Produkt bietet die Verwendung von Netzwerkdienste (siehe Seiten 62-71) z.B. Smart Hub und BD-LIVE, so wie Softwareaktualisierung wenn eine Internetverbindung besteht. Wir empfehlen für die Verbindung einen Drahtlos- oder IP-Router. Für weitere I...
Page 183 - PC
Deutsch 27 02 Anschlüsse Wireless-Netzwerk Sie können die Verbindung zum Netzwerk mit einem drahtlosen IP-Sharer herstellen. Zur Herstellung einer Funknetzwerkverbindung ist ein kabelloser AP/IP-Router erforderlich. Verbinden Sie den WLAN-Adapter auf der Rückseite des Heimkino-Systems an den WLAN-Ad...
Page 184 - Einstellung; Ersteinstellung
28 Deutsch Einstellung Ersteinstellung Schalten Sie Ihr Fernsehgerät ein, nachdem Sie das Produkt angeschlossen haben. Wenn Sie den Player zum ersten Mal an ein Fernsehgerät anschließen und es einschalten, erscheint die Bildschirmanzeige mit den Anfangseinstellungen. Initial Settings | On-Screen Lan...
Page 185 - Zugriff auf das Einstellungen Menü
Deutsch 29 03 Einstellung Zugriff auf das Einstellungen Menü DISC MENU MENU TITLE MENU TOOLS RETURN EXIT INFO TUNER POPUP DISC MENU TITLE MENU TOOLS INFO TUNER POPUP 1 2 4 3 1 MENU Taste : Wechseln zum Home-Menü. 2 RETURN Taste : Rückkehr zum vorherigen Menü. 3 EINGABE / AUSWAHL Taste : Cursor beweg...
Page 186 - immer im 3D Modus wieder.; Bildgröße
30 Deutsch Einstellung Anzeige Sie können verschiedene Anzeigeoptionen, wie Bildseitenverhältnis, Aufl ösung, usw. konfi gurieren. 3D-Einstell. Sie können auswählen, ob eine Blu-ray Disk mit 3D-Inhalten im 3D-Modus wiedergeben soll. Einstell. Anzeige Audio Netzwerk System Sprache Sicherheit Allgemein ...
Page 187 - Smart Hub-Bildschirmgröße; : Die Smart Hub Bildschirmgröße ist; Aufl ösung; : Bei Anschluss an ein Fernsehgerät
Deutsch 31 03 Einstellung TV-Bildformat Sie haben die Möglichkeit, das Bildformat je nach Art des verwendeten Fernsehgeräts entsprechend anzupassen. 16:9 Original : Wählen Sie dies aus, wenn Sie das Produkt an ein 16:9-Fernsehgerät anschließen. Das Produkt spielt alle Inhalte in ihrem Originalformat...
Page 188 - Aufl ösung entsprechend Ausgabegabemodus
32 Deutsch Einstellung Aufl ösung entsprechend Ausgabegabemodus Wiedergabe Blu-ray-Disc/E-Inhalte/digitale Inhalte Ausgang Einstellung HDMI / Verbindung HDMI / keine Verbindung HDMI-Modus Component/ VIDEO Modus Component-Modus VIDEO-Modus Blu-ray-Disc E-Inhalte/ digitale Inhalte Blu-ray-Disc E-Inhalt...
Page 189 - Progressiver Modus
Deutsch 33 03 Einstellung HINWEIS Falls das von Ihnen an das Produkt angeschlossene Fernsehgerät den Videorahmen oder die von Ihnen gewählte Aufl ösung nicht unterstützt, wird folgende Meldung angezeigt: ,,Wenn keine Bilder nach der Auswahl angezeigt werden, warten Sie 15 Sekunden. Und dann wird die ...
Page 190 - Entfernung; Testton; Drücken Sie die Tasten ◄, ►, um die Option; Pegel; • Die Lautstärke kann stufenweise von -6 dB bis
34 Deutsch Einstellung Entfernung Für Fälle, in denen die Lautsprecher nicht im gleichen Abstand von der Hörposition aufgestellt werden können, können Sie für Front-, Center-, Surround-Lautsprecher und Subwoofer die Verzögerungszeit des Audiosignals einstellen. Sie können die Entfernung zwischen den...
Page 191 - Autom. Tonkalibrierung; Autom. Tonkalibrierungsmodus
Deutsch 35 03 Einstellung Autom. Tonkalibrierung Bei der Installation oder einer Neuplatzierung des Hauptgeräts erfolgt einmalig die Einstellung der Funktion Automatische Sound-Kalibrierung (ASC). Dadurch kann das Hauptgerät automatisch die Entfernung zwischen den Lautsprechern, die Kanalstufen und ...
Page 192 - Das Videosignal wird nur über das HDMI-; Audioausgabekanal
36 Deutsch Einstellung HDMI Audio Die über das HDMI-Kabel gesendeten Audiosignale können Ein-/Aus geschaltet werden. Aus : Das Videosignal wird nur über das HDMI- Verbindungskabel gesendet. Die Audioausgabe erfolgt ausschließlich über die Lautsprecher Ihres Hauptgeräts. Ein : Sowohl Video- als auch ...
Page 193 - Auswahl des Digitalausgangs; Das Ausgangssignal ist LPCM 2ch.; Dynamikumfangsteuerung
Deutsch 37 03 Einstellung Auswahl des Digitalausgangs Einstellung PCM Bitstrom (unverarbeitet) Bitstrom (neue DTS- Encodierung) Bitstrom (neue Dolby D-Encodierung) Verbindung HDMI-unterstützender AV-Empfänger HDMI-unterstützender AV-Empfänger HDMI-unterstützender AV-Empfänger HDMI-unterstützender AV...
Page 194 - Netzwerkeinstellungen; Kabelnetzwerk
38 Deutsch Einstellung Audio-Sync Wenn das Produkt mit einem digitalen Fernseher verbunden ist, erscheint das Bild möglicherweise dem Ton gegenüber verzögert. Passen Sie in diesem Fall die Audio-Verzögerungszeit dem Video an. Sie können eine Audio-Verzögerungszeit zwischen 0 mSec und 300 mSec einste...
Page 197 - Netzwerkstatus
Deutsch 41 03 Einstellung WPS(PBC) Der einfachste Weg die WLAN-Netzwerkverbindung einzurichten, besteht in der Verwendung der WPS(PBC) Funktion oder der One Foot Connection Funktion. Wenn Ihr Wireless Router über eine WPS(PBC) Taste verfügt, folgen Sie diesen Schritten: Mit Hilfe der ▲▼ Tasten WPS(P...
Page 198 - Sicherheit; Zeigt das ausgewählte Gerät an.; Zeitzone
42 Deutsch Einstellung Sicherheit Ersteinstellung Mit der Hilfe der Funktion Ersteinstellungen können Sie die Sprache, Autom. Tonkalibrierung, Netzwerkeinstellung usw. einstellen. Für weitere Informationen über die Funktion Ersteinstellungen schlagen Sie im Abschnitt Ersteinstellungen in dieser Bedi...
Page 199 - Zurück; Das Standardkennwort lautet „0000“.; Sprache; Falls Sie Ihr Passwort vergessen haben; Allgemein; Frontdisplay
Deutsch 43 03 Einstellung Zurück Mit Ausnahme der Netzwerk- und Smart Hub Einstellungen werden alle Einstellungen auf die Voreinstellungen zurückgesetzt. Bei dieser Funktion muss das Passwort eingegeben werden. HINWEIS Das Standardkennwort lautet „0000“. Sprache Sie können die Sprache auswählen, in ...
Page 200 - Unterstützung; Über Internet; Taste; Per USB
44 Deutsch Einstellung Starten Sie die Anwendung auf Ihrem tragbaren Gerät. Die Anwendung fi ndet Ihr Produkt und zeigt es in einer Liste an.Wählen Sie das Produkt aus. Wenn Sie diese Funktion das erste Mal verwenden, werden Sie gefragt, ob Sie die Fernbedienung des Player zulassen oder ablehnen möch...
Page 201 - Über Disk; Samsung kontaktieren
Deutsch 45 03 Einstellung Über Disk Um das Update über eine Disk durchzuführen, folgen Sie diesen Schritten: Besuchen Sie www.samsung.com/bluraysupport. Laden Sie das letzte Disk Software Upgrade Zip-Archiv auf Ihren Computer herunter. Entpacken Sie das Zip-Archiv auf Ihrem Computer. Sie sollten ein...
Page 202 - Grundfunktionen; Ein Video wiedergeben; Wiedergabe; Tasten für die Wiedergabe:; WIEDERGABE; Diskmenü verwenden
46 Deutsch Grundfunktionen Ein Video wiedergeben Wiedergabe Legen Sie die Disk in das Diskfach mit der bedruckten Seite nach vorne ein Drücken Sie die WIEDERGABE ( ► ) Taste. Tasten für die Wiedergabe: WIEDERGABE ( ► ) Startet die Wiedergabe. STOPP ( ) Beendet die Wiedergabe. Wenn die Taste einmal...
Page 203 - Titelmenü verwenden; Titelliste abspielen; Nach gewünschter Szene suchen; Kapitel überspringen
Deutsch 47 04 Grundfunktionen Titelmenü verwenden Z Drücken Sie während der Wiedergabe die Taste TITLE MENU auf der Fernbedienung. Wählen Sie mit den Tasten ▲▼◄► die gewünschte Option aus, und drücken Sie die Taste EINGABE . HINWEIS Abhängig von der Disk können die Menüpunkte abweichen und dieses Me...
Page 204 - Wiedergabe in Zeitlupe/Einzelbildern; Wiedergabe in Zeitlupe; anhalten; Einzelbildwiedergabe; Wiedergabe wiederholen; Wiederholung des aktuellen Kapitels oder Titels.; Abschnittwiederholen
48 Deutsch Grundfunktionen Wiedergabe in Zeitlupe/Einzelbildern Wiedergabe in Zeitlupe hzZyx Drücken Sie im anhalten ( ) -Modus die Taste SUCHE ( ). Wenn Sie die Taste SUCHE ( ) drücken, reduziert sich die Wiedergabegeschwindigkeit auf * 1/8 * 1/4 * 1/2 Um zur normalen Wiedergabegeschwindigkei...
Page 205 - Die Taste TOOLS verwenden; Eine Gewünschte Szene Direkt Auswählen; Audiosprache wählen; Untertitelsprache wählen
Deutsch 49 04 Grundfunktionen Die Taste TOOLS verwenden Während der Wiedergabe können Sie das Diskmenü durch Betätigung der Taste TOOLS bedienen. EXTRAS Menüanzeige Extras < Ändern " Eingabe ' Zurück Titelsuche 1/2 Kapitelsuche : 1/20 Zeitsuche : 00:00:13/01:34:37 Bildeinstellungen : Normal A...
Page 206 - Untertitelfunktion; Kamerawinkel Ändern; Bildeinstellungen Wählen; BONUSVIEW Einstellen
50 Deutsch Grundfunktionen Untertitelfunktion x Für die ordnungsgemäße Verwendung dieser Funktion müssen Sie über Erfahrung in der Videoextraktion und -bearbeitung verfügen.Speichern Sie für die Verwendung der Untertitelfunktion die Untertiteldatei (*.smi) mit dem gleichen Dateinamen wie die DivX-Da...
Page 207 - Musik hören
Deutsch 51 04 Grundfunktionen Musik hören ow Tasten auf der Fernbedienung für die Musikwiedergabe MUTE REPEAT FULL SCREEN 1 2 4 5 6 7 8 0 9 RDS DISPLAY TA PTY+ PTY SEARCH PTY- MUTE FULL SCREEN RDS DISPLAY TA 2 3 1 0 ! 9 @ TOOLS RETURN EXIT INFO A B HUB C D MO/ST 2D ĺ D SMART SEARCH iPod SYNC TUNER M...
Page 208 - Wiedergabeliste
52 Deutsch Grundfunktionen Audio CD (CD-DA)/MP3 wiedergeben Legen Sie eine Audio-CD (CD-DA) oder eine MP3-Disk in die Disk-Lade ein. Von einer Audio-CD (CD-DA) wird der erste Titel automatisch abgespielt. Bei einer MP3-Disk wählen Sie mit den Tasten ◄► die Option Musik , dann drücken Sie die Taste E...
Page 209 - Tonmodus
Deutsch 53 04 Grundfunktionen Track 002 03:56 Track 004 04:02 Track 006 03:40 Track 008 03:52 1/2 Seite Audio-CD | Musik Bearb.-Mod. beend. ( ) Seite Extras " Wählen ' Zurück Track 001 00:43 Track 003 04:41 Track 005 03:43 Track 007 04:06 Ausgew. Elemente : 3 Wählen Sie einen gewünschten Titel u...
Page 210 - Ein Bild wiedergeben; Fotodateien betrachten
54 Deutsch Grundfunktionen Dolby Pro Logic II -Modus Sie können den gewünschten Dolby Pro Logic II -Audiomodus auswählen. Drücken Sie die PL II Taste. MUSIC Beim Musikhören können Sie Klangeffekte so erleben, als wären Sie bei einer Live Vorstellung. MOVIE Für eine realistischere Klangwiedergabe bei...
Page 211 - Die Taste EXTRAS verwenden; Wiedergabe eines USB-Speichergeräts
Deutsch 55 04 Grundfunktionen Die Taste EXTRAS verwenden Während der Diashowwiedergabe, können Sie verschiedene Funktion verwenden, indem Sie die Taste TOOLS drücken. Slideshow anhalten Diashow-Geschw. : Normal Diashow-Effekt : Jalousie Hintergrundmusik : Aus Einstellung der Hintergrundmusik Zoom Dr...
Page 212 - Radio hören; Mithilfe der Tasten auf der Fernbedienung; Sender voreinstellen; UKW-Senderempfang verwenden
56 Deutsch Grundfunktionen Radio hören Mithilfe der Tasten auf der Fernbedienung Wählen Sie mit der Taste FUNCTION die Option FM aus. Stellen Sie den gewünschten Sender ein. Voreinstellen der Senderwahl 1 : Zuerst müssen Sie eine gewünschte Frequenz als Voreinstellung hinzufügen. Drücken Sie die Tas...
Page 213 - Zur Anzeige der RDS-Signale; Über im Bildschirm angezeigte Zeichen; STOPP
Deutsch 57 04 Grundfunktionen Zur Anzeige der RDS-Signale Sie können die von der Station gesendeten RDS-Signale auf der Anzeige sehen. Betätigen Sie die Taste RDS DISPLAY , während sie einen UKW-Sender hören. Bei jeder Betätigung der Taste ändert sich die Anzeige, um Ihnen folgende Informationen anz...
Page 214 - anschließen; iPod/iPhone über dem Dock verbinden
58 Deutsch Grundfunktionen iPod/iPhone mithilfe eines USB-Kabels anschließen Wenn ein iPod/iPhone an das System angeschlossen ist, können Sie Musik von dem iPod/iPhone über das System wiedergeben. ASC IN 5V 500mA ASC IN 50 Schließen Sie iPod/iPhone unter Verwendung eines USB-Kabels an den vorderen U...
Page 215 - Benutzen Sie iPod/iPhone mit einer; Einen Film schauen
Deutsch 59 04 Grundfunktionen Benutzen Sie iPod/iPhone mit einer drahtlosen Docking-Station (separat erhältlich) für iPod/iPhone Ihre Lautsprecher werden Sie mit Musik besserer Qualität verwöhnen, indem Sie unter Verwendung eines drahtlosen Senders ein iPod/iPhone Audiosignal aussenden. Zum Anschlie...
Page 216 - Ladezustand der LED-Ladestation; Einschalten / Ladevorgang; Diesem Produkt Verwenden Können
60 Deutsch Grundfunktionen Ladezustand der LED-Ladestation Display Funktion GRÜNES LED EI NGESCHALTET Einschalten / Ladevorgang beendet ROTES LED EING ESCHALTET Ladevorgang HINWEIS Das LED zeigt den Ladestatus des integrierten Akkus im drahtlosen iPod-Sender an. Prüfen Sie den Ladestatus von iPod/iP...
Page 217 - Betriebszustand der LED des; So verbindet man den drahtlosen
Deutsch 61 04 Grundfunktionen Betriebszustand der LED des drahtlosen Senders CH ARG E STANDB Y LIN K STANDB Y LINK Display Funktion VERBINDUNG (Blaue LED) STANDBY (Rote LED) LED EIN Kopplung erfolgreich abgeschlossen STANDBY LED- BLINKEN (LANGES BLINKEN) iPod/iPhone in Bearbeitung AKKU SCHWACH LED- ...
Page 218 - Netzwerkdienste; Smart Hub verwenden; Taste auf der Fernbedienung auswählen.; Erster Start von Smart Hub; Mit Hilfe der ◄► Tasten
62 Deutsch Netzwerkdienste Sie können zahlreiche Netzwerkdienste wie Smart Hub oder BD-LIVE in Anspruch nehmen, wenn Sie das Produkt an Ihr Netzwerk anschließen. Lesen Sie sich die folgende Anleitung durch, bevor Sie irgendeinen Netzwerkdienst verwenden. Schließen Sie das Produkt ans Netzwerk an. (S...
Page 219 - Smart Hub auf einen Blick
Deutsch 63 05 Netzwerkdienste Smart Hub auf einen Blick xxxxxxxx Contents 1 xxxxxxxx Contents 6 xxxxxxxx Contents 5 xxxxxxxx Contents 4 xxxxxxxx Contents 3 xxxxxxxx Contents 2 xxxxxxxx Contents 7 xxxxxxxx Contents 8 xxxxxxxx Contents 9 xxxxxxxx Contents 10 xxxxxxxx Contents 11 xxxxxxxx Contents 12 x...
Page 220 - Verwenden der Tastatur; Eingabe von Text, Zahlen und Symbolen
64 Deutsch Netzwerkdienste Verwenden der Tastatur Mithilfe der Fernbedienung können Sie die Bildschirm-Tastatur benutzen, um Buchstaben, Zahlen und Symbole einzugeben. . , – abc def 1 2 3 ghi jkl mno 4 5 6 pqrs tuv wxyz 7 8 9 Umschalt. Entfernen 0 b Eingabemethode / Sprache: English T9 ab Ab AB 1 ...
Page 221 - Beim Konto anmelden
Deutsch 65 05 Netzwerkdienste Wenn die Eingabe abgeschlossen ist, die EINGABE Taste drücken, um OK auszuwählen und anschließend die EINGABE Taste drücken. Der Anmeldebildschirm wird erneut angezeigt. Passwort bestätigen auswählen und anschließend die EINGABE Taste drücken. Wiederholen Sie die Schrit...
Page 223 - Eigenschaften
Deutsch 67 05 Netzwerkdienste Nach einigen Augenblicken wird Smart Hub automatisch zurückgesetzt. Der Bildschirm kann für einen Moment schwarz werden, danach erscheint Smart Hub erneut. Nach einigen Augenblicken wird die Reinitialisierungsprozedur gestartet. Um die Reinitialisierung abzuschließen, g...
Page 224 - In Ordner verschieben
68 Deutsch Netzwerkdienste In Ordner verschieben Mit Hilfe der Funktion In Ordner verschieben können Anwendungen in einen Ordner verschoben werden. Um die Funktion In Ordner verschieben nutzen zu können, folgen Sie diesen Schritten: Drücken Sie die GELBE (C) Taste auf Ihrer Fernbedienung. Eine Anwen...
Page 225 - Sperrung aufheben; Gebührenpfl ichtige Anwendungen; Zugriff auf den Samsung Apps Bildschirm
Deutsch 69 05 Netzwerkdienste Sperrung aufheben Drücken Sie die GELBE (C) Taste auf Ihrer Fernbedienung. Mit Hilfe der ▲▼◄► Tasten eine gesperrte Anwendung auswählen und anschließend die EINGABE Taste drücken. Mit den ▲▼◄► Tasten Freigeben auswählen und anschließend die EINGABE Taste drücken. Das Fe...
Page 226 - Verwenden des Samsung Apps Bildschirms; Samsung Apps nach Kategorien; EINGABE
70 Deutsch Netzwerkdienste Verwenden des Samsung Apps Bildschirms Um den Samsung Apps Bildschirm nutzen zu können, folgen Sie diesen Schritten: Drücken Sie die Tasten ◄►, um zu der Kategorieliste auf der linken Seite zu gelangen. Mit Hilfe der ▲▼ Tasten die Kategorie markieren. Nach ein paar Sekunde...
Page 227 - Die vTuner-Funktion benutzen; AllShare-Funktion verwenden
Deutsch 71 05 Netzwerkdienste Verwenden der farbigen Tasten auf Ihrer Fernbedienung mit Samsung Apps ROT (A) (Anmelden) : Anmelden auf Ihrem Smart TV Konto. GRÜN (B) (Miniatur/Listenanzeige) : Umschalten der Anwendungen zwischen Miniatur und Listenansicht. BLAU (D) (Sortieren Nach) : Sortiert die An...
Page 228 - Sonstige Informationen
72 Deutsch Sonstige Informationen Troubleshooting Konsultieren Sie untenstehende Liste, wenn das Produkt nicht ordnungsgemäß funktioniert. Wenn das bei Ihnen auftretende Problem nicht aufgeführt ist oder die Anweisungen zu keiner Lösung führen, schalten Sie das Gerät aus, ziehen Sie das Netzkabel au...
Page 231 - Technische Daten; Disk
Deutsch 75 06 Sonstige Informationen Technische Daten Allgemein Gewicht 3,5 kg Abmessungen 429,3 (W) x 58,4 (H) x 325,1 (D) mm Betriebstemperaturbereich +5°C bis +35°C Zulässiger Luftfeuchtigkeitsbereich 10 % bis 75 % UKW-Tuner Signal/Rauschabstand 55 dB Verwendbare Empfi ndlichkeit 12 dB Klirrfakto...
Page 232 - Lautsprecher
76 Deutsch Sonstige Informationen HT-D5500 Lautsprecher Lautsprecher-System 5.1-Kanal Lautsprechersystem Front Surround Center Subwoofer Impedanz 3 Ω 3 Ω 3 Ω 3 Ω Frequenzbereich 140 Hz bis 20 kHz 140 Hz bis 20 kHz 140 Hz bis 20 kHz 40 Hz bis 160 Hz Schalldruck-Ausgabe 86 dB/W/M 86 dB/W/M 86 dB/W/M 8...
Page 235 - Sistema Home Entertainment; manuale utente; immagina; Grazie per avere acquistato questo prodotto Samsung.
Sistema Home Entertainment Blu-ray™ 5.1 canali manuale utente immagina le possibilità Grazie per avere acquistato questo prodotto Samsung. Per ricevere un servizio più completo, registrare il prodotto all'indirizzo www.samsung.com/register HT-D5500HT-D5530HT-D5550 HT-D5500_ITA_1226.indd 1 HT-D5500_I...
Page 236 - Italiano; Informazioni sulla sicurezza; Avvertenze per la sicurezza; AVVERTENZA; PRODOTTO LASER CLASSE 1; ATTENZIONE
2 Italiano Informazioni sulla sicurezza Avvertenze per la sicurezza PER RIDURRE IL RISCHIO DI SCOSSE ELETTRICHE, NON RIMUOVERE IL COPERCHIO (O LA PARTE POSTERIORE).ALL'INTERNO NON VI SONO PARTI RIPARABILI DALL'UTENTE. PER LA MANUTENZIONE RIVOLGERSI AL PERSONALE DI ASSISTENZA QUALIFICATO. ATTENZIONE ...
Page 237 - Precauzioni; Guardare la TV utilizzando la funzione 3D
Italiano 3 Precauzioni Verifi care che le caratteristiche degli alimentatori CA presenti in casa corrispondano all'etichetta di identifi cazione posta sul retro del prodotto.Installare il prodotto orizzontalmente su un supporto adeguato (mobile), verifi cando che vi sia spazio suffi ciente per una corre...
Page 238 - Licenza; Manipolazione dei dischi; Non toccare il lato di riproduzione dei dischi.; Conservazione dei dischi; Non esporre alla luce diretta del sole.; Fare in modo che i dischi non si sporchino.; Manipolazione e conservazione dei dischi
4 Italiano Licenza Dolby e il simbolo della doppia D sono marchi registrati di Dolby Laboratories. " INFORMAZIONI SUI VIDEO DIVX: DivX® è un formato video digitale creato da DivX, Inc. Questo è un dispositivo uffi ciale certifi cato DivX® che riproduce video DivX. Per ulteriori informazioni e per ...
Page 239 - Indice; INFORMAZIONI SULLA
Italiano 5 Indice ITALIANO INFORMAZIONI SULLA SICUREZZA 2 2 Avvertenze per la sicurezza 3 Precauzioni4 Precauzioni per la manipolazione e la conservazione dei dischi 4 Licenza4 Copyright OPERAZIONI PRELIMINARI 7 7 Icone utilizzate nel manuale8 Tipi di dischi e caratteristiche 12 Accessori13 Descrizi...
Page 240 - IMPOSTAZIONE
6 Italiano Indice IMPOSTAZIONE 43 43 Sicurezza43 Grado Blocco Can. BD 43 Grado Blocco Can. DVD 43 Cambia password 43 Generale43 Display frontale 43 Telecomando di Rete 44 Supporto44 Aggiornamento software 45 Contattare Samsung FUNZIONI DI BASE 46 46 Riproduzione di un video 46 Uso del menu del disco...
Page 241 - Icone utilizzate nel manuale; Questo prodotto è compatibile solo con il sistema di colori PAL.; Operazioni preliminari
Italiano 7 01 Operazioni preliminari Icone utilizzate nel manuale Prima di leggere il manuale utente, tenere presente le seguenti indicazioni. Termine Logo Icona Definizione BD-ROM h Indica una funzione disponibile per i dischi BD-ROM. BD-RE/-R z Indica una funzione disponibile per i dischi BD-RE/-R...
Page 242 - Tipi di dischi e caratteristiche; Compatibilità dei dischi Blu-ray; Dischi non riproducibili; Loghi dei dischi riproducibili
8 Italiano Operazioni preliminari Tipi di dischi e caratteristiche Compatibilità dei dischi Blu-ray Blu-ray è un formato nuovo e in evoluzione. Di conseguenza è possibile che si verifi chino problemi di compatibilità. Non tutti i dischi sono compatibili e non tutti i dischi verranno riprodotti. Per u...
Page 243 - Codice regionale; Tipi di dischi
Italiano 9 01 Operazioni preliminari Codice regionale Sia il prodotto sia i dischi sono codifi cati in base alla regione. Per poter riprodurre un disco è necessario che i due codici corrispondano. Se i codici non corrispondono, il disco non viene riprodotto. Tipo di disco Codice regionale Zona Blu-ra...
Page 244 - Formato del disco; Utilizzo di dischi JPEG; Formati fi le supportati; File video supportati
10 Italiano Operazioni preliminari Formato del disco Utilizzo di dischi JPEG Possono essere riprodotti dischi CD-R/-RW, DVD-RW/-R registrati in formato UDF o JOLIET.Possono essere visualizzati solo fi le JPEG con estensione ".jpg", ".JPG", ".jpeg" o "JPEG".È supportato...
Page 245 - Restrizioni; File musicali supportati
Italiano 11 01 Operazioni preliminari Estensione file Contenitore Codec video Codec audio Risoluzione *.vro VRO VOB MPEG2 AC3 MPEG LPCM 1920x1080 MPEG1 352x288 *.mpg *.mpeg PS MPEG1 AC3 MPEG LPCM AAC 352x288 MPEG2 1920x1080 H.264 1920x1080 *.ts *.tp *.trp TS MPEG2 AC3 AAC MP3 DD+ HE-AAC 1920x1080 H....
Page 246 - Appunti sui collegamenti USB; Dispositivi supportati:; Accessori; Controllare di seguito gli accessori forniti.
12 Italiano Operazioni preliminari Appunti sui collegamenti USB Dispositivi supportati: Supporto di memorizzazione USB, lettore MP3, foto/videocamera digitale, lettore di schede USB Nessun supporto se il nome di una cartella o di un fi le ha una lunghezza superiore a 125 caratteri.I fi le di sottotito...
Page 247 - Descrizione; Pannello anteriore; Inserire il disco qui.
Italiano 13 01 Operazioni preliminari Descrizione Pannello anteriore 1 TASTO DI ACCENSIONE ( ) Accende e spegne il prodotto. 2 TASTO FUNZIONE Per selezionare i modi nella sequenza seguente: BD/DVD D. IN AUX R. IPOD W. IPOD H. IN1 H. IN2 FM 3 DISPLAY Mostra lo stato di riproduzione, l'ora, ecc. 4 TAS...
Page 248 - Pannello posteriore; Per collegare il connettore dock per iPod.
14 Italiano Operazioni preliminari Pannello posteriore 1 JACK LAN WIRELESS Può essere utilizzato per servizi di rete (vedere le pagine 62~71), BD-LIVE e aggiornamenti del software tramite un adattatore LAN wireless. 2 TERMINALE LAN Può essere utilizzato per servizi di rete (vedere le pagine 62~71), ...
Page 249 - Telecomando; Descrizione del telecomando
Italiano 15 01 Operazioni preliminari FUNCTION TV SOURCE POWER DISC MENU MENU TITLE MENU MUTE SFE MODE VOL TUNING /CH TOOLS RETURN EXIT INFO A B HUB C D MO/ST D ĺ D SMART SEARCH iPod SYNC vTuner D SOUND REPEAT FULL SCREEN 1 2 4 5 6 7 8 0 9 POPUP RECEIVER SLEEP BD TV TUNER MEMORY DSP RDS DISPLAY TA P...
Page 250 - Inserimento delle batterie nel telecomando
16 Italiano Operazioni preliminari Inserimento delle batterie nel telecomando NOTA Assicurarsi che le batterie vengano poste con i poli positivo e negativo in corrispondenza dei simboli "+" e "-" riportati nell'apposito vano.Se impiegate per la TV in modo standard, le batterie durano...
Page 251 - Connessioni; Collegamento degli altoparlanti; Diffusori anteriori; Diffusore centrale
Italiano 17 02 Connessioni Connessioni Questa sezione illustra vari metodi per collegare il prodotto ad altri componenti esterni.Prima di spostare o installare il prodotto, spegnere l'apparecchio e staccare il cavo di alimentazione. Collegamento degli altoparlanti Diffusori anteriori ei Posizionare ...
Page 252 - Componenti dei diffusori
18 Italiano Connessioni Componenti dei diffusori Componenti dei diffusori Diffusori montati ( SX ) (dx) HT-D5530 HT-D5530 NOTA Vedere a pagina 19 per installare i diffusori sul supporto a colonna. ✎ ( SX ) (dx) HT-D5500 (sx) (sx) (dx) (dx) HT-D5550 HT-D5550 ( SX ) (dx) ( SX ) (dx) ANTERIORI SU...
Page 253 - Installazione dei diffusori sul supporto a colonna; Collegamento dei diffusori
Italiano 19 02 Connessioni FRONT SPEAKERS OUT SPEAKER IMPEDANCE : 3 VIDEO OUT SURROUND SUBWOOFER CENTER FRONT SURROUND ONENT OUT VIDEO OUT NT OUT FRONT SPEAKERS OUT SPEAKER IMPEDANCE : 3 SURROUND SUBWOOFER CENTER FRONT SURROUND Installazione dei diffusori sul supporto a colonna * Solo HT-D5530 - Dif...
Page 254 - Collegamento del modulo di ricezione wireless opzionale; ● Questo prodotto deve essere collegato solo con SWA-5000.; Scheda TX
20 Italiano Connessioni Collegamento del modulo di ricezione wireless opzionale Per collegare i diffusori surround senza fi li, è necessario acquistare il modulo di ricezione wireless e la scheda TX presso il proprio rivenditore Samsung. ● Questo prodotto deve essere collegato solo con SWA-5000. Modu...
Page 256 - INGRESSO HDMI; Lettore DVD o Blu-ray
22 Italiano Connessioni Collegamento di dispositivi esterni/del televisore tramite HDMI HDMI è l'interfaccia standard digitale per eseguire il collegamento a dispositivi quali televisori, proiettori, lettori DVD, lettori Blu-ray, set-top box e altro. Dal momento che HDMI è tutta in digitale, viene o...
Page 257 - HDMI IN: Collegamento a un componente esterno con cavo HDMI; Premere il tasto; Funzione di rilevamento automatico HDMI
Italiano 23 02 Connessioni HDMI IN: Collegamento a un componente esterno con cavo HDMI Collegare un cavo HDMI (non fornito) tra il jack HDMI IN sulla parte posteriore del prodotto e il jack HDMI OUT sul dispositivo digitale. Premere il tasto FUNCTION per selezionare l'ingresso H. IN1 o H. IN2 . I mo...
Page 258 - e Y) sul retro del prodotto e i jack di ingresso video; METODO 2; METODO 1
24 Italiano Connessioni METODO 1: Video Component (QUALITÀ OTTIMA) Se il televisore è dotato di ingressi video Component, collegare un cavo video Component (non fornito) tra i jack di uscita video Component (P R , P B e Y) sul retro del prodotto e i jack di ingresso video Component sul televisore. N...
Page 259 - Collegamento dell'audio da apparecchi esterni; OTTICO : Collegamento di un componente digitale esterno; AUX: Collegamento di un componente analogico esterno; Se il componente
Italiano 25 02 Connessioni Collegamento dell'audio da apparecchi esterni OTTICO : Collegamento di un componente digitale esterno Per apparecchi con segnale digitale come ad es. ricevitore per TV via cavo/ricevitore satellitare (Set-Top Box). Collegare l'ingresso digitale (OTTICO) sul prodotto all'us...
Page 260 - Connessione alla rete; Rete via cavo
26 Italiano Connessioni Connessione alla rete Questo prodotto consente di utilizzare servizi di rete (vedere le pagine 62~71) quali ad es. Smart Hub e BD-LIVE, e di ricevere aggiornamenti del software quando viene stabilita una connessione di rete. Si raccomanda di utilizzare un router wireless o un...
Page 261 - Collegamento dell'antenna FM; Rete wireless; È possibile collegarsi alla rete con un IP sharer wireless.; IP sharer wireless
Italiano 27 02 Connessioni Collegamento dell'antenna FM Collegare l'antenna FM fornita al relativo connettore. Muovere lentamente il fi lo dell'antenna fi nché non si trova una posizione con una buona ricezione, quindi fi ssarlo a un muro o a un'altra superfi cie rigida. NOTA Questo prodotto non riceve ...
Page 262 - Impostazione; Impostazione iniziale
28 Italiano Impostazione Impostazione iniziale Accendere il televisore dopo aver collegato il prodotto. Quando si collega il prodotto al televisore e lo si accende per la prima volta, appare la schermata delle impostazioni iniziali. Initial Settings | On-Screen Language m Move " Enter Select a l...
Page 263 - Impostazioni
Italiano 29 03 Impostazione Impostazioni DISC MENU MENU TITLE MENU TOOLS RETURN EXIT INFO TUNER POPUP DISC MENU TITLE MENU TOOLS INFO TUNER POPUP 1 2 4 3 1 Tasto MENU : Per passare al menu principale. 2 Tasto RETURN : Per tornare al menu precedente. 3 Tasto INVIO / DIREZIONE : Per spostare il cursor...
Page 264 - Impostazioni 3D; Riproduzione 3D Blu-ray; : Rileva automaticamente se il televisore
30 Italiano Impostazione Display È possibile confi gurare diverse opzioni di visualizzazione, quali il formato del televisore, la risoluzione, ecc. Impostazioni 3D Selezionare se riprodurre un disco Blu-ray con contenuti 3D in modo 3D. Impostazioni Display Audio Rete Sistema Lingua Sicurezza Generale...
Page 265 - Aspetto TV
Italiano 31 03 Impostazione Aspetto TV Per alcuni tipi di televisore, è possibile che si desideri regolare l'impostazione dello schermo. 16:9 originale : Selezionare per collegare il prodotto ad uno schermo TV 16:9. Il prodotto visualizza tutti i contenuti nel loro formato originale. I contenuti for...
Page 266 - Risoluzione in base al modo di uscita
32 Italiano Impostazione Risoluzione in base al modo di uscita Riproduzione disco Blu-ray/E-Contenuti/contenuti digitali Uscita Impostazione HDMI / collegato HDMI / non collegato Modo HDMI Modo Component/ VIDEO Modo Component Modo VIDEO Disco Blu-ray E-Contenuti/ contenuti digitali Disco Blu-ray E-C...
Page 267 - Formato colore HDMI; HDMI Profondità colori; Modalità pausa; Cornice; Modo progressivo
Italiano 33 03 Impostazione NOTA Se il televisore collegato al prodotto non supporta il fotogramma video o la risoluzione selezionata, appare il messaggio "Se dopo la selezione le immagini non compaiono, attendere per circa 15 secondi. In seguito, la risoluzione sarà automaticamente riportata al...
Page 268 - Distanza; Test tono; Premere i tasti ◄, ► per selezionare; Imposta altoparlanti; Livello; • Il livello del volume può essere regolato tra
34 Italiano Impostazione Distanza Se non è possibile collegare i diffusori a uguale distanza dalla posizione di ascolto, è possibile regolare il ritardo dei segnali audio dei diffusori anteriori, centrale, surround e subwoofer. È possibile impostare la distanza degli altoparlanti tra 0,3 m e 9,0 m. ...
Page 269 - Calibrazione musicale auto; EQ Utente
Italiano 35 03 Impostazione Calibrazione musicale auto Impostando la funzione Musical Auto Calibration (MAC, calibrazione musicale auto) solo una volta quando il prodotto viene riposizionato o installato, il prodotto può riconoscere automaticamente la distanza tra i diffusori, i livelli tra i canali...
Page 270 - Canale ritorno audio; Uscita Digitale
36 Italiano Impostazione HDMI Audio I segnali audio trasmessi tramite il cavo HDMI possono essere attivati o disattivati. Off : Il video è trasmesso solo tramite il cavo di collegamento HDMI e l'audio viene emesso solo tramite gli altoparlanti del prodotto. On : I segnali sia video sia audio vengono...
Page 271 - Selezione dell'uscita digitale; Controllo gamma dinamica
Italiano 37 03 Impostazione Selezione dell'uscita digitale Impostazione PCM Bitstream (non elaborato) Bitstream (DTS ricodificato) Bitstream (Dolby D ricodificato) Connessione Ricevitore AV con supporto HDMI Ricevitore AV con supporto HDMI Ricevitore AV con supporto HDMI Ricevitore AV con supporto H...
Page 272 - Sincronia audio; Impostazioni di rete
38 Italiano Impostazione Sincronia audio Il video può sembrare in ritardo rispetto all'audio quando il prodotto è collegato a un televisore digitale. Se si verifi ca questo inconveniente, regolare il ritardo dell'audio per sincronizzarlo con il video. È possibile impostare un ritardo dell'audio compr...
Page 275 - Stato rete; Connessione Internet BD-LIVE
Italiano 41 03 Impostazione WPS(PBC) Il modo più semplice per impostare la connessione di rete wireless è utilizzare la funzione WPS(PBC) o la funzione One Foot Connection. Se il router wireless è dotato di un tasto WPS(PBC) , seguire i passi riportati di seguito: Premere i tasti ▲▼ per selezionare ...
Page 277 - Reset; Lingua; Grado Blocco Can. DVD; Se non si ricorda la password; Display frontale
Italiano 43 03 Impostazione Reset Tutte le impostazioni vengono ripristinate ad eccezione delle impostazioni di rete e di Smart Hub. Si deve inserire la password per questa funzione. NOTA La password predefi nita è 0000. Lingua È possibile selezionare la lingua preferita per il menu principale, il me...
Page 278 - Aggiornamento software
44 Italiano Impostazione Avviare l'applicazione sul dispositivo portatile. L'applicazione deve trovare il prodotto e visualizzarlo in un elenco. Selezionare il prodotto. Se è la prima volta che si utilizza la funzione, viene richiesto di consentire o rifi utare il controllo da remoto del prodotto. Se...
Page 279 - Tramite disco; Contattare Samsung
Italiano 45 03 Impostazione Tramite disco Per eseguire l’aggiornamento via disco, seguire i passi riportati di seguito: Andare al sito www.samsung.com/bluraysupport. Scaricare sul computer l’ultimo archivio zip dell’aggiornamento software tramite disco. Decomprimere l’archivio zip sul computer. Deve...
Page 280 - Funzioni di base; Riproduzione di un video; Riproduzione; Premere il tasto di; Tasti relativi alla riproduzione; RIPRODUZIONE; Struttura dei dischi; Uso del menu del disco, dei titoli e popup; Utilizzo del menu del disco
46 Italiano Funzioni di base Riproduzione di un video Riproduzione Inserire un disco nell’apposito vano con l’etichetta rivolta verso l’alto. Premere il tasto di RIPRODUZIONE ( ► ). Tasti relativi alla riproduzione RIPRODUZIONE ( ► ) Avvia la riproduzione. ARRESTO ( ) Arresta la riproduzione. Se s...
Page 281 - Utilizzo del menu Titolo; Riproduzione dell'elenco titoli; Ricerca della scena desiderata; Salto di capitoli
Italiano 47 04 Funzioni di base Utilizzo del menu Titolo Z Durante la riproduzione, premere il tasto TITLE MENU sul telecomando. Premere i tasti ▲▼◄► per effettuare la selezione desiderata, quindi premere il tasto INVIO . NOTA A seconda del disco, le voci del menu potrebbero variare e questo menu po...
Page 282 - Riproduzione al rallentatore/; Riproduzione al rallentatore; Riproduzione fotogramma per fotogramma; Riproduzione ripetuta; Ripetizione di un titolo o di un capitolo; Ripete il titolo o il capitolo di un disco.; Ripetizione di una sezione
48 Italiano Funzioni di base Riproduzione al rallentatore/ fotogramma per fotogramma Riproduzione al rallentatore hzZyx In modo pausa ( ), premere il tasto di RICERCA ( ). Se si preme il tasto di RICERCA ( ), la velocità di riproduzione viene ridotta a * 1/8 * 1/4 * 1/2 Per tornare alla veloci...
Page 283 - Utilizzo del tasto TOOLS; Selezione della lingua dell'audio; Selezione della lingua dei sottotitoli
Italiano 49 04 Funzioni di base Utilizzo del tasto TOOLS Durante la riproduzione è possibile attivare il menu del disco premendo il tasto TOOLS . Schermata del menu STRUMENTI Strumenti < Cambia " Conferma ' Ritorna Ricerca titolo 1/2 Ricerca capitoli : 1/20 Ricerca durata : 00:00:13/01:34:37 ...
Page 284 - Funzione Didascalie; Selezione di Impostazioni immagine; Impostazione di BONUSVIEW
50 Italiano Funzioni di base Funzione Didascalie x È necessario avere un po' di esperienza di estrazione e editing di video per usare questa funzione correttamente.Per utilizzare la funzione Didascalie, salvare il fi le con le didascalie (*.smi) con lo stesso nome del fi le DivX (*.avi) e nella stessa...
Page 285 - Ascolto di musica
Italiano 51 04 Funzioni di base Ascolto di musica ow Tasti del telecomando utilizzati per la riproduzione della musica MUTE REPEAT FULL SCREEN 1 2 4 5 6 7 8 0 9 RDS DISPLAY TA PTY+ PTY SEARCH PTY- MUTE FULL SCREEN RDS DISPLAY TA 2 3 1 0 ! 9 @ TOOLS RETURN EXIT INFO A B HUB C D MO/ST 2D ĺ D SMART SEA...
Page 287 - Modo audio
Italiano 53 04 Funzioni di base Traccia 002 03:56 Traccia 004 04:02 Traccia 006 03:40 Traccia 008 03:52 1/2 Pagina CD audio | Musica Chiudi mod Modif ( ) Pagina Strumenti " Seleziona ' Ritorna Traccia 001 00:43 Traccia 003 04:41 Traccia 005 03:43 Traccia 007 04:06 Voci selezionate : 3 Selezionar...
Page 288 - Modo Dolby Pro Logic; Riproduzione di un'immagine; Visualizzazione di fi le foto
54 Italiano Funzioni di base Modo Dolby Pro Logic II È possibile selezionare il modo audio Dolby Pro Logic II desiderato. Premere il tasto PL II . MUSIC Durante l'ascolto di musica, è possibile sentire gli effetti sonori come se si stesse assistendo a un'esibizione dal vivo MOVIE Conferisce maggiore...
Page 289 - Riproduzione da un dispositivo di
Italiano 55 04 Funzioni di base Utilizzo del tasto TOOLS Durante la presentazione, è possibile utilizzare varie funzioni premendo il tasto TOOLS . Pausa presentazione Velocità slide show : Normale Effetto slide show : Veneziana Musica di sottofondo : Off Impostazione musica di sottofondo Zoom Ruota ...
Page 290 - Radio; Utilizzo dei tasti del telecomando; Impostazione mono/stereo; Trasmissione RDS; ricevere le stazioni FM
56 Italiano Funzioni di base Radio Utilizzo dei tasti del telecomando Premere il tasto FUNCTION per selezionare FM . Selezionare la stazione desiderata. Sintonizzazione preimpostata 1 : È necessario innanzitutto aggiungere una frequenza preimpostata desiderata. Premere il tasto di ARRESTO ( ) per ...
Page 292 - utilizzando il cavo USB; basetta dock
58 Italiano Funzioni di base Collegamento dell'iPod/iPhone utilizzando il cavo USB Se il sistema è collegato a un iPod/iPhone, si può riprodurre la musica sull’iPod/iPhone utilizzando il sistema. ASC IN 5V 500mA ASC IN 50 Collegare l'iPod/iPhone alla porta USB anteriore utilizzando il cavo USB. L'iP...
Page 293 - Utilizzo di iPod/iPhone con una basetta dock; Caricamento del trasmettitore wireless; Visione di un fi lm
Italiano 59 04 Funzioni di base Utilizzo di iPod/iPhone con una basetta dock wireless per iPod/iPhone (venduta separatamente) Per ottenere una migliore qualità musicale dagli altoparlanti, inviare il segnale audio dell'iPod/iPhone utilizzando un trasmettitore wireless. Per collegare l'unità principa...
Page 294 - Stato operativo del led della basetta di carica; Sotto tensione / ricarica; Modelli iPod/iPhone utilizzabili con
60 Italiano Funzioni di base Stato operativo del led della basetta di carica Display Funzione LED VERDE ACCESO Sotto tensione / ricarica completata LED ROSSO ACCESO Ricarica in corso. NOTA Il LED indica lo stato di carica della batteria integrata nel trasmettitore di iPod wireless.Verifi care lo stat...
Page 295 - Stato operativo del led del; Collegamento del trasmettitore wireless; ID
Italiano 61 04 Funzioni di base Stato operativo del led del trasmettitore wireless CHAR GE STANDB Y LIN K STANDB Y LINK Display Funzione COLLEGAMENTO (LED blu) STANDBY (LED rosso) LED ACCESO Accoppiamento completato con successo STANDBY LED LAMPEGGIANTE (lampeggio lungo) Elaborazione iPod/iPhone BAT...
Page 296 - Servizi di rete; Utilizzo di Smart Hub; Primo avvio di Smart Hub; Andare al menu principale.; Premere i tasti ◄► per selezionare
62 Italiano Servizi di rete È possibile usufruire di diversi servizi di rete come Smart Hub o BD-LIVE collegando il prodotto alla rete. Prima di utilizzare qualsiasi servizio di rete, leggere le seguenti istruzioni. Collegare il prodotto alla rete.(Vedere le pagine 26~27) Confi gurare le impostazioni...
Page 297 - Smart Hub in breve
Italiano 63 05 Servizi di rete Smart Hub in breve xxxxxxxx Contents 1 xxxxxxxx Contents 6 xxxxxxxx Contents 5 xxxxxxxx Contents 4 xxxxxxxx Contents 3 xxxxxxxx Contents 2 xxxxxxxx Contents 7 xxxxxxxx Contents 8 xxxxxxxx Contents 9 xxxxxxxx Contents 10 xxxxxxxx Contents 11 xxxxxxxx Contents 12 xxxxxxx...
Page 298 - Utilizzo del tastierino; Inserimento di testo, numeri e simboli
64 Italiano Servizi di rete Utilizzo del tastierino Attraverso il telecomando è possibile utilizzare il tastierino a video per inserire lettere, numeri e simboli. . , – abc def 1 2 3 ghi jkl mno 4 5 6 pqrs tuv wxyz 7 8 9 Passa a Elimina 0 b Metodo di immissione / Lingua: English T9 ab Ab AB 1 1 4 ...
Page 299 - Login all’account
Italiano 65 05 Servizi di rete A operazione ultimata, premere il tasto INVIO per selezionare OK , quindi premere nuovamente il tasto INVIO . Riappare la schermata di accesso. Selezionare Conferm. password , quindi premere il tasto INVIO . Ripetere i passi 7 e 8. Quando riappare la schermata di acces...
Page 301 - Proprietà
Italiano 67 05 Servizi di rete Dopo alcuni istanti, Smart Hub viene ripristinato automaticamente. È possibile che appaia una schermata nera, dopodiché riappare Smart Hub. Dopo alcuni istanti si avvia la procedura di reinizializzazione. Per completare la reinizializzazione, andare al passo 4 in Primo...
Page 302 - Blocco
68 Italiano Servizi di rete Sposta in cart. La funzione Sposta nella cartella consente di spostare un’applicazione in una cartella. Per utilizzare la funzione Sposta nella cartella, seguire i passi riportati di seguito: Premere il tasto GIALLO (C) sul telecomando. Selezionare un’applicazione, quindi...
Page 303 - Sblocco; Applicazioni a pagamento; Accesso alla schermata delle applicazioni Samsung
Italiano 69 05 Servizi di rete Sblocco Premere il tasto GIALLO (C) sul telecomando. Premere ▲▼ ◄► per selezionare l’applicazione bloccata, quindi premere il tasto INVIO . Premere ▲▼◄► per selezionare Sblocca, quindi premere il tasto INVIO . Si apre la fi nestraSicurezza. Inserire il codice di blocco ...
Page 304 - Uso della schermata Appl. Samsung; Applicazioni Samsung per categoria; INVIO
70 Italiano Servizi di rete Uso della schermata Appl. Samsung Per utilizzare la schermata Appl. Samsung, seguire i passi riportati di seguito: Premere i tasti ◄► per passare all’elenco di categoria di sinistra. Premere ▲▼ per selezionare una categoria. In pochi secondi, la schermata Appl. Samsung vi...
Page 305 - Utilizzo della funzione vTuner; Utilizzo della funzione AllShare
Italiano 71 05 Servizi di rete Uso dei tasti colorati del telecomando con le applicazioni Samsung ROSSO (A) (Login) : Per effettuare il login all’ account Smart TV. VERDE (B) (Vista miniature/Vista elenco) : Per commutare le applicazioni tra Miniatura e Visualizzazione elenco. BLU (D) (Ordina per) :...
Page 306 - Altre informazioni; Risoluzione dei problemi
72 Italiano Altre informazioni Risoluzione dei problemi Se il prodotto non funziona correttamente, consultare la tabella che segue. Se il problema non è elencato nella tabella o se le istruzioni fornite non portano a una soluzione, spegnere il prodotto, scollegare il cavo di alimentazione e contatta...
Page 307 - Sintomo
Italiano 73 06 Altre informazioni Sintomo Controlli/rimedi Il formato non può essere cambiato. • È possibile riprodurre i BD/DVD 16:9 in modo 16:9 Wide, 4:3 Letter Box o 4:3 Pan - modo scansione, ma i BD/DVD 4:3 possono essere visti solo in formato 4:3. Selezionare la funzione appropriata in base al...
Page 309 - Specifi che; Generale; Dischi
Italiano 75 06 Altre informazioni Specifi che Generale Peso 3.5 kg Dimensioni 429.3 (L) x 58.4 (A) x 325.1 (P) mm Temperatura di esercizio da +5°C a +35°C Umidità di esercizio da 10 % a 75 % Sintonizzatore FM Rapporto segnale/rumore 55 dB Sensibilità utile 12 dB Distorsione armonica totale 0,5 % Disc...
Page 310 - Diffusori
76 Italiano Altre informazioni HT-D5500 Diffusori Sistema di diffusori Sistema di diffusori 5,1 canali Anteriori Surround Centrale Subwoofer Impedenza 3 Ω 3 Ω 3 Ω 3 Ω Gamma di frequenze 140Hz~20kHz 140Hz~20kHz 140Hz~20kHz 40Hz ~ 160Hz Livello di pressione sonora di uscita 86dB/W/M 86dB/W/M 86dB/W/M ...
Page 319 - Corretto smaltimento delle batterie del prodotto
Corretto smaltimento del prodotto (rifiuti elettrici ed elettronici) (Applicabile nell’Unione Europea e in altri paesi europei con sistema di raccolta differenziata) Il marchio riportato sul prodotto, sugli accessori o sulla documentazione indica che il prodotto e i relativi accessori elettronici (q...


 Samsung HT-DS400
Manual
Samsung HT-DS400
Manual
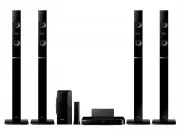 Samsung HT-H6550WM
User Manual
Samsung HT-H6550WM
User Manual
 Samsung HT-Q20
Manual
Samsung HT-Q20
Manual
 Samsung HT-A100
User Manual
Samsung HT-A100
User Manual
 Samsung HT-BD1255
User Manual
Samsung HT-BD1255
User Manual
 Samsung HT-C350
Manual
Samsung HT-C350
Manual
 Samsung HT-C453
Manual
Samsung HT-C453
Manual
 Samsung HT-C5200
User Manual
Samsung HT-C5200
User Manual
 Samsung HT-C5500
User Manual
Samsung HT-C5500
User Manual
 Samsung HT-C5900
User Manual
Samsung HT-C5900
User Manual
 Samsung HT-C6930W
User Manual
Samsung HT-C6930W
User Manual
 Samsung HT-C720
User Manual
Samsung HT-C720
User Manual