Page 2 - Contents
Engl ish English 2 Contents Safety information 4 What you need to know about the safety instructions 4 Important safety symbols 4 CALIFORNIA PROPOSITION 65 WARNING 7 Important safety precautions 8 Warnings 9Cautions 9 Installation requirements 11 Key installation requirements 11 Location considerati...
Page 4 - SAVE THESE INSTRUCTIONS; What you need to know about the safety instructions
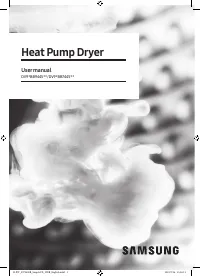
Engl ish SAVE THESE INSTRUCTIONS English 4 Safety information Congratulations on your new Samsung dryer. This manual contains important information on the installation, use and care of your appliance. Please take some time to read this manual to take full advantage of your dryer’s many benefits and ...
Page 5 - WARNING - Risk of Fire; • Clothes dryer installation must be performed by a qualified
Engl ish SAVE THESE INSTRUCTIONS English 5 WARNING - Risk of Fire • Clothes dryer installation must be performed by a qualified installer. • Install the clothes dryer according to the manufacturer’s instructions and local codes. • Do not install a clothes dryer with flexible plastic venting materi...
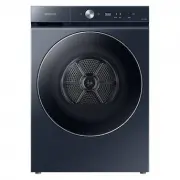
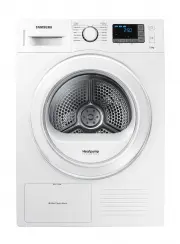
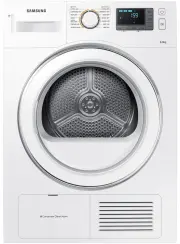
Page 6 - WARNING - To reduce the risk of fire or explosion:; • Do not dry items that have been previously cleaned, washed,; WARNING - Fire or explosion hazard; • Do not store or use gasoline or other flammable vapors and liquids
Engl ish SAVE THESE INSTRUCTIONS Safety information English 6 WARNING - To reduce the risk of fire or explosion: • Do not dry items that have been previously cleaned, washed, soaked, or spotted with gasoline, dry cleaning solvents, or other flammable or explosive substances. They emit vapors that co...
Page 7 - the gas supplier’s instructions.; CALIFORNIA PROPOSITION 65 WARNING
Engl ish SAVE THESE INSTRUCTIONS English 7 WARNING - What to do if you smell gas: • Do not try to light any appliance.• Do not turn on the appliance.• Do not touch any electrical switch.• Do not use any phone in your building.• Clear the room, building or area of all occupants.• Immediately call y...
Page 8 - Important safety precautions
Engl ish SAVE THESE INSTRUCTIONS Safety information English 8 Important safety precautions WARNING To reduce the risk of fire, electric shock, or injury to persons when using your appliance, follow basic precautions, including the following: 1. Read all instructions before using this appliance. 2. D...
Page 9 - Warnings; Cautions
Engl ish SAVE THESE INSTRUCTIONS English 9 18. Do not allow children to play on or in the appliance. Close supervision of children is necessary when the appliance is used near children. 19. Do not insert your hand under the dryer. - This may result in injury. 20. Take care that children’s fingers ...
Page 11 - Installation requirements; Key installation requirements; Location considerations
Engl ish English 11 Installation requirements Read through the following instructions before installing the dryer, and keep this manual for future reference. WARNING Certain internal parts are intentionally not grounded and may present a risk of electric shock only during servicing.Service Personn...
Page 12 - Dimensions
Engl ish Installation requirements English 12 Dimensions U 9 A Type Front loading dryer Dimensions (in. (mm)) A. Overall height 46.1 (1172) B. Width 27.0 (686) C. Depth with door open 50.1 (1273) D. Depth 30.2 (768) Untitled-3 12 2022-04-27 4:03:23
Page 13 - Clearance requirement
Engl ish English 13 Clearance requirement This clearance requirement is applicable for dryers only. NOTE • For washer's clearance requirement, see the washer's user manual.• If the washer and dryer have different clearance requirements, use the one with the larger value. Alcove or closet installat...
Page 14 - Ducting requirements; Manometer measurements
Engl ish Installation requirements English 14 Ducting requirements Recommended Use only for short-run installation Weather hood type 4” (10.2 cm) 2.5” (6.4 cm) No. of 90° elbows Rigid Rigid 0 80 ft. (24.4 m) 74 ft. (22.6 m) 1 68 ft. (20.7 m) 62 ft. (18.9 m) 2 57 ft. (17.4 m) 51 ft. (15.5 m) 3 47 ft....
Page 15 - Mobile home installation
Engl ish English 15 Mobile home installation The installation of the dryer in mobile homes must conform to the Manufactured Home Construction and Safety Standard Title 24 CFR, Part 3280 {formerly the Federal Standard for Mobile Home Construction and Safety, Title 24, HUD (Part 280), 1975} for the ...
Page 16 - In the United States and Canada; Outside the United States and Canada
Engl ish Installation requirements English 16 Exhausting requirements The dryer must not be exhausted into a chimney, a wall, a ceiling, an attic, a crawl space, or a concealed space of a building. Exhausting the dryer to the outside will prevent large amounts of lint and moisture from being blown i...
Page 17 - Gas requirements
Engl ish English 17 Gas requirements WARNING • Use only natural or LP (liquid propane) gases.• The installation must be conformed with local codes, or in the absence of local codes, with the national fuel gas code, ANSI Z223.1/NFPA 54, latest revision(for the UNITED STATES), or with the natural ga...
Page 18 - Electrical requirements; Grounding
Engl ish Installation requirements English 18 Electrical requirements The wiring diagram is located on the plate under the control panel or rear frame. WARNING • Improperly connecting the equipment grounding conductor can result in a risk of electric shock. Check with a qualified electrician or serv...
Page 19 - Electrical connections; Risk of Electric Shock
Engl ish English 19 Electrical connections Before operating or testing, follow all grounding instructions in the “ Grounding ” section. An individual branch (or separate) circuit serving only your dryer is recommended.Do not use an extension cord. Gas models – U.S. and Canada A 120 volt, 60 Hz AC ...
Page 20 - Installation; What’s included
Engl ish English 20 Installation This dryer must be installed by a qualified technician. The installer is responsible for connecting the dryer to the main power while observing the relevant safety regulations of your area. What’s included Make sure all the parts are included in the product package. ...
Page 21 - Tools needed for installation
Engl ish English 21 Tools needed for installation Pliers Cutting knife Pipe wrench (gas models only) Nut driver Level Phillips screwdriver Duct tape Wrench LPG-safe compound or Teflon Tape (for gas installation) WARNING Packing materials can be dangerous to children. Keep all packing materials (pl...
Page 22 - STEP 1; STEP 2
Engl ish Installation English 22 Step-by-step installation Make sure you have a qualified technician install the dryer. Step by step installation instructions start below.• Do not remove the protective film on the door before completing the product installation. If you remove the protective film bef...
Page 23 - STEP 3
Engl ish English 23 STEP 3 Connect the electrical wiring Before connecting the electrical wiring, make sure you have read the “ Electrical requirements ” section on page 18 . 3-wire system A B C L2 L1 D E A. External ground connector B. Neutral grounding wire (white) C. Center silver-colored term...
Page 25 - STEP 4
Engl ish English 25 STEP 4 Level the dryer To ensure optimal performance, the dryer must be level. A B Using a level (A) , check if the dryer is level side to side and then front to back. If the dryer is not level, adjust the leveling feet (B) at the bottom of the dryer. Then, check if the dryer ...
Page 26 - STEP 5; STEP 6
Engl ish Installation English 26 STEP 5 Power on (for gas models) Make sure all gas connections, the exhaust line, and all wiring is connected correctly. Then, plug the power cord into a power source and check the dryer’s installation and operation using the final checklist in STEP 6 Final check se...
Page 27 - Vent blockage test; Running the vent blockage test
Engl ish English 27 Vent blockage test After the dryer is installed, start the Vent Blockage Test to check if the duct system is properly installed. The Vent Blockage Test automatically detects the status of the ducts and reports any blockage or problems. Proper ducting can reduce drying time and ...
Page 28 - Installation check codes
Engl ish Installation English 28 Installation check codes Check code Meaning Solution 0 Vent condition is good. Clg (Cg) The vent is clogged. 1. Clean the lint filter. 2. Check your vent condition. (Refer to the “ Ducting requirements ” section) * You must take measures (such as cleaning) through ex...
Page 29 - Exhaust ducting guide; Ducting; Cleaning
Engl ish English 29 Exhaust ducting guide Ducting 1. Make sure the dryer is installed properly so the air exhausts freely. 2. Use 4-inch rigid metal ducts. Tape all joints including the dryer connection. Never use lint-trapping screws. 3. To facilitate the exhaust, keep the ducts as straight as po...
Page 32 - Before you start; Sort and load; Lint filter
Engl ish English 32 Before you start Here are a few things you should know before starting your dryer. Sort and load • Put one wash load in the dryer at a time.• Do not mix heavy and lightweight items together. • To improve drying efficiency for one or two items, add a dry towel to the load. • For b...
Page 33 - Operations; Control panel
Engl ish English 33 Operations WARNING To reduce the risk of fire, electric shock, or injury to persons, read the “ Safety information ” before operating this appliance. Control panel 05 01 02 03 04 06 07 01 Cycle Selector Turn the Cycle Selector to select a desired cycle. When a cycle is selected...
Page 34 - Simple steps to start; To change the cycle during operation
Engl ish Operations English 34 04 Time / * Wrinkle Prevent Press to adjust the drying time for the Manual Dry cycles. This is not available with the Sensor Dry cycles because the dryer determines the drying time by sensing the current moisture level of the load.* Wrinkle Prevent provides approximate...
Page 35 - Cycle overview; Sensor Dry
Engl ish English 35 Cycle overview Sensor Dry Sensor Dry cycles sense moisture in the load and stop the dryer when the load reaches the dryness level you have selected with Dryness . Cycle Description NORMAL For most fabrics including cottons and linens. HEAVY DUTY For drying items made out of hea...
Page 36 - Cycle chart
Engl ish Operations English 36 Cycle chart NOTE For best results, follow the load size recommendations for each dry cycle.• Large load: Fill the drum to about 3/4 full. Do not add items over this level as they need to tumble freely. • Medium load : Fill the drum to about 1/2 full. • Small load : Fil...
Page 37 - Cycle guide
Engl ish English 37 Cycle guide The best way to dry items is to follow the instructions on the care label. If no drying instructions are provided, see the following table for reference. Cycle Description Bedspreads & Comforters Follow the care label instructions or dry using BEDDING.• Make sur...
Page 38 - Special features; Child Lock
Engl ish Operations English 38 Special features Child Lock Child Lock prevents children from playing with the dryer. When Child Lock is activated, all buttons except for the POWER button are disabled. To activate/deactivate Child Lock, simultaneously press and hold Dryness and Temp. for 3 seconds. N...
Page 40 - Troubleshooting; Checkpoints
Engl ish English 40 Troubleshooting Checkpoints If the dryer operates abnormally, first check the list of problems in the table below and try the suggested actions. Problem Action Does not run. • Make sure the door is latched shut.• Make sure the power cord is plugged into a live electrical outlet.•...
Page 43 - Information codes
Engl ish English 43 Information codes If the dryer fails to operate, you may see an information code on the display panel. To determine what you should do, check the list of codes in the table below, and then try the suggested actions. Code Action dC Operating the dryer with the door open.• Make s...
Page 44 - Specifications
Engl ish English 44 Specifications Fabric care chart The following symbols provide garment care direction. The clothing care labels include symbols for drying, bleaching, ironing, and dry cleaning. The use of symbols ensures consistency among garment manufacturers of domestic and imported items. Fol...
Page 45 - Warning symbols for laundering; Protecting the environment
Engl ish English 45 Warning symbols for laundering Do not wash Do not wring Do not bleach Do not tumble dry No steam (added to iron) Do not iron Dry-clean Dry-clean Do not dry-clean Line dry / Hang to dry Drip dry Dry flat Protecting the environment This appliance is manufactured from recyclable m...
Page 46 - SAMSUNG DRYER
English 46 LIMITED WARRANTY (U.S.A.) SAMSUNG DRYER LIMITED WARRANTY TO ORIGINAL CONSUMER PURCHASER WITH PROOF OF PURCHASE This SAMSUNG brand product, as supplied and distributed by SAMSUNG ELECTRONICS AMERICA, INC. (SAMSUNG) and delivered new, in the original carton to the original consumer purchase...
Page 47 - EXCLUSION OF IMPLIED WARRANTIES
English 47 Visits by an authorized servicer to explain product functions, maintenance or installation are not covered by this limited warranty. Please contact SAMSUNG at the number below for assistance with any of these issues. EXCLUSION OF IMPLIED WARRANTIES IMPLIED WARRANTIES, INCLUDING THE IMPL...
Page 48 - LIMITED WARRANTY TO ORIGINAL PURCHASER
English 48 Warranty (CANADA) SAMSUNG DRYER LIMITED WARRANTY TO ORIGINAL PURCHASER This SAMSUNG brand product, as supplied and distributed by SAMSUNG ELECTRONICS CANADA, INC. (SAMSUNG) and delivered new, in the original carton to the original consumer purchaser, is warranted by SAMSUNG against manufa...
Page 50 - Memo