Page 2 - Contents; Safety information
2 English Contents Contents Safety information 4 What you need to know about the safety instructions 4 Important safety symbols 4 Important safety precautions 5 Critical installation warnings 9 Critical usage warnings 11 Usage cautions 12 Critical cleaning warnings 15 Instructions about the WEEE 1...
Page 3 - Maintenance; Lint filter; Troubleshooting; Specification
English 3 Contents Maintenance 44 Control panel 44 Exterior 44Drum 44 Lint filter 44 Water tank 47 Heat exchanger 48 Troubleshooting 50 Checkpoints 50Information codes 52 Appendix 53 Fabric care chart 53 Protecting the environment 55 Specification 56 Consumption data 57 Specification sheet 60 DV...
Page 4 - What you need to know about the safety instructions; What the icons and signs in this user manual mean:
4 English Safety information Congratulations on your new Samsung dryer. This manual contains important information on the installation, use, and care of your appliance. Please take the time to read this manual to take full advantage of your dryer’s many benefits and features. What you need to know...
Page 5 - WARNING - Risk of Fire; Important safety precautions; WARNING; To reduce the risk of fire, electric shock, or injury to persons; This appliance is not to be used by persons (including
English 5 As with any equipment that uses electricity and moving parts, potential hazards exist. To safely operate this appliance, familiarize yourself with its operation and exercise care when using it. WARNING - Risk of Fire • Clothes dryer installation must be performed by a qualified technic...
Page 6 - For use in Europe
Safety information 6 English 2. For use in Europe : This appliance can be used by children aged from 8 years and above and persons with reduced physical, sensory or mental capabilities or lack of experience and knowledge if they have been given supervision or instruction concerning use of the appl...
Page 7 - CAUTION
English 7 8. CAUTION : In order to avoid a hazard due to inadvertent resetting of the thermal cut-out, this appliance must not be supplied through an external switching device, such as a timer, or connected to a circuit that is regularly switched on and off by the utility. 9. The tumble dryer is...
Page 8 - waterproof textiles, rubber backed articles and clothes or
Safety information 8 English 15. Items such as foam rubber (latex foam), shower caps, waterproof textiles, rubber backed articles and clothes or pillows fitted with foam rubber pads should not be dried in the tumble dryer. 16. Fabric softeners, or similar products, should be used as specified by t...
Page 9 - Critical installation warnings
English 9 22. WARNING : The appliance must not be supplied through an external switching device, such as a timer, or connected to a circuit that is regularly switched on and off by a utility. Heat pump model only : The instructions shall also include the substance of the following: WARNING : In ...
Page 10 - If a child places a bag over its head, it may result in suffocation.
Safety information 10 English Keep all packaging materials well out of the reach of children, as packaging materials can be dangerous to children. • If a child places a bag over its head, it may result in suffocation. This appliance must be properly grounded.Do not ground the appliance to a gas pi...
Page 11 - Critical usage warnings
English 11 Since an ingredient in hair spray may degrade the hydrophile property of the heat exchanger so that dew may appear on the outer surface of the appliance when the cooling operation is running, do not install the appliance in a beauty salon.This appliance should be positioned so that th...
Page 12 - This may result in electric shock.; Usage cautions
Safety information 12 English • This may result in electric shock. When gas (city gas, propane gas, LP gas) leaks, do not touch this appliance or the power cord, ventilate immediately. • At this time, do not use the ventilating fan. • A spark may cause an explosion or fire. Do not repair, replace,...
Page 13 - This may result in burns.
English 13 Do not touch the glass door and inside of the drum during or just after drying as it is hot. • This may result in burns. The door glass becomes hot during washing and drying. Therefore, do not touch the door glass.Also, do not allow children to play around the washing machine or touch...
Page 14 - fire or an explosion.
Safety information 14 English Do not place inflammable materials near the product.• This may result in toxic gases from the product, damage to parts, electric shock, fire or an explosion. • The appliance should not be placed behind lockable doors etc. Do not touch the rear side of the appliance du...
Page 15 - Critical cleaning warnings
English 15 Critical cleaning warnings WARNING Do not clean the appliance by spraying water directly onto it.Do not use benzene, thinner or alcohol to clean the appliance. • This may result in discoloration, deformation, damage, electric shock or fire. Before cleaning or performing maintenance, u...
Page 16 - Instructions about the WEEE
Safety information 16 English Instructions about the WEEE Correct Disposal of This Product (Waste Electrical & Electronic Equipment) (Applicable in countries with separate collection systems)This marking on the product, accessories or literature indicates that the product and its electronic ac...
Page 17 - Installation; What’s included; Dryer at a glance
English 17 Installation What’s included Carefully unpack the dryer. Keep all packaging materials away from children. The parts and location of parts shown below may differ from your dryer. Before installation, make sure the dryer has all the parts listed here. If the dryer and/or parts are damag...
Page 18 - NOTE
Installation 18 English Accessories (supplied) Hose guide Cable tie Hose connector Long drain hose (2m) User manual Rack Dry (applicable models only) Cleaning brush Accessories (not supplied) Bracket-Stacking kit (SK-DH, SK-DA, SKK-DF) Stacking kit (SKK-DD, SKK-DDX) NOTE • The stacking kit allows ...
Page 19 - installation manual included in the stacking kit.
English 19 • For stacking instructions with the dryer, see the installation manual included in the stacking kit. • For information about model-specific availability of the stacking kit, see the installation manual included in the stacking kit. Installation DV5000T_DC68-04209F-00_EN.indd 19 2020/...
Page 20 - Installation requirements
Installation 20 English Installation requirements NOTE This dryer must be installed by a qualified installer. If service is required due to poor or faulty installation, it is considered the owner’s responsibility and may void the warranty. Keep these instructions for future reference. WARNING • Do...
Page 21 - Location requirements; Alcove or closet installation; Electrical and grounding requirements; The dryer requires an AC 220-240 V / 50 Hz electrical supply.
English 21 Location requirements Select a level, well-constructed surface that will withstand vibrations. Select a location where a grounded, 3-prong outlet is easily accessible. WARNING • Install the dryer indoors only. • Do not install the dryer in areas exposed to the weather. • Do not instal...
Page 23 - Levelling
English 23 Levelling Before you install the dryer, make sure you have read Installation requirements on page 20 . Please note that the following instructions are for installation without using a drain hose. For instructions for using a drain hose, see the next section, Drain hose (if necessary) ...
Page 24 - Remove the drain hose from
Installation 24 English Drain hose (if necessary) The dryer comes with a built-in water tank. However, if you do not want to use the water tank, you may install the drain hose. The provided accessory hose (long drain hose) can be used as an extension to the drain hose. B A 1. Remove the drain hose...
Page 25 - hose
English 25 A 2. Insert one end of the accessory hose (long drain hose) into hole (A) . 3. Insert the other end (outlet) of the accessory hose to the drainage system in one of the following ways: Over a wash basin: A C B 1. Make sure to place the end of the accessory hose lower than 90 cm (*) fro...
Page 26 - By using the drain pipe of the wash basin:; Assemble the
Installation 26 English By using the drain pipe of the wash basin: A 1. Assemble the hose connector (A) , and attach it to the end of the accessory hose as shown. CAUTION To prevent water leak, make sure to connect the hose and the connector firmly. 2. Connect the hose adaptor directly to the drai...
Page 27 - Installation checklist; TIME DRY; Before using the dryer
English 27 Installation checklist • The dryer is plugged into a properly grounded outlet. • All packaging material is completely removed and properly disposed. • The dryer is level and standing firmly on the floor.• Start the dryer to make sure that it runs, heats, and shuts off. • Run a TIME DR...
Page 28 - conditions or to your needs.
Installation 28 English Door reversal (DV**TA***A*/DV**TA***T* only) You might want to reverse the direction of the door, depending on your site conditions or to your needs. WARNING Make sure door reversal is performed by a qualified technician. 1. Open the door, and then remove the two screws on ...
Page 29 - Remove the glass holder, and
English 29 4. Remove the glass holder, and then rotate the door cover by 180 degrees. 5. Insert the glass holder into the new position of the door cover. Make sure the door hinge is in the same position as in the figure. 6. Tighten the upper 3 screws and the lower 3 screws on the glass holder. N...
Page 30 - Insert the door sealing in the correct
Installation 30 English 7. Insert the door sealing in the correct position. 8. Remove the 2 screws that remain after removing the door hinge. 9. Remove the 4 screws on the door lock. Remove the door lock, and then reinsert it to the opposite side. Installation DV5000T_DC68-04209F-00_EN.indd 30 202...
Page 31 - Tighten the 2 screws that were
English 31 10. Tighten the 2 screws that were removed from step 8 on the hinge frame at the opposite side. Note that you must tighten them on the right (top-right and bottom-right) of the frame. 11. Remove the screw on the bottom of the door hinge, and the fasten it on the top of the door hinge....
Page 32 - Control panel; Operations
32 English Operations Control panel DV9*TA*****/DV8*TA***** 01 11 12 03 04 05 06 07 09 10 02 DV7*TA***** 02 01 11 12 03 04 05 06 08 09 10 Operations DV5000T_DC68-04209F-00_EN.indd 32 2020/9/8 14:05:24
Page 33 - Digital Graphic
English 33 01 Digital Graphic Display Displays all cycle information, including cycle time, information codes, and dryer status. See the table below for status details. Drying Cooling Heat-exchanger clean alarm Sound on/off Child Lock Check filter alarm Water Tank Full Delay End Wrinkle Prevent ...
Page 34 - This alarm is available only with
Operations 34 English 06 Damp Alert This alarm is available only with SHIRTS, COTTON, MIXED LOAD , and SYNTHETICS cycle. If a load contains mixed fabrics, the Damp Alert indicator ( ) blinks when the average dryness of the item is 80 % dry. This lets you take items that you don’t want fully dried ...
Page 35 - Cycle overview; This cycle finishes the drying process in a moist state,
English 35 Cycle overview Optimal Dry Cycle Description Max load (kg) SHIRTS Use to quickly dry one item such as a shirt. 2 IRON DRY This cycle finishes the drying process in a moist state, which facilitates ironing. 4 DELICATES For items to be handled with care such as lingerie. 2 WOOL For mach...
Page 36 - Use to set a desired Time.
Operations 36 English Manual Dry Cycle Description Max load (kg) QUICK DRY 35' For drying light cotton synthetics or items that needs quick drying. The default Time is 35 minutes. 1 TIME DRY Use to set a desired Time. 1. Turn the Cycle Selector to select TIME DRY . 2. Press Time to set the drying ...
Page 37 - Cycle chart
English 37 Cycle chart NOTE For best results, follow the load size recommendations for each dry cycle. • Large load: Fill the drum to about ¾ full. Do not add items over this level as they need to tumble freely. • Medium load : Fill the drum to about ½ full. • Small load : Fill the drum with 3-5...
Page 39 - Getting started; Simple steps to start; Sorting and loading
English 39 Getting started Simple steps to start 1. Press Power to turn the dryer on. 2. Load the dryer and close the door. 3. Turn the Cycle Selector to select a cycle. 4. Change the cycle settings ( Drying Level , and Time ) as necessary. 5. Select necessary settings and options to your prefer...
Page 41 - Drying suggestions; Washable sweaters (block to shape
English 41 Drying suggestions Items (max 1.5 kg) Description Washable sweaters (block to shape and lay flat on rack) When drying the laundry using the rack, fold and place the clothes on the rack to prevent the clothing from becoming wrinkled. Stuffed toys (cotton or polyester fibre filled)Stuff...
Page 42 - Cycle guide; Blankets
Operations 42 English Cycle guide Always follow the care label when drying. If care label instructions are not available, refer to the following table. Bedspreads and comforters • Use the High temperature settings. Blankets • For best results, dry only one blanket at a time. Cloth diapers • Use th...
Page 43 - Special features; Delay End; You can set the dryer to complete a; Child Lock; • If the dryer reflects light on the
English 43 Special features Delay End You can set the dryer to complete a selected cycle at your set time. 1. Select a cycle with necessary options. 2. Press the - or + Delay End buttons to set a time between 1 to 24 hours in 1-hour increment. 3. Press and hold Start/Pause (Hold to Start) . The ...
Page 44 - Clean the lint filter after each load.
Maintenance 44 English WARNING • Do not clean the dryer by directly spraying water onto the dryer. • Do not clean the dryer with benzene, thinner, alcohol, or acetone. This may cause discoloration, deformation, damage, electric shock, or fire. • Before cleaning the dryer, be sure to unplug the pow...
Page 45 - Open the door and pull the lint filter
English 45 1. Open the door and pull the lint filter upward to remove. A 2. Open the outer filter and remove the inner filter (A) . 3. Unfold both the inner filter and the outer filter. 4. Remove the lint from both filters, and then clean the filters with the cleaning brush. NOTE To clean the fi...
Page 46 - Put the inner filter into the outer
Maintenance 46 English 5. Put the inner filter into the outer filter, and then reinsert the lint filter into the original position. CAUTION • Clean the lint filter after each load. Otherwise, the drying performance may decrease. • Do not operate the dryer without the inner filter inside the outer ...
Page 47 - Water tank; To avoid leaks, empty the water tank after every load.
English 47 Water tank To avoid leaks, empty the water tank after every load. A 1. Using both hands, pull the water tank (A) forward to remove. B 2. Empty the water through the drain hole (B) and place the water tank back into place. NOTE If you empty the water tank and press and hold Start/Pause...
Page 48 - Heat exchanger; Gently press the top part of the
Maintenance 48 English Heat exchanger Clean the heat exchanger at least once a month. (or When the Buzzer rings and the heat exchanger indicator lights up on the display.) A 1. Gently press the top part of the outer cover (A) to open. B 2. Unlock the fixers (B) . C 3. Remove the inner cover (C) . ...
Page 49 - Clean the heat exchanger with the
English 49 4. Clean the heat exchanger with the provided cleaning brush or a vacuum cleaner with a brush attachment. Take care not to bend or damage the heat exchanger fins when cleaning. This may lead to a decrease in drying performance. CAUTION • To avoid physical injury and burns, do not touc...
Page 50 - Checkpoints; • Clean the lint filter.
50 English Troubleshooting Troubleshooting Checkpoints If you encounter an issue with the dryer, first check the table below and try the suggestions. Symptom Action Dryer does not run • Make sure the door is completely closed. • Make sure the power cord is plugged in. • Check the home’s circuit br...
Page 52 - Information codes; tC
Troubleshooting 52 English Troubleshooting Information codes If the dryer fails to operate, you may see an information code on the display. Check the table below and try the suggestions. Information code Meaning Action tC Air temperature sensor issue Clean the lint filter and/or heat exchanger. If...
Page 53 - Appendix; Fabric care chart; Wash cycle; Normal
English 53 Appendix Appendix Fabric care chart The following symbols provide garment care direction. The Clothing care labels include symbols for drying, bleaching, drying and ironing, or dry cleaning when necessary. The use of symbols ensures consistency among garment manufacturers of domestic ...
Page 55 - Protecting the environment
English 55 Appendix Dry-clean Dry-clean Do Not dry-clean Line Dry / Hang to Dry Drip Dry Dry Flat Protecting the environment This appliance is manufactured from recyclable materials. If you decide to dispose of this appliance, please observe local waste disposal regulations. Cut off the power co...
Page 56 - DIMENSIONS
Appendix 56 English Appendix Specification B A D E C DV9*TA2****, DV8*TA2****, DV7*TA2**** TYPE FRONT LOADING DRYER DIMENSIONS A 600 mm B 850 mm C 600 mm D 650 mm E 1100 mm WEIGHT 50 kg ELECTRICAL REQUIREMENTS 220-240 V / 50 Hz 780-800 W ALLOWABLE TEMPERATURE 5-35 °C DV5000T_DC68-04209F-00_EN.indd...
Page 57 - Consumption data
English 57 Appendix DV9*TA0****, DV8*TA0****, DV7*TA0**** TYPE FRONT LOADING DRYER DIMENSIONS A 600 mm B 850 mm C 600 mm D 650 mm E 1100 mm WEIGHT Door Glass Type 49 kg * Non Door Glass Type 48 kg ELECTRICAL REQUIREMENTS 220-240 V / 50 Hz 600-650 W ALLOWABLE TEMPERATURE 5-35 °C NOTE Non Door Gla...
Page 58 - : Weight of dry laundry
Appendix 58 English Appendix Model Program Load (kg) (1) Energy (kWh) Max. Duration (Minutes) DV7*TA2**** COTTON (2) 7.0 1.25 180 3.5 0.73 120 IRON DRY (2) 7.0 0.85 120 SYNTHETICS 3.5 0.50 82 (1) : Weight of dry laundry (2) : EN 61121:2013 test program All data without a “star” against it was calc...
Page 60 - Specification sheet; In accordance with applicable energy labelling regulations.
Appendix 60 English Appendix Specification sheet In accordance with applicable energy labelling regulations. NOTE “*” Asterisk(s) means variant model and can be varied (0-9) or (A-Z). Samsung Model Name DV9*TA2**** DV8*TA2**** DV7*TA2**** Capacity kg 9.0 8.0 7.0 Type Condenser Condenser Condenser ...
Page 64 - QUESTIONS OR COMMENTS?
QUESTIONS OR COMMENTS? COUNTRY CALL OR VISIT US ONLINE AT UK 0333 000 0333 www.samsung.com/uk/support IRELAND (EIRE) 0818 717100 www.samsung.com/ie/support DC68-04209F-00 DV5000T_DC68-04209F-00_EN.indd 64 2020/9/8 14:06:13


 Samsung DF60A8100HG
User Manual
Samsung DF60A8100HG
User Manual
 Samsung DF60R8200WG
User Manual
Samsung DF60R8200WG
User Manual
 Samsung DV22N6800HW
User Manual
Samsung DV22N6800HW
User Manual
 Samsung DV25B6900EW
User Manual
Samsung DV25B6900EW
User Manual
 Samsung DV25B6900EW/A2
User Manual
Samsung DV25B6900EW/A2
User Manual
 Samsung DV25B6900HW
User Manual
Samsung DV25B6900HW
User Manual
 Samsung DV25B6900HW/A2
User Manual
Samsung DV25B6900HW/A2
User Manual
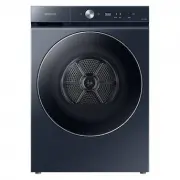 Samsung DV53BB8900HD
User Manual
Samsung DV53BB8900HD
User Manual
 Samsung DV53BB8900HDA2
User Manual
Samsung DV53BB8900HDA2
User Manual
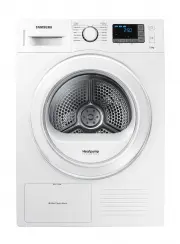 Samsung DV80F5E5HGW
User Manual
Samsung DV80F5E5HGW
User Manual
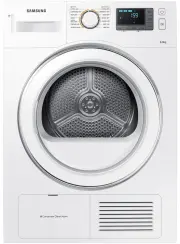 Samsung DV80H4100CW
User Manual
Samsung DV80H4100CW
User Manual
 Samsung DV80T5420AW
User Manual
Samsung DV80T5420AW
User Manual
 Samsung DV80T6420LE
User Manual
Samsung DV80T6420LE
User Manual
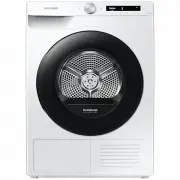
 Samsung DV90BB7445GEUA
User Manual
Samsung DV90BB7445GEUA
User Manual
 Samsung DV90BB9440GH
User Manual
Samsung DV90BB9440GH
User Manual
 Samsung DV90H8000HW
User Manual
Samsung DV90H8000HW
User Manual
 Samsung DV90T5240AT
Installation Manual
Samsung DV90T5240AT
Installation Manual
 Samsung DV90T7440BT
User Manual
Samsung DV90T7440BT
User Manual