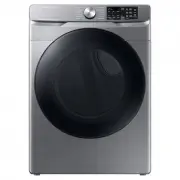
Page 2 - contents; INSTALLING YOUR DRYER
English - 2 contents INSTALLING YOUR DRYER 11 11 Unpacking your dryer and Installing guide 11 See dryer exterior 12 Check before installing 12 Before using the product 12 Important to installer 12 Location considerations 13 Alcove or closet installation 13 Electrical requirements 13 Grounding 14 Ins...
Page 4 - safety information; WARNING - Risk of Fire; WHAT YOU NEED TO KNOW ABOUT SAFETY INSTRUCTIONS
English - 4 safety information Congratulations on your new Samsung Dryer. This manual contains important information on the installation, use, and care of your appliance. Please take the time to read this manual to take full advantage of your dryer’s many benefits and features. WARNING - Risk of Fir...
Page 8 - SEVERE WARNING SIGNS FOR INSTALLATION
English - 8 SEVERE WARNING SIGNS FOR INSTALLATION The installation of this appliance must be performed by a qualified technician or service company.- Failure to do so may result in electric shock, fire, an explosion, problems with the product, or injury. Plug the power cord into an AC 220-240 V 50 H...
Page 9 - SEVERE WARNING SIGNS FOR USING
English - 9 SEVERE WARNING SIGNS FOR USING Do not let children or pets on or into the product. In addition, when disposing of this product, disassemble the door lock (lever).- This may result in children falling and injuring themselves.- If children become locked in the product, there is a danger of...
Page 10 - CAUTION SIGNS FOR USING; SEVERE WARNING SIGNS FOR CLEANING
English - 10 CAUTION SIGNS FOR USING Do not stand on top of the appliance or place objects (such as laundry, lighted candles, lighted cigarettes, dishes, chemicals, metal objects, etc.) on the appliance.- This may result in electric shock, fire, problems with the product, or injury. Do not touch the...
Page 11 - installing your dryer; UNPACKING YOUR DRYER AND INSTALLING GUIDE
English - 11 installing your dryer UNPACKING YOUR DRYER AND INSTALLING GUIDE Hire a professional to install this dryer properly. If there is a service call performed as a result of poor setup, adjustment, and connection, it is considered the responsibility of the installer. It is recommended that a ...
Page 14 - INSTALLATION SIDE BY SIDE; FINAL INSTALLATION CHECKLIST
English - 14 INSTALLATION SIDE BY SIDE For proper installation, we recommend that you hire a professional. To install: 1. Move your dryer to an appropriate location for installation. Consider installing the dryer and washer side-by-side. Lay two of the carton cushion-tops on the floor. Tip your drye...
Page 16 - Connecting the drain hose; Connecting the direct-hose
English - 16 Connecting the drain hose The end of the drain hose can be positioned in three ways: 1. Over the edge of a wash basin: The drain hose must be placed lower than 90 cm. If the end of the drain hose needs to be placed above the ground, we recommend a height of 60 cm ~ 90 cm. To keep the dr...
Page 17 - INSTALLATION STACKING
English - 17 INSTALLATION STACKING In case of purchasing the additional stacking kit, contact our Samsung service center or local distributers. [Part no. SK-DH / SK-DA / SKK-DF]The stacking kit differs depending on the model. 1. Carefully lay the dryer on its side. Use the packing material so you do...
Page 18 - DOOR REVERSAL
English - 18 6. Finalise the installation • Refer to the washer Installation Instructions to complete the washer installation.• Refer to the dryer Installation Instructions to complete the dryer installation. • Carefully slide or walk the stacked washer and dryer into place. Use felt pads or other s...
Page 20 - operating Instructions, tips; OVERVIEW OF THE CONTROL PANEL
English - 20 operating Instructions, tips To reduce the risk of fire, electric shock, or injury to persons, read the IMPORTANT SAFETY INSTRUCTIONS before operating this appliance.If the Wrinkle Prevent option is not selected, take out the laundry immediately after it is washed and dried. Leaving the...
Page 23 - CHILD LOCK; Activating/Deactivating
English - 23 CHILD LOCK A function to prevent children from playing with your dryer. Activating/Deactivating If you want to activate or deactivate the Child Lock, press both the Temp. and Time buttons simultaneously for 3 seconds. The “ Child Lock ” will be lit when this feature is activated. • When...
Page 24 - DELAY END
English - 24 DELAY END You can set the dryer to finish your drying cycle automatically at a later time, choosing a delay of between 1 to 19 hours (in 1 hour increments). The hour displayed indicates the time at which the dry will be finished. The Delay End settings range from 1 hour to 19 hours, dep...
Page 25 - SMART CHECK; Downloading the Samsung Smart Washer app; Using the Smart Check function
English - 25 SMART CHECK This function enables you to check the status of the dryer using a smartphone. The Smart Check function has been optimized for:Galaxy & iPhone series (cannot be supported for some models) Downloading the Samsung Smart Washer app Download the Samsung Smart Washer app to y...
Page 26 - Installing the drying rack
English - 26 RACK DRY (ON SOME MODELS) Installing the drying rack 1. Open the dryer door. 2. Position the drying rack in the tumbler, placing the front lip of the drying rack on the top of the lint filter case. 3. Place the items to be dried on the rack, leaving space between them so air can circula...
Page 28 - care and cleaning
English - 28 care and cleaning CLEAN THE FILTER CASE • After each load. • To shorten drying time. • To operate more energy efficiently. Do not operate your dryer without the filter case in place. There is a danger of damaging the laundry when drying laundry without the filter case. CLEAN THE CONDENS...
Page 30 - CLEANING THE CONDENSER ASSEMBLY
English - 30 CLEANING THE CONDENSER ASSEMBLY 1. Open the condenser compartment cover. 2. Unlock the fixer condenser. 3. Remove the condenser. 4. Clean the condenser completely under the tap letting water to flow through. • Since the drying performance may be degraded if you do not clean the condense...
Page 31 - special laundry tips; SPECIAL LAUNDRY TIPS
English - 31 special laundry tips SPECIAL LAUNDRY TIPS Please follow the care label or manufacturer’s instructions for drying special items. If care label instructions are not available, use the following information as a guide. Bedspreads & Comforters • Follow the care label instructions or dry...
Page 32 - troubleshooting; CHECK THESE POINTS IF YOUR DRYER...
English - 32 troubleshooting CHECK THESE POINTS IF YOUR DRYER… PROBLEM SOLUTION Doesn’t run. • Make sure the door is latched shut. • Be sure the power cord is plugged into a live electrical outlet. • Check the home’s circuit breaker and fuses. • Press the Start/Pause button again if the door is open...
Page 34 - INFORMATION CODES
English - 34 INFORMATION CODES Information codes may be displayed to help you better understand what is occurring with your Dryer. ERROR DISPLAY MEANING SOLUTION tE Clogged filter case is restricted. Clean the filter case or condenser.If the problem continues call for service. tE5 dE Running the dry...
Page 35 - appendix; FABRIC CARE CHART
English - 35 appendix FABRIC CARE CHART The following symbols provide garment care direction. The Clothing care labels include symbols for drying, bleaching, drying and ironing, or dry cleaning when necessary. The use of symbols ensures consistency among garment manufacturers of domestic and importe...
Page 37 - CYCLE CHART
English - 37 CYCLE CHART ( user option) Cycle Max load (kg)(Dry Laundry) Temp Wrinkle Prevent Mixed Load Bell Interior Lamp (Only DV8 Series) Sound On/ Off Delay End DV8 Series DV7 Series Cotton EXTRA DRY 8 7 CUPBOARD DRY IRON DRY - Synthetics EXTRA DRY 4 3.5 ...
Page 38 - note
English - 38 note DV80H4000CX-03408E-03_EN.indd Sec4:38 DV80H4000CX-03408E-03_EN.indd Sec4:38 2014-11-28 2:41:24 2014-11-28 2:41:24
Page 40 - QUESTIONS OR COMMENTS?
QUESTIONS OR COMMENTS? Country CALL OR VISIT US ONLINE AT AUSTRALIA 1300 362 603 www.samsung.com/au/support DC68-03408E-03 DV80H4000CX-03408E-03_EN.indd Sec4:40 DV80H4000CX-03408E-03_EN.indd Sec4:40 2014-11-28 2:41:24 2014-11-28 2:41:24