Samsung AM180JNHFKH/EU - Manuals
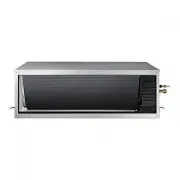
User Manual Samsung AM180JNHFKH/EU


Summary
2 Correct Disposal of This Product (Waste Electrical & Electronic Equipment) (Applicable in the countries with separate collection systems) This marking on the product, accessories or literature indicates that the product and its electronic accessories (e.g. charger, headset, USB cable) should n...
3 ENGLISH Safety precautions Before using your new air conditioner, please read this manual thoroughly to ensure that you know how to safely and efficiently operate the extensive features and functions of your new appliance.Because the following operating instructions cover various models, the chara...
4 Safety precautions FOR INSTALLATION WARNING Do not install this appliance near a heater, inflammable material. Do not install this appliance in a humid, oily or dusty location, in a location exposed to direct sunlight and water (rain drops). Do not install this appliance in a location where gas ma...
Samsung Air Conditioners Manuals
-
 Samsung AM022TNVDKH/TK
User Manual
Samsung AM022TNVDKH/TK
User Manual
-
 Samsung AQ07S8GE
User Manual
Samsung AQ07S8GE
User Manual
-
Samsung AQ07S8GE
Manual
-
 Samsung AQ09FAX
User Manual
Samsung AQ09FAX
User Manual
-
 Samsung AQ09JWAX
User Manual
Samsung AQ09JWAX
User Manual
-
 Samsung AQ12FAN
User Manual
Samsung AQ12FAN
User Manual
-
 Samsung AQ12JWAN
User Manual
Samsung AQ12JWAN
User Manual
-
 Samsung AQ18FENSER
User Manual
Samsung AQ18FENSER
User Manual
-
 Samsung AR09TXHYBWKN/AR09TXHYBWKX
User Manual
Samsung AR09TXHYBWKN/AR09TXHYBWKX
User Manual
-
 Samsung AVMGH052EA4
User Manual
Samsung AVMGH052EA4
User Manual
-
 Samsung AVMKH026EA4
User Manual
Samsung AVMKH026EA4
User Manual
-
 Samsung AW05B0LA/AW0519
User Manual
Samsung AW05B0LA/AW0519
User Manual
-
 Samsung AW07A0SE/AW07A1SE
User Manual
Samsung AW07A0SE/AW07A1SE
User Manual
-
 Samsung AW126JB/127JB
User Manual
Samsung AW126JB/127JB
User Manual
-
 Samsung AW-1407B
User Manual
Samsung AW-1407B
User Manual
-
 Samsung AWH126JE
User Manual
Samsung AWH126JE
User Manual
-
 Samsung F-AR09BXGYCWK1
User Manual
Samsung F-AR09BXGYCWK1
User Manual
-
 Samsung F-AR09FSSSCWK1
User Manual
Samsung F-AR09FSSSCWK1
User Manual
-
 Samsung F-AR12BXGYCWK1
User Manual
Samsung F-AR12BXGYCWK1
User Manual
-
 Samsung F-AR12FSSSCWK1
User Manual
Samsung F-AR12FSSSCWK1
User Manual