Page 2 - Features of your new air conditioner; Turbo function; Easy Installation; function
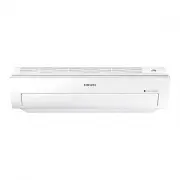
Features of your new air conditioner Turbo function You can set the Turbo function to provide fast and powerful cooling (heating). Easy Filter There is no grille to remove before separating the filter from the air conditioner! Therefore, filter can be cleaned easily, more frequently! Frequent filter...
Page 3 - Contents
Contents Preparation Safety precautions . . . . . . . . . . . . . . . . . . . . . . . . . . . . . . . . . . . . . . . . . . . . . . . . . . . . . . . . . . . . . . . . . . . . . . . . . . . . . . . . . . . . . . . . . . . . . . . . . . . . . . . . . .4Checking before use . . . . . . . . . . . . . . ...
Page 4 - Safety precautions; Important safety symbols and precautions:; WARNING; severe; CAUTION; Hazards or unsafe practices that may result in; minor; Make sure the machine is grounded to prevent electric shock.; FOR INSTALLATION; Extending the power line may result in electric shock or fire.; technician or service company.; Failing to do so may result in electric shock or fire.
Safety precautions Before using your new air conditioner, please read this manual thoroughly to ensure that you know how to safely and efficiently operate the extensive features and functions of your new appliance.Because the following operating instructions cover various models, the characteristics...
Page 5 - so that draining is performed correctly.; FOR POWER SUPPLY; the power line into the space behind the appliance.
Do not install this appliance near a heater, inflammable material. Do not install this appliance in a humid, oily or dusty location, in a location exposed to direct sunlight and water (rain drops). Do not install this appliance in a location where gas may leak. This may result in electric shock or...
Page 6 - thunder/lightning storm, cut the power at the circuit breaker.; FOR USING; Do not touch the circuit breaker with wet hands.
Safety precautions FOR POWER SUPPLY CAUTION When not using the air conditioner for a long period of time or during a thunder/lightning storm, cut the power at the circuit breaker. Failing to do so may result in electric shock or fire. FOR USING WARNING If the appliance is flooded, please contact y...
Page 7 - locations or near infirm people.
Do not insert your fingers or foreign substances into the outlet when the air conditioner is operating. Take special care that children do not injure themselves by inserting their fingers into the product. Do not touch the air flow blade with your hands or fingers during the heating operation. T...
Page 8 - you start to run air conditioner.
Safety precautions FOR USING CAUTION Do not place objects or devices under the indoor unit. Water dripping from the indoor unit may result in fire or property damage. (example electrical appliances) Check that the installation frame of the outdoor unit is not broken at least once a year. Failing...
Page 9 - This appliance can be used by children aged from 8; benzene, thinner or alcohol to clean the appliance.; FOR CLEANING; unit since it has sharp edges.; air conditioner’ section.
This appliance is not intended for use by persons (including children) with reduced physical, sensory or mental capabilities, or lack of experience and knowledge, unless they have been given supervision or instruction concerning use of the appliance by a person responsible for their safety. Children...
Page 10 - Checking before use; Operation ranges; Internal protections via the unit control system
Checking before use Operation ranges The table below indicates the temperature and humidity ranges the air conditioner can be operated within. Refer to the table for efficient use. Maintaining your air conditioner The standardized temperature for heating is 7˚C. If the outdoor temperature drops to...
Page 11 - Main parts; Checking the name of the parts; Display
Main parts Checking the name of the parts Display Power button/ Remote controller receiver Turbo indicator Timer/Auto clean indicator Power indicator Air filter Air flow blade (up and down) Air flow blade (left and right) Air intake Room temperature sensor English-11 PREP AR ATION 01
Page 12 - Using the remote controller; Remote controller buttons
Using the remote controller f Point the remote controller towards the remote controller receiver of the indoor unit. f When you press the button on the remote controller correctly, you will hear beep sound from the indoor unit and a transmit indicator( ) appears on the remote controller display. Rem...
Page 13 - Remote controller display; Battery changing time
Remote controller display Operation mode *Heat mode is applicable to MR-EH00/MR-EH00U model only. Remote controller transmission Low battery Fan speed Air flow direction Settings Set temperature or on/off set time with the timer function On/Off timer Options • For MR-EH00U/MR-EC00U model, the temper...
Page 14 - Inserting the batteries
Using the remote controller Inserting the batteries 1. Open the battery cover of the remote controller. - Press the ( ) part gently and lift it up in the arrow direction. 2. Insert the batteries. - Check and match the (+)and (-) signs accordingly. 3. Close the battery cover. - Match the cover and bo...
Page 15 - Basic operation; Auto
Basic operation Basic operation is an operation mode that can be selected by pressing the Mode button. Auto In Auto mode, the air conditioner will automatically adjust the temperature and fan speed to maintain your fresh environment. f When the indoor temperature is too high, the powerful cool breez...
Page 18 - Setting the On/Off timer; Setting the On timer
Setting the On/Off timer You can set the air conditioner to be turned on or off automatically at desired time. Setting the On timer When the air conditioner is turned off. Remote controller display 1. Press the Timer button to select (On). - (On) indicator will keep blinking and you can set the time...
Page 20 - Setting the good’sleep mode; When the air conditioner is operating in Cool mode
Setting the good’sleep mode For a comfortable sleep, the air conditioner will operate in 3 stages in order of ‘Fall asleep Sound sleep Wake up’ stages. When the air conditioner is operating in Cool mode; Remote controller display 1. Press the Timer button to select ( ). - ( ) indicator will keep...
Page 21 - Temperature and Fan speed change in good’sleep mode
Temperature and Fan speed change in good’sleep mode 1. Fall asleep mode : Provides you with comfortable environment for a good sleep by rapid cooling and hypnagogue expedition breeze. 2. Sound sleep mode : The sound sleep mode adjusts temperature and air flow in waves to maintain healthy skin temper...
Page 22 - Using the Turbo function; When the air conditioner is operating in Cool or Heat mode
Using the Turbo function You can set the Turbo function to provide fast and powerful cooling (heating). When the air conditioner is operating in Cool or Heat mode; Remote controller display 1. Press the Options button. 2. Press the <, > or Options button until (Turbo) indicator starts to blink...
Page 23 - Using the Purity function; When the air conditioner is turned on; When the air conditioner is turned off
Using the Purity function Purity function will remove harmful materials in the air to provide you clean and healthy environment.You can select this function additionally while the air conditioner is in operation. When the air conditioner is turned on Remote controller display 1. Press the Options bu...
Page 24 - Selecting an indoor unit; Selecting a blade
Selecting an indoor unit You can select and operate individual indoor units out of 4 indoor units. When the air conditioner is turned on Remote controller display 1. Press the Settings button. 2. Press the <, > or Settings button until (Zone) indicator starts to blink. 3. Press the SET button ...
Page 25 - Cleaning the air conditioner; Cleaning the indoor unit; Make sure to turn off the power of the indoor unit and cut-off; • Do not clean the display using alkaline detergent.
Cleaning the air conditioner Cleaning the indoor unit Wipe the surface of the unit with a slightly damp micro fiber cloth when needed. • Contact the service center when you clean the indoor unit heat exchanger because it needs to be disassembled. • Since the panel of the indoor unit is easily scra...
Page 27 - Reassembling the Air filter
Reassembling the Air filter 1. Put the filter on the main body and insert the hooks which are in the top of the Air filter into the main body. Air filter 2. There’s one hook in both side of the filter, press the surface of the Air filter softly and get the hooks into the main body. 3. Press the ...
Page 28 - Maintaining the air conditioner; odors which may have generated from dampness.; Periodical checks; the area of installation is very dusty.
Maintaining the air conditioner If the air conditioner will not be used for an extended period of time, dry the air conditioner to maintain it in best condition. 1. Dry the air conditioner thoroughly by operating in Fan mode for 3 to 4 hours and cut-off the power supply. There may be internal damage...
Page 29 - Troubleshooting; PROBLEM
Troubleshooting Refer to the following chart if the air conditioner operates abnormally. This may save time and unnecessary expenses. PROBLEM SOLUTION The air conditioner does not work at all. • Check power status and then operate the air conditioner again. • Plug in or switch on the circuit breaker...
Page 31 - Model specification (Dimension and weight); Appendix
Model specification (Dimension and weight) Dimension and weight Type Model Net dimension (WxDxH) (mm) Net weight (kg) Indoor unit AM015JNVDKH 750*250*242 8.1 AM022JNVDKH 750*250*242 8.1 AM028JNVDKH 750*250*242 8.2 AM036JNVDKH 826*275*260 9.8 AM045JNVDKH 826*275*260 9.8 AM056JNVDKH 1063*317*294 14.6 ...
Page 32 - Installation parts; Fixing the installation plate
Installation parts English-32 B A D C B A D C B A D C Fixing the installation plate You can select the direction of the drain hose depending on where you want to install the indoor unit. Therefore before fixing the installation plate to a wall or a window frame, you must determine the position of th...
Page 33 - Assembling the hanger screw; Performing leak test & insulation; Leak test
English-33 INSTALLATION 07 Assembling the hanger screw Use 2 screws to fix the indoor unit with hanger plate as shown in the picture. Screw • Search for other spots if there are less than two studs, or the distance between the studs are different from the plate hanger. • Fix the installation plate w...
Page 34 - Installing and connecting the drain hose of the indoor unit; Drain hose installation
English-34 Installing and connecting the drain hose of the indoor unit The drain hose must NOT slant upwards. The end of the drain hose must NOT be placed under water. Keep a clearance of at least 5 cm between the end of the drain hose and the ground. When installing the drain hose for the indoor un...
Page 35 - Changing direction of the drain hose
English-35 INSTALLATION 07 Changing direction of the drain hose • The hose will be fixed permanently into position after finishing the installation and the gas leak test; refer to page 22 for further details. • Make sure the installed direction of the drain hose is correct. Inadequate installation m...
Page 36 - Wiring work; Power and communication cable connection
English-36 Wiring work N L N L N L N L ELCB MCCB+ ELB V1 V2 Indoor Unit 1 Indoor Unit 2 Indoor Unit 3 Indoor Unit 4 Indoor Unit 5 Indoor Unit 6 Outdoor Unit Wired Remote Control EEV kit Ceiling, wall-mounted indoor unit. 220-240V~ or ELCB : Essential Installation WARNING : Power off before conne...
Page 37 - Specification of electronic wire
English-37 INSTALLATION 07 Power supply MCCB ELB or ELCB Power cable Earth cable Communication cable Max : 242V Min : 198V X A X A, 30mmA 0.1 s 2.5mm 2 2.5mm 2 0.75~1.5mm 2 Decide the capacity of ELCB(or MCCB+ELB) by below formula. Power supply cords of parts of appliances for outdoor use shall ...
Page 38 - The procedure of option setting; Setting an indoor unit address and installation option
English-38 Set the indoor unit address and installation option with remote controller option. Set the each option separately since you cannot set the ADDRESS setting and indoor unit installation setting option at the same time. You need to set twice when setting indoor unit address and installation ...
Page 42 - 2 series installation option; Setting an indoor unit installation option
English-42 1. Check whether power is supplied or not. - When the indoor unit is not plugged in, there should be additional power supply in the indoor unit. 2. The panel(display) should be connected to an indoor unit to receive option. 3. Set the installation option according to the installation cond...
Page 45 - 5 series installation option
English-45 INSTALLATION 07 SEG1 SEG2 SEG3 SEG4 SEG5 SEG6 0 5 Use of Auto Change Over for HR only in Auto mode (When setting SEG3) Standard heating temp. Offset (When setting SEG3) Standard cooling temp. Offset (When setting SEG3) Standard for mode change Heating → Cooling SEG7 SEG8 SEG9 SEG10 SEG11 ...
Page 49 - Changing a particular option
English-49 INSTALLATION 07 Option SEG1 SEG2 SEG3 SEG4 SEG5 SEG6 Explanation PAGE MODE The option mode you want to change The tens’ digit of an option SEG you will change The unit digit of an option SEG you will change Changed value Remote Controller Display On Auto On Auto Cool On Cool On On Dry Ind...
Page 51 - user & installation manual; imagine; Air Conditioner; user manual; imagine
AR ✴✴ FSSSBWK Series AR ✴✴ FSSSCUR Series Air Conditioner user & installation manual imagine the possibilities Thank you for purchasing this Samsung product. To receive more complete service, please register your product at www.samsung.com/register This manual is made with 100% recycled paper. A...