Page 2 - English; Contents; InstaLLatIon
2 English Contents InstaLLatIon Safety information 3 Preparing for installation 8 Specifications of the non-pump models 8 Specifications of the pump integrated models 9 DVM CHILLER Classification 10 Moving the product 10 Center location 11 Accessories (Basic specification) 11 Field Supply 11 Selecti...
Page 3 - InStallatIon; Safety information; For operation; WaRnInG
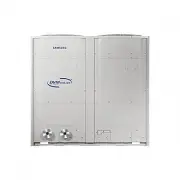
In St alla tI on 3 English InStallatIon Safety information DVM Chiller uses R-410a refrigerant. • When moisture or foreign substances enter into the refrigerant pipe using R-410A, it may affect the performance and reliability of the product. Safety precautions must be obeyed when installing the refr...
Page 4 - CaUtIon
In St alla tI on Safety information 4 English Do not operate the product with power switch or circuit breaker. • Potential risk of electric shock or fire.• If automatic blackout restore is set, fan may spin suddenly and it may cause injury. If fuse load switch is used, do not use fuse in incorrect c...
Page 5 - For installation
In St alla tI on 5 English When outdoor temperatre drops below zero, take appropriate countermeasures for frozen damage. • Freeze protection such as using brine, heater, pump operation, etc. is necessary. • Drain all water and cut-off the power supply when the product is not operated during winter t...
Page 8 - Preparing for installation; Specifications of the non-pump models
In St alla tI on 8 English Preparing for installation Specifications of the non-pump models Model aG042KSVanH aG056KSVanH aG070KSVanH Power supply 3 Phase 4 Wires 380 ~ 415 V, 50/60 Hz Capacity Cooling (Rated) kW 42 56 65 Heating (Rated) kW 42 56 69.5 Power consumption Cooling (Rated) kW 12.35 18.67...
Page 9 - Specifications of the pump integrated models
In St alla tI on 9 English Specifications of the pump integrated models Model aG042KSVGnH aG056KSVGnH aG070KSVGnH Power supply 3 Phase 4 Wires 380 ~ 415 V, 50/60 Hz Capacity Cooling (Rated) kW 42 56 65 Heating (Rated) kW 42 56 69.5 Power consumption Cooling (Rated) kW 13.59 20.14 28.26 Heating (Rate...
Page 10 - DVM CHIllER Classification; Moving the product
In St alla tI on Preparing for installation 10 English DVM CHIllER Classification Classification DVM CHIllER appearance applied model AG042/056/070KSV Series CaUtIon • Safely store or dispose the packaging materials. - Sharp metals such as nails or wooden material packaging that may break into piece...
Page 11 - Center location
In St alla tI on 11 English CaUtIon • Do not hang the rope on side of the water pipe. The rope may force the water pipe to deformed or damaged. 2 When moving with a forklift f Carefully insert the forklift forks into the forklift holes at the palette. f Be careful with the forklift from damaging the...
Page 12 - Installation Guide at the seashore; Selecting installation location
In St alla tI on 12 English Decide the installation location, with the consideration of the following conditions, under user's approval. f Place where hot discharge air or noise from the DVM CHILLER may not disturb the neighbor (Especially in residential areas, keep the operation hours in mind.) f P...
Page 14 - Required space for installation
In St alla tI on 14 English Required space for installation f Space requirement was decided based on the following conditions; Cooling mode, outdoor temperature of 35 °C. Larger space is required if the outdoor temperature is higher than 35 °C or if the place is heated easily by quantity of solar ra...
Page 16 - Supporting base construction; Base construction and installation
In St alla tI on 16 English WaRnInG • Make sure to remove the wooden pallet before installing the DVM CHILLER. If you do not remove the wooden pallet, there is risk of fire during welding the pipes. If the DVM CHILLER is installed with wooden pallet on, and it was used for long period time, wooden p...
Page 17 - Product installation; Examples of draining work
In St alla tI on 17 English Product installation Unit: mm 200 or more 200 or more 50 or more H beam or vibration-isolation frame Supporting base Base mount and anchor bolt position A B 54 761 803 54 Product - vibration-isolation frame (4 - Ø12) Supporting base (H beam or vibraition-isolation frame) ...
Page 18 - Installation precautions; Connecting the anchor bolt; anchor specification; Connecting the pipe
In St alla tI on Base construction and installation 18 English Installation precautions Connecting the anchor bolt CaUtIon Plastic (rubber) washer • Tighten the rubber washer to prevent the bolt connection part of the DVM CHILLER from corroding. anchor specification a b c m • Use the anchor bolts an...
Page 19 - Installing vibraiton-isolation frame
In St alla tI on 19 English Installing vibraiton-isolation frame f During installation, make sure there is no gap between the supporting base and the extra structures such as vibration-isolation frame or H beam. f Supporting base must be constructed strongly to support the bottom part of the vibrati...
Page 20 - Installing the wind/snow prevention duct
In St alla tI on 20 English Installing the discharge duct around the obstacles Ex.) Balcony Upper floor Discharged air Ex.) Mechanical room Discharged air Grille/ louver Suction air f It is necessary to install a wind/snow prevention duct (field supply) to direct exhaust from the fan horizontally, w...
Page 22 - Water pipe diagram; Water pipe installation
In St alla tI on 22 English Water pipe diagram Install the water system according to the diagram. Direction of water flow Expansion vessel Cleaning and flushing pipe (Install when cleaning) Load unit AHU or Fan coil DVM CHIllER Field scope Water side heat exchanger 03 07 04 10 11 09 12 08 01 04 06 0...
Page 25 - Maintaining contamination; Solution for water level decrease; Freeze protection operation
In St alla tI on 25 English Maintaining contamination Foreign substances included in chilled/heating water by small particles pass strainers, and they may be stuck or stacked inside plate type heat exchanger. Some parts of water pipes inside the plate type heat exchanger, and the performance may dec...
Page 26 - Securing water storage; Minimum water storage; Connecting water pipe
In St alla tI on Water pipe installation 26 English Securing water storage Minimum water storage Chilled/ heating water pump Buffer tank Fan coil f If the length of water pipe is too short, water storage within the system becomes lower and ON/OFF operation of the compressor occurs more often. For st...
Page 27 - Using the pump; Startup; Checking the direction of rotation; Maintenance
In St alla tI on 27 English Using the pump notE • The description below applies to AG TTT KSVG series models only. Startup CaUtIon • Do not start the pump until it has been filled with liquid. WaRnInG • Pay attention to the direction of the vent hole, and make sure that the escaping hot or cold liqu...
Page 28 - Frost protection; Cleaning; Pump performance chart
In St alla tI on Using the pump 28 English Frost protection Pumps which are not being used during periods of frost must be drained to avoid damage.Remove the filling and drain plugs from the pump. Do not refit the plugs until the pump is taken into operation again. CaUtIon • Before startup after a p...
Page 29 - Fault finding
In St alla tI on 29 English Fault finding WaRnInG • Before removing the terminal box cover, switch off the power supply. Make sure that the power supply cannot be accidentally switched on. • The pumped liquid may be scalding hot and under high pressure. Before any removal or dismantling of the pump,...
Page 31 - RK; Circuit breaker and power cable specification; Electrical wiring work; ElECtRICal WoRK
El E C tRICal W o RK 31 English Circuit breaker and power cable specification Classification Capacity (HP) Model MCa (a) MFa (a) Non-pump models 15 AG042KSVANH 32 40 20 AG056KSVANH 46 60 25 AG070KSVANH 58 75 Pump integrated models 15 AG042KSVGNH 39 50 20 AG056KSVGNH 53 60 25 AG070KSVGNH 65 75 • Powe...
Page 32 - Power and communication cable configuration; Specification of the protection tube
El E C tRICal W o RK Electrical wiring work 32 English Example of exposed core wire Insulator (inner cover) Exposed wire core Sheath (outer cover) • Do not use the power cable with the core wire exposed due to insulator damage occurred during removal of the sheath. When the core wire is exposed, it ...
Page 33 - Connecting the power cable
El E C tRICal W o RK 33 English Connecting the power cable Power cable Power cable Power cable UnIt 1 UnIt 2 UnIt 3 Communication cablePower • ground cable Power cable ELCB or MCCB+ELB ELCB or MCCB+ELB ELCB or MCCB+ELB Power • ground cable Power • ground cable Power • ground cable Power cable Protec...
Page 34 - Connecting the communication cable; External contact wiring work; output contact
El E C tRICal W o RK Electrical wiring work 34 English Connecting the communication cable UnIt 1 Module control F1 F2 V1 V2 F3 F4 UnIt2 UnIt 3 Protection tube Communication cable Communication cable Single connection Module/Group connection Hydro controller communication part Module control F1 F2 V1...
Page 36 - Input contact
El E C tRICal W o RK Electrical wiring work 36 English Input contact 1 3 5 7 9 11 13 15 17 19 2 4 6 8 10 12 14 16 18 20 B-t/B no. name Signal Function Contact on (Short) Contact off (open) Signal recognition Setting unit Maximum allowable current B-t/B 1-2 Disuse - - - - - - - 3-4 Disuse - - - - - -...
Page 40 - Selecting solderless ring terminal
El E C tRICal W o RK Electrical wiring work 40 English Selecting solderless ring terminal f Select the solderless ring terminal depending on the nominal dimension of the power cable. f Cover and insulate the solderless ring terminal and connection part of the power cable. Soldering Unit: mm nominal ...
Page 41 - Connecting the power terminal
El E C tRICal W o RK 41 English Connecting the power terminal f Connect the cables to the terminal board with solderless ring terminals. f Properly connect the cables by using certified and rated cables and make sure to fix them properly so that external force is not applied to the terminal. f Use a...
Page 42 - Examples of using the cable striper
El E C tRICal W o RK Electrical wiring work 42 English Examples of using the cable striper Cable striper 1 Adjust the blade position by coin. (Controller is at the bottom side of the tool.) Fix the blade position according to the outer sheath thickness of the power cable. 2 Fix the power cable and t...
Page 43 - Fixing the power cable; Fixing the ground cable
El E C tRICal W o RK 43 English Fixing the power cable CaUtIon • Do not let the power cable come into contact with the pipes inside the DVM CHILLER. If the power supply cable touches the pipes, the vibration of the compressor is transferred to the pipes and can damage the power supply cables or pipe...
Page 44 - Withdrawing the power cable; Grounding the power cable
El E C tRICal W o RK Electrical wiring work 44 English Withdrawing the power cable Connect the power cable protection tube into the power supply box. Be sure that the power supply cable is not damaged by burr on the knock-out hole. Installing the Solution device F1F2oF1oF2R1R2 F1 Terminal block with...
Page 45 - Performing the grounding work
El E C tRICal W o RK 45 English Performing the grounding work Use a rated grounding cable by referring to the specification of the electric cable for the product. f When using the exclusive grounding terminal (When the exclusive grounding terminal is already built in the house) Exclusive grounding t...
Page 46 - Setting key function; Setting hydro controller option; Basic segment display
El E C tRICal W o RK 46 English Setting key function Setting hydro controller option Basic segment display SEG1 SEG2 SEG3 SEG4 SEG5 SEG6 Remarks Water In 0 1 - 0 5 0 Ex) -5 °C View mode display f Press and hold K3 and K4 for 3 seconds to enter the view mode. f Press K3 to change view mode in order o...
Page 49 - How to set hydro controller option
El E C tRICal W o RK 49 English How to set hydro controller option option no. option value SEG1 SEG2 SEG3 SEG4 SEG5 SEG6 operation on/off input method 0 1 - - - 0 temperature setting input method 0 2 - - - 0 1 Turn on the product. 2 Press and hold the K2 to enter the option setting. f In option sett...
Page 52 - Function description
El E C tRICal W o RK Setting key function 52 English Function description no. Description 1 Select operation On/Off input method of module/group 2 Select temperature setting input method of module/group 3 Select operation mode (Cool/Heat, Hot water/Cool storage) input method of module/group 4 Select...
Page 53 - Water law
El E C tRICal W o RK 53 English Water law This function allows water outlet temperature to change regarding damand load changes depending on outdoor temperature and room temperature. It can be set to increase energy efficiency and comfort. f Outdoor temparture standard W at er ou tle t se t t emp . ...
Page 54 - MICoM version display
El E C tRICal W o RK Setting key function 54 English MICoM version display f Press and hold K3 and K5 for 3 seconds to enter the view mode. f Press K3 to change view mode in order of the table. f Cancelling view mode display - Press and hold K3 for 3 seconds. SEG1 SEG2 SEG3 SEG4 SEG5 SEG6 Remarks Da...
Page 55 - Setting inverter controller option; Setting inverter controller option switch
El E C tRICal W o RK 55 English Setting inverter controller option Basic segment display Step Display contents Display SEG1 SEG2 SEG3 SEG4 At initial power supply Checking segment display 8 8 8 8 Setting communication (Addressing) - A d 0 1 After communication setting (usual occasion) Transmit/Recep...
Page 56 - Installing and setting the option with tact switch and functions
El E C tRICal W o RK Setting key function 56 English Installing and setting the option with tact switch and functions 1 Press and hold K2 for 3 seconds. (Only available when the operation is stopped) f The display will show the following. f If you have set the Emergency operation for compressor malf...
Page 58 - Setting key operation and checking the view mode with tact switch
El E C tRICal W o RK Setting key function 58 English Setting key operation and checking the view mode with tact switch K1 K2 K3 K4 K1 K2 K3 K4 K1 (number of press) KEY operation Display on 7-Segment 1 time Refrigerant charging in Heating mode 2 times Trial operation in Heating mode 3 times Refrigera...
Page 61 - Check points after installation; BEFoRE oPERatIon
B EFo RE o PER a tI on 61 English Check points after installation 1 Before supplying the power, use DC 500 V insulation resistance tester to measure the power terminal and the product grounding. f 3 phase 4 wires 380 ~ 415 V: R, S, T, N / Single phase: L, N f Measurement should be over 30 MΩ. 2 Befo...
Page 62 - trial operation; PRECaUtIonS BEFoRE
B EFo RE o PER a tI on Check points after installation 62 English trial operation Before the trial operation, check the following list to protect the product. PRECaUtIonS BEFoRE tRIal oPERatIon • When the outdoor temperature is low, turn on the main power 6 hours before starting the operation. - If ...
Page 65 - name of the parts; MaIntEnanCE
MaIntE nan CE 65 English Maintenance name of the parts Hydro controller control box Air side heat exchanger Water side heat exchanger Inverter controller control box Compressor Plate type heat exchanger Hydro Air vent valve Water inlet temperature sensorWater inlet pressure sensor Water inlet flange...
Page 68 - Caution regarding drainage during winter time; air venting; Water maintenance standard
MaIntE nan CE Maintenance 68 English Caution regarding drainage during winter time Drain valve f When DVM CHILLER is not operated during winter time, drain all water by opening drain valves in CHILLER shown in figure and drain valves in the pipes. Filling hole Drain hole f If the DVM CHILLER has an ...
Page 71 - Stopping during winter time; Stopping for a long time
MaIntE nan CE 71 English Stopping during winter time f Do not cut-off the power supply. - This may result in water leakage or pipe damage because pump will not operate to prevent freezing. Do not cut-off the power supply for the pump. f Stop the operation with water pipe valve opened. - Stop the ope...
Page 72 - Inspection for normal operation
MaIntE nan CE Maintenance 72 English Inspection for normal operation Item Standard number of inspection Side effects when inadequate Forced drainage Have you set the electric conductivity value properly? Once a week Corrosion, water scale or slime may occur Is electric conductivity sensor working pr...
Page 73 - Chilled water management
MaIntE nan CE 73 English Chilled water management If the chilled water storage exceeds optimal range, stop the operation until cause is taken care before re-start the operation. f Range: 50 ~ 200 % of rated flow rate 0 50 100 150 200 250 300 20 40 60 80 100 120 140 160 180 200 220 240 Pr es sur e lo...
Page 74 - Water temperature range; Freeze prevention; necessity of freeze prevention
MaIntE nan CE Maintenance 74 English Water temperature range Operate the product within the following range. For product protection, compressor operation may be limited. Classification Rated condition (inlet/ outlet) Range (water outlet) Water Brine Cooling 12/7 °C 5 °C ~ 25 °C -10 °C ~ 25 °C Heatin...
Page 75 - Freeze prevention of water pipe
MaIntE nan CE 75 English Freeze prevention of water pipe Follow the list if draining water inside the pump and water pipe is difficult. Using brine f Use ethylene glycol, propylene glycol, etc. for brine. Ethylene glycol is inexpensive, and used for general industry, and propylene glycol is used for...
Page 77 - Error display
MaIntE nan CE 77 English Error display f Segment will display error code (4 digit). HYDRO-UNIT_MODULE_CHILLER K1 K2 K3 K4 K5 K6 88-SEG DISPLAY Display Description 101 Communication error between hydro controller and inverter controller (If not received for 3 minutes from outdoor unit) 108 Error due ...
Page 80 - Error history display; air tightness test
MaIntE nan CE Maintenance 80 English Error history display f Press and hold K3 and K6 for 3 seconds to enter the view mode. f Press K3 to change view mode in order of the table. f Cancelling view mode display - Press and hold K3 for 3 seconds. SEG1 SEG2 SEG3 SEG4 SEG5 SEG6 Remarks Currently occurred...
Page 82 - Vacuuming the pipes
MaIntE nan CE Maintenance 82 English Vacuuming the pipes f Use tools for R-410A to prevent the inflow of foreign substances and resist against the internal pressure. f Use vacuum pump that allows vacuuming under -100.7 kPa (5 Torr). f Use the vacuum pump with the check valve to prevent pump oil from...
Page 83 - troubleshooting
MaIntE nan CE 83 English troubleshooting f Following situations are not product breakdown. Problem Cause When only pump operates during winter time or outdoor temperature is low Supplying power Forced pump function to prevent water freezing is available. (Refer to page 63.) When compressor is heated...
Page 85 - Periodic maintenance
MaIntE nan CE 85 English Periodic maintenance For proper operation, check and record the following list periodically. Recommended values are normal operation range. Operation time is 3650 hours/year. f Common items name Periodic maintenance Preventive maintenance Checklist Check standard Check perio...
Page 87 - Maintaining water system
MaIntE nan CE 87 English Maintaining water system f Check and clean water strainer. - If strainer is blocked, water side heat exchanger may freeze due to lack of water storage. f Check if air is not mixed in inlet/outlet of chilled/heating water pipe system. - Air may be mixed in the system even if ...
Page 88 - automatic function; Quiet function; Quick Smart Features
MaIntE nan CE 88 English CaUtIon • To change functions of the product, electrical wiring and changing setting are also mandatory. Contact the merchandise or service center for electrical wiring work and changing settings. automatic function f Cooling/Heating - The product contains function that cool...
Page 89 - Forced fan function; Pump operation output; Remote control wiring
MaIntE nan CE 89 English Forced fan function f This function operates fan of CHILLER to remove accumulated snow on the fan. f Snow accumulation prevention, which operates occasionally when outdoor temperature is below 5 °C, is basic function Use this function by module control or external contact wh...