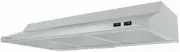
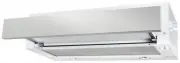
Robinhood RWC3CL9SS - Manuals

User Manual Robinhood RWC3CL9SS


Summary
Contents Congratulations! Thank you for choosing one of our appliances. Before you use the appliance, we strongly recommend that you read through the whole user manual which provides important safety instructions and description of the product and the proper use of its functions. To avoid the ever‐p...
1 Important Safety Instructions IMPORTANT : Read the assembly instruction section and safety precautions of this booklet carefully before removing the contents of this carton. 1. In certain circumstances electrical appliances may be a safety hazard. 2. This appliance is not intended for use by perso...
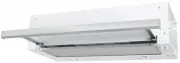
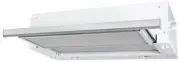
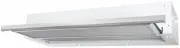
2 Appliance Details Voltage and Frequency: 220‐240V 50Hz Lamp Max: RWC3CL6SS: 2 x 3W GU10 LED RWC3CL9SS: 2 x 3W GU10 LED RWC3CL6WHT: 2 x 3W GU10 LED Rated Input Power: RWC3CL6SS: 196W RWC3CL9SS: 196W RWC3CL6WHT: 196W General Information Before installing and operating the rangehood, carefully read t...
Robinhood Range Hoods Manuals
-
 Robinhood RCA2AI6SS
User Manual
Robinhood RCA2AI6SS
User Manual
-
 Robinhood RCA2AI6WH
User Manual
Robinhood RCA2AI6WH
User Manual
-
 Robinhood RCA2AI9SS
User Manual
Robinhood RCA2AI9SS
User Manual
-
 Robinhood RCA2AI9WH
User Manual
Robinhood RCA2AI9WH
User Manual
-
 Robinhood RI61SS/WH
User Manual
Robinhood RI61SS/WH
User Manual
-
 Robinhood RIE3CL9SS
User Manual
Robinhood RIE3CL9SS
User Manual
-
 Robinhood RIV3CL9G
User Manual
Robinhood RIV3CL9G
User Manual
-
 Robinhood RLES61SS-WH
User Manual
Robinhood RLES61SS-WH
User Manual
-
 Robinhood RLES91SS-WH
User Manual
Robinhood RLES91SS-WH
User Manual
-
 Robinhood RO61SS-WH-80
User Manual
Robinhood RO61SS-WH-80
User Manual
-
 Robinhood RO91SSWH80
User Manual
Robinhood RO91SSWH80
User Manual
-
 Robinhood RPB3CL6SS/WH
User Manual
Robinhood RPB3CL6SS/WH
User Manual
-
 Robinhood RPB3CL9SS/WH
User Manual
Robinhood RPB3CL9SS/WH
User Manual
-
 Robinhood RPD3CL6BK
User Manual
Robinhood RPD3CL6BK
User Manual
-
 Robinhood RSA2CL6SS
User Manual
Robinhood RSA2CL6SS
User Manual
-
 Robinhood RSA2CL9SS
User Manual
Robinhood RSA2CL9SS
User Manual
-
 Robinhood RWB3CF12SS
User Manual
Robinhood RWB3CF12SS
User Manual
-
 Robinhood RWC3CH9SS
User Manual
Robinhood RWC3CH9SS
User Manual
-
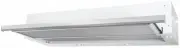
 Robinhood RWC3CL6SS
User Manual
Robinhood RWC3CL6SS
User Manual
-
 Robinhood RWC3CL6WHA
User Manual
Robinhood RWC3CL6WHA
User Manual