Robinhood RWB3CF12SS Range Hood – User Manual, read for free online in PDF format. We hope this helps you resolve any issues you may have. If you have further questions, please contact us through the contact form.
1
2
3
4
5
6
7
8
9
10
11
12
Table of Contents:
Page 2 – Overview
Page 3 – Duct mounting option
Page 4 – continued; Minimum; height from the hob surface to the underside face of the rangehood; Any installation above 750mm will compromise performance.; Vertical height from bottom of rangehood to mounting screws
Page 5 – Installation; Only if ducting; Wall stud
Page 6 – Upper chimney
Page 7 – Operating Instructions; Allow approximately 2 seconds for the canopy motor to start.; Light icon; Pictured: Capacitive touch icons
Page 8 – Cleaning and Maintenance; Switch off the canopy before cleaning or maintenance.; a build up of oil may occur if the canopy is not cleaned regularly.; Filter Maintenance; Care must be taken to avoid the lamp cover falling on to the hob top; Operating Instructions -
Page 9 – Chimney Extensions; top and bottom chimney assembly.; Cleaning and Maintenance -
Page 10 – Product Approvals and Ratings; Product rating; Important safety information; Do not flambé under the rangehood.
Loading the manual
Description:
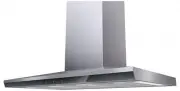
ROBINHOOD WALL CANOPY
Model Numbers:
RWA3CF9SS, RWA3CF12SS
RWB3CF9SS, RWB3CF12SS
RWB3CF9SS
RWA3CF9SS
RWA/B
Issue:H
All dimensions in mm
Models may vary slightly from images pictured
"Loading the manual" means you need to wait until the file loads and becomes available for online reading. Some manuals are very large, and the time they take to appear depends on your internet speed.
Summary
Page 2 - Overview
2 Overview Pre-Installation Thank you for purchasing a quality Robinhood rangehood. Robinhood has a high standard of quality control and every rangehood is tested and approved before it leaves the factory. Important: Please read the entire instructions before installing the rangehood, always switch ...
Page 3 - Duct mounting option
3 Pre-Installation - continued Contents of packaging: o 1 x rangehood o 1 x packet of fasteners and wall plugs o 2 x chimney pieces (upper and lower) o 2 x chimney brackets o 1 x Installation and Operating Instructions Typical equipment required: o electric drill and screwdriver o tape measure and s...
Page 4 - continued; Minimum; height from the hob surface to the underside face of the rangehood; Any installation above 750mm will compromise performance.; Vertical height from bottom of rangehood to mounting screws
4 Pre-Installation - continued Installation position A Minimum height from the hob surface to the underside face of the rangehood 600mm electric hob 650mm gas hob Notes: If the instructions for the gas hob specify a greater distance, this has to be taken into account. Any installation above 750mm wi...
Page 5 - Installation; Only if ducting; Wall stud
5 Installation Mounting to a stud is recommended. However, if fitted to other wall linings (plasterboard, concrete etc) suitable fixings will be required. Before drilling any holes check that the wall and ceiling are clear of any electrical cables, pipes etc. 1. Pre drill pilot holes in the position...
Page 6 - Upper chimney
6 Installation - continued 7. Connect and secure the ducting (use duct tape if required). 8. Insert the upper chimney piece into the lower chimney piece. Assemble the lower chimney bracket onto the lower chimney using screws provided and ensure the bracket holds both chimney pieces. Do not fully tig...
Page 7 - Operating Instructions; Allow approximately 2 seconds for the canopy motor to start.; Light icon; Pictured: Capacitive touch icons
7 Operating Instructions Control icons Notes: o Touch entire icon(s): a short beep will indicate a functional operation . o Allow approximately 2 seconds for the canopy motor to start. Power icon Touch the power icon to turn the canopy motor on or off. The motor will resume the speed to which it was...
Page 8 - Cleaning and Maintenance; Switch off the canopy before cleaning or maintenance.; a build up of oil may occur if the canopy is not cleaned regularly.; Filter Maintenance; Care must be taken to avoid the lamp cover falling on to the hob top; Operating Instructions -
8 Filter cleaning reminder mode - continued When filters need cleaning, warning beeps will sound (short sequence of beeps for 2 seconds every 2 minutes). Touching any icon will stop this warning and reset the count down. Note: o If the power to the canopy is disconnected the filter cleaning memory i...
Page 9 - Chimney Extensions; top and bottom chimney assembly.; Cleaning and Maintenance -
9 Parts and Accessories list o Charcoal filter pack of 3 (900 models) 2514 o Charcoal filter pack of 3 (1200 models) 2515 o Chimney extension 1550mm for 3048mm 10 ft ceiling 1761 o Chimney extension 2150mm for 3658mm 12 ft ceiling 1762 o Fluorescent tube 12V 24W 114287 For any other problems please ...
Page 10 - Product Approvals and Ratings; Product rating; Important safety information; Do not flambé under the rangehood.
10 Product Approvals and Ratings Product approval number ESV130399/01 Product rating 378W Max at 240V 50Hz Electric approval AS/NZS 60335.2.31:2004 EMC AS/NZS CISPR14:2001 Performance tested IEC61591 Important safety information This appliance is not intended for use by persons (including children) ...