QNap TS-351-2G - Manuals
QNap TS-351-2G Network Storage Unit – User Manual in PDF format online.
Manuals:
User Manual QNap TS-351-2G


Summary
Contents 1. Preface About This Guide.......................................................................................................................................... 3Audience.......................................................................................................................
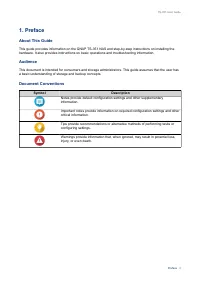
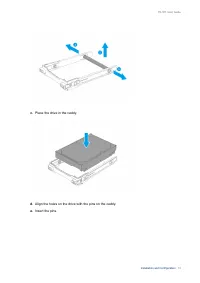
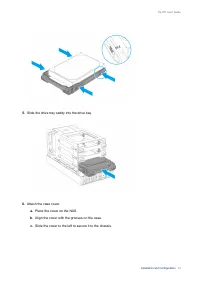
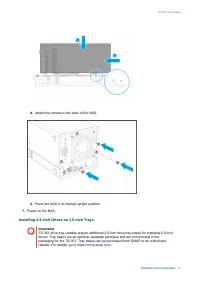
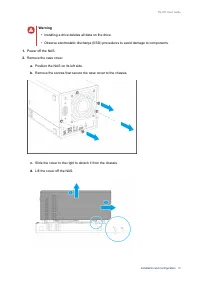
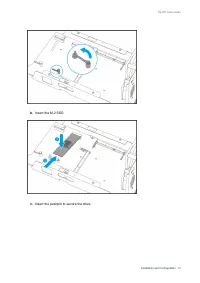
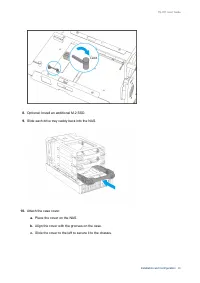
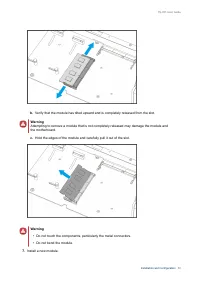
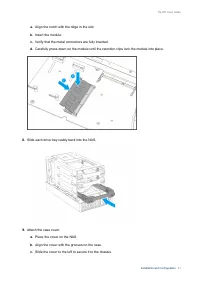
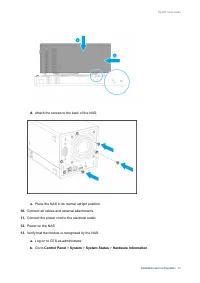
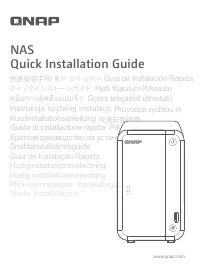
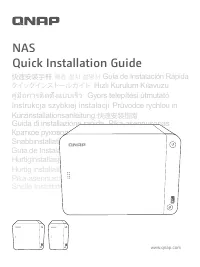
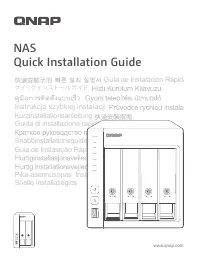
1. Preface About This Guide This guide provides information on the QNAP TS-351 NAS and step-by-step instructions on installing thehardware. It also provides instructions on basic operations and troubleshooting information. Audience This document is intended for consumers and storage administrators. ...
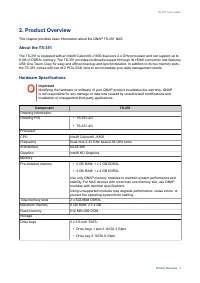
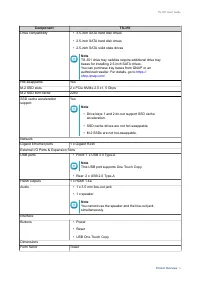
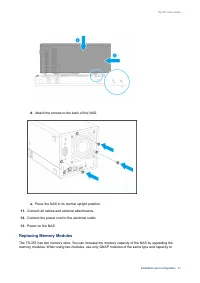
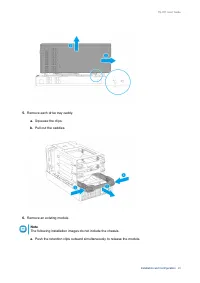
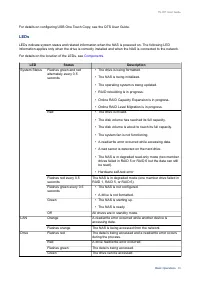
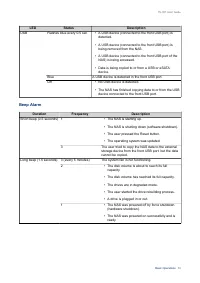
2. Product Overview This chapter provides basic information about the QNAP TS-351 NAS. About the TS-351 The TS-351 is equipped with an Intel® Celeron® J1800 dual-core 2.4 GHz processor and can support up to8 GB of DDR3L memory. The TS-351 provides multimedia support through its HDMI connection and f...
QNap Network Storage Units Manuals
-
 QNap HS-264-8G (2.5GbE, HDMI, Gen2)
User Manual
QNap HS-264-8G (2.5GbE, HDMI, Gen2)
User Manual
-
 QNap TS-231K
User Manual
QNap TS-231K
User Manual
-
 QNap TS-251D-2G
User Manual
QNap TS-251D-2G
User Manual
-
 QNap TS-253D-4G
User Manual
QNap TS-253D-4G
User Manual
-
 QNap TS-328
User Manual
QNap TS-328
User Manual
-
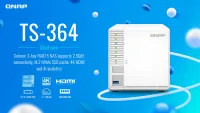 QNap TS-364-4G (2.5GbE, HDMI)
User Manual
QNap TS-364-4G (2.5GbE, HDMI)
User Manual
-
 QNap TS-431K
User Manual
QNap TS-431K
User Manual
-
 QNap TS-431P3-2G
User Manual
QNap TS-431P3-2G
User Manual
-
QNap TS-453D-4G
User Manual
-
 QNap TS-462-2G (2.5GbE, HDMI, Gen2)
User Manual
QNap TS-462-2G (2.5GbE, HDMI, Gen2)
User Manual
-
QNap TS-462-4G
User Manual
-
 QNap TS-473-4G
User Manual
QNap TS-473-4G
User Manual
-
QNap TS-653D-4G
User Manual
-
QNap TS-673-4G
User Manual
-
 QNap TS-864eU-4G
User Manual
QNap TS-864eU-4G
User Manual
-
 QNap TS-873AeU-4G
User Manual
QNap TS-873AeU-4G
User Manual