Prolux x8elite - Manuals
User Manual Prolux x8elite


Summary
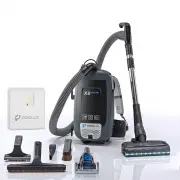
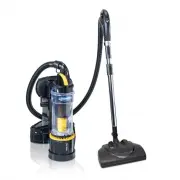
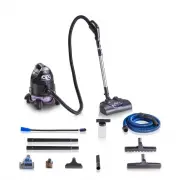
Prolux X8 Backpack Vacuum For your safety please read the owner’s manual in its entirety before use. Congratulations on purchasing your very own Prolux X8 Lite Backpack Vacuum Cleaner. This high-end kit is designed to cut cleaning time in half without breaking the bank. Keep your floors clean, and pr...
Table of Contents Quick Assembly 4 Specifications 5 Warranty 6 Safety Precautions 7-9 Description of Parts 10-11 Unpacking and Assembly Assembly 12-14 Operation Using the Attachments 15-16 Maintenance Replacing the Dust Filter Bag 17 Replacing the Cloth Filter Bag and Filters 18-19 Brushroll Mainten...
Quick Assembly To view some videos on unboxing, assembling and using your new vacuum you can find them at the link below, or scan the QR code to go to our YouTube page to see all of our videos: https://proluxcleaners.com/pages/prolux-x8-how-to-video-s 4
Prolux Vacuums Manuals
-
 Prolux 19pl10qt
User Manual
Prolux 19pl10qt
User Manual
-
 Prolux 19prolux2.0a
User Manual
Prolux 19prolux2.0a
User Manual
-
 Prolux 19prolux2.0b
User Manual
Prolux 19prolux2.0b
User Manual
-
 Prolux 19prolux2.0c
User Manual
Prolux 19prolux2.0c
User Manual
-
 Prolux 19prolux2.0d
User Manual
Prolux 19prolux2.0d
User Manual
-
 Prolux 19prolux2.0f
User Manual
Prolux 19prolux2.0f
User Manual
-
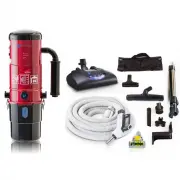
 Prolux Blackcen
User Manual
Prolux Blackcen
User Manual
-
 Prolux blackcen3
User Manual
Prolux blackcen3
User Manual
-
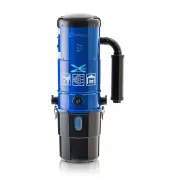 Prolux bluecen
User Manual
Prolux bluecen
User Manual
-
 Prolux bluecen3
User Manual
Prolux bluecen3
User Manual
-
 Prolux ctx1
User Manual
Prolux ctx1
User Manual
-
 Prolux ctx250
User Manual
Prolux ctx250
User Manual
-
 Prolux CV12000
User Manual
Prolux CV12000
User Manual
-
 Prolux pl10qtblue
User Manual
Prolux pl10qtblue
User Manual
-
 Prolux pl35-280
User Manual
Prolux pl35-280
User Manual
-
 Prolux Prolux_6000
User Manual
Prolux Prolux_6000
User Manual
-
 Prolux Prolux_7000
User Manual
Prolux Prolux_7000
User Manual
-
 Prolux prolux_8000
User Manual
Prolux prolux_8000
User Manual
-
 Prolux prolux_9000
User Manual
Prolux prolux_9000
User Manual
-
 Prolux prolux_garage
User Manual
Prolux prolux_garage
User Manual