Prolux Prolux_7000 - Manuals
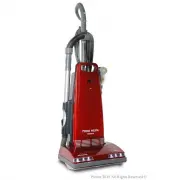
User Manual Prolux Prolux_7000


Summary
2 Contents Safety Instructions ---------------------------------------------------------------- 2-5 Included Parts -------------------------------------------------------------------- 6-7 Assembly Instructions ------------------------------------------------------------ 8-10 Operating Instructions -...
3 and keep this booklet as a permanent record of your purchase. Model Number: _______________________________________________________ Serial Number: _______________________________________________________ Date Purchased: ______________________________________________________ IMPORTANT SAFETY INSTRUC...
5 WARNING Household Models 6000 & 7000 NOTE: As a safety feature and to reduce risk of damage, injury or electric shock, this vacuum cleaner is equipped with a polarized alternating current line plug (one blade wider than the other). This plug will fit in a polarized outlet only one way. If the ...
Prolux Vacuums Manuals
-
 Prolux 19pl10qt
User Manual
Prolux 19pl10qt
User Manual
-
 Prolux 19prolux2.0a
User Manual
Prolux 19prolux2.0a
User Manual
-
 Prolux 19prolux2.0b
User Manual
Prolux 19prolux2.0b
User Manual
-
 Prolux 19prolux2.0c
User Manual
Prolux 19prolux2.0c
User Manual
-
 Prolux 19prolux2.0d
User Manual
Prolux 19prolux2.0d
User Manual
-
 Prolux 19prolux2.0f
User Manual
Prolux 19prolux2.0f
User Manual
-
 Prolux Blackcen
User Manual
Prolux Blackcen
User Manual
-
 Prolux blackcen3
User Manual
Prolux blackcen3
User Manual
-
 Prolux bluecen
User Manual
Prolux bluecen
User Manual
-
 Prolux bluecen3
User Manual
Prolux bluecen3
User Manual
-
 Prolux ctx1
User Manual
Prolux ctx1
User Manual
-
 Prolux ctx250
User Manual
Prolux ctx250
User Manual
-
 Prolux CV12000
User Manual
Prolux CV12000
User Manual
-
 Prolux pl10qtblue
User Manual
Prolux pl10qtblue
User Manual
-
 Prolux pl35-280
User Manual
Prolux pl35-280
User Manual
-
 Prolux Prolux_6000
User Manual
Prolux Prolux_6000
User Manual
-
 Prolux prolux_8000
User Manual
Prolux prolux_8000
User Manual
-
 Prolux prolux_9000
User Manual
Prolux prolux_9000
User Manual
-
 Prolux prolux_garage
User Manual
Prolux prolux_garage
User Manual
-
 Prolux Prolux_Terra_B
User Manual
Prolux Prolux_Terra_B
User Manual