Page 2 - Warranty and Service
2 1.0 Warranty and Service Powermatic warrants every product it sells against manufacturers’ defects. If one of our tools needs service or repair, please contact Technical Service by calling 1-800-274-6846, 8AM to 5PM CST, Monday through Friday. Warranty Period The general warranty lasts for the tim...
Page 3 - Table of contents
3 2.0 Table of contents Section Page 1.0 Warranty and Service ..................................................................................................................................... 2 2.0 Table of contents ...................................................................................
Page 4 - Safety warnings
4 3.0 Safety warnings As with all machines, there is a certain amount of hazard involved with the use of this sander. Use the machine with the respect and caution demanded where safety precautions are concerned. When normal safety precautions are overlooked or ignored, personal injury to the operato...
Page 5 - About this manual
5 RED TAGGED to show it should not be used until the maintenance is complete. 14. Maintain tools in top condition. Keep all tools sharp and clean for the best and safest performance, and follow instructions for lubricating and changing accessories. Never stand on the machine. Serious injury could oc...
Page 6 - Specifications
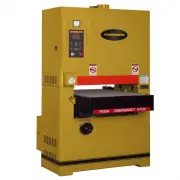
6 5.0 Specifications Stock number .........................................................1791250 ............................................................ 1791251 Model number ........................................................1632-1 ...........................................................
Page 7 - Setup and assembly; Shipping contents; Installation; Electrical connections; Voltage conversion
7 6.0 Setup and assembly Remove the sander from its crate and inspect for damage to ensure all parts are intact. Any damage should be reported to your distributor and shipping agent immediately upon discovery. Before proceeding with installation, read your instruction manual thoroughly. Familiarize ...
Page 8 - Adjustments
8 An undersized cord will cause a drop in line voltage resulting in loss of power and overheating. Table 1 shows correct size to use depending on cord length and nameplate ampere rating. If in doubt, use the next heavier gauge. The smaller the gauge number, the heavier the cord. 8.0 Adjustments Disc...
Page 9 - Feed speed adjustment; Operation; Controls
9 Figure 5 8.5 Feed speed adjustment The Model 1632 has two speeds that feed the workpiece at 15 feet per minute (FPM) finished surface sanding, and 32.5 FPM for faster, lighter sanding. To change the feed rate: 1. Disconnect machine from power source. 2. Remove cap screw that holds the sprocket cov...
Page 10 - Maintenance
10 9. Refer to the scale for the desired setting. The recommended depth of sanding is .0164" or two revolutions of the handwheel. The table can be locked in place by the lever at the base of the column. 6. Turn on the power to the machine. 7. Start the sanding belt. 8. Start the feeding conveyor...
Page 11 - Troubleshooting the 1632 Sander; Replacement Parts
11 11.0 Troubleshooting the 1632 Sander Symptom Possible Cause Correction Motor will not start Low voltage. Check power line for proper voltage. Open circuit in motor or loose connection. Inspect all lead connections on motor for loose or open connections. Motor will not start: fuses or circuit brea...
Page 13 - Electrical Control and Upper Adjustment Roller – Exploded View
13 12.2.1 Electrical Control and Upper Adjustment Roller – Exploded View
Page 14 - Electrical Control and Upper Adjustment Roller – Parts List
14 12.2.2 Electrical Control and Upper Adjustment Roller – Parts List Index No Part No Description Size Qty 1 ................ 6293203 .................... Upper Door (L) ......................................................... ...................................... 1 2 ................ 6293204 ......
Page 15 - Sanding Drum Assembly – Exploded View
Page 16 - Sanding Drum Assembly – Parts List
16 12.3.2 Sanding Drum Assembly – Parts List Index No Part No Description Size Qty 1 ................ 6293240 .................... Ring ......................................................................... ...................................... 2 2 ................ 6293241 .................... B...
Page 18 - Base and Table Adjustment Assembly – Parts List
18 12.4.1 Base and Table Adjustment Assembly – Parts List
Page 21 - Conveyor Belt and Table – Exploded View
Page 22 - Reduction Motor – Exploded View
Page 23 - Conveyor Belt and Table Reduction Motor – Parts List
23 12.5.3 Conveyor Belt and Table; Reduction Motor – Parts List Index No Part No Description Size Qty 1 ................ 6293351 .................... Hex Socket Cap Screw ............................................ 1/4" x 1/4"...................... 6 2 ................ 6293352 ................
Page 25 - Electrical Connections – 1632 Sander
25 13.0 Electrical Connections – 1632 Sander 13.1 460V – 3 Phase