Panasonic TH-43GX600A - Manuals
User Manual Panasonic TH-43GX600A


Summary
English 2 Contents Be Sure to Read Important Notice··················································· 3 Safety Precautions ··············································· 4 Accessories ························································ 6 Installing the TV ·····································...
English 3 Important Notice Internet apps are provided by their respective service providers, and may be changed, interrupted, or discontinued at any time. Panasonic assumes no responsibility and makes no warranty for the availability or the continuity of the services. Panasonic does not guarantee op...
English 4 ● Do not expose the TV to rain or excessive moisture. This TV must not be exposed to dripping or splashing water and objects filled with liquid, such as vases, must not be placed on top of or above the TV. ● Do not insert foreign objects into the TV through the air vents. ● If the TV is us...
Panasonic TVs Manuals
-
 Panasonic 32J330E
User Manual
Panasonic 32J330E
User Manual
-
 Panasonic 55LZ1000E
User Manual
Panasonic 55LZ1000E
User Manual
-
 Panasonic TH-32D400A
User Manual
Panasonic TH-32D400A
User Manual
-
 Panasonic TH-32E400A
User Manual
Panasonic TH-32E400A
User Manual
-
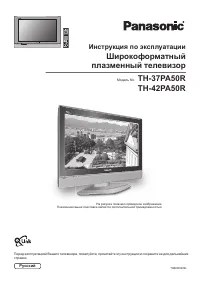 Panasonic TH-37PA50R_TH-42PA50R
User Manual
Panasonic TH-37PA50R_TH-42PA50R
User Manual
-
 Panasonic TH-40C400A
User Manual
Panasonic TH-40C400A
User Manual
-
 Panasonic TH-40D400A
User Manual
Panasonic TH-40D400A
User Manual
-
 Panasonic TH-40DS610U
User Manual
Panasonic TH-40DS610U
User Manual
-
 Panasonic TH-40E400A
User Manual
Panasonic TH-40E400A
User Manual
-
 Panasonic TH-42PWD4
Manual
Panasonic TH-42PWD4
Manual
-
 Panasonic TH-43EX600A
User Manual
Panasonic TH-43EX600A
User Manual
-
 Panasonic TH-49D400A
User Manual
Panasonic TH-49D400A
User Manual
-
 Panasonic TH-49DX600U
User Manual
Panasonic TH-49DX600U
User Manual
-
 Panasonic TH-49EX600A
User Manual
Panasonic TH-49EX600A
User Manual
-
 Panasonic TH-49GX600A
User Manual
Panasonic TH-49GX600A
User Manual
-
 Panasonic TH-50DS610U
User Manual
Panasonic TH-50DS610U
User Manual
-
 Panasonic TH-50DX700A
User Manual
Panasonic TH-50DX700A
User Manual
-
 Panasonic TH-55CS610A
User Manual
Panasonic TH-55CS610A
User Manual
-
 Panasonic TH-55CS650A
User Manual
Panasonic TH-55CS650A
User Manual
-
 Panasonic TH-55DS610U
User Manual
Panasonic TH-55DS610U
User Manual