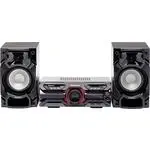
Panasonic SC-PM24 - Manuals
Panasonic SC-PM24 Sound System – Manual in PDF format online.
Manuals:
Manual Panasonic SC-PM24


Summary
RQTX0262 2 These operating instructions are applicable to the following system. System SC-PM5 SC-PM24 Main unit SA-PM5 SA-PM24 Speakers SB-PM5 SB-PM24 Back of product Inside of product ■ Sales and Support Information (For the United Kingdom and Republic of Ireland) Customer Care Centre• For customer...
RQTX0262 3 For your safety, please read the following text carefully. This appliance is supplied with a moulded three pin mains plug for your safety and convenience.A 5-ampere fuse is fi tted in this plug.Should the fuse need to be replaced please ensure that the replacement fuse has a rating of 5-a...
RQTX0262 4 Safety precautions Placement Placement Set the unit up on an even surface away from direct sunlight, high temperatures, high humidity, and excessive vibration. These conditions can damage the cabinet and other components, thereby shortening the unit’s service life. Place it at least 15 cm...
Panasonic Sound Systems Manuals
-
 Panasonic SC-AK240
Manual
Panasonic SC-AK240
Manual
-
 Panasonic SC-AK340
Manual
Panasonic SC-AK340
Manual
-
 Panasonic SC-AK640
Manual
Panasonic SC-AK640
Manual
-
 Panasonic SC-AKX220GNK
User Manual
Panasonic SC-AKX220GNK
User Manual
-
 Panasonic SC-AKX320E-K
User Manual
Panasonic SC-AKX320E-K
User Manual
-
 Panasonic SC-AKX320GSK
User Manual
Panasonic SC-AKX320GSK
User Manual
-
 Panasonic SC-BMAX3GN-K
User Manual
Panasonic SC-BMAX3GN-K
User Manual
-
 Panasonic SC-CMAX5GS-K
User Manual
Panasonic SC-CMAX5GS-K
User Manual
-
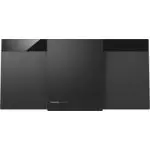
 Panasonic SC-HC19
User Manual
Panasonic SC-HC19
User Manual
-
 Panasonic SC-HC295GN-K
User Manual
Panasonic SC-HC295GN-K
User Manual
-
 Panasonic SC-HC29GN-K
User Manual
Panasonic SC-HC29GN-K
User Manual
-
 Panasonic SC-HC300EG-K
User Manual
Panasonic SC-HC300EG-K
User Manual
-
 Panasonic SC-HC300EG-W
User Manual
Panasonic SC-HC300EG-W
User Manual
-
 Panasonic SC-HC302GN-K
User Manual
Panasonic SC-HC302GN-K
User Manual
-
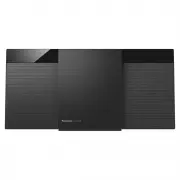
 Panasonic SC-HC39
User Manual
Panasonic SC-HC39
User Manual
-
Panasonic SC-HC39
Manual
-
 Panasonic SC-HC397GN-S
User Manual
Panasonic SC-HC397GN-S
User Manual
-
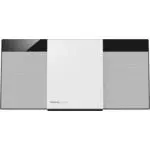
 Panasonic SC-HC40
Manual
Panasonic SC-HC40
Manual
-
 Panasonic SC-MAX770GSK
User Manual
Panasonic SC-MAX770GSK
User Manual
-
 Panasonic SC-MAX9000GN
User Manual
Panasonic SC-MAX9000GN
User Manual