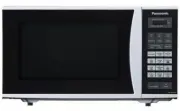
Page 3 - Table of Contents
– 1 – Table of Contents Before Operation Safety Instructions .......................................................................................................................... 2Installation and General Instructions ................................................................................
Page 4 - Safety Instructions; READ CAREFULLY AND KEEP FOR FUTURE REFERENCE; Important Instructions
– 2 – Safety Instructions READ CAREFULLY AND KEEP FOR FUTURE REFERENCE Precautions to be taken when using Microwave Ovens for Heating foodstuffs INSPECTION FOR DAMAGE. A microwave oven should only be used if an inspection con fi rms all of the following conditions:1. The door fi ts squarely and secu...
Page 5 - Installation and General Instructions; Earthing Instructions; WARNING; General Use
– 3 – Installation and General Instructions Earthing Instructions This microwave oven must be earthed. In the event of an electrical short circuit, earthing reduces the risk of electric shock by providing an escape wire for the electric current. This microwave oven is equipped with a cord having an ...
Page 6 - Placement of Oven; Building-in your oven; Circuits
– 4 – Placement of Oven 1. The oven must be placed on a fl at, stable surface. For correct operation, the oven must have suf fi cient air fl ow. Allow 15 cm of space on the top of the oven, 10 cm at the back, and 5 cm on both sides. If one side of the oven is placed fl ush to wall, the other side or...
Page 7 - Re; Paper Products and Freezer Wrap
– 5 – Microwaves and How They Work Cookware and Utensils Guide Microwaves are a form of high frequency radio waves similar to those used by a radio, including AM, FM and CB. They are similar to a television where the radio waves are converted to a picture on the screen. However, microwaves are much ...
Page 8 - Cookware and Utensils Guide; Plastics; Jars and Bottles; Straw, Wicker and Wood
– 6 – Cookware and Utensils Guide (continued) Plastics Plastic dishes, cups and some freezer containers should be used with care in a microwave oven. Choose plastic containers carefully, as some plastic containers may become soft, melt and may scorch. The majority of plastic dishes, even those desig...
Page 9 - Feature Diagram
– 7 – Feature Diagram Glass Tray 1. Do not operate the oven without the Roller Ring and Glass Tray in place.2. Only use the Glass Tray speci fi cally designed for this oven. Do not substitute another Glass Tray. 3. If Glass Tray is hot, allow to cool before cleaning or placing in water.4. Do not coo...
Page 10 - Control Panel; Beep Sound
– 8 – Control Panel Beep Sound When pad is pressed correctly, a beep sound will be heard. If a pad is pressed and no beep is heard, the unit does not or cannot accept the instruction. The oven will beep twice between programmed stages. At the end of any complete programme, the oven will beep fi ve t...
Page 11 - Plug in; Set Time; Press
– 9 – Let’s Start To Use Your Oven! Display Window 1 Plug in Plug into a properly earthed electrical outlet." "appears in the Display Window. (This will immediately cease when any pad is pressed.) 2 Open Door Open the door and place container with food in a dish on Glass Tray in the oven. Th...
Page 13 - To Use Micro Power and Time; Select Power Level
– 11 – To Use Micro Power and Time 1 Select Power Level Press Micro Power Pad until your desired power level appears in the Display Window. (see chart below) Note: When selecting P10 on the fi rst stage, you can start from step 2. 2 Set Cooking Time Enter cooking time using Time Pads. Maximum Length...
Page 14 - To Defrost; To Defrost using Turbo Defrost; To Defrost by Micro Power and Time Setting
– 12 – To Defrost To Defrost using Turbo Defrost This feature allows you to defrost meat, poultry and seafood automatically by just setting the weight of the food. 1 Press until the desired weight appears in the Display Window.The shape and size of the food will determine the maximum weight the oven...
Page 15 - Defrosting Tips and Techniques; Preparation for Freezing:; FOOD
– 13 – Defrosting Tips and Techniques Preparation for Freezing: 1. Heavy-duty plastic wraps, bags and freezer wrap are suitable.2. Freeze meats, poultry and fi sh in packages with only 1 or 2 layers of food. To aid in separating layers, place two pieces of wax paper between them. 3. REMOVE ALL AIR a...
Page 16 - To Use Add Time; After cooking, press; Add Cooking Time
– 14 – To Use Add Time This feature allows you to add cooking time at the end of previons cooking. 1 After cooking, press once To select the Add Time feature 2 Add Cooking Time Enter cooking time using Time Pads. Maximum cooking time: High power: up to 30 minutes, other powers: up to 99 minutes and ...
Page 17 - To Use Beverage
– 15 – To Use Beverage This feature allows you to reheat coffee/milk without setting power and time. 1 Press Pad Press once to reheat coffee, “1” will display in the dispay window.Press twice to reheat milk, “2” will display in the dispay window. 2 Select the Weight of beverage by pressing the Pads ...
Page 18 - To Use Inverter Melt & Soften
– 16 – To Use Inverter Melt & Soften This feature allows you to melt & soften food at the touch of a pad. There is no need to select the power level or cooking time as the microwave does this for you. 1 Press Pad until the desired food number appears in the display window. (see below chart) ...
Page 19 - To Use Sensor Cook; Press Desired Food Category Pad
– 17 – To Use Sensor Cook Sensor Cook allows you to cook foods without selecting times and power levels. The sensor detects the heat and humidity generated by the food and cooks your food automatically. Place food into an appropriate sized dish for the volume of food you are cooking. Cover securely ...
Page 20 - Vegetables; Legumes
– 18 – For best results, follow these recommendations: Vegetables Menu Number Menu Recommended Weight Recommended Containers 7 Vegetables 125 g - 500 g microwave safe dish with plastic wrap 8 Frozen Vegetables 125 g - 1.0 kg microwave safe dish with plastic wrap 7. Vegetables It is suitable for cook...
Page 22 - Rice
– 20 – Rice Menu Number Menu Recommended Weight Recommended Containers 13 Rice 1 cup - 2½ cups microwave safe dish with plastic wrap 14 Curries 250 g - 750 g (meat weight only) microwave safe dish with plastic wrap 15 Quinoa ¼ cup - 1 cup microwave safe dish with plastic wrap 13. Rice It is suitable...
Page 23 - Pasta
– 21 – Pasta Menu Number Menu Weight Recommended Containers 16 Fresh Pasta 125 g - 625 g microwave safe dish with plastic wrap 17 Dried Pasta 125 g - 500 g microwave safe dish with plastic wrap 16. Fresh Pasta It is suitable for cooking fresh pasta such as fettuccine, tagliatelle, tortellini, raviol...
Page 24 - Desserts
– 22 – Desserts Menu Number Menu Weight Recommended Containers 18 Desserts 1 Serv. - 4 Serv. microwave safe dish 18. Desserts It is suitable for cooking individual steamed sponge puddings. Use packet mixes available from supermarkets or individual recipes. Not suitable for heavy fruit type puddings....
Page 25 - To Use Sensor Reheat
– 23 – To Use Sensor Reheat For best results on Sensor Reheat, follow these recommendations: 1. Reheating by Sensor is suitable for pre-cooked foods. There is a setting for frozen and refrigerator temperature or room temperature foods. It is suitable for casseroles, plated meals, soup, stews, pasta ...
Page 27 - To Use Timer; To Use as a Kitchen Timer; To Set Standing Time; To Set Delay Start
– 25 – To Use Timer This feature allows you to program standing after cooking is completed and to program the oven as a minute or a second timer or program delay start. To Use as a Kitchen Timer Press once. Set desired amount of time. (up to 99 minutes and 50 seconds) Press Start. Time will count do...
Page 28 - Before Requesting Service; THESE THINGS ARE NORMAL; PROBLEM
– 26 – Before Requesting Service THESE THINGS ARE NORMAL The oven causes interference with my TV. Some radio, TV, Wi-Fi, cordless telephone, baby monitor, blue tooth or other wireless equipment interference might occur when you cook with the microwave oven. This interference is similar to the interf...
Page 29 - Care of your Microwave Oven; Technical Speci
– 27 – Care of your Microwave Oven Note: 1. The oven should be cleaned regularly and any food deposits removed. Failure to maintain the oven in a clean condition could lead to deterioration of the surface that could adversely affect the life of the appliance and possibly result in a harzardous situa...
Page 30 - Panasonic Warranty
– 28 – Panasonic Warranty (For Australia) F0003BQ00QP_OI_02_150722.indd 28 F0003BQ00QP_OI_02_150722.indd 28 2015/7/22 17:52:00 2015/7/22 17:52:00
Page 32 - Quick Guide to Operation
– 30 – Quick Guide to Operation Feature How to Operate To Set Clock ( page 10) Press twice Press once Set time of day. (Max 12:59) To Set/Cancel Child Safety Lock ( page 10) To set 3 times. Display or To cancel 3 times. Display To Cook/Reheat/ Defrost by Micro Power and Time Setting ( page 11) Selec...
Page 37 - Reheat
– 35 – Reheat Converting Recipes from Other Sources When the recipe is written with a wattage different than your oven, adjust the cooking time by approximately 10% per 100 watts, e.g. 6 minutes would be adjusted by 36 seconds. Alternately, adjust the power level by one level. If your wattage is hig...
Page 40 - Soups and Snacks
– 38 – Soups and Snacks P UMPKIN S OUP Serves: 4 Ingredients: 1 kg diced pumpkin 1 onion, diced 2 cups chicken stock 1 teaspoon curry powder pepper Method: Place pumpkin, onion and curry powder in a 2-litre casserole dish. Cover and cook on P10 for 12 minutes. Add chicken stock and pepper. Cook on P...
Page 44 - Poultry and Eggs
– 42 – Poultry and Eggs Season as desired, but salt after cooking. Browning sauce mixed with equal parts of butter will enhance the appearance.Poultry must be unstuffed. Tie legs together with cotton string. Place on a microwave rack set in a rectangular dish. Place poultry breast-side down: turn ov...
Page 48 - Meat
– 46 – Meat Cooking Tender Cuts of Meat using Micro Power For best results, select roasts that are uniform in shape.Place meat on a microwave rack in a suitable dish. Beef rib roast should be placed cut-side down. Other bone-in roasts should be placed fat-side down. Boneless roasts should be placed ...
Page 52 - egetables and Legumes
– 50 – V egetables and Legumes Cooking Fresh Vegetables By Micro Power Place vegetables in a casserole dish. Add 2 to 3 tablespoons of water per 500 g of vegetables. Add salt to water or add after cooking. Do not place salt directly on vegetables. Cover dish with glass lid or plastic wrap.Cook on P1...
Page 58 - Rice, Pasta and Noodles
– 56 – Rice, Pasta and Noodles Cooking Rice by Micro power Follow directions in chart for recommended dish size, amounts of water and cooking time. Add rice to water. Add salt and butter according to package directions. Cook on P10 for time recommended in chart. Allow to stand, covered, before servi...
Page 62 - Cakes, Desserts and Slices
– 60 – Cakes, Desserts and Slices Cakes, Desserts and slices can successfully be cooked in the microwave oven if a few simple rules are followed see individual recipes for instructions. C OOKING C AKES BY M ICRO P OWER • The texture of cakes cooked in the microwave oven is not the same as cakes cook...
Page 67 - Sauces and Extras
– 65 – Sauces and Extras B ASIC W HITE S AUCE Makes: 1 cup Ingredients: 2 tablespoons butter 2 tablespoons fl our salt and white pepper 1¼ cups milk Method: Place butter in a 4-cup jug. Cook on P10 for 30 to 40 seconds. Stir in fl our, salt and pepper. Gradually add milk, stirring until smooth.Cook ...