Page 3 - Table of Contents; Before Operation; Maintenance
– 3 – Table of Contents Before Operation Important Safety Instructions .......................................................................................................6-7 Installation and General Instructions .......................................................................................
Page 4 - Quick Guide to Operation
– 4 – Quick Guide to Operation Feature How to Operate To Set Clock ( page 14) Press twice Press once Set time of day To Set / Cancel Child Safety Lock ( page 13) To set: Press 3 times. To cancel: Press 3 times. To Cook/Reheat/ Defrost by Micro Power and Time Setting ( page 15) Select power. set the ...
Page 6 - Important Safety Instructions; READ CAREFULLY AND KEEP FOR FUTURE REFERENCE; Precautions To Be Taken When; Important Instructions; Circuits
– 6 – Important Safety Instructions READ CAREFULLY AND KEEP FOR FUTURE REFERENCE Precautions To Be Taken When Using Microwave Ovens For Heating Foodstuffs INSPECTION FOR DAMAGE: A microwave oven should only be used if an inspection con fi rms all of the following conditions: 1. The door fi ts square...
Page 7 - Earthing Instructions; WARNING; General Use
– 7 – Important Safety Instructions (continued) Earthing Instructions This microwave oven must be earthed. In the event of an electrical short circuit, earthing reduces the risk of electric shock by providing an escape wire for the electric current. This microwave oven is equipped with a cord having...
Page 8 - Installation and General Instructions; Placement of Oven; Food
– 8 – Installation and General Instructions (continued) Placement of Oven 1. The oven must be placed on a fl at, stable surface. For correct operation, the oven must have suf fi cient air fl ow. Allow more than 15 cm of space on the top of the oven, 10 cm at the back, and 5 cm on both sides. If one ...
Page 9 - Re; How to Test a Container for Safe; Paper Products and Freezer Wrap
– 9 – Microwaves and How They Work Cookware and Utensils Guide Microwaves are a form of high frequency radio waves similar to those used by a radio, including AM, FM and CB. They are similar to a television where the radio waves are converted to a picture on the screen. However, microwaves are much ...
Page 10 - Cookware and Utensils Guide; Plastics; Jars and Bottles; Straw, Wicker and Wood
– 10 – Cookware and Utensils Guide (continued) Plastics Plastic dishes, cups and some freezer containers should be used with care in a microwave oven. Choose plastic containers carefully, as some plastic containers may become soft, melt and may scorch. The majority of plastic dishes, even those desi...
Page 11 - Feature Diagram; Note
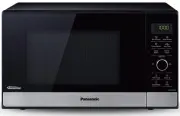
– 11 – Feature Diagram Oven Window Door Safety Lock System Door Release Button Push to open the door. Opening the door during cooking will stop the cooking process without cancelling the program. Cook resumes as soon as the door is closed and Start Button is pressed. It is quite safe to open t...
Page 12 - Control Panel; CONTROL PANEL; Beep Sound
– 12 – Control Panel CONTROL PANEL 1. Display Window 2. Mico Power Button (Pg.13, 15,16) 3. Auto Reheat Button (Pg.22) 4. Turbo Defrost Button (Pg.16) 5. Auto Cook Button (Pg.22) 6. Keep Warm Button (Pg.25) 7. Melt & Soften Button (Pg.25) 8. Dial (Pg.14) Enter time or weight of food by turning t...
Page 13 - To Use Child Safety Lock
– 13 – To Use Child Safety Lock To set: This feature allows you to prevent operation of the oven by a young child; however, the door will open. This feature can be set when colon or time of day is displayed. To set or cancel child safety lock, Start Button or Stop/Reset Button must be pressed 3 time...
Page 14 - Dial Features; To Set Clock
– 14 – Dial Features TIME CHOICE Push then rotate the dial. Rotate the dial clockwise to increase the cooking time and rotate the dial counter-clockwise to decrease the cooking time. Note: This dial can be used during manual cooking. This feature allows you to increase or decrease cooking time in 1 ...
Page 15 - Micro Power by Time Setting
– 15 – 1 Press to Select Micro Power Level. Press Micro Power button until your desired power level appears in the Display Window. (see chart below) Press Power Level Example Of Use once 1000 W (HIGH) Boil water. Reheat. Cook vegetables, rice, pasta and noodles. twice 800 W (MED-HIGH) Cook poultry, ...
Page 16 - To Defrost on Micro Power by Time Setting; To Defrost Using Turbo Defrost
– 16 – 1 Press 5 times for 300W. 2 Set Cooking Time. Set defrosting time by turning the dial. (up to 1 hour and 30 minutes) 3 Press . Press Start . Defrosting time appears in the display window and begins to count down. To Defrost on Micro Power by Time Setting If you want to decide the defrost time...
Page 18 - To Cook Using the Quick 30 Feature; Using the Add Time Feature
– 18 – To Cook Using the Quick 30 Feature 1. Press Quick 30 to set the desired cooking time (up to 5 minutes). Each press is 30 seconds. Time appears in the display. Power level is pre-set at 1000 W. 2. Press Start . The cooking will start and the time in the display will count down. At the end of c...
Page 19 - To Cook/Reheat Food Using; Auto Menus
– 19 – To Cook/Reheat Food Using Auto Menus This feature allows you to cook foods without selecting times and Power Level. Only set desired menu number and Serving/Weight, the oven will cook your food automatically. 1 Select Desired Menu Number. Press to select the desired button until the desired m...
Page 22 - Melt & Soften Feature; Keep Warm Feature
– 22 – Melt & Soften Feature 2. Select the Weight of food by turning the dial. (see chart below) 1. Press Melt & Soften button until the desired menu number appear in the display window. (see chart below) This feature allows you to melt/soften food at the touch of a button. There is no need ...
Page 24 - To Use Timer
– 24 – To Use Timer This feature allows you to use the oven as a kitchen timer. It can be also a stand time after cooking is completed or to program a delay start. To Use as a Kitchen Timer. To Set Standing Time. To Set Delay Start. Press once. Set desired amount of time by turning dial. (up to 1 ho...
Page 25 - Defrosting Chart
– 25 – Defrosting Chart The times given below are a guideline only.Always check the progress of the food by opening the oven door and then re-starting. For larger quantities adjust times accordingly. Food should not be covered during defrosting. Food Weight/Quantity Time & Mode Method Beef/Lamb/...
Page 26 - Reheating Chart
– 26 – Reheating Chart The times given in the charts below are a guideline only, and will vary depending on starting temperature, dish size etc. Food Weight/ Quantity Time & Mode Method Drinks-Coffee-Milk Coffee 1 mug 235 ml 1000 W 1 min 30 secs Stir before, and after reheating. Coffee 2 mugs 47...
Page 27 - Cooking Chart
– 27 – Cooking Chart Food Weight/Quantity Time & Mode Method Beans & Pulses-should be pre-soaked (except lentils) Chick peas 225 g 1000 W 8 mins then 440 W 15-20 mins Use 600 ml (1 pt) boiling water in a large bowl. Cover. Stir halfway. Lentils 225 g 440 W 35-40 mins Red kidney beans 225 g 1...
Page 28 - Microwave Recipe Techniques
– 28 – Microwave Recipe Techniques Microwaves penetrate the surface of the food to a depth of about two to three centimetres and then the heat is gradually conducted in a random pattern. Some parts of food matter cook faster than others. Special microwave techniques are used to promote fast and even...
Page 31 - Basic Recipes
– 31 – Basic Recipes G RANOLA C EREAL Makes: approximately 4 cups Ingredients: 2 cups oats 2 ⁄ 3 cup chopped nuts 1 ⁄ 3 cup wheat germ 1 ⁄ 4 cup brown sugar 1 ⁄ 4 cup honey 1 teaspoon vanilla essence 1 ⁄ 3 cup raisins 1 ⁄ 3 cup coconut Method: 1. Place oats in 3-litre casserole dish, cook on 1000 W ...
Page 32 - Soups and Snacks
– 32 – Soups and Snacks C HICKEN AND P RAWN L AKSA Serves: 4 Ingredients: Soup: 2 tablespoons laksa paste 400 ml coconut milk 1 litre chicken stock 1 tablespoon soy sauce fresh ground black pepper Laksa: 250 g rice noodles 8 cups boiling water 1 bunch coriander, leaves chopped 4 small red chillies, ...
Page 36 - Poultry
– 36 – Poultry Cooking Whole Poultry by Micro Power Season as desired, but salt after cooking. Browning sauce mixed with equal parts of butter will enhance the appearance. Poultry may be stuffed or unstuffed. Tie legs together with cotton string. Place on a microwave rack set in a rectangular dish. ...
Page 38 - Main Fare Meats
– 38 – Main Fare Meats For best results, select roasts that are uniform in shape. Place meat on a microwave rack in a suitable dish. Beef rib roast should be placed cut-side down. Other bone-in roasts should be placed fat-side down. Boneless roasts should be placed fat-side up. Halfway through cooki...
Page 41 - Vegetable Varieties
– 41 – Vegetable Varieties Directions for Cooking Vegetables F RESH V EGETABLES BY M ICRO P OWER Place vegetables in a casserole dish. Add 2 to 3 tablespoons of water per 500 g of vegetables. Add salt to water or add after cooking. Do not place salt directly on vegetables. Cover dish with glass lid ...
Page 45 - Rice, Pasta and Cereal
– 45 – Rice, Pasta and Cereal Cooking Rice and Other Grains by Micro Power Cooking Pasta by Micro Power Follow directions in chart for recommended dish size, amounts of water and cooking time. Add grain to water. Add salt and butter according to package directions. Cook on 1000 W for time recommende...
Page 47 - Desserts
– 47 – Desserts B UTTERSCOTCH P UDDING Serves: 4 to 6 Ingredients: 400 g sweetened condensed milk 30 g butter 1 teaspoon vanilla essence 1 ⁄ 2 cup milk 3 ⁄ 4 cup self raising fl our, sifted 1 cup brown sugar 1 ⁄ 2 cup hot tap water Method: 1. Place condensed milk in 2-litre casserole dish. Cook on 6...
Page 48 - Before Requesting Service; ALL THESE THINGS ARE NORMAL
– 48 – Before Requesting Service ALL THESE THINGS ARE NORMAL The oven causes interference with my TV. Some radio, TV, Wi-Fi, cordless telephone, baby monitor, blue tooth or other wireless equipment interference might occur when you cook with the micro- wave oven. This interference is similar to the ...
Page 49 - Care of your Microwave Oven
– 49 – Care of your Microwave Oven Turn the oven off and remove the power plug from the wall socket before cleaning. The outside oven surfaces should be cleaned with a damp cloth. To prevent damage to the operating parts inside the oven, water should not be allowed to seep into the ventilation openi...
Page 50 - Panasonic Warranty
– 50 – Panasonic Warranty (for Australia) F0003BW40QP_OI_08_170630.indd 50 2017/6/30 13:28:30