Page 2 - CAUTION; Microwave Oven Safety; Your safety and the safety of others are very important.; PRECAUTIONS TO AVOID
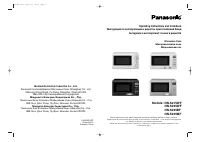
DANGERWARNING CAUTION Microwave Oven Safety Your safety and the safety of others are very important. We have provided important safety messages in this manual and on your appliance. Always read and obey all safety messages. This is the safety alert symbol. It is used to alert you to poten-tial hazar...
Page 3 - WARNING; Thank you for purchasing a Panasonic Microwave Oven.; IMPORTANT SAFETY INSTRUCTIONS
1 WARNING Thank you for purchasing a Panasonic Microwave Oven. Your microwave oven is a cooking appliance and you should use as much care as you use with a stove or any other cooking appliance. When using electric appli-ance, basic safety precautions should be followed, including the following: IMPO...
Page 4 - Superheated Liquids
2 IMPORTANT SAFETY INSTRUCTIONS (continued) 16. Some products such as whole eggs with or without shell, narrow neck bottles and sealed containers — for example, closed glass jars — may explode and should not be heated in this oven. 17. To reduce the risk of fi re in the oven cavity: (a) DO NOT overc...
Page 5 - TO AVOID THE RISK OF SHOCK:; TO AVOID THE RISK OF FIRE:; TO AVOID THE RISK OF SCALDING:; SAVE THESE INSTRUCTIONS; Glass Tray
3 WARNING IMPORTANT SAFETY INSTRUCTIONS (continued) TO AVOID THE RISK OF SHOCK: DO NOT remove outer panel from oven. Repairs must be done only by a quali fi ed service person. TO REDUCE THE RISK OF EXPOSURE TO MICROWAVE ENERGY: DO NOT tamper with, or make any adjustments or repairs to Door, Control ...
Page 6 - Examine Your Oven; Placement of Oven; Installation; Grounding Instructions
4 INSTALLATION AND GROUNDING INSTRUCTIONS Examine Your Oven Unpack oven, remove all packing material and examine the oven for any damage such as dents, broken door latches or cracks in the door. Notify dealer immedi- ately if oven is damaged. DO NOT install if oven is damaged. Placement of Oven 1. T...
Page 7 - Power supply; Wiring requirements; TV / RADIO / WIRELESS EQUIPMENT INTERFERENCE
5 INSTALLATION AND GROUNDING INSTRUCTIONS (continued) Power supply 1. A short power-supply cord is provided to reduce the risks resulting from becoming entangled in or tripping over a longer cord. 2. Longer cord sets or extension cords are available and may be used if care is exer- cised in their us...
Page 8 - SMALL QUANTITIES OF FOODS; ) FOODS WITH NONPOROUS SKINS; Safety Precautions
6 Follow These Safety Precautions When Cooking in Your Oven. IMPORTANTProper cooking depends upon the power, the time setting and quantity of food. if you use a smaller portion than recommended but cook at the time for the recommended portion, fi re could result. 1) HOME CANNING / STERILIZING / DRYI...
Page 10 - Cookware Guide
8 Cookware Guide ITEM MICROWAVE COMMENTS Aluminum Foil Yes for Shielding only Small strips of foil can be molded around thin parts of meat or poultry to prevent overcooking. Arcing can occur if foil is too close to oven wall or door and damage to your oven will result. Browning Dish Yes Browning dis...
Page 11 - Oven Components Diagram
9 Oven Components Diagram 1 External Air Vent 2 Internal Air Vent 3 Door Safety Lock System 4 Exhaust Air Vent 5 Control Panel 6 Identi fi cation Plate 7 Glass Tray 8 Roller Ring 9 Heat/Vapor Barrier Film (do not remove) 10 Waveguide Cover (do not remove) 11 Door Release Button 12 Warning Label 13 F...
Page 12 - Control Panel
10 Control Panel Beep Sound: When a pad is touched correctly, a beep will be heard.If a pad is touched and no beep is heard, the unit did not or cannot accept the instruction. When operating, the oven will beep twice between programmed stages. At the end of any complete program, the oven will beep 5...
Page 13 - Child Safety Lock; Starting to Use; Setting the Clock
11 Child Safety Lock This feature prevents the electronic operation of the oven until cancelled. It does not lock the door. To set: • Touch Start 3 times. “LOCK” appears in the display window. “LOCK” continues to be displayed until Child Lock is cancelled. Key pads may be touched but the microwave...
Page 15 - Function Features
13 Function Features (continued) Set LB/KG, LANGUAGE and BEEP by following the steps below: 1. • Plug into a properly grounded electrical outlet. 2. • Touch Start once. 3. • Touch “+” or swipe the slider bar to right to choose metric weight measurements (KG). • Touch “-” or swipe the slider bar to l...
Page 16 - Selecting Power; Cooking
14 Selecting Power & Cook Time Example: To cook at P6 (MEDIUM) pow- er for 1 minute 30 seconds 1. Touch 5 times • Touch Power Level until the desired power level appears in the display window. 2. Swipe • Set cooking time by touching “+”/“-” or swipe the slider bar to 1 minute and 30 seconds. 3. ...
Page 17 - Keep Warm Feature; Quick 30 Feature; To Set Time using Quick 30:
15 Keep Warm Feature This feature will keep food warm for up to 30 minutes after cooking. Example: To keep 2 cups of gravy warm 1. • Touch Keep Warm . 2. Swipe • Set warming time, up to 30 minutes. 3. • Touch Start . Keep Warm will start. The time in the display window will count down. NOTE: Keep ...
Page 18 - Popcorn Feature
16 Popcorn Feature Example: To pop 3.5 oz. (99 g ) of popcorn 1. Touch once • Touch Popcorn until the desired size appears in the display window. Touch Weight once twice 3 times 3.5 oz. (99 g ) 2.75 oz. (78 g ) 1.5 oz. (42 g ) 2. or Optional • (see More/Less Feature.) 3. • Touch Start . After seve...
Page 19 - Inverter Turbo Defrost Feature; Preparation for freezing:
17 Example: To Defrost 1.5 pounds of meat Place food on microwave safe dish. 1. • Touch Inverter Turbo Defrost . 2. Swipe • Set weight of the food by touching “+”/“-” or swipe the slider bar to 1.5 pounds. 3. • Touch Start . Defrosting will start. The time will count down. Larger weight foods will...
Page 20 - Defrosting Tips & Techniques
18 Defrosting Tips & Techniques (continued) FOOD DEFROST TIME at P3 mins (per lb) DURING DEFROSTING AFTER DEFROSTING Stand Time Rinse Fish and Seafood Crabmeat[up to 3 lbs. (1.4 kg )] 6 Break apart/Rearrange 5 min. YES Fish Steaks 4 to 6 Turn over Fish Fillets 4 to 6 Turn over/Rearrange/Shield e...
Page 22 - Sensor Cook Chart
20 Sensor Cook Chart Recipe Serving/Weight Hints 1. Sensor Reheat 4 - 16 oz. (110 - 450 g ) All foods, such as casseroles, plated dinners, soups, stews, pasta dishes (except lasagne) and canned foods, must be pre-cooked. Foods should be reheated from refrigerator or room temperature, do not reheat f...
Page 24 - Microwave Recipes; OMELET
22 Microwave Recipes OMELET Basic Omelet 1 tablespoon butter or margarine 2 eggs 2 tablespoons milk salt and ground black pepper, if desired Heat butter in a microwave safe 9-inch pie plate, 20 seconds at p10, or until melted. Turn the plate to coat the bottom with butter. Meanwhile, combine the rem...
Page 25 - Timer Feature; To Use as a Kitchen Timer:
23 Timer Feature This feature allows you to program the oven as a kitchen timer. It can also be used to program a standing time after cooking is completed and/or to program a delay start. To Use as a Kitchen Timer: Example: To count down 5 minutes. 1. • Touch Timer once. 2. Swipe • Set time by touch...
Page 26 - Microwave Shortcuts
24 Microwave Shortcuts FOOD POWER TIME (in mins.) DIRECTIONS To separate refrigerated Bacon , 1 pound (450 g ) P10 (HIGH) 30 sec. Remove wrapper and place in microwave safe dish. After heating, use a plastic spatula to separate slices. To soften Brown Sugar 1 cup (250 ml) P10 (HIGH) 20 - 30 sec. Pla...
Page 29 - Cooking Techniques
27 Cooking Techniques (continued) Covering As with conventional cooking, moisture evaporates during microwave cooking. Cas-serole lids or plastic wrap are used for a tighter seal. When using plastic wrap, vent the plastic wrap by folding back part of the plastic wrap from the edge of the dish to all...
Page 30 - Care and Cleaning of Your Microwave Oven; IT IS IMPORTANT TO KEEP THE OVEN CLEAN AND DRY.
28 Care and Cleaning of Your Microwave Oven BEFORE CLEANING: Unplug oven at wall outlet. If outlet is inacces- sible, leave oven door open while cleaning. AFTER CLEANING: Be sure to place the Roller Ring and the Glass Tray in the proper position and touch Stop/Reset Pad to clear the Display. Label: ...
Page 31 - Before Requesting Service; PROBLEM; These things are normal:
29 Before Requesting Service The oven is not plugged in se-curely. Remove plug from outlet, wait 10 seconds and re-insert. Main circuit breaker or main fuse is tripped or blown. Reset main circuit breaker or re-place main fuse. The door is not closed completely. Close the oven door securely. Start P...
Page 32 - Customer Services
30 Limited Warranty (Only for U.S.A.) Panasonic Products Limited Warranty Limited Warranty Coverage (For USA Only) If your product does not work properly because of a defect in materials or workmanship, Panasonic Consumer Electronics Corporation (referred to as “the warrantor”) will, for the length ...
Page 33 - Quick Guide to Operation
31 Quick Guide to Operation Feature How to Operate To set Clock ( page 11) Touch once. Touch once. Enter time of day. To Use Child Safety Lock ( page 11) To Set: Touch 3 times. To Cancel: Touch 3 times. To Use Power and Time ( page 14) Touch to select Power Level. Touch once. Set time. To use ...
Page 36 - User’s Record
34 User’s Record The serial number of this product may be found on the back side of the oven or on the left side of the control panel. You should note the model number and the serial number of this oven in the space provided and retain this book as a permanent record of your purchase for future refe...