Page 2 - WARNING
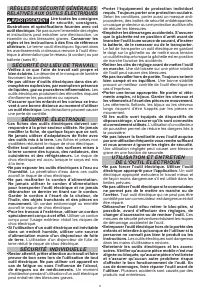
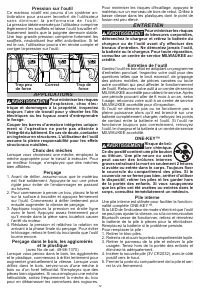
2 GENERAL POWER TOOL SAFETY WARNINGS WARNING Read all safety warnings, instruc- tions, illustrations and specifica - tions provided with this power tool. Failure to follow all instructions listed below may result in electric shock, fire and/or serious injury. Save all warnings and instructions for f...
Page 3 - SYMBOLOGY; BPM; FUNCTIONAL DESCRIPTION
3 • Under abusive conditions, liquid may be ejected from the battery; avoid contact. If contact acciden - tally occurs, flush with water. If liquid contacts eyes, additionally seek medical help. Liquid ejected from the battery may cause irritation or burns. • Do not use a battery pack or tool that i...
Page 4 - SPECIFICATIONS; Removing/Inserting the Battery; Adjusting the Side Handle Position
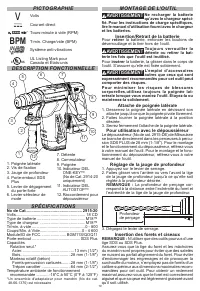
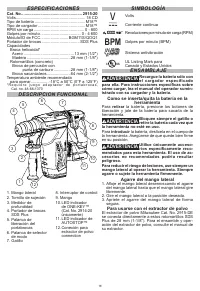
4 Setting the Depth Gauge 1. Press in the clamping lever. 2. Slide the depth gauge rod backward or forward until it is set for the desired depth. NOTE: The drilling depth is the distance between the tip of the bit and the tip of the depth gauge rod. Drilling Depth 3. Release the clamping lever. Inst...
Page 5 - OPERATION; Selecting Action
5 OPERATION WARNING Always remove battery pack before changing or removing accesso- ries. Only use accessories specifically recom - mended for this tool. Others may be hazardous. To reduce the risk of injury, keep hands away from the bit and all moving parts. Always wear proper eye protection marked...
Page 6 - APPLICATIONS; MAINTENANCE
6 APPLICATIONS WARNING To reduce the risk of electric shock, check work area for hidden pipes and wires before drilling. Cut embedded rebar only if this operation does not affect the integrity of the building. If in doubt, consult a structural engineer. Tool operator fully responsible for adverse st...
Page 7 - To reduce the risk of personal in-; Cleaning; ACCESSORIES; Use only recommended accesso-; WIRELESS COMMUNICATION
7 WARNING To reduce the risk of personal in- jury and damage, never immerse your tool, battery pack or charger in liquid or allow a liquid to flow inside them. Cleaning Clean dust and debris from any vents. Keep tool clean, dry and free of oil or grease. Use only mild soap and a damp cloth to clean,...
Page 8 - AVERTISSEMENT
8 RÈGLES DE SÉCURITÉ GÉNÉRALES RELATIVES AUX OUTILS ÉLECTRIQUES AVERTISSEMENT Lire toutes les consignes de sécurité, consignes, illustrations et spécifications fournies avec cet outil électrique. Ne pas suivre l’ensemble des règles et instructions peut entraîner une électrocution, un incendie ou des...
Page 10 - PICTOGRAPHIE; DESCRIPTION FONCTIONNELLE; Insertion/Retrait de la batterie; retirer; Toujours verrouiller la; Attache de poignée latérale
10 PICTOGRAPHIE Volts Courant direct Tours-minute á vide (RPM) BPM T-min. Charge/vide (BPM) Système anti-vibrations C US UL Listing Mark pour Canada et États-unis DESCRIPTION FONCTIONNELLE 1 2 3 4 5 6 7 8 9 12 10 11 1. Poignée latérale 2. Vis de fixation 3. Jauge de profondeur 4. Porte-embout SDS Pl...
Page 11 - MANIEMENT; Choix du mode de forage
11 1. Introduisez le foret ou le ciseau dans la bec de l’outil. 2. Tournez la pièce lentement jusqu’à ce qu’elle s’aligne sur le mécanisme d’enclechement. 3. Poussez la pièce dans l’outil pour qu’ell s’enclenche. 4. Verifiez que le foret correctement verrouillé; il doit pouvoir être déplacé légèreme...
Page 12 - Pression sur l’outil; Choix des mèches; ENTRETIEN; Entretien de l’outil; Pile interne
12 Pression sur l’outil Ce marteau rotatif est pourvu d’un système an- tivibration pour assurer leconfort de l’utitisateur s a n s d i m i n u e r l a p e r f o r m a n c e d e l ’ o u t i l . La pression idéale exercée par l’utilisateur comprime légèrement les soufflets et laisse l’outil travailler...
Page 13 - Nettoyage; ACCESOIRES; COMMUNICATION SANS FIL
13 AVERTISSEMENT Pour minimiser les risques de blessures ou de dom - mages à l'outil, n'immergez jamais l'outil, la bat - terie ou le chargeur et ne laissez pas de liquide s'y infiltrer. Nettoyage Débarrassez les tous évents des débris et de la poussière. Gardez les outil propres, à sec et ex - empt...
Page 14 - ADVERTENCIA
14 ADVERTENCIAS DE SEGURIDAD GENERALES PARA LA HERRAMIENTA ELÉCTRICA ADVERTENCIA Lea todas las advertencias de seguridad, instrucciones, ilustraciones y especificaciones con esta her - ramienta eléctrica. Si no sigue todas las adverten- cias e instrucciones, se pueden provocar una des- carga eléctri...
Page 16 - ESPECIFICACIONES; DESCRIPCION FUNCIONAL; SIMBOLOGÍA; ENSAMBLAJE; Como se inserta/quita la batería en la; Agarre del mango lateral; Para usarse con el extractor de polvo
16 ESPECIFICACIONES Cat. No.. .................................................... 2915-20 Volts .............................................................. 18 CD Tipo de batería ............................................. M18™ Tipo de cargador .......................................... M18™ RP...
Page 17 - OPERACIÓN; Seleccion de funciones
17 Cómo colocar el medidor de profundidad 1. Oprima la palanca de fijación. 2. Deslice el vástago del medidor de profundidad hacia atrás o hacia adelante hasta que quede ajustado en la profundidad deseada. NOTA: La profundidad de taladrado es la distancia entre la punta de la broca y la punta del vá...
Page 18 - APLICACIONES; Selección de las brocas
18 Utilización del interruptor de control El interruptor de control se puede colocar en tres posiciones diferentes. avance, retroceso y bajo seguro. Para poder usar el interruptor de control, siempre se debe esperar a que el motor se pare por completo. Para avanzar (el giro es en el sentido de las m...
Page 19 - MANTENIMIENTO; Mantenimiento de las herramientas; Batería interna; Limpieza; ACCESORIOS; SOPORTE DE SERVICIO - MEXICO
19 Cómo taladrar en madera, materiales compuestos y plásticos (con Cat. No. 48-66-1370) Al taladrar en madera, materiales compuestos o plásticos, comience lentamente, aumentando gradu- almente la velocidad, a medida que taladra. Cuando taladre en madera, use brocas de de berbequí o brocas convencion...
Page 20 - MILWAUKEE TOOL; PÓLIZA DE GARANTÍA - VALIDA
58140458d1 961013737-01(A) 05/21 Printed in China MILWAUKEE TOOL 13135 West Lisbon Road Brookfield, WI 53005 USA GARANTÍA LIMITADA - E.U.A. Y CANADÁ Cada herramienta eléctrica* de MILWAUKEE (ver excepciones a continuación) está garantizada para el comprador original únicamente de que no tenga materi...